Philips 107B4374 User manual
Philips 107B4374 Manual
 |
View all Philips 107B4374 manuals
Add to My Manuals
Save this manual to your list of manuals |
Philips 107B4374 manual content summary:
- Philips 107B4374 | User manual - Page 1
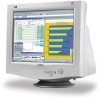
electronic user's manual file:///D|/Rita/LF3/lf3manual/english/107B/manual.html [2002/7/7 ?? 11:01:40] - Philips 107B4374 | User manual - Page 2
Maintenance • Troubleshooting • Regulatory into vents or cover them and prevent proper cooling of the monitor's electronic devices. q To avoid the risk of shock or permanent damage to Consult a service technician if the monitor does not operate normally when operating instructions of this manual are - Philips 107B4374 | User manual - Page 3
in our printed version. The sections are as follows: q Safety and Troubleshooting Information provides tips and solutions for common problems, and other related information you may need. q About This Electronic User's Manual gives overview of what information are included as well as notation icon - Philips 107B4374 | User manual - Page 4
Electronic User's Manual Notes, Cautions, and Warnings Throughout this guide for bodily harm and tells you how to avoid the problem. SMART HELP: This icon indicates helpful information when TO TOP OF THE PAGE ©2002 Koninklijke Philips Electronics N.V. All rights reserved. Reproduction, copying - Philips 107B4374 | User manual - Page 5
monitors or other manufacturers monitors will not work with this special software. It is recommended that you install this software only on a Philips monitor designed to use it. These monitors can be identified by the LightFrame™ logo on the front of the monitor. This software is not designed - Philips 107B4374 | User manual - Page 6
107B Product Information LightFrame™ will work with true Windows-based programs and DOS-based programs that operate in a Windows environment. It will not work with DOS-based programs operating only in a DOS environment. Language Selection While English is the default language of LightFrame™, the - Philips 107B4374 | User manual - Page 7
generation of the LightFrame™ feature introduced by Philips. In that version the user needs to manually turn on/off the feature and select the tell which version LightFrame™ my monitor can support? A:To check which version of LightFrame™ is supported by your monitor check the LightFrame logo which - Philips 107B4374 | User manual - Page 8
. Q:What is wrong when my mouse changes into a light bulb with a red cross? A:Nothing. It just means but its functions are limited to manually highlighting the entire Netscape client window. if my monitor comes with LightFrame™ 3? A: All Philips LightFrame™ 3 monitors display this logo on their front - Philips 107B4374 | User manual - Page 9
performs. Accustomed to working with the original LightFrame™ tray icon? No problem: It s still there and can be used to turn LightFrame™ on 21 mm Shadow mask, real flat, high contrast, anti-glare, anti-static, anti reflection, light transmission55% P22 12.0" x 9.0" / 306 x 230 mm 12.9" x 9.6" / 327 - Philips 107B4374 | User manual - Page 10
, scanners, etc.) Using a standard unified color space, sRGB will help represent pictures taken by an sRGB compatible device correctly on your sRGB enabled Philips monitors. In that way, the colors are calibrated and you can rely on the correctness of the colors shown on your screen. Important with - Philips 107B4374 | User manual - Page 11
Yes Blanked No Yes Typical 68W No < 2W 0 % 96% Green Yellow This monitor is ENERGY STAR® compliant. As an ENERGY STAR® Partner, PHILIPS has determined that this product meets the ENERGY STAR® guidelines for energy efficiency. RETURN TO TOP OF THE PAGE Physical Specifications • Dimensions - Philips 107B4374 | User manual - Page 12
107B Product Information • Temperature (storage) -25° to +65°C / -13° to +149°F • Relative humidity (storage) 5% to 95% * Resolution 1280 x 1024, standard size, contrast max., brightness 50%, 9300°, full white pattern. * These information are subject to change without notice. RETURN TO TOP OF - Philips 107B4374 | User manual - Page 13
107B Product Information Follow the links to see various views of the monitor and its components. Front View Rear View RETURN TO TOP OF THE PAGE file:///D|/Rita/LF3/lf3manual/english/107B/PRODUCT/PRODUCT.HTM (9 of 9) [2002/7/7 ?? 11:01:55] - Philips 107B4374 | User manual - Page 14
Installing your Monitor Installing your Monitor Front View • Rear View • 6G3B11 Multimedia Base (option) • PCUH411 USB Hub (option) Front View Power button switches your monitor on. OK button which when pressed will take you to the OSD controls Contrast hotkey. When the UP arrow is pressed, the - Philips 107B4374 | User manual - Page 15
Installing your Monitor UP and DOWN buttons are used when adjusting the OSD of your monitor Brightness hotkey. When the RIGHT arrow is pressed, the adjustment controls for BRIGHTNESS will show up. LEFT and RIGHT buttons, like the UP and DOWN buttons, are also used in adjusting the OSD of your - Philips 107B4374 | User manual - Page 16
Installing your Monitor 1. Power in - attach power cable here. 2. Video In - this is a cable which is already attached to your monitor. Connect the other end of the cable to your PC. RETURN TO TOP OF THE PAGE file:///D|/Rita/LF3/lf3manual/english/INSTALL_2/INSTALL.HTM (3 of 3) [2002/7/7 ?? 11:01:56] - Philips 107B4374 | User manual - Page 17
the On Screen Display What is the On-Screen Display? This is a feature in all Philips monitors which allows an end-user to adjust screen performance of monitors directly through an on-screen instruction window. The user interface provides user-friendliness and ease-of-use when operating the monitor - Philips 107B4374 | User manual - Page 18
On-Screen Display RETURN TO TOP OF THE PAGE The OSD Tree Below is an overall view of the structure of the On-Screen Display. You can use this as reference when you want to later on work your way around the different adjustments. file:///D|/Rita/LF3/lf3manual/english/OSD/OSDDESC.HTM (2 of 4) [2002 - Philips 107B4374 | User manual - Page 19
On-Screen Display file:///D|/Rita/LF3/lf3manual/english/OSD/OSDDESC.HTM (3 of 4) [2002/7/7 ?? 11:01:56] - Philips 107B4374 | User manual - Page 20
On-Screen Display RETURN TO TOP OF THE PAGE file:///D|/Rita/LF3/lf3manual/english/OSD/OSDDESC.HTM (4 of 4) [2002/7/7 ?? 11:01:56] - Philips 107B4374 | User manual - Page 21
Customer Care and Warranty Customer Care & Warranty PLEASE SELECT YOUR COUNTRY/AREA TO READ THE WARRANTY COVERED: WESTERN EUROPE: Austria • Belgium • Cyprus • Denmark • France • Germany • Greece • Finland • Ireland • Italy • Luxembourg • the Netherlands • Norway • Portugal • Sweden • Switzerland • - Philips 107B4374 | User manual - Page 22
Windows" logo means your Philips monitor fulfills the requirements and recommendations of the PC9x (97, 98, or 99) System Design Guide and passes stringent WHQL tests or want a USB hub. To give users freedom of choice, Philips provides an optional USB hub (type number PCUH411). The USB hub consists - Philips 107B4374 | User manual - Page 23
. Contact your dealer/reseller for details. 6. What models are Mac compatible? All listed Philips monitors are Mac compatible. BUT, you may need an adapter to connect the monitor to your Mac system. Please contact your dealer/reseller for details. 7. - Philips 107B4374 | User manual - Page 24
followed by 'Monitor Control.' Select "All default selection' and choose your Philips monitor model from the default driver list. Plug and Play will automatically you. In DOS or Windows 3.1, you must first make sure your PC supports power saving. 11. What is refresh rate? "Refresh rate" describes the - Philips 107B4374 | User manual - Page 25
press OK button then select "Reset to factory settings" to restore all settings. 16. What is LightFrame"? LightFrame" is a Philips technology breakthrough which offers a unique and revolutionary solution for boosting a monitor 's brightness and sharpness. With LightFrameTM, the user experiences - Philips 107B4374 | User manual - Page 26
. Today's state-of-the-art Philips monitors employ improved phosphors and are designed for high light output. LightFrame" normally highlights photos warning that my monitor 'may not support LightFrame" '. I am certain my monitor does. What is wrong? Only a Philips driver can determine if your monitor - Philips 107B4374 | User manual - Page 27
XSD monitors combine the world's smallest front-to-back footprint with excellent front of screen performance. 24. How did Philips achieve XtraSpace Design? Philips achieved this breakthrough in reduced footprint CRT display devices through short depth tubes and a focused design process that squeezed - Philips 107B4374 | User manual - Page 28
and width are unchanged. Only the monitor's height is increased by only 3 centimeters. 29. Where can I buy a multimedia base to incorporate with my Philips monitor? Please contact your dealer/reseller for details. 30. What does Auto Calibrate do? It makes your monitor perform better and last longer - Philips 107B4374 | User manual - Page 29
Auto Calibration takes place when a monitor receives a signal indicating an imminent switch to its sleep mode/stand-by mode. 34. Which models of Philips monitors are equipped with Auto Calibrate feature? Auto Calibrate is currently available in the new 201P, 201B and 109P. 35. The Main Menu displays - Philips 107B4374 | User manual - Page 30
the Moir¨² effect. 39. What is CustoMax? CustoMax is proprietary Philips software that allows user to control parameter (e.g. Size, Color, this? q If the OSD menu is also missing a color, please contact service for details q Set color temperature to 9300 color coordination q Check the video cable - Philips 107B4374 | User manual - Page 31
Please be aware that not all models in the Philips range has this manual degauss function. Some models are built with an the following for possible solutions: q If the OSD menu is also dim, please contact service for repair q Reset the monitor via the OSD menu q Change the color temperature settings - Philips 107B4374 | User manual - Page 32
Frequently Asked Questions This phenomenon can occur with Philips 107P, 109P and 201P monitors and is normal. Your monitor is using an Aperture Grille, which consists of fine vertical wires to align the electron beams with the phosphors on the screen. To prevent these vertical wires from vibrating - Philips 107B4374 | User manual - Page 33
Frequently Asked Questions 50. Why does the picture disappear after I press the on/off button quickly? This is a unique Philips feature designed to preserve the life of your monitor. Please allow 5 seconds between powering off and on your monitor, your picture will then be restored. - Philips 107B4374 | User manual - Page 34
Glossary Glossary A B C D E F G H I J K L M N O P Q R S T U V W X Y Z A Autoscan A microprocessor-based feature of Philips Brilliance monitors is able to detect automatically horizontal and vertical frequencies of input signals with those of the installed video card. An autoscan monitor can - Philips 107B4374 | User manual - Page 35
black body radiating with the same dominant frequency as the source. Most Philips monitors offer the possibility of setting the color temperature to any desired light is reflected. Contrast is therefore reduced in conditions of high ambient light levels. Black Matrix tubes reflect less ambient light - Philips 107B4374 | User manual - Page 36
tube - the general term for all tubes in which one or more electron beams emitted by a cathode are periodically scanned across a phosphor screen by -ray tube is the TV and monitor picture tube. CustoMax Philips proprietary monitor control software that allows users to control parameters (e.g., - Philips 107B4374 | User manual - Page 37
decays to demagnetize the tube. Some monitors offer a manual degaussing facility that can be activated at any time. without having to spend time readjusting the picture. It is currently available in most Philips monitors. Dot pitch The shortest distance between two phosphor dots of the same color - Philips 107B4374 | User manual - Page 38
Glossary Dot rate Frequency in MHz of the dot clock. It is a measure of the speed with which data is transferred between the video card and subsequent processing circuitry. Also known as video dot rate. RETURN TO TOP OF THE PAGE E Electromagnetic radiation standards International standards set to - Philips 107B4374 | User manual - Page 39
the electron beam to scan a picture onto the screen. Two kinds of flicker occur: line flicker caused by the electron light background), and can be very disturbing, especially for those who work regularly with displays contributing to eye strain, headaches, visual blurring, stress, etc. The problem - Philips 107B4374 | User manual - Page 40
Glossary Also called line frequency and expressed in kHz, it is the number of video lines written on the screen every second (from left to right). The higher the horizontal scanning frequency, the better the resolution (i.e., the higher the resolution and/or the higher the refresh rate). RETURN TO - Philips 107B4374 | User manual - Page 41
Glossary L Linearity The degree to measure the actual location of a pixel on the screen corresponds with its intended location. ( see figure ) Line frequency See Horizontal scanning frequency. Low-emission monitor A monitor that complies with international standards on radiation. See Electromagnetic - Philips 107B4374 | User manual - Page 42
On Screen Display) The feature that allows an end user to adjust screen performance and parameters of monitors directly through an on-screen instruction window. See CustoMax in CrystalClear section. Overscan The practice in which areas without useful video information are scanned outside the visible - Philips 107B4374 | User manual - Page 43
a picture on screen, phosphors are deposited on the inner surface of the picture-tube screen and excited into luminescence by the electron beam. Typical examples of phosphors are P22 medium short-persistence phosphor and EBU high-color-saturation phosphor. Pin-cushion Distortion See Geometric - Philips 107B4374 | User manual - Page 44
Glossary R Raster The area on screen that electron beam can reach. Refresh rate See Vertical scanning frequency. Resolution The number of pixels that can be displayed on the screen. The resolution is specified - Philips 107B4374 | User manual - Page 45
Anti-Static coatings Due to bombardment by beam electrons, monitor screens become electrically charged when in use screen by a spinning and spraying process. It operates by diffusing reflected light to blur images of light sources on the screen. To provide anti-static properties, the coating is - Philips 107B4374 | User manual - Page 46
Glossary The ARAS coating reflects only about 0.5% of the incident light. AGRAS (Anti-Glare anti-Reflection Anti-Static) coating. A combined anti-reflection, anti-glare, anti-static coating. Self-test function A monitor equipped with hardware or software - Philips 107B4374 | User manual - Page 47
Glossary SOG (Synchronization On Green) A properly functioning color monitor requires five kinds of signals: horizontal sync pulse, vertical sync pulse, red color signal, green color signal and blue color signal. Signals from a PC are transmitted to a monitor using one of three methods: 1. Separate - Philips 107B4374 | User manual - Page 48
of USB. Attachment points are referred to as ports. Each hub converts a single attachment point into multiple attachment points. The architecture supports concatenation of multiple hubs. The upstream port of a hub connects the hub towards the host. Each of the other downstream ports of - Philips 107B4374 | User manual - Page 49
Controller and Hub Repeater. The repeater is a protocol-controlled switch between the upstream port and downstream ports. It also has hardware support for reset and suspend/resume signaling. The controller provides the interface registers to allow communication to/from the host. Hub specific status - Philips 107B4374 | User manual - Page 50
as refresh rate). Vertical sync pulses A train of square shaped waveforms that define the start of a new frame. VESA Video Electronic Standards Association, a consortium of manufacturers formed to establish and maintain industry-wide standards for video cards and monitors. VESA was instrumental - Philips 107B4374 | User manual - Page 51
Glossary resolutions from 1280 x 1024 to 1600 x 1280, horizontal line frequencies up to 90 kHz and bandwidths up to 200 MHz. VIS (Viewable Image Size) The real screen dimensions that users can see measured diagonally. The VIS of a monitor is always less than the so called screen size of a monitor. - Philips 107B4374 | User manual - Page 52
prompted to save as either 'text' or 'source', choose 'source'). Printing instructions: To print the manual: 1. With the manual file open, follow your printer's instructions and print the pages you need. 105E.pdf English language manual 107B.pdf 107E.pdf 107F.pdf 107P.pdf 107S.pdf 107T.pdf - Philips 107B4374 | User manual - Page 53
Download and Print 109B.pdf 109S.pdf file:///D|/Rita/LF3/lf3manual/english/DOWNLOAD/DOWNLOAD.HTM (2 of 2) [2002/7/7 ?? 11:01:57] - Philips 107B4374 | User manual - Page 54
items_page file:///D|/Rita/LF3/lf3manual/english/107B/items.html [2002/7/7 ?? 11:01:57] - Philips 107B4374 | User manual - Page 55
Troubleshooting • Regulatory Information • Other Related Information Common Problems Having trouble? Something not working? Before calling for help, try these suggestions. Having this problem to your computer. (Also refer to the Quick Start Guide). q Check to see if the monitor cable has bent - Philips 107B4374 | User manual - Page 56
Adjust Sync Input. q Increase your refresh rate. Problem with On Screen Display q Refer to the instructions and troubleshooting information in that chapter. For further assistance, refer to the Consumer Information Centers list to contact your local Philips distributor. RETURN TO TOP OF THE PAGE - Philips 107B4374 | User manual - Page 57
Ergonomie Hinweis (nur Deutschland) • Philips End-of-Life Disposal • Information for UK only Safety Precautions and Maintenance • Troubleshooting • Other Related Information TCO of goods and services to the environment. The main problem, as far as computers and other electronics equipment are - Philips 107B4374 | User manual - Page 58
Regulatory Information Approval requirements cover a wide range of issues: environment, ergonomics, usability, emission of electric and magnetic fields, energy consumption and electrical and fire safety. The environmental demands impose restrictions on the presence and use of heavy metals, - Philips 107B4374 | User manual - Page 59
in the stratosphere, causing increased reception on earth of ultraviolet light with increased risks e.g. skin cancer (malignant melanoma) as a RETURN TO TOP OF THE PAGE CE Declaration of Conformity q Philips Consumer Electronics declare under our responsibility that the product is in conformity with - Philips 107B4374 | User manual - Page 60
Confederation of Professional Employees) for TCO versions RETURN TO TOP OF THE PAGE Energy Star Declaration PHILIPS 107B4* This monitor is equipped with a function for saving energy which supports the VESA Display Power Management Signaling (DPMS) standard. This means that the monitor must be - Philips 107B4374 | User manual - Page 61
installation. This equipment generates, uses and can radiate radio frequency energy and, if not installed and used in accordance with the instructions, may cause harmful interference to radio communications. However, there is no guarantee that interference will not occur in a particular installation - Philips 107B4374 | User manual - Page 62
Information Toutes modifications n'ayant pas reçu l'approbation des services compétents en matière de conformité est , it may cause radio Interference. Install and use the equipment according to the instruction manual. Class B ITE file:///D|/Rita/LF3/lf3manual/english/107B/SAFETY/regs/regulat.htm (6 - Philips 107B4374 | User manual - Page 63
Regulatory Information RETURN TO TOP OF THE PAGE MIC Notice (South Korea Only) Class B Device Please note that this device has been approved for non-business purposes and may be used in any environment, including residential areas. RETURN TO TOP OF THE PAGE Polish Center for Testing and - Philips 107B4374 | User manual - Page 64
Regulatory Information RETURN TO TOP OF THE PAGE North Europe Information Placering/Ventilation VARNING: FÖRSÄKRA DIG OM ATT HUVUDBRYTARE OCH UTTAG ÄR LÄTÅTKOMLIGA, NÄR DU STÄLLER DIN UTRUSTNING PÅPLATS. Placering/Ventilation ADVARSEL: SØRG VED PLACERINGEN FOR, AT NETLEDNINGENS STIK OG STIKKONTAKT - Philips 107B4374 | User manual - Page 65
Regulatory Information Paikka/Ilmankierto VAROITUS: SIJOITA LAITE SITEN, ETTÄ VERKKOJOHTO VOIDAAN TARVITTAESSA HELPOSTI IRROTTAA PISTORASIASTA. Plassering/Ventilasjon ADVARSEL: NÅR DETTE UTSTYRET PLASSERES, MÅ DU PASSE PÅ AT KONTAKTENE FOR STØMTILFØRSEL ER LETTE Å NÅ. RETURN TO TOP OF THE PAGE BSMI - Philips 107B4374 | User manual - Page 66
minimize the amount to be disposed of. Please find out about the local regulations on how to dispose of your old monitor from your local Philips dealer. RETURN TO TOP OF THE PAGE Information for UK only WARNING - THIS APPLIANCE MUST BE EARTHED. Important: This apparatus is supplied with an - Philips 107B4374 | User manual - Page 67
Regulatory Information have a value of 5A. If a plug without a fuse is used, the fuse at the distribution board should not be greater than 5A. Note: The severed plug must be destroyed to avoid a possible shock hazard should it be inserted into a 13A socket elsewhere. How to connect a plug The wires - Philips 107B4374 | User manual - Page 68
Other Related Information Other Related Information Safety Precautions and Maintenance • Troubleshooting • Regulatory Information • Information for Users in the U. S. • Information for Users Outside the U.S Information for Users in the U. S. For units set at 115 V : Use a UL Listed - Philips 107B4374 | User manual - Page 69
6G3B11 Multimedia Base (option) 6G3B11 Multimedia Base (option) Front View • Rear View • Technical Specifications • Description of the Controls • Installing your Multimedia Base • Power adapter Installation Technical Specifications* • Output power • Bass Boost • Headphone connection • Microphone in - Philips 107B4374 | User manual - Page 70
6G3B11 Multimedia Base (option) D. Microphone jack Attach your microphone here. E. Audio In Connect this to the audio output of your PC. F. MIC Out Connect this to the microphone output of your PC. G. DC Input Connect power input here. RETURN TO TOP OF THE PAGE Installing your Multimedia Pedestal - Philips 107B4374 | User manual - Page 71
6G3B11 Multimedia Base (option) 2. To UN-INSTALL q Lift the back hook from the hole on the bottom plate of your monitor. q Slide out the pedestal the opposite direction (from when you installed it). RETURN TO TOP OF THE PAGE Power adapter Installation Installing the adapter There are two (2) ways - Philips 107B4374 | User manual - Page 72
6G3B11 Multimedia Base (option) RETURN TO TOP OF THE PAGE file:///D|/Rita/LF3/lf3manual/english/INSTALL_2/mm_pede/mm_inst.htm (4 of 4) [2002/7/7 ?? 11:02:35] - Philips 107B4374 | User manual - Page 73
USB Hub (Optional Feature) PCUH411 USB Hub (Option) Front View • Rear View • Installing your USB Hub Installing your USB Hub Installing on a conventional base. 1. Take out the USB hub from the box. 2. Take off the USB hub cover. 3. Slightly tilt and lift the base of your monitor. 4. Attach the USB - Philips 107B4374 | User manual - Page 74
USB Hub (Optional Feature) of the Multimedia Pedestal. 7. Attach the USB hub by sliding-in to the Multimedia base. RETURN TO TOP OF THE PAGE file:///D|/Rita/LF3/lf3manual/english/INSTALL_2/usbhub/usb_inst.htm (2 of 2) [2002/7/7 ?? 11:02:36] - Philips 107B4374 | User manual - Page 75
CONTRAST. RETURN TO TOP OF THE PAGE CONTRAST To adjust your screen's contrast, follow the steps bellow. Contrast is the difference between the light and dark areas on the screen. A 100% contrast is recommended. file:///D|/Rita/LF3/lf3manual/english/OSD/osd_cont.htm (1 of 27) [2002/7/7 ?? 11:02 - Philips 107B4374 | User manual - Page 76
The OSD Controls 1) Press the or button on the monitor. The CONTRAST window appears. 2) Press the or button to adjust the contrast. 3) When the contrast is adjusted to the level desired, stop pressing the or button and after three seconds the CONTRAST window will disappear with the new adjustment - Philips 107B4374 | User manual - Page 77
The OSD Controls 3) Press the or button until the desired language is highlighted. 4) Press the button to confirm your selection and return to MAIN CONTROLS window. CLOSE MAIN CONTROLS will be highlighted... After returning to MAIN CONTROLS . . . Help . . . to continue to INPUT SIGNAL SELECTION, - Philips 107B4374 | User manual - Page 78
The OSD Controls RETURN TO TOP OF THE PAGE INPUT SIGNAL SELECTION (Not available in all models) INPUT SIGNAL SELECTION determines what you see on the screen. The default setting is INPUT A, but if the video input signal is different that the output signal, you may want to change it to INPUT B.? 1) - Philips 107B4374 | User manual - Page 79
The OSD Controls MAIN CONTROLS will be highlighted. After returning to MAIN CONTROLS . . . Help Smart . . . to continue to ZOOM, press the steps 3 - 5 under ZOOM. button until ZOOM is highlighted. Next, follow . . . to exit completely, press the button RETURN TO TOP OF THE PAGE ZOOM ZOOM - Philips 107B4374 | User manual - Page 80
The OSD Controls 4) Press the or button to adjust ZOOM. 5) Press the button to confirm your selection and return to the MAIN CONTROLS window. CLOSE MAIN CONTROLS will be highlighted. After returning to MAIN CONTROLS . . . Help Smart . . . to continue to ADJUST HORIZONTAL, press the button - Philips 107B4374 | User manual - Page 81
The OSD Controls 3) Press the button. The ADJUST HORIZONTAL window appears. POSITION should be highlighted. 4) Press the or button to move the image to the left or right. 5) When the position is adjusted, press the to highlight SIZE. button to return to MAIN CONTROLS window, or press the file - Philips 107B4374 | User manual - Page 82
The OSD Controls 6) To adjust the horizontal size, press the or button. 7) When the size is adjusted, press the button to return to MAIN CONTROLS window. CLOSE MAIN CONTROLS will be highlighted. After returning to MAIN CONTROLS . . . Help . . . to continue to ADJUST VERTICAL, press the button - Philips 107B4374 | User manual - Page 83
The OSD Controls 3) Press the button. The ADJUST VERTICAL window appears. POSITION should be highlighted. 4) Press the or button to move the image up or down. 5) When the position is adjusted, press the to highlight SIZE. button to return to MAIN CONTROLS window, or press the file:///D|/Rita/ - Philips 107B4374 | User manual - Page 84
The OSD Controls 6) To adjust the vertical size, press the or button. 7) When the size is adjusted, press the button to return to MAIN CONTROLS window. CLOSE MAIN CONTROLS will be highlighted. After returning to MAIN CONTROLS . . . Help . . . to continue to ADJUST SHAPE, press the button until - Philips 107B4374 | User manual - Page 85
The OSD Controls 3) Press the highlighted. button. The ADJUST SHAPE window appears. ADJUST SIDE CURVE should be 4) Press the button. The SIDE CURVE window appears. PINCUSHION should be highlighted. file:///D|/Rita/LF3/lf3manual/english/OSD/osd_cont.htm (11 of 27) [2002/7/7 ?? 11:02:49] - Philips 107B4374 | User manual - Page 86
The OSD Controls 5) To adjust the pincushion, press the or button. 6) When the pincushion is adjusted, press the to return to the ADJUST SHAPE window. button to highlight BALANCED or press the button 7) To adjust the balanced pincushion, press the or button. 8) When the balanced pincushion - Philips 107B4374 | User manual - Page 87
The OSD Controls After returning to MAIN CONTROLS . . . Help ...to continue to ADJUST SIDE ANGLES, start with step 5 under ADJUST SIDE ANGLES and follow the directions. Smart ...to exit completely, press the button twice. ...to adjust only the BALANCED pincushion, follow steps 1 - 4 above, - Philips 107B4374 | User manual - Page 88
The OSD Controls 4) Press the button to highlight ADJUST SIDE ANGLES. 5) Press the button. The SIDE ANGLES window appears. TRAPEZOID should be highlighted. 6) To adjust the trapezoid, press the or button. 7) When the trapezoid is adjusted, press the button to highlight PARALLELOGRAM or press - Philips 107B4374 | User manual - Page 89
The OSD Controls 8) To adjust the parallelogram, press the or button. 9) When the parallelogram is adjusted, press the BACK TO MAIN WINDOWS will be highlighted. button to return to the ADJUST SHAPE window. 10) Press the button to return to the MAIN CONTROLS window, or press the IMAGE is - Philips 107B4374 | User manual - Page 90
The OSD Controls 3) Press the highlighted. 4) Press the button. The ADJUST SHAPE window appears. ADJUST SIDE CURVE should be arrow until ROTATE IMAGE is highlighted. 5) Press the button. The ROTATE IMAGE window appears. ROTATE should be highlighted. file:///D|/Rita/LF3/lf3manual/english/OSD/ - Philips 107B4374 | User manual - Page 91
The OSD Controls 6) To adjust the rotation, press the or button. 7) When the rotation is adjusted, press the MAIN CONTROLS should be highlighted. button to return to the ADJUST SHAPE window. BACK TO 8) Press the button to return to MAIN CONTROLS. After returning to MAIN CONTROLS . . . Help . - Philips 107B4374 | User manual - Page 92
The OSD Controls 3) Press the button. The ADJUST COLOR window appears. 4) Press the or button to highlight 9300K for GENERAL USE, 6500K for IMAGE MANAGEMENT, 5500K for PHOTO RETOUCH, or USER PRESET. 5) Once you have highlighted GENERAL USE, IMAGE MANAGEMENT, or PHOTO RETOUCH, press the button to - Philips 107B4374 | User manual - Page 93
The OSD Controls 6a) If USER PRESET is highlighted, press the button to adjust the color red. button to highlight RED. Next, press the or 6b) When finished with RED, press the to adjust the color green. button to highlight GREEN. Next, press the or button 6c) When finished GREEN, press the - Philips 107B4374 | User manual - Page 94
The OSD Controls RESET TO FACTORY SETTINGS returns everything in all the windows to factory presets. 1) Press the button on the monitor. The MAIN CONTROLS window appears. 2) Press the button until RESET TO FACTORY SETTINGS is highlighted. 3) Press the button. The RESET TO FACTORY SETTINGS - Philips 107B4374 | User manual - Page 95
The OSD Controls After returning to MAIN CONTROLS . . . Help . . . to continue to EXTRA CONTROLS, press the button until EXTRA Smart CONTROLS is highlighted. Next, start with step 3 under EXTRA CONTROLS. . . . to exit completely, press the button. RETURN TO TOP OF THE PAGE EXTRA CONTROLS - Philips 107B4374 | User manual - Page 96
The OSD Controls 5) To degauss your screen, press the button. Your screen will be degaussed, then the MAIN CONTROLS window will reappear. CLOSE MAIN CONTROLS will be highlighted. After returning to MAIN CONTROLS . . . Help . . . to continue to ADJUST MOIRE, press the button until EXTRA CONTROLS - Philips 107B4374 | User manual - Page 97
The OSD Controls 3) Press the button. The EXTRA CONTROLS window appears. ADJUST MOIRE will be highlighted. 4) Press the button. The ADJUST MOIRE window appears. HORIZONTAL will be highlighted. file:///D|/Rita/LF3/lf3manual/english/OSD/osd_cont.htm (23 of 27) [2002/7/7 ?? 11:02:49] - Philips 107B4374 | User manual - Page 98
The OSD Controls 5) To adjust the horizontal moire, press the or button. 6) When the horizontal moire is adjusted, press the button to highlight VERTICAL. 7) To adjust the vertical moire, press the or button. 8) When the vertical moire is adjusted, press the BACK TO MAIN CONTROLS will be - Philips 107B4374 | User manual - Page 99
The OSD Controls on the LIGHTFRAME function to activate in full screen mode. 1) Press button on the monitor. The MAIN CONTROLS window appears. 2) Press the button until EXTRA CONTROLS is highlight. 3) Press the button. The EXTRA CONTROLS window appears. ADJUST MOIRE will be highlighted. 4) - Philips 107B4374 | User manual - Page 100
The OSD Controls 5) Pess the button. LIGHTFRAME will be activated. 6) Press button to go back to MAIN CONTROLS. Press button again to exit the OSD. RETURN TO TOP OF THE PAGE CLOSE MAIN CONTROLS file:///D|/Rita/LF3/lf3manual/english/OSD/osd_cont.htm (26 of 27) [2002/7/7 ?? 11:02:49] - Philips 107B4374 | User manual - Page 101
The OSD Controls RETURN TO TOP OF THE PAGE file:///D|/Rita/LF3/lf3manual/english/OSD/osd_cont.htm (27 of 27) [2002/7/7 ?? 11:02:49] - Philips 107B4374 | User manual - Page 102
ease of installation. Should you encounter any difficulties while installing or using this product, please contact Philips directly to benefit from your Philips F1rst Choice Warranty. This three-year service warranty entitles you to a swap model on-site within 48 hours of your call being received - Philips 107B4374 | User manual - Page 103
The Philips guarantee applies provided the product is handled properly for its intended use, in accordance with its operating instructions and In case your Philips product is not working correctly or is defective, please contact your Philips dealer. In the event you require service whilst in another - Philips 107B4374 | User manual - Page 104
distributed by Philips Consumer Electronics. In countries where Philips Consumer Electronics does not distribute the product, the local Philips service organization will attempt to provide service (although there may be a delay if the appropriate spare parts and technical manual(s) are not - Philips 107B4374 | User manual - Page 105
) 242-4804. Before Requesting Service... Please check your owner's manual before requesting service. Adjustments of the controls discussed there may save you a service call. TO GET WARRANTY SERVICE IN U.S.A., PUERTO RICO OR U.S. VIRGIN ISLANDS... Contact the Philips Customer Care Center phone number - Philips 107B4374 | User manual - Page 106
directly to benefit from your Philips F1rst Choice Warranty. This one-year service warranty entitles you to a swap model on-site within 48 hours of your call being received within the first year of purchase. If you have any problems with your monitor within the second or third year of purchase - Philips 107B4374 | User manual - Page 107
warranty service. A sales receipt or other document showing that you purchased the product is considered proof of purchase. Attach it to this owner's manual and other cause not within the control of Philips Consumer Electronics. q reception problems caused by signal conditions or cable or antenna - Philips 107B4374 | User manual - Page 108
distributed by Philips Consumer Electronics. In countries where Philips Consumer Electronics does not distribute the product, the local Philips service organization will attempt to provide service (although there may be a delay if the appropriate spare parts and technical manual(s) are not - Philips 107B4374 | User manual - Page 109
directly to benefit from your Philips F1rst Choice Warranty. This three-year service warranty entitles you to a swap model on-site within 48 hours of your call being received within the first year of purchase. If you have any problems with your monitor within the second or third year of purchase
-
 1
1 -
 2
2 -
 3
3 -
 4
4 -
 5
5 -
 6
6 -
 7
7 -
8
-
9
-
10
-
11
-
12
-
13
-
14
-
15
-
16
-
17
-
18
-
19
-
20
-
21
-
22
-
23
-
24
-
25
-
26
-
27
-
28
-
29
-
30
-
31
-
32
-
33
-
34
-
35
-
36
-
37
-
38
-
39
-
40
-
41
-
42
-
43
-
44
-
45
-
46
-
47
-
48
-
49
-
50
-
51
-
52
-
53
-
54
-
55
-
56
-
57
-
58
-
59
-
60
-
61
-
62
-
63
-
64
-
65
-
66
-
67
-
68
-
69
-
70
-
71
-
72
-
73
-
74
-
75
-
76
-
77
-
78
-
79
-
80
-
81
-
82
-
83
-
84
-
85
-
86
-
87
-
88
-
89
-
90
-
91
-
92
-
93
-
94
-
95
-
96
-
97
-
98
-
99
-
100
-
101
-
102
-
103
-
104
-
105
-
106
-
107
-
108
-
109
 |
 |
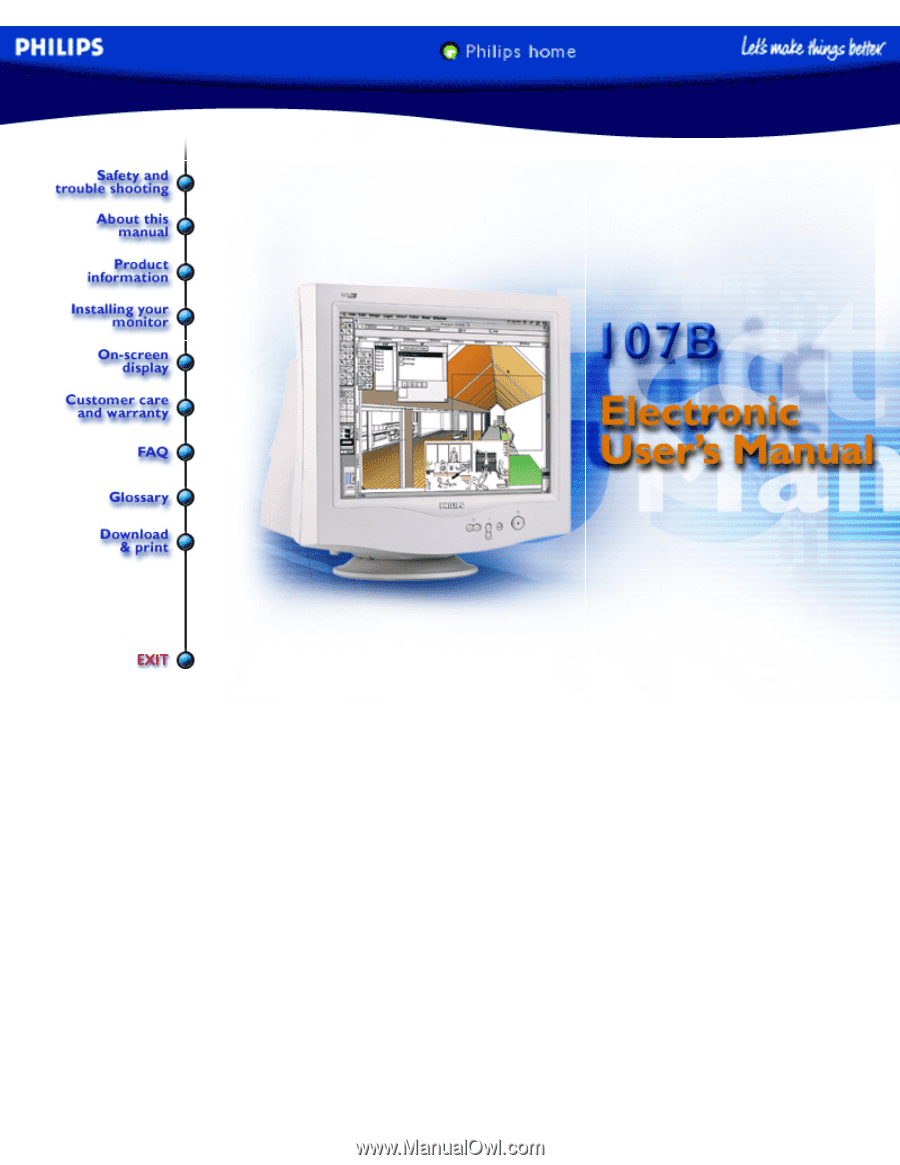
electronic user's manual
file:///D|/Rita/LF3/lf3manual/english/107B/manual.html [2002/7/7 ?? 11:01:40]