Philips 17PF9936/37 User Manual
Philips 17PF9936/37 Manual
 |
View all Philips 17PF9936/37 manuals
Add to My Manuals
Save this manual to your list of manuals |
Philips 17PF9936/37 manual content summary:
- Philips 17PF9936/37 | User Manual - Page 1
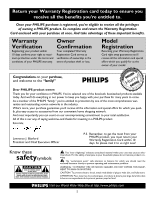
Important! Return your Warranty Registration Card within 10 days. See why inside. Need help? Call us! Philips representatives are ready to help you with any questions about your new product. We can guide you through Connections, First-time Setup, or any of the Features. We want you to start enjoying - Philips 17PF9936/37 | User Manual - Page 2
As a member of the PHILIPS "family," you're entitled to protection by one of the most comprehensive warranties and outstanding service networks in the industry. should read the enclosed literature closely to prevent operating and maintenance problems. WARNING: TO PREVENT FIRE OR SHOCK HAZARD, DO NOT - Philips 17PF9936/37 | User Manual - Page 3
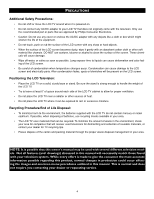
openings. Install in accordance with the manufacturers instructions. 8. Do not install near any heat of time. 14. Refer all servicing to qualified service personnel. Servicing is required when the apparatus has to proper grounding of the mast and supporting structure, grounding of the lead-in - Philips 17PF9936/37 | User Manual - Page 4
Only use the recommended part or parts that are approved by Philips Consumer Electronics. • Caution: Do not use any cover or manual may be used with several different television models. Not all features (and drawings) discussed in this manual manual. This is normal and does not require - Philips 17PF9936/37 | User Manual - Page 5
of Your TV 2 Safety Instructions 3 Precautions 4 Table of Features 57-58 General Information Troubleshooting Tips 59 Cleaning and Care 59 Glossary of Terms 60 Index 61 Factory Service Location 62-63 Warranty 64 Philips Consumer Electronics Company. Copyright © 2003 All rights reserved. 5 - Philips 17PF9936/37 | User Manual - Page 6
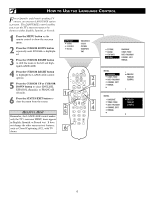
PC MUTE CH RADIO TV HD 1 2 3 456 789 STATUS/EXIT 0 SURF 3 4 PICTURE SOUND FEATURES INSTALL LANGUAGE TUNER MODE AUTO PROGRAM CHANNEL EDIT MANUAL INSTALL LANGUAGE TUNER MODE AUTO PROGRAM CHANNEL EDIT MANUAL ENGLISH FRANCAIS ESPA˜NOL INSTALL LANGUAGE TUNER MODE AUTO PROGRAM CHANNEL EDIT - Philips 17PF9936/37 | User Manual - Page 7
available. PICTURE SOUND FEATURES INSTALL LANGUAGE TUNER MODE AUTO PROGRAM CHANNEL EDIT MANUAL LANGUAGE TUNER MODE AUTO PROGRAM CHANNEL EDIT MANUAL ENGLISH FRANCAIS ESPANOL LANGUAGE TUNER MODE AUTO PROGRAM CHANNEL EDIT MANUAL ANTENNA AUTO CABLE LANGUAGE TUNER MODE AUTO PROGRAM CHANNEL EDIT - Philips 17PF9936/37 | User Manual - Page 8
be connected to your TV (see instructions for making connections on page 1 of this guide). PICTURE SOUND FEATURES INSTALL BRIGHTNESS COLOR MANUAL INSTALL LANGUAGE TUNER MODE AUTO PROGRAM CHANNEL EDIT MANUAL ENGLISH FRANCAIS ESPANOL INSTALL LANGUAGE TUNER MODE AUTO PROGRAM CHANNEL EDIT MANUAL - Philips 17PF9936/37 | User Manual - Page 9
CH RADIO TV HD 1 2 3 456 789 STATUS/EXIT 0 SURF 3 5 7 PICTURE SOUND FEATURES INSTALL LANGUAGE TUNER MODE AUTO PROGRAM CHANNEL EDIT MANUAL INSTALL LANGUAGE TUNER MODE AUTO PROGRAM CHANNEL EDIT MANUAL ENGLISH FRANCAIS ESPANOL INSTALL LANGUAGE TUNER MODE 2 AUTO PROGRAM 3 CHANNEL EDIT - Philips 17PF9936/37 | User Manual - Page 10
the CURSOR RIGHT button to start the AutoChron™ feature. Then just follow the onscreen instructions to set the clock. 6 Press the CURSOR RIGHT button to select AUTO. SOUND FEATURES INSTALL LANGUAGE TUNER MODE AUTO PROGRAM CHANNEL EDIT MANUAL 1 PIP POSITION CC TV PROG. LIST CLOCK DVD SLEEP - Philips 17PF9936/37 | User Manual - Page 11
LANGUAGE TUNER MODE AUTO PROGRAM CHANNEL EDIT MANUAL INSTALL LANGUAGE TUNER MODE AUTO PROGRAM CHANNEL EDIT MANUAL ENGLISH FRANCAIS ESPANOL INSTALL AUTO PROGRAM CHANNEL EDIT MANUAL AutoChron NAME PERSONAL INSTALL AUTO PROGRAM CHANNEL EDIT MANUAL AutoChron NAME X_ _ _ _ OR INSTALL AUTO PROGRAM - Philips 17PF9936/37 | User Manual - Page 12
HOW TO USE THE PICTURE ADJUSTMENT CONTROLS To adjust your TV picture controls, select a channel and follow these steps. 1 Press the MENU button on the remote control to show the onscreen menu. PICTURE will be highlighted. 2 Press the CURSOR RIGHT and the menu will shift to the left. BRIGHTNESS will - Philips 17PF9936/37 | User Manual - Page 13
HOW TO USE THE EQUALIZER CONTROLS The Equalizer Controls allow you to adjust the sound frequencies to suit the type of programming be watched. 1 Press the MENU button on the remote control to show the onscreen menu. 2 Press the CURSOR DOWN button repeatedly until SOUND in highlighted. 3 Press the - Philips 17PF9936/37 | User Manual - Page 14
HOW TO USE THE BALANCE CONTROL The Balance Control will allow you to adjust the sound levels between the right and left speaker output. 1 Press the MENU button on the remote control to show the onscreen menu. PICTURE will be highlighted. 2 Press the CURSOR DOWN button repeatedly until SOUND in - Philips 17PF9936/37 | User Manual - Page 15
HOW TO USE THE AVL CONTROL In most cases, the volume levels coming from broadcast programming or commercials are never the same. With the AVL (Audio Volume Leveler) control turned ON, you can have the TV level out sound that is being heard. This makes for a more consistent sound by reducing the - Philips 17PF9936/37 | User Manual - Page 16
HOW TO USE THE INCREDIBLE SURROUND CONTROL The Incredible Surround feature adds greater depth and dimension to both monaural (MONO) and stereo TV sound. With the control set to INCR. SURROUND (Incredible Surround), the TV's speakers can add even wider sound separation to normal broadcasts. 1 Press - Philips 17PF9936/37 | User Manual - Page 17
HOW TO SET THE TV TO RECEIVE STEREO PROGRAMMING You can receive broadcast stereo TV programs. The TV has both an amplifier and twin speakers through which the stereo sound can be heard. 1 Press the MENU button on the remote control to show the onscreen menu. 2 Press the CURSOR DOWN to highlight - Philips 17PF9936/37 | User Manual - Page 18
HOW TO SET THE TV TO RECEIVE SAP (SECONDARY AUDIO PROGRAMMING) SAP is an additional part of the stereo broadcast system. Sent as a third audio channel, an SAP can be heard apart from the current TV program sound. TV stations are free to use SAP for any number of purposes. 1 Press the MENU button on - Philips 17PF9936/37 | User Manual - Page 19
AUDIO OUT CONTROL If you have connected the TV's AUDIO OUTPUT jacks to the AUDIO INPUT jacks on a stereo receiver (see the Quick Use Guide for connection instructions), set AUDIO OUT to either VARIABLE or FIXED to determine whether you adjust the volume at the stereo or at the TV. If you - Philips 17PF9936/37 | User Manual - Page 20
or Off. 6 Press the STATUS/EXIT button to remove the menu from the screen. HELPFUL HINT Be sure to first refer to the Quick Use Guide supplied with your TV to connect an external audio system to the television's Monitor Output (audio) jacks. PICTURE SOUND FEATURES INSTALL BRIGHTNESS COLOR PICTURE - Philips 17PF9936/37 | User Manual - Page 21
HOW TO USE THE TIMER CONTROLS Your television comes with an on-screen clock. The TV also can be set to turn on or off at a specific time and tune to a specific channel when it powers its self on. 1 Press the CLOCK button on the remote control to show the TIMER onscreen menu. 2 Press the CURSOR - Philips 17PF9936/37 | User Manual - Page 22
TV to the desired mode. Please refer to each specific mode later in this manual. 8 Press the STATUS/EXIT button to remove the menu from the screen. Specific information regarding each of the MODE SELECT options can be found later in this manual. FM RADIO - refer to page 46-49. HD - refer to page - Philips 17PF9936/37 | User Manual - Page 23
HOW TO SET THE ACTIVE CONTROL The Active Control monitors and adjusts incoming video signals to help provide the best picture quality. When you choose to turn the Active Control ON, the picture sharpness and noise reduction are controlled automatically. Active Control adjusts these picture settings - Philips 17PF9936/37 | User Manual - Page 24
UNDERSTANDING THE AUTOLOCK™ CONTROLS T he AutoLock™ feature receives and processes data sent by broadcasters or other program providers that contain program content advisories. When programmed by the viewer, a TV with AutoLock™ can respond to the content advisories and block program content that - Philips 17PF9936/37 | User Manual - Page 25
SETTING UP THE AUTOLOCK™ ACCESS CODE AutoLockTM allows parents to block out or "censor" any channels they think children should not watch. A channel blocked by the AutoLockTM control cannot be viewed until a correct access code is used to unlock the channel for viewing. First, let's set your - Philips 17PF9936/37 | User Manual - Page 26
HOW TO BLOCK CHANNELS USING AUTOLOCK™ After your personal access code has been set (see the previous page), you are ready to select the channels or inputs you want to block out or censor. 1 Press the MENU button on the remote control to show the onscreen menu. 2 Press the CURSOR DOWN button to - Philips 17PF9936/37 | User Manual - Page 27
HOW TO CLEAR ALL BLOCKED CHANNELS AT THE SAME TIME Various onscreen messages will appear when someone tries to view blocked programming. The message is determined by how the current programming is blocked. You may view the blocked programming and turn OFF the AutoLock™ feature by using the Clear - Philips 17PF9936/37 | User Manual - Page 28
BLOCKING PROGRAMS BASED ON MOVIE RATINGS After your personal access code has been set, you can select specific movie ratings that you want to censor. 1 Press the MENU button on the remote control to show the onscreen menu. 2 Press the CURSOR DOWN button to highlight FEATURES. 3 Press the CURSOR - Philips 17PF9936/37 | User Manual - Page 29
BLOCKING PROGRAMS BASED ON TV RATINGS You can select specific TV ratings that you want to censor by following these steps. 1 Press the MENU button on the remote control to show the onscreen menu. 2 Press the CURSOR DOWN button to highlight FEATURES. 3 Press the CURSOR RIGHT button and the menu will - Philips 17PF9936/37 | User Manual - Page 30
OTHER AUTOLOCK™ BLOCKING OPTIONS The BLOCKING control is what can be thought of as the "master switch" for AutoLock™. This control affects the settings you have chosen for blocking programs according to movie ratings or TV ratings, or for blocking programs that have no rating. When the BLOCKING - Philips 17PF9936/37 | User Manual - Page 31
USING THE AUTOLOCK™ REVIEW SCREEN To remind you which ratings you have blocked and which Block Options you have selected, a review screen is available to review your AutoLockTM settings. To access this screen follow the steps below. 1 Press the STATUS/EXIT button on your remote control TWICE. Your - Philips 17PF9936/37 | User Manual - Page 32
HOW TO USE THE CLOSED CAPTIONING CONTROLS Closed Captioning (CC) allows you to read the voice content of television programs on the TV screen. Designed to help the hearing impaired, this feature uses onscreen "text boxes" to show dialogue and conversations while the TV program is in progress. 1 - Philips 17PF9936/37 | User Manual - Page 33
HOW TO USE THE WIDESCREEN (FORMAT) CONTROL You can change the screen format size to match the type of program you're watching. Select the normal 4:3, or the Zoom 14:9, Zoom 16:9, Subtitle Zoom, Super Wide, Widescreen, or Full Screen aspect ratios. 1 Press the MENU button on the remote control to - Philips 17PF9936/37 | User Manual - Page 34
allow you to quickly overview all the programmed channels that have been placed into the televisions memory (see the Auto Programming section of this manual for more details). Program List will let you easily select the desired channels your looking for. Program List will display the channel number - Philips 17PF9936/37 | User Manual - Page 35
HOW TO SET THE SLEEPTIMER CONTROL Have you ever fallen asleep in front of the TV, only to have it wake you up at two in the morning with a test pattern sound screeching in your ears? Well, your TV can enable you to avoid that discomfort by automatically turning itself off. With the Sleep Timer - Philips 17PF9936/37 | User Manual - Page 36
HOW TO USE THE AUTOPICTURE™ CONTROL Whether you're watching a movie or a video game, your TV has automatic video control settings that will match with your current program source or content. AutoPicture™ quickly resets your TV's video controls for a number of different types of programs and viewing - Philips 17PF9936/37 | User Manual - Page 37
HOW TO USE THE AUTOSOUND™ CONTROL AutoSound™ allows you to select from three factory-set controls and a personal control that you set according to your own preferences through the onscreen Sound menu. The three factory-set controls (Voice, Music, and Theatre) enable you to tailor the TV sound so as - Philips 17PF9936/37 | User Manual - Page 38
HOW TO USE THE SURF CONTROL Alist or series of previously viewed channels can be selected with the SURF button on your remote control. With this feature, you can easily switch between different TV channels that currently interest you. The SURF control allows you to set up to ten channels in its - Philips 17PF9936/37 | User Manual - Page 39
REMOTE CONTROL USE WITH ACCESSORY DEVICES - DIRECT METHOD Your remote control is set to work your TV and many infrared remote (IR) control VCRs, Cable Boxes, Satellite Systems, DBS, DVD, etc. However, an easy onetime step may be necessary before the remote will work your VCR. Try this initial - Philips 17PF9936/37 | User Manual - Page 40
REMOTE CONTROL USE WITH ACCESSORY DEVICES - CODE ENTRY METHOD Now that you have looked up the threedigit Remote Code Number for your brand of device, you are ready to follow the four simple steps below. Please read through steps 1-4 before beginning. 1 Place the TV/DVD/ACC Mode Switch in the proper - Philips 17PF9936/37 | User Manual - Page 41
REMOTE CONTROL USE WITH ACCESSORY DEVICES - SEARCH METHOD Your TV remote can be set to work various external devices such as VCRs, Cable Boxes, Satellite Receivers, DBS, DVD, etc. by what is called the search method of remote control programming. If the "Remote Code" number method shown on the - Philips 17PF9936/37 | User Manual - Page 42
REMOTE CONTROL DIRECT ENTRY CODES Admiral 2027, 2052 Adventura 2001 Aiko 2059 Aiwa . . . .2001, 2017, 2062, 2070, 2072 Akai . . . . .2021, 2029, 2038, 2060, 2063 Akiba 2034 Alba 2011, 2034, 2052, 2059, 2063, 2072 Ambassador 2011 American Action 2059 American High 2015 Amstrad 2001, 2059, - Philips 17PF9936/37 | User Manual - Page 43
DISC CODES Akai 5316 Harman/Kardon 5314 JVC 5311, 5318 Kenwood 5307 Magnavox 5302 Mitsubishi 5303 Onkyo 5302, 5317, 5319 Panasonic 5301, 5322 Philips . . .5302, 5308 (DEFAULT DVD) Pioneer 5305, 5312, 5321 Proscan 5304 RCA 5304 Samsung 5313 Sharp 5320 Sony 5306 Technics 5301 Theta - Philips 17PF9936/37 | User Manual - Page 44
, 4054, 4063 Nordmende 4029 Orbitech 4039 Oxford 4024 Pace 4002, 4009, 4014, 4023, 4037, 4055, 4058 Palladium 4048 Palsat 4039 Panda 4037 Philips 4007, 4011, 4020, 4037, 4048, 4059 Phonotrend 4019, 4050 44 Pioneer 4021, 4059 Planet 4061 Promax 4037 Prosat 4019 Quadral 4029, 4044 - Philips 17PF9936/37 | User Manual - Page 45
REMOTE CONTROL ACCESSORY DEVICE RELATED BUTTONS When using the TV remote with an accessory device, first make certain it is set to control your accessory device (by the REMOTE CODE or SEARCH method). 1 Set the TV/DVD/ACC mode switch to the proper position on the remote. 2 Point the top of the - Philips 17PF9936/37 | User Manual - Page 46
menu. 3 Press the CURSOR UP or DOWN buttons to scroll through the available FM Mode onscreen options. These options include: Language, Auto Program, Manual Store, Sort, or Name. LANGUAGE - Choose to view the onscreen menu in English, French or Spanish. AUTO PROGRAM - The Auto Program control will - Philips 17PF9936/37 | User Manual - Page 47
FM MODE (FM RADIO) MANUAL STORE/SORT To Manually search, store and sort FM channels follow the instructions below: 1 If in the FM Mode, press the MENU button on the remote control to display the FM Mode onscreen menu. 2 Press the CURSOR DOWN buttons to highlight the MANUAL STORE option. 3 Press the - Philips 17PF9936/37 | User Manual - Page 48
SETTING UP THE FM MODE (FM RADIO) SOUND CONTROLS To ensure the best sound quality from the FM Radio feature of this TV, several Sound Controls are available for adjustment. 1 To enter the FM Mode, press the RADIO button on the remote control. The FM Mode has its own onscreen menu options. 2 Press - Philips 17PF9936/37 | User Manual - Page 49
SETTING UP THE FM MODE (FM RADIO) TIMER CONTROLS The FM Radio within the TV can be set to turn on and off at a specific time, or tune to a specific channel when it powers on. The Timer controls also allows the FM Display to be turned on or off. 1 To enter the FM Mode, press the RADIO button on the - Philips 17PF9936/37 | User Manual - Page 50
SETTING UP THE FM MODE (FM RADIO) MODE SELECT CONTROLS The Mode Select options allow you to move to other operating modes within he TV. When in the FM Mode, choose from TV, PC, or HD Modes. 1 If in the FM mode, press the MENU button on the remote control to display the FM Mode onscreen menu. 2 - Philips 17PF9936/37 | User Manual - Page 51
SETTING UP THE FM MODE (FM RADIO) SCREENSAVER CONTROL While in the FM Mode, there is a Screensaver option that can be used. The Screensaver control, when on, will circulate the screen station indication around the display. 1 If in the FM mode, press the MENU button on the remote control to display - Philips 17PF9936/37 | User Manual - Page 52
SETTING UP THE FM MODE (FM RADIO) AUTOSOUND™ CONTROLS AutoSound™ allows you to select from four factory-set controls and a personal control that you set according to your own preferences through the onscreen Sound menu within the FM Mode. The four factory-set controls (Classical, Jazz Pop, or Rock) - Philips 17PF9936/37 | User Manual - Page 53
SETTING UP THE HD MODE (HIGH DEFINITION) PICTURE CONTROLS The HD Mode offers certain Picture, Sound and Blocking options within its onscreen menu. Below is a list of Picture Menu options. 1 Press the HD button on the remote control to place the TV in the HD Mode (HD1). 2 Press the MENU button on - Philips 17PF9936/37 | User Manual - Page 54
SETTING UP THE HD MODE (HIGH DEFINITION) SOUND CONTROLS The HD Mode also offers certain Sound control adjustments to fine tune the sound being heard when in the HD Mode. 1 Press the HD button on the remote control to place the TV in the HD Mode (HD1). 2 Press the MENU button on the remote control - Philips 17PF9936/37 | User Manual - Page 55
SETTING UP THE HD MODE (HIGH DEFINITION) HD SELECT CONTROL The HD Select Control will allow you to quickly change from the HD Mode of operation to the TV, FM Radio, or PC Modes. 1 If in the HD Mode, press the MENU button on the remote control to display the HD Mode onscreen menu. The PICTURE option - Philips 17PF9936/37 | User Manual - Page 56
SETTING UP THE HD MODE (HIGH DEFINITION) BLOCK CHANNEL CONTROL The HD Mode channel can be blocked to censor the viewing of programming not suitable for children. To block the HD Mode channel, follow the steps below. 1 Press the HD button on the remote control to place the TV in the HD Mode (HD1). 2 - Philips 17PF9936/37 | User Manual - Page 57
SETTING UP THE PC MODE (PERSONAL COMPUTER MONITOR) PC MODE CONTROLS The TV can be used as a PC Monitor. A PC video signal must be present or the TV will go into standby mode. Follow the steps below to access and adjust the onscreen PC Menu controls. 1 Press the PC button on the remote control to - Philips 17PF9936/37 | User Manual - Page 58
SETTING UP THE PC MODE (PERSONAL COMPUTER MONITOR) No. Resolution 1 640 x 480 2 3 4 5 6 720 x 400 7 800 x 600 8 9 10 11 12 832 x 624 13 1024 x 768 14 15 16 17 1152 x 864 18 1280 x 960 19 1280 x 1024 20 Refresh Rate 60 Hz 67 Hz 72 Hz 75 Hz 85 Hz 70 Hz 56 Hz 60 Hz 72 Hz 75 Hz - Philips 17PF9936/37 | User Manual - Page 59
TROUBLESHOOTING Remote Sensor Window on the TV. See page 1 of the Quick Use Guide for details. TV Displays Wrong Channel or No Channels Above 13 • Repeat • Video-game images and scoreboards • Television station logos-present a problem if they are bright and stationary; moving or low-contrast graphics - Philips 17PF9936/37 | User Manual - Page 60
GLOSSARY OF TERMS Active Control • Active Control continuously measures and corrects the incoming signals to provide the best picture possible. Audio/Video Inputs • Jacks (standard RCA), located on the back of the TV, used for external accessory devices. These jacks are designed to receive higher - Philips 17PF9936/37 | User Manual - Page 61
Factory Service Locations 62-63 FM Radio Mode Controls AutoSound™ Control 52 Install Menu Controls Auto Program Control 46 Language Control 46 Manual Registration Information 2 Safety/Precautions 3-4 Table of Contents 5 Troubleshooting Tips 55 TV Mode Controls Active Control 23 Audio Out - Philips 17PF9936/37 | User Manual - Page 62
llame al lugar más cercano de los abajo indicados. In Canada How you can obtain efficient and expedient carry-in, mail-in, or in-home service for your product Please contact Philips at 1-800-661-6162 (French speaking) 1-800-531-0039 (English or Spanish speaking) Au Canada Comment obtenir le - Philips 17PF9936/37 | User Manual - Page 63
Bonita, Ste. V Carson, CA 90746 800-300-9013 CHICAGO Philips Factory Service 1279 W. Hamilton Pkwy. Itasca, IL 60143 800-531-2922 KNOXVILLE Philips Factory Service One Philips Drive Knoxville, TN 37914 800-821-1767 PHILADELPHIA Philips Factory Service 352 Dunks Ferry Rd. Bensalem, PA 19020 800-847 - Philips 17PF9936/37 | User Manual - Page 64
or other cause not within the control of Philips Consumer Electronics Company. • reception problems caused by signal conditions or cable or antenna local Philips service organization will attempt to provide service (although there may be a delay if the appropriate spare parts and technical manual(s)
-
 1
1 -
 2
2 -
 3
3 -
 4
4 -
 5
5 -
 6
6 -
 7
7 -
8
-
9
-
10
-
11
-
12
-
13
-
14
-
15
-
16
-
17
-
18
-
19
-
20
-
21
-
22
-
23
-
24
-
25
-
26
-
27
-
28
-
29
-
30
-
31
-
32
-
33
-
34
-
35
-
36
-
37
-
38
-
39
-
40
-
41
-
42
-
43
-
44
-
45
-
46
-
47
-
48
-
49
-
50
-
51
-
52
-
53
-
54
-
55
-
56
-
57
-
58
-
59
-
60
-
61
-
62
-
63
-
64
 |
 |

3139 125 31421
LCD TV
Directions for Use
LCD TV
Need help?
Call us!
Philips representatives are ready to help you with any ques-
tions about your new product. We can guide you through
Connections, First-time Setup, or any of the Features.
We want you to start enjoying your new product right away!
FOR FAST HELP PLEASE CALL,
1-800-531-0039
or
Visit us on the web at
www.philips.com
Important!
Return your
Warranty
Registration Card
within 10 days.
See why inside.