Philips 180P User Manual
Philips 180P - Professional Brilliance - 18.1" LCD Monitor Manual
 |
UPC - 037849907177
View all Philips 180P manuals
Add to My Manuals
Save this manual to your list of manuals |
Philips 180P manual content summary:
- Philips 180P | User Manual - Page 1
Philips 180P Electronic User's Manual file:///D|/Philips LCD/english/180P/Index.htm [1/20/2001 3:19:10 PM] - Philips 180P | User Manual - Page 2
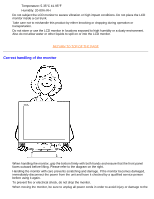
slightly damp cloth. Wiping the screen with a dry cloth is possible when the power is off. However, never use alcohol, solvents, or ammonia-based liquids. q Consult a service technician if the monitor does not operate normally when following the instructions in this manual. q The casing cover should - Philips 180P | User Manual - Page 3
have it checked by a qualified service person before using it again. 3. To prevent fire or electrical shock, do not drop the monitor. 4. When moving the monitor, be sure to unplug all power cords in order to avoid injury or damage to the file:///D|/Philips LCD/english/180P/SAFETY/SAFETY.HTM (2 of - Philips 180P | User Manual - Page 4
Safety & Troubleshooting equipment. RETURN TO TOP OF THE PAGE file:///D|/Philips LCD/english/180P/SAFETY/SAFETY.HTM (3 of 3) [1/20/2001 3:19:21 PM] - Philips 180P | User Manual - Page 5
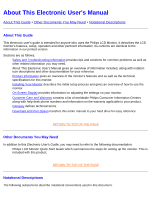
the Philips LCD Monitor. It describes the LCD monitor's features, setup, operation and other pertinent information. Its contents are identical to the information in our printed version. Sections are as follows: q Safety and Troubleshooting Information provides tips and solutions for common problems - Philips 180P | User Manual - Page 6
problem. SMART HELP: This icon indicates helpful information when adjusting the On Screen Display of your monitor. Some warnings may appear in alternate formats and may be unaccompanied by an icon. In such cases, the specific of Philips Electronics N.V. file:///D|/Philips LCD/english/180P/ABOUT/ - Philips 180P | User Manual - Page 7
Information Product Features • Technical Specifications • Resolution & Preset Modes • Philips Pixel Defect Policy • Automatic Power Saving • Physical Specification • Pin Assignment • Product Views • Attention Signals Product Features 180P q 18.1" color LCD monitor with excellent display performance - Philips 180P | User Manual - Page 8
180P Product Information Horizontal Frequency VIDEO • Video dot rate • Input impedance - Video - Sync • Input signal levels • Sync input signal • Sync polarities • Video max -5dB at 180° 300Hz~3KHz OPTICAL (min.) file:///D|/Philips LCD/english/180P/PRODUCT/PRODUCT.HTM (2 of 10) [1/20/2001 3: - Philips 180P | User Manual - Page 9
31.5 31.5 31.5 35.0 37.5 35.2 37.9 46.9 49.7 48.4 60 69.0 80.0 63.9 80 Resolution 640*350 720*400 640*480 640*480 640*480 800*600 800*600 800*600 832*624 1024*768 1024* 75 75 60 75 RETURN TO TOP OF THE PAGE file:///D|/Philips LCD/english/180P/PRODUCT/PRODUCT.HTM (3 of 10) [1/20/2001 3:19:28 PM] - Philips 180P | User Manual - Page 10
) 20% to 80% 50K hrs (excluding LCD panel, CCFL) * These information are subject to change without notice. * Resolution 1280x1024, standard size, contrast max., brightness 50%, 6500° K, full white pattern, without audio/USB. file:///D|/Philips LCD/english/180P/PRODUCT/PRODUCT.HTM (4 of 10) [1/20 - Philips 180P | User Manual - Page 11
for +5V) 16 Hot Plug Detect 17 T.M.D.S. Data0- 18 T.M.D.S. Data0+ 19 T.M.D.S. Data0/5 Shield 20 T.M.D.S. Data5- video input 2 Green video input 3 Blue video input Pin No. Assignment 9 +5V power 10 Logic ground 11 Identical output - connected to pin 10 file:///D|/Philips LCD/english/180P - Philips 180P | User Manual - Page 12
and alerts about the status of the monitor. 1. CANNOT DISPLAY THIS VIDEO MODE, CHANGE COMPUTER DISPLAY INPUT TO 1024X768 @ 60Hz or CANNOT DISPLAY THIS VIDEO MODE, CHANGE COMPUTER DISPLAY INPUT TO 1280x1024 @ 60Hz file:///D|/Philips LCD/english/180P/PRODUCT/PRODUCT.HTM (6 of 10) [1/20/2001 - Philips 180P | User Manual - Page 13
video mode or is out of the monitor's scanning range. Solution: For best display performance, reset the display mode of your computer to 1024x768@60Hz for 14" or 15" models and 1280x1024 @60Hz for 17" or 18" models. 2. NO VIDEO . file:///D|/Philips LCD/english/180P/PRODUCT/PRODUCT.HTM (7 of 10) - Philips 180P | User Manual - Page 14
180P Product Information 4. ENTERING SLEEP MODE -- This message appears when monitor is about to enter power saving. To wake up monitor, press any key or click on mouse. 5. RESULT or USE 1280X1024 FOR BEST RESULT file:///D|/Philips LCD/english/180P/PRODUCT/PRODUCT.HTM (8 of 10) [1/20/2001 3:19:28 PM] - Philips 180P | User Manual - Page 15
: For best performance, reset display. 7. MUTE ON or MUTE OFF These signals appear to indicate audio status after the mute button has been pressed. 8. SECOND VIDEO IS NOT AVAILABLE file:///D|/Philips LCD/english/180P/PRODUCT/PRODUCT.HTM (9 of 10) [1/20/2001 3:19:28 PM] - Philips 180P | User Manual - Page 16
when a picture's size is manually extended to the largest screen display size with same video aspect ratio as the original picture. Picture size can continue to be enlarged up to full screen size, but its aspect ratio will be distorted. Message appears on 17" and 18" LCD monitors when a user - Philips 180P | User Manual - Page 17
in adjusting the OSD of your monitor. BRIGHTNESS hotkey. When the UP and DOWN arrow buttons are pressed, the adjustment controls for the BRIGHTNESS will show up. .OK button which when pressed will take you to the OSD controls file:///D|/Philips LCD/english/180P/INSTALL/INSTALL.HTM (1 of 2) [1/20 - Philips 180P | User Manual - Page 18
, 60Hz (for 17"/18"). Note: You can monitor, included in this CD. A step-by-step instructions is provided to guide you through the installtion process. Click on the link to know more about this program. More about FPadjust Program RETURN TO TOP OF THE PAGE file:///D|/Philips LCD/english/180P - Philips 180P | User Manual - Page 19
• The OSD Controls Description of the On Screen Display What is the On-Screen Display? This is a feature in all Philips LCD monitors which allows an end-user to adjust screen performance of monitors directly though an on-screen instruction window. The user interface provides user-friendliness and - Philips 180P | User Manual - Page 20
TO TOP OF THE PAGE The OSD Tree Below is an overall view of the structure of the On-Screen Display. You can use this as reference when you want to later on work your way around the different adjustments. file:///D|/Philips LCD/english/180P/OSD/OSDDESC.HTM (2 of 5) [1/20/2001 3:19:33 PM] - Philips 180P | User Manual - Page 21
On-Screen Display file:///D|/Philips LCD/english/180P/OSD/OSDDESC.HTM (3 of 5) [1/20/2001 3:19:33 PM] - Philips 180P | User Manual - Page 22
On-Screen Display file:///D|/Philips LCD/english/180P/OSD/OSDDESC.HTM (4 of 5) [1/20/2001 3:19:33 PM] - Philips 180P | User Manual - Page 23
On-Screen Display RETURN TO TOP OF THE PAGE file:///D|/Philips LCD/english/180P/OSD/OSDDESC.HTM (5 of 5) [1/20/2001 3:19:33 PM] - Philips 180P | User Manual - Page 24
and Warranty Customer Care & Warranty PLEASE SELECT YOUR COUNTRY/AREA TO REVIEW DETAILS OF YOUR WARRANTY COVERAGE WESTERN EUROPE: Austria • Belgium • Cyprus Thailand AFRICA: Morocco • South Africa MIDDLE EAST: Dubai • Egypt file:///D|/Philips LCD/english/WARRANTY/WARRANTY.HTM [1/20/2001 3:19:35 PM] - Philips 180P | User Manual - Page 25
. CustoMax Philips proprietary monitor control software that allows users to control parameters (e.g., Size, Color, Geometry) using software running in Windows. CustoMax is compatible with existing VGA cards. See CrystalClear FAQ and USB Bay FAQ. file:///D|/Philips LCD/english/180P/GLOSSARY/GLOSSARY - Philips 180P | User Manual - Page 26
, etc.) and will enable these different segments to unite around one monitor interface specification. The DVI interface enables: 1. Content to remain in the lossless by the user. RETURN TO TOP OF THE PAGE file:///D|/Philips LCD/english/180P/GLOSSARY/GLOSSARY.HTM (2 of 5) [1/20/2001 3:19:38 PM] - Philips 180P | User Manual - Page 27
has hardware support for reset and suspend/resume signaling. The controller provides the interface registers to allow communication to/from the host. Hub specific status and control commands permit the host to configure a hub and to monitor and control file:///D|/Philips LCD/english/180P/GLOSSARY - Philips 180P | User Manual - Page 28
. Upstream ports receive downstream data traffic. RETURN TO TOP OF THE PAGE V Vertical refresh rate Expressed in Hz, it is the number of frames (complete pictures) written to the screen every second. file:///D|/Philips LCD/english/180P/GLOSSARY/GLOSSARY.HTM (4 of 5) [1/20/2001 3:19:38 PM] - Philips 180P | User Manual - Page 29
Glossary RETURN TO TOP OF THE PAGE file:///D|/Philips LCD/english/180P/GLOSSARY/GLOSSARY.HTM (5 of 5) [1/20/2001 3:19:38 PM] - Philips 180P | User Manual - Page 30
and Printing Instructions • Installing FPadjust Program This page provides an option to read the manual in . Download 150P.pdf Download 150X.pdf Download 170B.pdf Download 180P.pdf 2. From the menu that appears, choose ' Philips LCD/english/DOWNLOAD/DOWNLOAD.HTM (1 of 2) [1/20/2001 3:19:40 PM] - Philips 180P | User Manual - Page 31
Print Printing instructions: To print the manual: 1. With the manual file open, follow your printer's instructions and print the pages you need. RETURN TO TOP OF THE PAGE Installing FPadjust Program The FP Adjust program generates alignment patterns which will help you adjust monitor settings such - Philips 180P | User Manual - Page 32
you first install your monitor. Follow the instructions to insert the driver disk (either floppy or CD-ROM) included in this package. Monitor drivers (.inf and .icm files) will be installed automatically. Q: How do I adjust resolution? file:///D|/Philips LCD/english/180P/SAFETY/SAF_FAQ.HTM (1 of - Philips 180P | User Manual - Page 33
Frequently Asked Questions) A: Your video card/graphic driver and monitor together determine the available resolutions. You can select desired resolution under Window 95/98 with the "Display properties/Settings" control panel Q: What if I get lost when making monitor adjustments? A: Simply press the - Philips 180P | User Manual - Page 34
hexane, etc. Q: What accessories are available for my 150P / 180P/ 170B LCD monitor? A: Currently there are 3 accessories available for the 150P. There different video sources a breeze. Q: Can the Philips LCD Monitor be hung on the wall or used as touch panel? A: Yes, Philips Brilliance LCD monitors - Philips 180P | User Manual - Page 35
words, there are 1024x768 or 786,432 pixels on this 15-inch LCD screen. When the monitor needs to display at a lower resolution, say 640x480, the image on the screen is smaller because it requires fewer pixels. file:///D|/Philips LCD/english/180P/SAFETY/SAF_FAQ.HTM (4 of 9) [1/20/2001 3:19:52 PM] - Philips 180P | User Manual - Page 36
Philips LCD monitors Plug-and-Play? A: Yes, the monitors are Plug-and-Play compatible with Windows® 95, 98 and the PC98/99 platforms. Q: What is USB (Universal Serial Bus)? A: Think of USB as a smart plug for PC peripherals. USB automatically determines resources (like driver video (150P/180P/181AS) - Philips 180P | User Manual - Page 37
frequently, improving the screen refresh time (your mouse pointer will appear to move more smoothly across the screen, for example). The passive matrix LCD has a grid of conductors with pixels located at each intersection in the grid. file:///D|/Philips LCD/english/180P/SAFETY/SAF_FAQ.HTM (6 of - Philips 180P | User Manual - Page 38
an LCD monitor, why? A: Unlike a CDT monitor, the TFT LCD panel has a fixed resolution. For example, an XGA monitor has 1024x3 (R, G, B) x 768 pixels and higher resolution may ) is used for wider viewing angle. file:///D|/Philips LCD/english/180P/SAFETY/SAF_FAQ.HTM (7 of 9) [1/20/2001 3:19:52 PM] - Philips 180P | User Manual - Page 39
. The specification page provides detailed safety standards data. More information is provided in the Regulatory Information chapter. Q: Is the Philips LCD Monitor Y2k compliant? A: Yes, all Philips LCD Monitors are compliant with the Y2K. file:///D|/Philips LCD/english/180P/SAFETY/SAF_FAQ - Philips 180P | User Manual - Page 40
FAQs (Frequently Asked Questions) RETURN TO TOP OF THE PAGE file:///D|/Philips LCD/english/180P/SAFETY/SAF_FAQ.HTM (9 of 9) [1/20/2001 3:19:52 PM] - Philips 180P | User Manual - Page 41
possible solutions, contact your nearest Philips dealer. Common Problems Having this problem? Check these items No Picture (Power LED not lit) No Picture (Power LED is amber or yellow) Screen says q Make sure the Power cable is plugged to the wall and back of the monitor. q Make sure the DC - Philips 180P | User Manual - Page 42
First Window q Adjust the contrast and brightness using the First Window. (The backlight of the LCD monitor has a fixed life span. When the screen becomes dark or begins to flicker, please contact your dealer. file:///D|/Philips LCD/english/180P/SAFETY/saf_troub.htm (2 of 3) [1/20/2001 3:19:53 PM] - Philips 180P | User Manual - Page 43
Troubleshooting An after-image appears q If an image remains in the screen for an extended period of time, it may be imprinted in the screen and leave Centers list to contact your local Philips distributor. RETURN TO TOP OF THE PAGE file:///D|/Philips LCD/english/180P/SAFETY/saf_troub.htm (3 of - Philips 180P | User Manual - Page 44
Deutschland) • Philips End-of-Life Disposal • Information for UK only Safety and Troubleshooting • Troubleshooting • Other Related the adaptation of goods and services to the environment. The main problem, as far as computers file:///D|/Philips LCD/english/180P/SAFETY/REGS/REGULAT.HTM (1 of 7) [1/20/2001 3: - Philips 180P | User Manual - Page 45
Lead** Lead can be found in picture tubes, display screens, solders and capacitors. Lead damages the PHILIPS 150P1 140S1 150B1 170B1 180P1 This monitor is equipped with a function for saving energy which supports 3 W file:///D|/Philips LCD/english/180P/SAFETY/REGS/REGULAT.HTM (2 of 7) [1/20/2001 3: - Philips 180P | User Manual - Page 46
in accordance with the instructions, may cause harmful that was supplied with the monitor when connecting this monitor to a computer device. To modifications n'ayant pas reçu l'approbation des services compétents en matière de conformité Philips LCD/english/180P/SAFETY/REGS/REGULAT.HTM (3 of 7) [1/20/ - Philips 180P | User Manual - Page 47
cause radio Interference. Install and use the equipment according to the instruction manual. Class B ITE MOC Notice (South Korea Only) Class B works together (computer, monitor, printer, and so on) should have the same power supply source. file:///D|/Philips LCD/english/180P/SAFETY/REGS/REGULAT.HTM - Philips 180P | User Manual - Page 48
SITEN, ETTÄ VERKKOJOHTO VOIDAAN TARVITTAESSA HELPOSTI IRROTTAA PISTORASIASTA. Plassering/Ventilasjon ADVARSEL: NÅR DETTE UTSTYRET PLASSERES, MÅ DU PASSE PÅ AT KONTAKTENE FOR STØMTILFØRSEL ER LETTE Å NÅ. file:///D|/Philips LCD/english/180P/SAFETY/REGS/REGULAT.HTM (5 of 7) [1/20/2001 3:19:54 PM] - Philips 180P | User Manual - Page 49
on how to dispose of your old monitor from your local Philips dealer. RETURN TO TOP OF THE PAGE Information for UK only WARNING - THIS APPLIANCE MUST BE EARTHED 5A,A.S.T.A. or BSI approved type. file:///D|/Philips LCD/english/180P/SAFETY/REGS/REGULAT.HTM (6 of 7) [1/20/2001 3:19:54 PM] - Philips 180P | User Manual - Page 50
that the cord grip is clamped over the sheath of the lead - not simply over the three wires. RETURN TO TOP OF THE PAGE file:///D|/Philips LCD/english/180P/SAFETY/REGS/REGULAT.HTM (7 of 7) [1/20/2001 3:19:54 PM] - Philips 180P | User Manual - Page 51
Troubleshooting • Regulatory Information • Information for Users in the U. S. • Information for Users Outside the U.S Information for Users in the U. S. For units set at 115 V : Use a UL Listed Cord Set consisting of a minimum 18 Philips LCD/english/180P/SAFETY/saf_other.htm [1/20/2001 3:19:54 PM] - Philips 180P | User Manual - Page 52
Specifications • Resolution & Preset Modes • Automatic Power Saving • Physical Specification • Pin Assignment • Product Views Philips' Flat Panel Monitors Pixel Defect Policy Philips appear on the screen in different ways. Philips LCD/english/180P/PRODUCT/PIXEL.HTM (1 of 3) [1/20/2001 3:20:05 PM] - Philips 180P | User Manual - Page 53
repair or replacement due to pixel defects during the warranty period, a TFT LCD panel in a Philips flat panel monitor must have pixel or subpixel defects exceeding the tolerances listed in the following tables. file:///D|/Philips LCD/english/180P/PRODUCT/PIXEL.HTM (2 of 3) [1/20/2001 3:20:05 PM] - Philips 180P | User Manual - Page 54
Philips Pixel Defect Policy RETURN TO TOP OF THE PAGE file:///D|/Philips LCD/english/180P/PRODUCT/PIXEL.HTM (3 of 3) [1/20/2001 3:20:05 PM] - Philips 180P | User Manual - Page 55
Connecting to Your PC Connecting to Your PC Your LCD Monitor : Front View Product Description • Accessory Pack • Connecting to Your PC • may differ for different countries) 4) Macintosh Adapter (optional) file:///D|/Philips LCD/english/180P/INSTALL/CONNECT.HTM (1 of 5) [1/20/2001 3:20:11 PM] - Philips 180P | User Manual - Page 56
6) E-DFU package with Quick Setup Guide, Using Your Monitor Manual, and CD-ROM. Connecting to Your PC RETURN TO TOP OF THE PAGE 1) To remove the back cover, press up to disengage the clips on each side, then pull and lift. file:///D|/Philips LCD/english/180P/INSTALL/CONNECT.HTM (2 of 5) [1/20 - Philips 180P | User Manual - Page 57
Connecting to Your PC 2) Remove the plastic ring from the hinge 3) Plug in the video cable into VGA or DVI-D connector. Also connect audio cable, if any. file:///D|/Philips LCD/english/180P/INSTALL/CONNECT.HTM (3 of 5) [1/20/2001 3:20:11 PM] - Philips 180P | User Manual - Page 58
ring back on the hinge NOTE: If you use an Apple Macintosh™, you need to connect the special Mac adapter to one end of the monitor signal cable 5) Replace the back cover on the monitor file:///D|/Philips LCD/english/180P/INSTALL/CONNECT.HTM (4 of 5) [1/20/2001 3:20:11 PM] - Philips 180P | User Manual - Page 59
its power cable. 6.2 Connect the monitor signal cable to the video connector on the back of your computer monitor into a nearby outlet. 6.5 Turn on your computer and monitor. If the monitor displays an image, installation is complete. RETURN TO TOP OF THE PAGE file:///D|/Philips LCD/english/180P - Philips 180P | User Manual - Page 60
, 60Hz (for 17"/18"). q Shut down your computer, disconnect your old monitor and reconnect your Philips LCD monitor. q Turn on your monitor and then turn on your PC. 1.4 Your computer may ask you for monitor drivers (.inf and .icm files) or a driver disk. Follow the instructions to insert the CD - Philips 180P | User Manual - Page 61
Installing Your USB Hub Your LCD Monitor : Front View Product Description Wall Mount Kit Description of the USB Hub USB Hub supports four down stream ports and one upstream port. With its Downstream Port #4 5) Upstream Port file:///D|/Philips LCD/english/180P/INSTALL/USBHUB/USB_INST.HTM (1 of 4) [1/ - Philips 180P | User Manual - Page 62
Installing Your USB Hub RETURN TO TOP OF THE PAGE Application Just a few peripherals you can connect to your USB Hub . file:///D|/Philips LCD/english/180P/INSTALL/USBHUB/USB_INST.HTM (2 of 4) [1/20/2001 3:20:12 PM] - Philips 180P | User Manual - Page 63
. Software: Windows system which supports USB (OSR2.1 or higher). Installation of USB Hub 1. Turn off the monitor and unplug the power cord 2. Remove the cover of "USB BAY" at the back of the monitor. 3. Insert USB Hub into the slot file:///D|/Philips LCD/english/180P/INSTALL/USBHUB/USB_INST.HTM - Philips 180P | User Manual - Page 64
tight, the unit may not connect properly! 6. Plug-in the power cord and turn on the monitor. 7. The two ends of USB cable attached are different. Plug in the square end into the RETURN TO TOP OF THE PAGE file:///D|/Philips LCD/english/180P/INSTALL/USBHUB/USB_INST.HTM (4 of 4) [1/20/2001 3:20:12 PM] - Philips 180P | User Manual - Page 65
on the top of the monitor and one on each side. Below each of the openings is a clip. Using a medium-sized coin, press in (A) and then twist (B) to disengage the clip in one of the opening. Repeat for the rest of the openings. file:///D|/Philips LCD/english/180P/INSTALL/P_COVER/pcov_inst.htm (1 of - Philips 180P | User Manual - Page 66
Installing the Protective Cover 2) Pull up and forward to remove the front bezel from the monitor. 3) Peel off the film on both sides of the protective cover. file:///D|/Philips LCD/english/180P/INSTALL/P_COVER/pcov_inst.htm (2 of 4) [1/20/2001 3:20:12 PM] - Philips 180P | User Manual - Page 67
onto the monitor, engaging only the top two clips. Now press the bottom corners of the protective cover to engage the two side clips. RETURN TO TOP OF THE PAGE Cleaning Instructions The anti-scratch, anti-reflective cover protects the LCD screen. file:///D|/Philips LCD/english/180P/INSTALL/P_COVER - Philips 180P | User Manual - Page 68
Installing the Protective Cover Cleaning Instructions: q Wipe with a soft dry cloth q Do not use alcohol solvents or other strong chemical RETURN TO TOP OF THE PAGE file:///D|/Philips LCD/english/180P/INSTALL/P_COVER/pcov_inst.htm (4 of 4) [1/20/2001 3:20:12 PM] - Philips 180P | User Manual - Page 69
Protective Cover • Installing the Wall Mount Kit Installing the Wall Mount Kit 1) Please turn off the monitor and unplug all cables, then remove the screw in the monitor base and pull it away completely. file:///D|/Philips LCD/english/180P/INSTALL/M_KIT/mkit_inst.htm (1 of 4) [1/20/2001 3:20:13 PM] - Philips 180P | User Manual - Page 70
Installing Your Wall Mount Kit 2) Detach the monitor base by pulling away the two parts. 3) Fix the mount bracket to the desired location. file:///D|/Philips LCD/english/180P/INSTALL/M_KIT/mkit_inst.htm (2 of 4) [1/20/2001 3:20:13 PM] - Philips 180P | User Manual - Page 71
to hold them in place. 5) Slide the support pin at the bottom of the monitor into the matching hole on the bracket, making sure that the pin is aligned. Then use the original base screw to securely fix the monitor to the bracket. file:///D|/Philips LCD/english/180P/INSTALL/M_KIT/mkit_inst.htm (3 of - Philips 180P | User Manual - Page 72
Installing Your Wall Mount Kit 6) Connect the AC power adaptor provided to the DC-IN cable, and connect all other cables to the computer. RETURN TO TOP OF THE PAGE file:///D|/Philips LCD/english/180P/INSTALL/M_KIT/mkit_inst.htm (4 of 4) [1/20/2001 3:20:13 PM] - Philips 180P | User Manual - Page 73
coming from the screen. To adjust your screen's brightness, follow the steps below. An 80% brightness is recommended. 1) Press the or button on the monitor. The BRIGHTNESS for details. RETURN TO TOP OF THE PAGE file:///D|/Philips LCD/english/180P/OSD/OSD_CONT.HTM (1 of 18) [1/20/2001 3:20:23 PM] - Philips 180P | User Manual - Page 74
window. Simply follow the steps below. 1) Press the highlighted. button on the monitor. The MAIN CONTROLS window appears. LANGUAGE is 2) Press button until VOLUME is highlighted MAIN CONTROLS is highlighted. file:///D|/Philips LCD/english/180P/OSD/OSD_CONT.HTM (2 of 18) [1/20/2001 3:20:23 PM] - Philips 180P | User Manual - Page 75
OF THE PAGE LANGUAGE The ON SCREEN DISPLAY prompts can be in one of monitor until LANGUAGE is highlighted) 2) Press the button again. The LANGUAGE window appears. 3) Press the or button until the desired language is highlighted. file:///D|/Philips LCD/english/180P/OSD/OSD_CONT.HTM (3 of 18 - Philips 180P | User Manual - Page 76
in relation to the top and bottom of your screen. 1) Press the highlighted. button on the monitor. The MAIN CONTROLS window appears. LANGUAGE is 2) Press the button until ADJUST POSITION is highlighted. file:///D|/Philips LCD/english/180P/OSD/OSD_CONT.HTM (4 of 18) [1/20/2001 3:20:23 PM] - Philips 180P | User Manual - Page 77
image up or down until it appears centered. 6) Press the button to confirm your selections and return to the MAIN CONTROLS window. EXIT MAIN file:///D|/Philips LCD/english/180P/OSD/OSD_CONT.HTM (5 of 18) [1/20/2001 3:20:23 PM] - Philips 180P | User Manual - Page 78
highlighted. button on the monitor, The MAIN CONTROLS window appears. LANGUAGE is 2). Press the button until ADJUST SIZE is highlighted. 3). Press the button. the ADJUST SIZE window appears. FULL Screen is highlighted. file:///D|/Philips LCD/english/180P/OSD/OSD_CONT.HTM (6 of 18) [1/20/2001 3:20 - Philips 180P | User Manual - Page 79
Brightness is the overall intensity of the light coming from the screen. An 80% brightness is recommended. Contrast is the difference between the light and dark areas on the screen. A 100% contrast is recommended. file:///D|/Philips LCD/english/180P/OSD/OSD_CONT.HTM (7 of 18) [1/20/2001 3:20:23 PM] - Philips 180P | User Manual - Page 80
See the steps at the beginning of these instructions to learn how. 1) Press the highlighted. button on the monitor. The MAIN CONTROLS window appears. LANGUAGE is 2) the contrast. A 100% contrast is recommended. file:///D|/Philips LCD/english/180P/OSD/OSD_CONT.HTM (8 of 18) [1/20/2001 3:20:23 PM] - Philips 180P | User Manual - Page 81
CLOCK help you to eliminate flicker from screen and TEXT/GRAPHICS help you to /GRAPHIC adjustment is not applicable if display resolution set to 1280x1024. To adjust the PHASE monitor, The MAIN CONTROLS window appears. LANGUAGE is file:///D|/Philips LCD/english/180P/OSD/OSD_CONT.HTM (9 of 18) [1/ - Philips 180P | User Manual - Page 82
IMAGE OPTIMIZATION is highlighted. 3). Press the button. The IMAGE OPTIMIZATION window appears. VIDEO NOISE is highlighted. 4). Press or button to select PHASE, CLOCK and TEXT/ EXIT MAIN CONTROLS is highlighted. file:///D|/Philips LCD/english/180P/OSD/OSD_CONT.HTM (10 of 18) [1/20/2001 3:20:23 PM] - Philips 180P | User Manual - Page 83
adjust the colors on your screen to a setting you desire. 1) Press the highlighted. button on the monitor. The MAIN CONTROLS window appears. LANGUAGE is 2) Press the button until ADJUST COLOR is highlighted. file:///D|/Philips LCD/english/180P/OSD/OSD_CONT.HTM (11 of 18) [1/20/2001 3:20:23 PM - Philips 180P | User Manual - Page 84
, or 6500K FOR IMAGE MANAGEMENT, press the button to confirm your selection and return to the MAIN CONTROLS window. EXIT MAIN CONTROLS is highlighted. file:///D|/Philips LCD/english/180P/OSD/OSD_CONT.HTM (12 of 18) [1/20/2001 3:20:23 PM] - Philips 180P | User Manual - Page 85
returning to MAIN CONTROLS... Smart Help ... to continue to PRODUCTION INFORMATION, press the button until PRODUCTION INFORMATION is highlighted. Next, start with step 3 under file:///D|/Philips LCD/english/180P/OSD/OSD_CONT.HTM (13 of 18) [1/20/2001 3:20:23 PM] - Philips 180P | User Manual - Page 86
is 2) Press the button until PRODUCT INFORMATION is highlighted. 3) Press the button. The PRODUCT INFORMATION window appears. This window shows the monitor's SERIAL NUMBER and RESOLUTION of the monitor. file:///D|/Philips LCD/english/180P/OSD/OSD_CONT.HTM (14 of 18) [1/20/2001 3:20:23 PM] - Philips 180P | User Manual - Page 87
will be returned to the original settings. 1) Press the OK button on the monitor. The MAIN CONTROLS window appears. LANGUAGE is highlighted. 2) Press the button until RESET TO FACTORY SETTINGS is highlighted. file:///D|/Philips LCD/english/180P/OSD/OSD_CONT.HTM (15 of 18) [1/20/2001 3:20:23 PM] - Philips 180P | User Manual - Page 88
. (Note: INPUT SELECTION is not available on all monitors. If not on your monitor, RESET TO FACTORY SETTINGS is your last selection.) ... to exit completely, press the button. RETURN TO TOP OF THE PAGE file:///D|/Philips LCD/english/180P/OSD/OSD_CONT.HTM (16 of 18) [1/20/2001 3:20:23 PM] - Philips 180P | User Manual - Page 89
determined by how the video signal is sent from your computer to your monitor. To find out if the signal is digital or analog, first consult the owner's manual for your computer. Second, make sure you have the correct connection made to your monitor. If your computer supports both analog and digital - Philips 180P | User Manual - Page 90
The OSD Controls Smart Help After returning to MAIN CONTROLS... Smart Help ... to exit completely, press the button. Exit Main Controls RETURN TO TOP OF THE PAGE RETURN TO TOP OF THE PAGE file:///D|/Philips LCD/english/180P/OSD/OSD_CONT.HTM (18 of 18) [1/20/2001 3:20:23 PM] - Philips 180P | User Manual - Page 91
contact Philips directly to benefit from your Philips F1rst Choice Warranty. This three-year service warranty 18.00 hrs CET by using one of the toll-free numbers. Click here to access the F1rst Choice Contact Information. Or you can reach us via: Website: http://www.philips.com file:///D|/Philips LCD - Philips 180P | User Manual - Page 92
/or manufactured. Therefore always check whether a product can be used in a specific country. In case your Philips product is not working correctly or is defective, please contact your Philips dealer. In the event you require service whilst in another country a dealer address can be given to you by - Philips 180P | User Manual - Page 93
Monitor) Three Years Free Labor / Three Years Free Service on Parts / One Year Exchange* *Product will be exchanged with a new or renewed to original specifications other cause not within the control of Philips Consumer Electronics. q reception problems caused by signal conditions or cable or - Philips 180P | User Manual - Page 94
... Please record the model and serial numbers found on the product below. MODEL SERIAL This warranty gives you specific legal rights. You may have other rights which vary from state/province to state/province. file:///D|/Philips LCD/english/WARRANTY/WAR_USA.HTM (2 of 3) [1/20/2001 3:20:29 PM] - Philips 180P | User Manual - Page 95
directly to benefit from your Philips F1rst Choice Warranty. This three-year service warranty entitles you to a swap model on-site within 48 hours of your call being received within the first year of purchase. If you have any problems with your monitor within the second or third year of purchase
-
 1
1 -
 2
2 -
 3
3 -
 4
4 -
 5
5 -
 6
6 -
 7
7 -
8
-
9
-
10
-
11
-
12
-
13
-
14
-
15
-
16
-
17
-
18
-
19
-
20
-
21
-
22
-
23
-
24
-
25
-
26
-
27
-
28
-
29
-
30
-
31
-
32
-
33
-
34
-
35
-
36
-
37
-
38
-
39
-
40
-
41
-
42
-
43
-
44
-
45
-
46
-
47
-
48
-
49
-
50
-
51
-
52
-
53
-
54
-
55
-
56
-
57
-
58
-
59
-
60
-
61
-
62
-
63
-
64
-
65
-
66
-
67
-
68
-
69
-
70
-
71
-
72
-
73
-
74
-
75
-
76
-
77
-
78
-
79
-
80
-
81
-
82
-
83
-
84
-
85
-
86
-
87
-
88
-
89
-
90
-
91
-
92
-
93
-
94
-
95
 |
 |

Philips 180P Electronic User's Manual
file:///D|/Philips LCD/english/180P/Index.htm [1/20/2001 3:19:10 PM]