Philips 220S2SS User manual (English) - Page 7
Description of the On Screen Display - monitor lcd
 |
View all Philips 220S2SS manuals
Add to My Manuals
Save this manual to your list of manuals |
Page 7 highlights
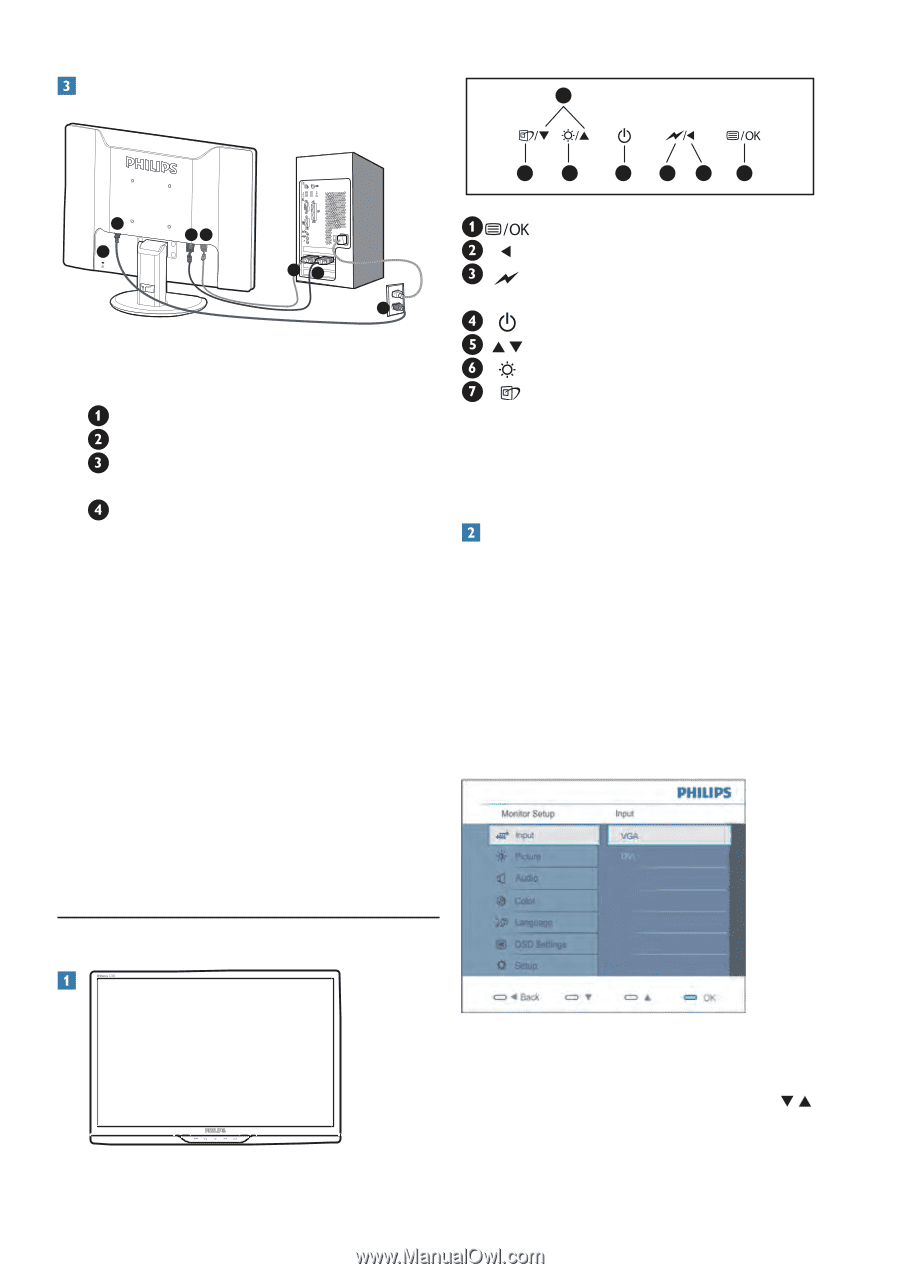
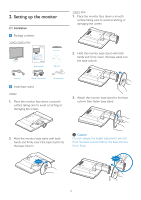
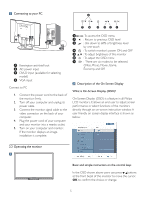
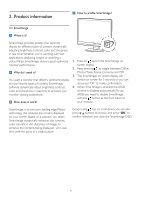
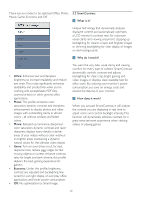
Connecting to your PC 5 76 4 32 1 2 34 1 43 2 Kensington anti-thief lock AC power input DVI-D input (available for selecting model) VGA input Connect to PC 1. Connect the power cord to the back of the monitor firmly. 2. Turn off your computer and unplug its power cable. 3. Connect the monitor signal cable to the video connector on the back of your computer. 4. Plug the power cord of your computer and your monitor into a nearby outlet. 5. Turn on your computer and monitor. If the monitor displays an image, installation is complete. :To access the OSD menu : Return to previous OSD level : dim down to 60% of brightness level by one touch :To switch monitor's power ON and OFF :To adjust brightness of this monitor :To adjust the OSD menu : There are six modes to be selected. Office, Photo, Movie ,Game, Economy, and Off Description of the On Screen Display What is On-Screen Display (OSD)? On-Screen Display (OSD) is a feature in all Philips LCD monitors. It allows an end user to adjust screen performance or select functions of the monitors directly through an on-screen instruction window. A user friendly on screen display interface is shown as below: 2.2 Operating the monitor Front view product description Basic and simple instruction on the control keys In the OSD shown above users can press buttons at the front bezel of the monitor to move the cursor, OK to confirm the choice or change. 5 5
-
 1
1 -
 2
2 -
 3
3 -
 4
4 -
 5
5 -
 6
6 -
 7
7 -
 8
8 -
 9
9 -
 10
10 -
 11
11 -
 12
12 -
13
-
14
-
15
-
16
-
17
-
18
-
19
-
20
-
21
-
22
-
23
-
24
-
25
-
26
-
27
-
28
-
29
-
30
-
31
-
32
-
33
-
34
-
35
-
36
-
37
-
38
-
39
-
40
-
41
-
42
-
43
-
44
-
45
-
46
-
47
-
48
-
49
-
50
-
51
-
52
-
53
 |
 |