Philips DVP3960 User manual - Page 39
Using the Video setup menu - cannot access hdmi
 |
UPC - 609585187818
View all Philips DVP3960 manuals
Add to My Manuals
Save this manual to your list of manuals |
Page 39 highlights
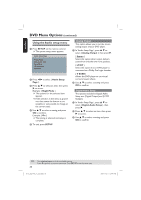
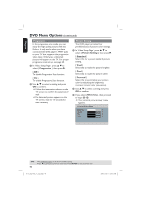
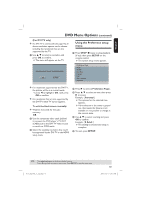
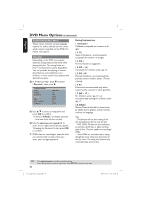
English DVD Menu Options (continued) Using the Video setup menu A Press SETUP on the remote control. The system setup menu appears. Video Setup Page TV Type TV Display Progressive Picture Setting Closed Captions HDMI Setup B Press W X to select { Video Setup Page }. C Press S T to select an item, then press X to access. Example: { TV Display } The options for the selected item appears. If the selection in the menu is greyed out, that means the feature is not available or not possible to change at the current state. D Use S T to select a setting and press OK to confirm. Example: { 4:3 Pan Scan } The setting is selected and setup is complete. E To exit, press SETUP. TV Type This menu contains the options for selecting the color system that matches the connected TV. For details, see page 21. Setting the TV Display The picture shape can be adjusted to fit your TV and the format must be available on the playback disc. Otherwise, the TV display will not affect the picture during playback. A In 'Video Setup Page', press S T to select { TV Display }, then press X. { 4:3 Pan Scan } Select this if you have a normal TV and want both sides of the picture to be trimmed or formatted on the TV screen. { 4:3 Letter Box } Select this if you have a normal TV. A 'widescreen' display with black bars on the top and bottom will be displayed on the TV screen. { 16:9 } Select this for wide-screen TV (frame ratio 16:9). B Use S T to select a setting and press OK to confirm. TIPS: The underlined option is the factory default setting. Press W to go back to previous menu item. Press SETUP to exit the menu item. 01-53_dvp3960_37_eng2.indd 39 39 2006-12-28 11:24:50 AM
-
 1
1 -
2
-
3
-
4
-
5
-
6
-
7
-
8
-
9
-
10
-
11
-
12
-
13
-
14
-
15
-
16
-
17
-
18
-
19
-
20
-
21
-
22
-
23
-
24
-
25
-
26
-
27
-
28
-
29
-
30
-
31
-
32
-
33
-
 34
34 -
 35
35 -
 36
36 -
 37
37 -
 38
38 -
 39
39 -
 40
40 -
 41
41 -
 42
42 -
 43
43 -
 44
44 -
45
-
46
-
47
-
48
-
49
-
50
-
51
-
52
-
53
 |
 |