Philips LX8000SA User manual - Page 12
Preparations - home audio system
 |
View all Philips LX8000SA manuals
Add to My Manuals
Save this manual to your list of manuals |
Page 12 highlights
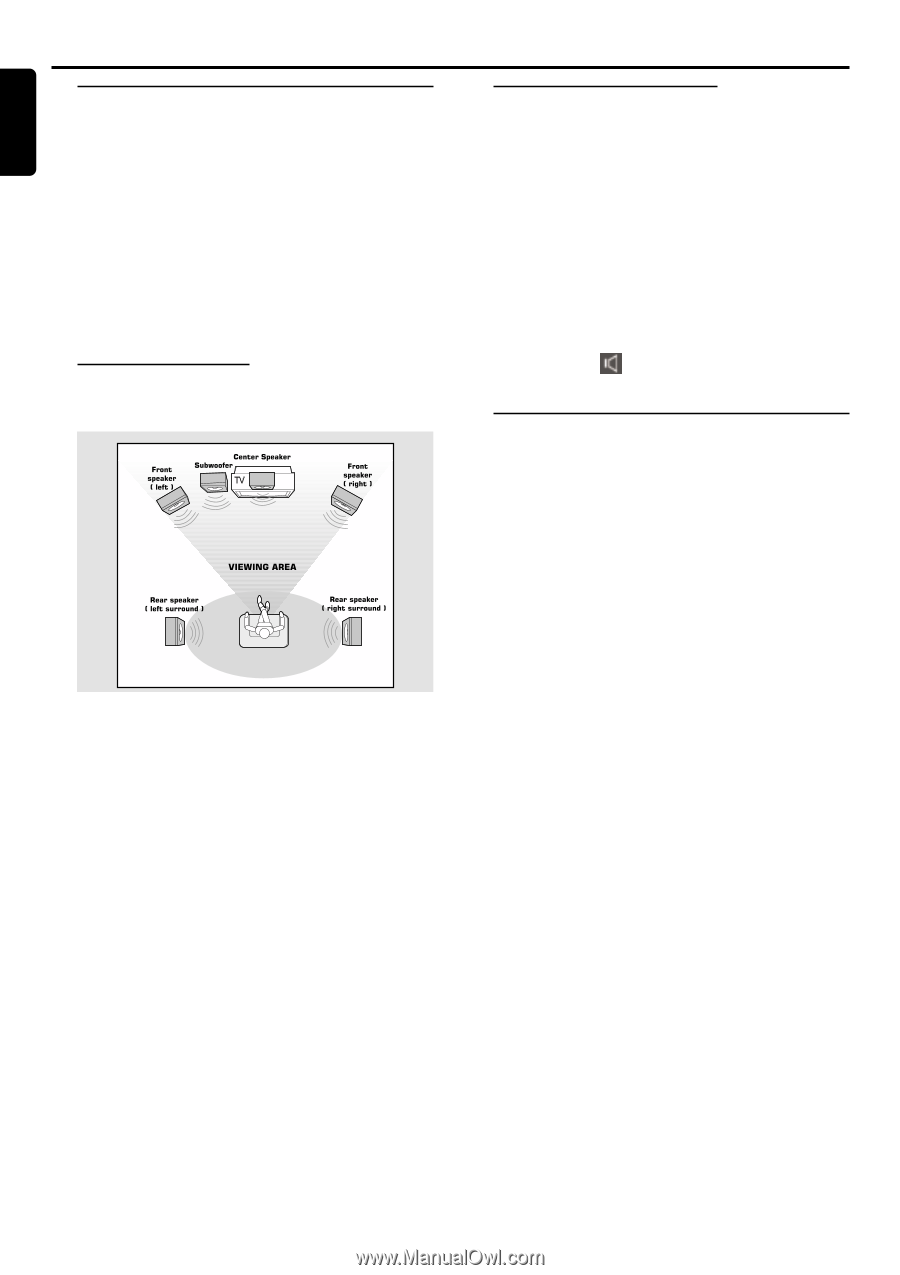
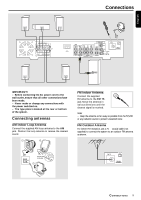
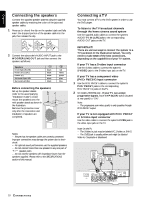
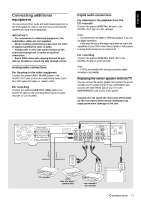
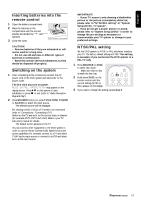
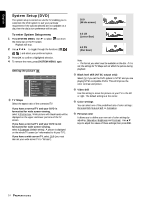
English Preparations Setting up the surround sound system You must connect all the speakers and set up the system properly in order to enjoy the Digital Cinema experience at home (refer to "Connections - Connecting the speakers"). You will have the feeling of being in the middle of the action because sound is coming from everywhere around you. The subwoofer can enhance the bass performance of your system dramatically. IMPORTANT! Please sit at your usual listening position in order to set up the speaker balance correctly. Placing the speakers To obtain the best surround effect, place the speakers as follows. 1 Place the front left and right speakers at equal distances from the TV and at an angle of approximately 45 degrees from the listening position. 2 Place the center speaker above or below the TV so the center channel's sound is localized. 3 Place the surround speakers at normal listening ear level facing each other or mounted on the wall. 4 Place the subwoofer on the floor near the TV. Notes: - To avoid magnetic interference, do not position the front speakers too close to your TV. - If the rear surround speakers are installed farther away from the listening position than the front and center speakers, it will weaken the surround effect. - All speakers should be securely installed to prevent accidents and improve sound quality. Changing the volume level You can change the speakers' sound distribution to suit your surround sound needs, except for CDDA DTS disc. q Press CENTER +/- to adjust the level of the center speaker. ➜ "CEN XX" is displayed. q Press REAR +/- to adjust the level of the rear surround speakers. ➜ "SL XX" or "SR XX" is displayed. Notes: - "XX" denotes the volume level between -6 to +6. - For CDDA DTS disc, please refer to "System Setup (DVD) Setting the sound ( ) - Speakers" for changing the volume level of the center speaker, rear speakers and subwoofer. Setting up the subwoofer 1 Use the supplied subwoofer cable to connect the subwoofer's audio input jack to the WOOFER LINE OUT jack of the DVD system. 2 Connect the subwoofer's AC power cable to the wall socket and switch on the power. ➜ It will automatically switch on when receiving an audio signal input. If there is no audio signal input, it will switch off automatically. 3 Set the phase polarity at the rear of the subwoofer at either 0o or 180o to determine better bass reproduction effect in your listening environment. 4 Press SUBW +/- to adjust the volume level of the subwoofer (-6 to +6). ➜ "SUB XX" is displayed. 12 PREPARATIONS
-
 1
1 -
2
-
3
-
4
-
5
-
6
-
 7
7 -
 8
8 -
 9
9 -
 10
10 -
 11
11 -
 12
12 -
 13
13 -
 14
14 -
 15
15 -
 16
16 -
 17
17 -
18
-
19
-
20
-
21
-
22
-
23
-
24
-
25
-
26
-
27
-
28
-
29
-
30
-
31
 |
 |