Philips SRU8010 User manual
Philips SRU8010 - Prestigo Universal Remote Control Manual
 |
UPC - 609585135369
View all Philips SRU8010 manuals
Add to My Manuals
Save this manual to your list of manuals |
Philips SRU8010 manual content summary:
- Philips SRU8010 | User manual - Page 1
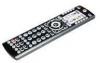
Owner's Manual Manuel de l'utilisateur Model SRU8010 Modèle SRU8010 - Philips SRU8010 | User manual - Page 2
Devices 8 Setting Up Your Favorites 10 Using The Remote 13 QuickPower 14 Sleep 15 Learning 16 Tips On Learning 16 Learning Main Keys 18 Learning Macros - Main Keys 19 Learning Side Keys 21 Learning Macros Device Codes 34 Combo Devices 35 Punchthrough 35 KidSafe 37 Troubleshooting 38 2 - Philips SRU8010 | User manual - Page 3
with your Philips Universal Remote. After you are familiar with this owner's manual, the first thing you need to do is to install batteries and setup your remote following the on-screen instructions. Thank you for buying this Philips remote and we hope it will give you many years of service. All - Philips SRU8010 | User manual - Page 4
Hard Key Functions 1. 29. 2. 28. 3. 27. 4. 26. 5. 25. 6. 24. 7. 23. 8. 22. 9. 21. 10. 20. 11. 19. 12. 18. 13. 17. 14. 16. 15. Note: blue text on the remote corresponds to DVD functions, green text are Tivo functions, and red text is for audio functions. 4 - Philips SRU8010 | User manual - Page 5
remote. 5. HOME - The starting screen on the LCD for most operations. 6. VOLUME UP/DOWN - Changes the volume level of the device, normally the TV. 7. OK/SELECT - Selects menu items for the device you are controlling, or confirms selections on the screen. 8. GUIDE Thumbs ratings. 17. INPUT , DVR, or - Philips SRU8010 | User manual - Page 6
can have problems with learning codes if your batteries are old. 3. Press the battery cover back into place. Battery Saver Your remote automatically turns Options menu, see page 34. Permanent Memory All the devices you set up, their codes, punchthrough settings, and all your favorites, etc., are - Philips SRU8010 | User manual - Page 7
(4) that has 10 yellow arrows. This is an exception to the rule because we're teaching you how to use the remote. But pressing Back again at this point does take you "back." Try pressing the Back key a few times to go back through the Wizard and then follow the instructions on the - Philips SRU8010 | User manual - Page 8
Back takes you to the last screen of brands (so you can go back through the list instead of forward through it if you prefer). In this case we selected Philips. Screen (3) tells you to point the remote directly at your TV and repeatedly press (4) (but not hold) Power (or Chan Up/Down - Philips SRU8010 | User manual - Page 9
Setting Up Your Devices, cont. (5) Pressing Save shows screen (5) that instructs you to try a few other keys on the remote to make sure you've found the correct code. Tip: try keys like Menu, and Guide. Power might work yet you still might not have the correct code. If several keys seem to - Philips SRU8010 | User manual - Page 10
a TV, and set up more devices, or skipped the rest of them can include ENTER, or OK, if your device requires it to change channels, e.g. 472Ok, logos. You can select Next (Side Key 10) or Back (Side Key 5) to see The Default device is this case was Sat, but you can select Pick Device to change - Philips SRU8010 | User manual - Page 11
to indicate that you can add another favorite channel. Again just press a channel number key on the remote, choose a logo and change the Device Type (if you want to). Add a few more favorites (up to 10). You can add more later, or delete or edit them later, or even reorder their positions. Select - Philips SRU8010 | User manual - Page 12
to confirm your new name. (6) You can continue to add favorites, up to a total of 10 (you can add more later, see page 28). At screen (6) you choose if the favorites you His, or press the His key at the top left hand side of the remote to go to screen (7) above. Then pressing the key next to the - Philips SRU8010 | User manual - Page 13
controlled. Press the HOME key at any time to access the screen where you can set things up, or access other features. Press the MODE key, then select a device type to change the mode that the remote is in. E.G., if the remote current mode that the remote is in is displayed with an icon in the lower - Philips SRU8010 | User manual - Page 14
from one easy to use screen. Press the HOME Key to go to the Home screen. Then press the Side Key next to QuickPower. Only Devices you've previously set up are displayed. The others are grayed out. Press any key that isn't grayed out to send the "Power" command for - Philips SRU8010 | User manual - Page 15
Side Key K2 next to the Cable Box icon twice, to set a sleep timer of 30 minutes. And we press Side Key K7 next to the Sat icon five times to set a sleep timer of count down. Make sure you leave the remote pointing at the device(s) you've set Sleep Timers for so it can send the Power command to - Philips SRU8010 | User manual - Page 16
lights when learning. e. Place the original remote end-to-end with the SRU8010 remote so the IR transmitter (at the top) on your original remote points at the IR learning device on the bottom of the SRU8010 remote. f. Keep the distance between the two remotes to approximately 1 inch. g. Line up the - Philips SRU8010 | User manual - Page 17
learning the original remote keys again. 4. If problems reoccur with the same key, check the original remote key being learned - does it transmit? Does it operate the target device? You can learn commands from an existing remote and store them under the "Main" keys on the SRU8010 remote, or learn - Philips SRU8010 | User manual - Page 18
the rest are grayed out, but you can still select any of the devices to learn commands for. You are then instructed to line up the remotes, and press the key on the SRU8010 remote that you want to learn. You then point the remote you want to learn commands from at the bottom of the - Philips SRU8010 | User manual - Page 19
instructions on the screen, and then press Done when you're finished. Or you can press Add Key to Macro, (see below and next page). Learning a Macro your TV's remote, then select Add Key to Macro, and press the 3 key and learn the channel 3 key from your TV's remote. Then the Macro stored under the - Philips SRU8010 | User manual - Page 20
the second key in the Macro, you can if desired, set a delay (1-10 secs) after which the command stored in the Macro will be sent. For remote at the bottom of the SRU8010 remote and press OK when you're ready. You then press the second key on your original remote that you want to add to the Macro - Philips SRU8010 | User manual - Page 21
press any of the Side Keys K1K5 to the left of the screen. Select the device you want to learn keys for. In this example we only have a TV, set up, so the rest are grayed out, but you can still select any of the devices to learn commands for. In this case we selected TV. Some typical "extra" keys - Philips SRU8010 | User manual - Page 22
bottom of the SRU8010 remote, and press OK when you're ready. (See Tips on Learning on page 16). Next press the key (on the other remote) for the function the key (in this case L7) and/or add the key to a Macro (see page 24 for Macros). If you select Change Label, by pressing Side Key K9, you can - Philips SRU8010 | User manual - Page 23
and then selecting a device type shows the "extra" keys and learned keys for that mode. Note, you can learn keys from any kind of remote under any mode. You 'll be able to turn on your TV, turn on your audio system, and control your DVD player, all from the Side Keys on this one screen. Note: "Triple - Philips SRU8010 | User manual - Page 24
(after a 2 second delay), by digit 4 from your cable remote. Then when you later activate this Macro it will turn on your TV, turn on your cable box, any of the devices to learn commands for. E.G., in this case we selected DVR. Then select the Side Key that you want to store the Macro under. For - Philips SRU8010 | User manual - Page 25
Learning Macros, cont. Line up the remotes and press OK when you're ready. Next press the key (on the other remote) for the function Key K8 next to "Add Key to Macro" to add more keys. You can set a delay (1-10 secs) after which the command stored in the Macro will be sent. (Repeatedly press Side - Philips SRU8010 | User manual - Page 26
Macros, cont. Point your existing remote at the bottom of the SRU8010 remote and Macro you learned and stored under the L1 key. The next time you select the Mode that the Macro was learned in (in this case DVR) you'll see that you can press the Side Key next to "Macro 1" to activate the Macro - Philips SRU8010 | User manual - Page 27
Setting up more Setting up more Devices When you first inserted the batteries in the remote you likely went through the Wizard and set up a few devices. Here's how to set up more devices. Press the HOME key to display the Home screen. Then press the Side Key next to Setup. Then press the - Philips SRU8010 | User manual - Page 28
Setting up more, cont. Setting up more Favorites When you first inserted the batteries in the remote you likely went through the Wizard and set up a few favorites. You could only set up 10 favorites at that time. Here's how to set up more favorites. Press the HOME key to display the Home - Philips SRU8010 | User manual - Page 29
next to a blank location to add a new favorite, or press More to add or edit icons on a new page. For example, you might only want to have four favorites on this can fill up this page and add more to the next page (up to 10 pages of favorites). From this point on adding favorites is the same as you - Philips SRU8010 | User manual - Page 30
Setting up more, cont. Reordering Favorites This lets you move the favorites that you previously set up in a group, to different locations on the screen, i.e., reorder them. Press the HOME key, select Setup, and then select Favorites. Then at the screen to the right select Reorder. Pick the group in - Philips SRU8010 | User manual - Page 31
Setting up more, cont. Deleting Favorites This lets you delete favorites that you previously set up in a group. Press the HOME key, select Setup, and then select Favorites. Then at the screen to the right select Delete. Pick the group in which you want to delete the favorites. Groups that don't have - Philips SRU8010 | User manual - Page 32
, in a similar fashion to typing in text on a cell phone. E.G. in this example we pressed the 3 key on the remote to enter the letter "D." Then we pressed the 2 key repeatedly until the letter "a" was displayed. Then we waited a second and repeatedly pressed 8 to select "v." Then - Philips SRU8010 | User manual - Page 33
ve set up in the remote. Press the HOME key, select Setup. Then at the screen to the right select Clear Settings. Pressing the Side Key next to Devices lets you clear the settings, i.e. codes, for various Devices (TV, VCR, etc.). After selecting Devices, you select the device you want to clear. Only - Philips SRU8010 | User manual - Page 34
select Advanced. The screen to the right lets you change the backlight delay; enter codes for devices directly from the printed code list that came with the remote; set up punchthrough for various devices; and limit the channels that young children can access. Display Options Select Options, then - Philips SRU8010 | User manual - Page 35
have one code that will control both parts of the device. See separate code list. To set up a combo device, press the HOME key, then select Setup, then select Advanced then Device Codes, as described on previous page. Punchthrough This lets you set up how various keys on the remote operate in - Philips SRU8010 | User manual - Page 36
. Play, Stop, Pause, etc., will operate the DVD (i.e. Punchthrough Not Set for Play, etc.) You need to set up Punchthrough for each device you've set up in the remote. I.E., you need to set up how you want the "Volume Up/Down and Mute" "Chan Up/Down" and "Play, Stop, Pause REW - Philips SRU8010 | User manual - Page 37
KidSafe On. If you turn KidSafe On everything in the remote except access to the KidSafe group (and Volume/Mute code. You cannot continue unless you enter the correct KidSafe code. See the Troubleshooting section if you forget your KidSafe code - but don't let your kids read this owner's manual! 37 - Philips SRU8010 | User manual - Page 38
Troubleshooting The Favorites you set up don't operate your device. • Make sure you selected the correct device (TV, Cable, Sat, etc., when you set up each favorite. See Add/Edit Favorites page 29 to change the device type for your favorite(s). The Remote codes from your old remote. Having problems - Philips SRU8010 | User manual - Page 39
proof of purchase in the form of an original sales receipt that shows the product name and the date of purchase. For customer support or to obtain warranty service, please call 919-573-7854. THERE ARE NO OTHER EXPRESS OR IMPLIED WARRANTIES. Philips' liability is limited to repair or, at its sole - Philips SRU8010 | User manual - Page 40
principales 56 Apprentissage d'une macro - Touches principales ...57 Apprentissage des touches latérales 59 Apprentissage d'une macro - Touches latérales 62 72 Durée de transmission des touches 72 Codes des appareils 72 Appareils combinés 73 Punchthrough 73 KidSafe 75 Dépannage 76 40 - Philips SRU8010 | User manual - Page 41
télécommande universelle modèle SRU8010 de Philips. Les télécommandes universelles Philips permettent de remplacer une télécommande en suivant les instructions à l'écran. Merci d'avoir acheté cette télécommande Philips; nous espérons qu'elle vous procurera de nombreuses années de service de qualité. - Philips SRU8010 | User manual - Page 42
Fonctions des touches non programmables 1. 29. 2. 28. 3. 27. 4. 26. 5. 25. 6. 24. 7. 23. 8. 22. 9. 21. 10. 20. 11. 19. 12. 18. 13. 17. 14. 16. 15. Note : le texte en bleu sur la télécommande correspond aux fonctions DVD, le texte en vert aux fonctions du Tivo et le - Philips SRU8010 | User manual - Page 43
guide des canaux ou des émissions. 9. MENU - Pour afficher l'écran Menu, dans lequel vous utiliserez les touches de navigation Haut, Bas, Gauche et Droite (26). T-CENTRAL - Touche TiVo correspondant à TiVo Central. 10 entrer votre cote TiVo. 17. INPUT - Pour afficher magnétoscope, DVR ou lecteur de - Philips SRU8010 | User manual - Page 44
entre 2 et 35 secondes, à partir du menu Setup, Advanced, Options (cf. page 72). Mémoire permanente Tous les appareils que vous réglez, leurs codes, les paramètres punchthrough, tous vos favoris, etc., sont enregistrés dans une mémoire permanente; ainsi, vous ne perdez pas ces données lorsque vous - Philips SRU8010 | User manual - Page 45
reprises pour revenir en arrière dans l'assistant, puis suivez les instructions à (3) l'écran pour vous familiariser avec la façon de passer K1 K6 vous avez configuré dans la télécommande. K2 K7 K3 K8 N'importe quelle des 10 touches latérales (K1 à K10) à l'écran (4) K4 K9 vous ramène à - Philips SRU8010 | User manual - Page 46
vous pouvez ainsi parcourir la liste en sens inverse, si vous le souhaitez). Dans le cas présent, nous avons sélectionné Philips. L'écran suivant (3) vous votre TV et l'écran (4) indique que vous avez sélectionné le code 1 de xx (xx varie selon la marque). Continuez d'appuyer sur cette touche jusqu - Philips SRU8010 | User manual - Page 47
le bon code. Conseil : essayez des touches comme Menu et Guide. Même continuer et régler maintenant d'autres appareils : SAT, DVR, DVD, magnétoscope, audio, lecteur de CD ou codes (et non pas parmi la liste plus restreinte des codes correspondant à la marque de votre appareil, par ex. Philips - Philips SRU8010 | User manual - Page 48
un écran (3) contenant les logos de canaux connus. Vous pouvez sélectionner Next (touche latérale 10) ou Back (touche latérale 5) pour voir d'autres logos. Dans cet exemple, nous avons sé Sat, mais vous pouvez le changer en sélectionnant Pick Device. Nous l'avons remplacé par Cable. 48 - Philips SRU8010 | User manual - Page 49
ajouter de libellé au logo, sélectionnez simplement Save pour enregistrer le réglage de ce favori. Si vous enregistrez ce favori, Set Favorite 2 of 10 s'affiche maintenant au bas de l'écran pour indiquer que vous pouvez ajouter un autre canal favori. Encore une fois, appuyez simplement sur la touche - Philips SRU8010 | User manual - Page 50
d'un espace en appuyant sur la touche qui se trouve à gauche de la (6) touche 0 (zéro). Vous pouvez continuer à ajouter des favoris, jusqu'à 10 (vous pourrez en ajouter davantage plus tard, cf. page 66). À l'écran (6), vous déterminez si les favoris que vous venez de configurer seront - Philips SRU8010 | User manual - Page 51
Utilisation de la télécommande Si vous avez bien suivi les étapes des pages précédentes, vous avez configuré quelques appareils et quelques favoris que vous pouvez maintenant utiliser avec la télécommande. Pour configurer d'autres appareils et favoris, ou pour configurer d'autres fonctions, reportez - Philips SRU8010 | User manual - Page 52
QuickPower QuickPower est un moyen rapide d'éteindre ou d'allumer tous vos appareils, à partir d'un seul écran convivial. Appuyez sur la touche HOME pour afficher l'écran Home. Appuyez ensuite sur la touche latérale en regard de QuickPower. Seuls les appareils que vous avez déjà réglés sont affich - Philips SRU8010 | User manual - Page 53
Veille La fonction de veille permet d'éteindre un appareil après un délai que vous déterminez. Vous pouvez définir ce délai par segments de 15 minutes, jusqu'à un maximum de 90 minutes. Appuyez sur la touche HOME pour revenir à l'écran Home, puis appuyez sur la touche latérale en regard de Sleep. - Philips SRU8010 | User manual - Page 54
, HIS ou HERS. c. Utilisez des piles neuves tant dans la télécommande SRU8010 que dans la télécommande d'origine. d. Pendant l'apprentissage, restez à au le récepteur d'apprentissage IR qui se trouve au bas de la télécommande SRU8010. f. Laissez un espace d'environ 3 cm entre les deux télécommandes. - Philips SRU8010 | User manual - Page 55
visé? Vous pouvez apprendre les commandes d'une télécommande existante et les enregistrer sous les touches principales ou l'une ou l'autre des 10 touches latérales de la télécommande SRU8010. À l'écran Home, appuyez sur la touche latérale en regard de Learn. Sur cet écran, il faut appuyer sur l'une - Philips SRU8010 | User manual - Page 56
grisé, mais vous pouvez quand même sélectionner n'importe quel appareil. On vous demandera d'aligner les télécommandes, puis d'appuyer, sur la télécommande SRU8010, sur la touche dont vous voulez faire l'apprentissage. Il faut alors placer la télécommande dont vous voulez apprendre les commandes au - Philips SRU8010 | User manual - Page 57
et faire l'apprentissage d'autres touches en suivant les instructions à l'écran, et appuyer sur Done lorsque vous avez terminé. Ou vous pouvez appuyer sur Add Key to Macro (cf. ci-dessous et page suivante). Apprentissage d'une macro - Touches principales Sur cet écran, vous pouvez sélectionner - Philips SRU8010 | User manual - Page 58
d'une macro, vous pouvez, si vous le souhaitez, définir un délai (1-10 secondes) après lequel la seconde commande enregistrée dans la macro sera envoy . Dirigez ensuite la télécommande d'origine vers le bas de la télécommande SRU8010 et appuyez sur OK lorsque vous êtes prêt. Sur la télécommande d' - Philips SRU8010 | User manual - Page 59
Apprentissage des touches latérales À l'écran Home, appuyez sur la touche latérale en regard de Learn. Appuyez ensuite sur n'importe laquelle des touches latérales K1-K5 à gauche de l'écran. Sélectionnez l'appareil pour lequel vous voulez faire l'apprentissage des touches. Dans cet exemple, nous n' - Philips SRU8010 | User manual - Page 60
la télécommande dont vous voulez apprendre les commandes au bas de la télécommande SRU8010, et appuyer sur OK lorsque vous êtes prêt. (Cf. Conseils sur é de la touche (dans ce cas, L7) et/ou ajouter la touche à une macro (cf. page 62). Si vous sélectionnez Change Label, en appuyant sur la touche lat - Philips SRU8010 | User manual - Page 61
Apprentissage des touches latérales, suite Dans cet exemple, nous avons appuyé sur la touche 3 pour obtenir la lettre D. Puis nous avons appuyé plusieurs fois sur la touche 8 jusqu'à afficher la lettre V. Nous avons ensuite attendu une seconde avant d'appuyer sur 3 pour sélectionner D. Nous avons - Philips SRU8010 | User manual - Page 62
ensuite sur n'importe quelle touche latérale K1-K5 (à gauche) pour apprendre une macro que vous enregistrerez sous une touche latérale (vous pourrez la renommer plus tard . Dans cet exemple, nous avons sélectionné DVR. Sélectionnez ensuite la touche latérale sous laquelle vous voulez enregistrer la - Philips SRU8010 | User manual - Page 63
vement. Pour ajouter des touches, appuyez sur la touche latérale K8 en regard de Add Key to Macro. Vous pouvez définir un délai (1-10 secondes) après lequel la seconde commande enregistrée dans la macro sera envoyée. (Appuyez plusieurs fois sur la touche latérale K9 en regard de Set Delay, ou entrez - Philips SRU8010 | User manual - Page 64
Apprentissage d'une macro, suite Dirigez la télécommande d'origine vers le bas de la télécommande SRU8010 et appuyez sur OK macro que vous venez d'apprendre et d'enregistrer sous la touche L1. La prochaine fois que vous sélectionnerez le mode dans lequel la macro a été apprise (dans ce cas, DVR - Philips SRU8010 | User manual - Page 65
rale en regard de Setup, puis sur la touche latérale en regard de Devices. Choisissez alors l'appareil que vous voulez régler. Remarque : il n'est pas Change Type, à l'écran (1) (2) ci-dessus, pour faire défiler la liste des appareils et sélectionner TV (par exemple) pour régler une deuxième - Philips SRU8010 | User manual - Page 66
configurer qu'un maximum de 10. Voici comment configurer d'autres 10 pages de favoris sont autorisées). Les groupes n'ayant encore aucun favori sont en grisé, mais peuvent être sélectionnés. L'ajout de favoris se fait de la même façon que dans l'assistant; vous n'avez qu'à suivre les instructions - Philips SRU8010 | User manual - Page 67
et placer d'autres favoris sur une page distincte, ou au contraire remplir cette page et faire déborder les favoris en plus sur la page suivante (10 pages de favoris sont autorisées). L'ajout de favoris se fait de la même façon que dans l'assistant; vous n'avez qu'à suivre les - Philips SRU8010 | User manual - Page 68
Réglage supplémentaire, suite Reclassement des favoris La touche Reorder permet de déplacer ailleurs à l'écran les favoris déjà configurés dans un groupe (autrement dit, d'en modifier le classement). Appuyez sur la touche HOME, sélectionnez Setup, puis Favorites. Ensuite, à l'écran à droite, sé - Philips SRU8010 | User manual - Page 69
Réglage supplémentaire, suite Suppression de favoris La touche Delete permet de supprimer des favoris déjà configurés dans un groupe. Appuyez sur la touche HOME, sélectionnez Setup, puis Favorites. Ensuite, à l'écran à droite, sélectionnez Delete. Sélectionnez le groupe dans lequel vous voulez - Philips SRU8010 | User manual - Page 70
Réglage supplémentaire, suite Renommage des groupes de favoris La touche Rename vous permet de renommer les groupes dans lesquels vous enregistrez vos favoris. Vous par exemple remplacer le nom du groupe His par Dave, ou celui de Hers par Isabelle. Appuyez sur la touche HOME, sélectionnez Setup, - Philips SRU8010 | User manual - Page 71
en regard de Devices permet de supprimer les réglages (codes) des différents appareils (TV, magnétoscope, etc.). Après avoir sélectionné Devices, sélectionnez l'appareil les appareils dont vous avez appris des commandes et/ou des macros sont affichés. Tous les autres sont en grisé. La touche lat - Philips SRU8010 | User manual - Page 72
des appareils Sélectionnez Device Codes (codes des appareils), puis sélectionnez un appareil. Les appareils que vous n'avez pas réglés sont en grisé. Vous pouvez les sélectionner ici et en faire le réglage en entrant le code de l'appareil à partir de la liste des codes imprimée. Ou encore, vous - Philips SRU8010 | User manual - Page 73
DVD. Sur certains autres appareils combinés, un même code commande les deux parties de l'appareil. Cf. liste de codes séparée. Pour régler un appareil combiné, appuyez sur la touche HOME, sélectionnez Setup, puis Advanced, puis Device Codes, comme à la page précédente. Punchthrough Cette option - Philips SRU8010 | User manual - Page 74
Réglages avancés, suite Punchthrough, suite Sur cet écran, vous définissez la façon dont vous voulez que fonctionnent les touches VOL +/- et Mute lorsque la télécommande est en mode TV. Vous sélectionnez ensuite la façon dont vous voulez que fonctionnent les touches CH +/- lorsque la télé - Philips SRU8010 | User manual - Page 75
, de changer un paramètre ou d'accéder à un menu interdit, on vous demandera d'entrer le code KidSafe. Vous ne pourrez pas continuer à moins d'entrer le code KidSafe. Si vous oubliez le code KidSafe, consultez la section Dépannage - et ne laissez pas les enfants lire ce Manuel de l'utilisateur - Philips SRU8010 | User manual - Page 76
à partir de votre ancienne télécommande. • Installez des piles neuves. La télécommande ne commande pas certaines fonctions de votre produit. • Programmez un nouveau code dans la télécommande. • Il se peut que la télécommande ne soit pas capable de commander toutes les fonctions de votre produit, ou - Philips SRU8010 | User manual - Page 77
touche de favori. • Certains types de TV (les écrans plats de Philips, par ex.) s'allument et affichent le canal sélectionné lorsque vous appuyez sur chiffres, comme 550). Vous avez oublié votre code KidSafe? • Retirez et replacez les piles : le code KidSafe sera réinitialisé (ne laissez donc pas - Philips SRU8010 | User manual - Page 78
nom du produit et la date d'achat. Pour un support clientèle ou pour obtenir un service de garantie, veuillez appeler 919-573-7854. AUCUNE AUTRE GARANTIE, QU'ELLE SOIT EXPRESSE OU TACITE, N'EST OFFERTE. La garantie de Philips est - Philips SRU8010 | User manual - Page 79
79 - Philips SRU8010 | User manual - Page 80
Made in China. Quality Assured in USA. Ledgewood, NJ 07852 SRU8010-11/07
-
 1
1 -
 2
2 -
 3
3 -
 4
4 -
 5
5 -
 6
6 -
 7
7 -
8
-
9
-
10
-
11
-
12
-
13
-
14
-
15
-
16
-
17
-
18
-
19
-
20
-
21
-
22
-
23
-
24
-
25
-
26
-
27
-
28
-
29
-
30
-
31
-
32
-
33
-
34
-
35
-
36
-
37
-
38
-
39
-
40
-
41
-
42
-
43
-
44
-
45
-
46
-
47
-
48
-
49
-
50
-
51
-
52
-
53
-
54
-
55
-
56
-
57
-
58
-
59
-
60
-
61
-
62
-
63
-
64
-
65
-
66
-
67
-
68
-
69
-
70
-
71
-
72
-
73
-
74
-
75
-
76
-
77
-
78
-
79
-
80
 |
 |

Owner’s Manual
Manuel de l’utilisateur
Model
SRU8010
Modèle
SRU8010