Philips TS1000 User manual (English)
Philips TS1000 Manual
 |
View all Philips TS1000 manuals
Add to My Manuals
Save this manual to your list of manuals |
Philips TS1000 manual content summary:
- Philips TS1000 | User manual (English) - Page 1
user guide - Philips TS1000 | User manual (English) - Page 2
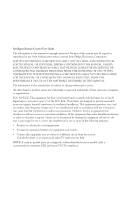
Remote Control User Guide The information in this manual is copyright-protected. No part of this manual may be copied or reproduced in any form without prior written consent from Philips Electronics Corporation. PHILIPS or parallel cable is recommended to minimize EMI and ensure FCC B compliance. - Philips TS1000 | User manual (English) - Page 3
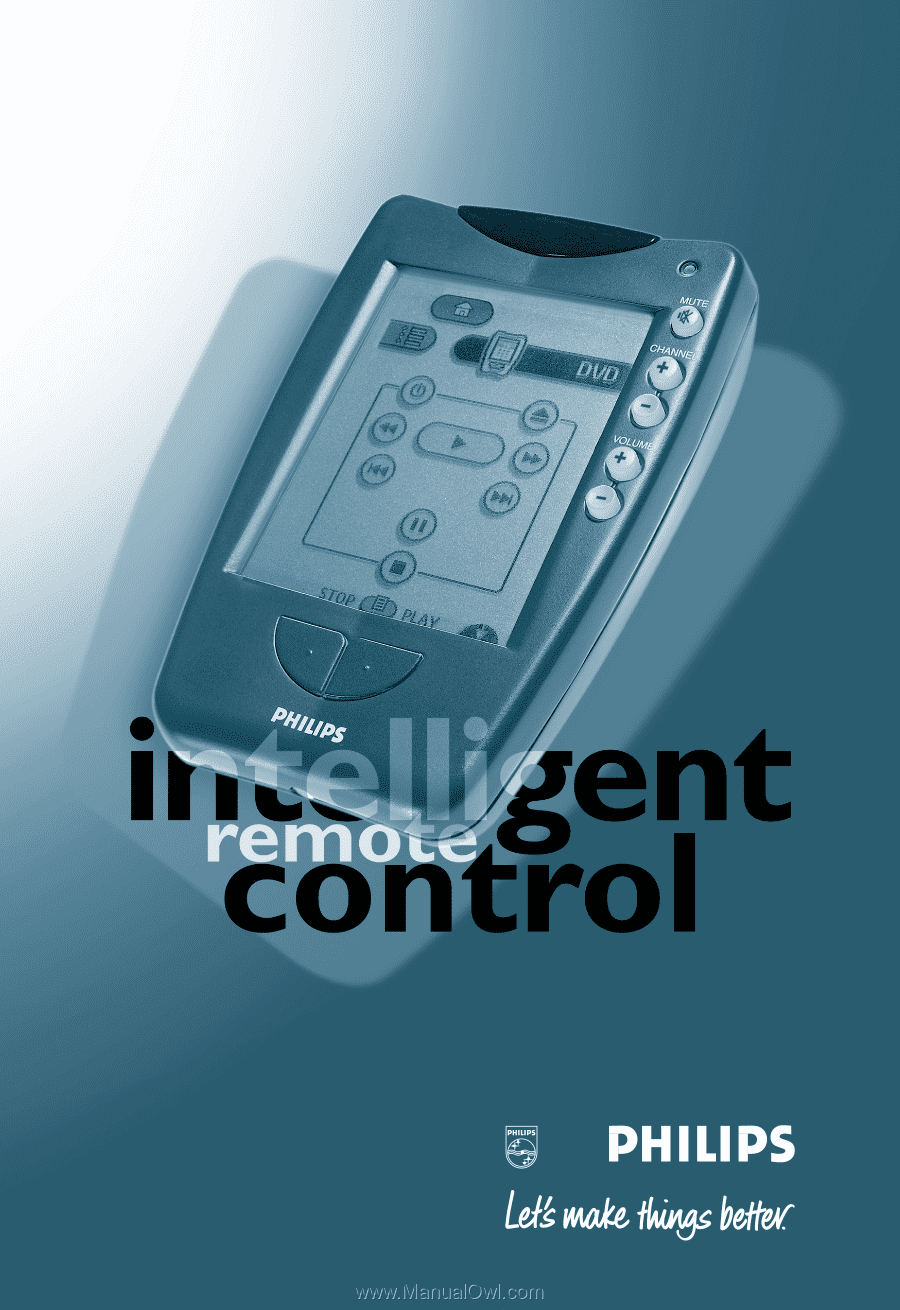
User Guide Intelligent Remote Control customizable/programmable, touch screen universal remote control - Philips TS1000 | User manual (English) - Page 4
the picture on the inside of the battery compartment. OR Use the rechargeable battery pack included with the dock. (Remove the AA battery tray first). Before using the remote control, be sure to charge the battery completely according to the instructions in the manual. Touch the screen to start To - Philips TS1000 | User manual (English) - Page 5
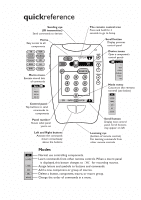
icon Press and hold for 3 seconds to go to Setup Scroll button Display previous control panel Device menu Open a component's control panels Macro menu Execute stored lists of commands Mode menu Customize the remote control (see below) Control panel Tap buttons to send commands to components Panel - Philips TS1000 | User manual (English) - Page 6
Contents Welcome 7 Features 8 The intelligent remote control 8 Recharging dock 8 1 Batteries 9 Installing AA batteries 9 Using the recharging dock 11 2 Using the remote control 14 Buttons and controls 14 Direct-access buttons 15 Left and Right buttons 15 Touchscreen buttons 15 Getting started 16 To - Philips TS1000 | User manual (English) - Page 7
remote controls (Learn mode) 30 To program a button on the display (soft button) 31 To program an item on the Device menu 34 To program a template button 36 Programming the direct-access and Left/Right buttons 37 To program a button globally 37 To program 62 To adjust settings 62 To exit Setup 65 5 - Philips TS1000 | User manual (English) - Page 8
6 Troubleshooting 66 Problems using the remote control 66 Problems using the recharging dock 69 Common questions 70 Additional procedures 71 To reset the remote control 71 To revert to the original configuration 72 To calibrate the touchscreen 72 Service and support 73 7 Specifications 74 8 Command - Philips TS1000 | User manual (English) - Page 9
Welcome Congratulations on purchasing the intelligent remote control. The remote control is a universal learning remote control that combines flexibility with ease of use through an LCD touchscreen and an intuitive user interface. The remote control and recharging dock COMPLETE CUSTOMIZATION You - Philips TS1000 | User manual (English) - Page 10
battery pack is easier on the environment than ordinary batteries that need replacing. • Indicator light tells you when the remote control is charging. PC serial cable • To connect the remote control with your computer. • Allows you to customize the graphical user interface through PC software - Philips TS1000 | User manual (English) - Page 11
cover off the back of the remote control. Insert 4 AA batteries as shown. Improper installation could damage the remote control. When you're done, slide the battery cover back on. The remote control starts up automatically, and the word "remote control" appears on the display. After a few seconds - Philips TS1000 | User manual (English) - Page 12
on very briefly (20 seconds or less). For instructions, see Chapter 5, "Settings." IF THE BATTERIES RUN OUT The remote control will retain your commands and settings in memory even after the batteries run out. However, you should replace the worn batteries with a fresh set as soon as possible. After - Philips TS1000 | User manual (English) - Page 13
the recharging dock The recharging dock comes with a rechargeable battery pack. You should fully charge the battery pack before using the remote control. Slide the battery cover off the back of the remote control. AA battery tray Remove the AA battery tray (the ridged piece of plastic at the back - Philips TS1000 | User manual (English) - Page 14
cover back on. You're ready to charge up the battery. When you insert the battery pack, the remote control starts up automatically, and the word "remote control" appears on the display. After a few seconds, the remote control beeps twice to indicate that it has finished starting up. Now you're - Philips TS1000 | User manual (English) - Page 15
's learning or customizing features. IMPORTANT Use the recharging dock only with the NiMH rechargeable battery pack. The dock won't recharge ordinary AA batteries, and if AA batteries are installed, the remote control can't get power from the dock while resting on it. Using the recharging dock - Philips TS1000 | User manual (English) - Page 16
how to use the remote control to operate your equipment. Buttons and controls Sending eye (IR transmitter) Light sensor Direct-access buttons Left button Contrast dial Backlight button Serial port (for future upgrades) Touchscreen Right button Learning eye Battery cover Recharging contacts Reset - Philips TS1000 | User manual (English) - Page 17
same component-for example, the TV. Or, you can program them to operate different devices at different times. Left and Right buttons The Left and Right buttons change function depending on the device the remote control is controlling. Labels displayed above them on the touchscreen show their current - Philips TS1000 | User manual (English) - Page 18
For instructions, see "To program a button globally" on page 37. Getting started To turn the display on • Touch the screen with your finger, then let go. This is called tapping the screen. Gently tap anywhere on the touchscreen to turn on the display. NOTE There's no need to turn the remote control - Philips TS1000 | User manual (English) - Page 19
the backlight on automatically whenever you tap the touchscreen. You can adjust the sensitivity of the remote control's light sensor and the length of time the backlight stays on. For instructions, see Chapter 5, "Settings." BE KIND TO YOUR LCD TOUCHSCREEN Take the following precautions when using - Philips TS1000 | User manual (English) - Page 20
by Philips, Marantz, and certain other companies. If the remote control doesn't operate your components, you will need to teach it; for instructions, see "Learning commands from other remote controls (Learn mode)" on page 30. However, if a dealer or installer has programmed the remote control for - Philips TS1000 | User manual (English) - Page 21
default commands to the direct-access and Left/Right buttons; for instructions, see "To program a button globally" on page 37. Device menu The Device menu contains the names of all the components you can operate with the remote control, and it allows you to choose a device to operate. OPENING THE - Philips TS1000 | User manual (English) - Page 22
. If you have a device that is not on the Device menu, you can add it and teach the remote control to operate it. For instructions, see "Adding devices to your system (Add mode)" on page 39. NOTE The Device menu contains more items than you can see at one time. - Philips TS1000 | User manual (English) - Page 23
takes you to the previous panel, while the Scroll button at the bottom takes you to the next panel. Tap a Scroll button ... ... the remote control displays either the next or the previous panel, depending on which scroll button you pressed. Scroll to next VCR panel Panel number (panel 2 of - Philips TS1000 | User manual (English) - Page 24
displays the same panel it displayed before shutting off. (The exception is any mode other than Use mode; after several minutes idle, the remote control reverts to Use mode automatically.) TIP Scroll buttons are repeating buttons; if you hold down a scroll button, the scrolling continues until you - Philips TS1000 | User manual (English) - Page 25
switch devices without affecting the source If your components are connected to a preamplifier or other device, such as a receiver, the remote control may be programmed to automatically switch the input source when you choose a device from Home or the Device menu. However, sometimes you may want to - Philips TS1000 | User manual (English) - Page 26
or audio feed to your monitor or speakers. NOTE When you choose a device from Home, the input source is always switched (if the button is programmed to switch the source). To switch devices without switching the source, you must use the Device menu. 24 Chapter 2-Using the remote control - Philips TS1000 | User manual (English) - Page 27
remote control The remote control is preprogrammed to work with popular Philips and Marantz components. The remote control may also operate equipment made by other manufacturers if the equipment recognizes RC-5 and RC-6 infrared codes (see "What are RC-5 and RC-6 codes programmed the remote control - Philips TS1000 | User manual (English) - Page 28
Learn mode)" on page 30. 4 Add any commands you need that don't already appear in the remote control. To do this, assign commands to "empty" buttons (template buttons); for instructions, see "To program a template button" on page 36. Then label the buttons appropriately; see "To relabel a button" on - Philips TS1000 | User manual (English) - Page 29
receiver? Do you use the preamp/receiver's remote control to change the video or audio input source for your monitor or speakers? If so, you can program the Device menu so that choosing a device automatically switches the input source; for instructions, see "To program an item on the Device menu" on - Philips TS1000 | User manual (English) - Page 30
change. The following table summarizes the modes and their use. Instructions for using the modes are later in this chapter. Use this mode: To: Use the remote control to control your components. Learn commands from other remote controls. When a macro panel is displayed, this button changes to for - Philips TS1000 | User manual (English) - Page 31
menu so that other users don't inadvertently make changes to your custom commands. To hide the Mode menu: 1 Make sure the remote control is in Use mode Setup panels 3 Scroll down to the second Setup panel. 4 Tap the Mode Menu button to hide the Mode menu. Mode menu is hidden 5 Tap to exit Setup. - Philips TS1000 | User manual (English) - Page 32
commands to the buttons in Home, you must program the items on the Device menu; for instructions, see "To program an item on the Device menu" on page 34. The commands you assign to the Device menu will automatically be assigned to the buttons in Home. 30 Chapter 3-Customizing the remote control - Philips TS1000 | User manual (English) - Page 33
for which there appears to be no button on the remote control, you can assign the function to one of the remote control's template buttons and then give the button a label. For instructions, see "To program a template button" on page 36. To program a button on the display (soft button) 1 View the - Philips TS1000 | User manual (English) - Page 34
the remote control has not learned the command successfully, it buzzes, and FAIL appears briefly on the display. See "Troubleshooting" on page 33. TIP You can use this same method to program the Mute, Volume, Channel, Left, and Right buttons; see the next sections for special instructions. 6 Repeat - Philips TS1000 | User manual (English) - Page 35
eye, the small hole at the lower end of the case. • Make sure the source remote is directly in line, not at an angle. • Make sure the source remote's batteries aren't low. • Avoid programming the remote control under bright fluorescent light. It can interfere with the infrared signals. • If all else - Philips TS1000 | User manual (English) - Page 36
button to display the Mode menu. Then, tap . 4 On the remote control, tap the Device tab to open the Device menu. Scroll up or down , if necessary, to display the item you want to program. Even if the item you want to program is the currently active device, you must scroll to its location - Philips TS1000 | User manual (English) - Page 37
and then returns to Learn mode. If after a few seconds the remote control has not learned the command successfully, it buzzes, and FAIL appears briefly on the display. See "Troubleshooting" on page 33. 8 Repeat steps 4 through 7 to program other Device menu items. 9 When you're done, return to Use - Philips TS1000 | User manual (English) - Page 38
are visible so that you can select and program them. TIP If the template buttons are hard to see, use the contrast dial on the upper left side of the remote control to adjust the display. 2 (Optional) Assign new labels to the buttons. For instructions, see "To relabel a button" on page 41. 36 - Philips TS1000 | User manual (English) - Page 39
Left, and Right. Each button can have a global function-a command that the button will always execute, no matter what device's control panels are displayed. For example, you can program the Volume buttons to always adjust the preamp volume, even when TV is the current device. As an alternative, you - Philips TS1000 | User manual (English) - Page 40
as chan+ or left, flashes on the display. If you encounter problems, refer to "Troubleshooting" on page 33. As long as you're in Learn mode, you can continue to program other buttons on a per-device basis. Use the Device menu to change the active device. 38 Chapter 3-Customizing the remote control - Philips TS1000 | User manual (English) - Page 41
tap . 4 (Optional) Assign new labels to the Left and Right buttons. For instructions, see "To relabel a button" on page 41. Adding devices to your system copy the built-in RC codes or leave the buttons "empty." Either way, as soon as you add the device the remote control is ready to start - Philips TS1000 | User manual (English) - Page 42
device called "Other"; it includes a variety of generic buttons. 5 Tap a button to tell the remote control whether to assign RC codes to the new device. For more information about RC codes, refer to "What are RC-5 and RC-6 codes?" on page 27. If you think your new device might understand RC-5 or RC - Philips TS1000 | User manual (English) - Page 43
Left and Right buttons. You can't relabel the buttons on Home panels; their labels are determined by the commands on the Device menu. 2 Switch the remote control to Label mode: Tap the Mode button to display the Mode menu. Then, tap . Relabeling buttons and menu items (Label mode) 41 - Philips TS1000 | User manual (English) - Page 44
Right button, labeled ZOOM, to zoom back out.) Tap near the character you want... ... then tap exactly the character you want. 42 Chapter 3-Customizing the remote control - Philips TS1000 | User manual (English) - Page 45
or menu item has a limit to the number of characters that can fit on the label. If the limit is reached, the cursor ( | ) disappears and the remote control buzzes if you try to add another character. You can make the cursor reappear by pressing the Right button (labeled DEL); this deletes the last - Philips TS1000 | User manual (English) - Page 46
of the following: • If you are going to rearrange the Device menu, then display any device control panel. • If you are going to rearrange the Macro menu, then display any macro group. 2 Switch the remote control to Move mode: Tap the Mode button to display the Mode menu. Then, tap . 3 Display - Philips TS1000 | User manual (English) - Page 47
, and then use the Left (UP) and Right (DOWN) buttons to move it. 5 Continue selecting and moving items in the menu. As long as the remote control is in Move mode, you can continue rearranging the menu items. 6 Tap Accept to save your changes. After a few seconds, the - Philips TS1000 | User manual (English) - Page 48
commands from the Device menu. (For more information, see "To delete a device, Device menu action, or macro group" on page 47.) 1 Switch the remote control to Delete mode: Tap the Mode button to display the Mode menu. Then, tap . 2 Tap the button you want to delete. 46 Chapter 3-Customizing - Philips TS1000 | User manual (English) - Page 49
remote control deletes the button action and returns to Delete mode. • If you deleted a soft button, it disappears from the display. (To restore it, see "To program borderless button, you can hide it by removing its label. Follow the instructions in "To relabel a button" on page 41; in Label mode, - Philips TS1000 | User manual (English) - Page 50
item. 3 Press and hold the Left or Right button, as appropriate. While holding the button down, tap the menu item you want to delete. The remote control displays a button asking you to confirm your request. The button label depends on the type of item you are deleting. 48 Chapter 3-Customizing the - Philips TS1000 | User manual (English) - Page 51
and Right buttons can't be restored from memory. To restore function to these buttons, you need to teach them using another remote control. For instructions, see "To program a button globally" on page 37. Deleted devices and macro groups are stored in memory. To restore a deleted device, make sure - Philips TS1000 | User manual (English) - Page 52
A macro lets you send a sequence of commands with a single button. RECORDING MACROS Recording a macro is easy: switch the remote control to Record mode, select a macro button, then use the remote control as you normally would when you're sending commands to your components. As you press buttons, the - Philips TS1000 | User manual (English) - Page 53
can execute all of these commands with a single button. This macro is included with the remote control as "example macro" in the group "Macro." The example macro is preprogrammed with RC-5 codes, which operate components from Philips, Marantz, and some other manufacturers. (For information about RC - Philips TS1000 | User manual (English) - Page 54
don't have commands assigned to them). An inactive button can be recorded as part of a macro, but the button won't have any effect when you execute it. For this reason, it's best to teach the remote control all of the commands it needs to control your devices before you record macros. To record a - Philips TS1000 | User manual (English) - Page 55
must exist before you can create a macro. If you need to create a macro group, see "Organizing macros into groups" on page 59. 4 Switch the remote control to Record mode: Tap the Mode button to display the Mode menu. Then, tap . The label appears, and "empty" macro buttons, which were hidden in - Philips TS1000 | User manual (English) - Page 56
remote control beeps. Besides button-presses, there are a few other kinds of command you can record: Switching the source: If the commands on the Device menu are programmed want to switch to. The device menu item gets recorded as part of the macro; if there is a source-switching command associated - Philips TS1000 | User manual (English) - Page 57
't be included in macros. However, you can use them to navigate while you're recording a macro. 7 When you're done, tap the Macro tab. The remote control displays the contents of the macro. Use the scroll buttons and to view the commands in the macro. Scroll to see earlier commands in this - Philips TS1000 | User manual (English) - Page 58
to appear on the macro button. For instructions, see "To relabel a button" on page 41. TROUBLESHOOTING MACROS If a macro isn't working correctly, teach the button a new command, the new command becomes part of the macro. If the remote control buzzes during recording, either the macro is full (it - Philips TS1000 | User manual (English) - Page 59
only after they have had time to "warm up." To edit a previously recorded macro 1 Display the macro panel that contains the macro. 2 Switch the remote control to Record mode: Tap the Mode button to display the Mode menu. Then, tap . 3 Tap the macro you want to edit. The contents of the - Philips TS1000 | User manual (English) - Page 60
move or delete a command: Tap the command to select it, then tap Delete or an arrow button. To record more commands: Go to the device controls and enter the commands. When you return to the macro, the new commands automatically appear at the end of the macro. NOTE The Go command - Philips TS1000 | User manual (English) - Page 61
channels. You can place all of these macros in a macro group you call TV. The macro group appears on the Macro menu. Macro groups The remote control comes with a built-in macro group called Macro. It contains an example macro and five panels of empty macro buttons where you can place your - Philips TS1000 | User manual (English) - Page 62
up space.) After you add the group, the remote control returns to Use mode. The new group appears on the Macro menu. 4 (Optional) Change the label of the new macro group. Switch to Label mode and enter a label to appear on the macro button. For instructions, see "To relabel an item on a menu - Philips TS1000 | User manual (English) - Page 63
playing, depending on the number of commands. Be sure to keep the remote control aimed in the direction of your components until all the commands have been sent. TIP If you open the macro before running it, the remote control will show you each command as it is sent. To open a macro, - Philips TS1000 | User manual (English) - Page 64
hard. for a few seconds (3 or more). It's not The remote control displays the first Setup panel. To scroll to the next Setup panel, tap the scroll buttons and . First Setup panel Second Setup panel Tap the scroll buttons to move between the two setup panels. Use Left and Right buttons to adjust - Philips TS1000 | User manual (English) - Page 65
Adjust the settings as described in the following tables. First Setup panel Setting Battery Level Indicator Clock Time LCD LCD Backlight Button Backlight What it does Shows battery level. Turns clock display on or off. Sets the clock. Sets how long the display stays on. Sets how long the display - Philips TS1000 | User manual (English) - Page 66
Second Setup panel Setting Light Sensor Set Level Mode Menu Touchscreen Beep Button Chapter 6, "Troubleshooting." You won't normally need to adjust the calibration. Reverts to the factory default configuration. All customization and programming is lost. See Chapter 6, "Troubleshooting." You won't - Philips TS1000 | User manual (English) - Page 67
Third Setup panel This panel provides technical information about the remote control. You need this information if you contact our customer service. For information, see "Service and support" on the inner backcover. To exit Setup • Tap the Setup label near the top of the screen. 65 - Philips TS1000 | User manual (English) - Page 68
CHAPTER 6 6 Troubleshooting This chapter offers troubleshooting tips, answers to common questions, and instructions for resetting the remote control. This chapter also tells you how to reach our customer service if you need service or support. Problems using the remote control THE DISPLAY IS BLANK • - Philips TS1000 | User manual (English) - Page 69
SOURCE CHANGES • The items on the Device menu might be programmed to switch the input source. For example, choosing VCR from instructions on choosing a device without switching the input source, see "To switch devices without affecting the source" on page 23. Problems using the remote control 67 - Philips TS1000 | User manual (English) - Page 70
commands for the device. • If the device is not locked, and you're having trouble teaching the remote control a command, see "Troubleshooting" on page 66. Or, try resetting the remote control; see "To reset the remote control" on page 71. • Keep in mind that a button that has no border can't learn - Philips TS1000 | User manual (English) - Page 71
lost, so you will need to reprogram the remote control. THE REMOTE CONTROL ERROR MESSAGES The following error messages indicate a problem with the configuration file where your custom commands are stored. Contact your dealer or Philips customer service if one of the following messages appears on the - Philips TS1000 | User manual (English) - Page 72
instructions on adding, removing, relabeling, and programming items on the Device menu, see Chapter 3, "Customizing the remote control.". Although you can't program the device buttons in Home, you can program in each template, refer to Chapter 8, "Command Reference." 70 Chapter 6 - Troubleshooting - Philips TS1000 | User manual (English) - Page 73
. You might feel some resistance when you press down. When you have pressed the Reset button, the remote control starts up. After a few seconds, the remote control beeps, indicating that it's ready to use. Reset button NOTE You will not lose custom commands and macros that you have saved. However - Philips TS1000 | User manual (English) - Page 74
to the second Setup panel. 3 Tap the Revert button. The remote control asks you to confirm your choice. 4 Tap Revert... to complete the process. (Tap Cancel to exit without reverting.) To calibrate the touchscreen Calibrating gives the software important information about your unit's touchscreen - Philips TS1000 | User manual (English) - Page 75
intelligent remote control : Hardware High-resolution (320 × 240) liquid crystal display with contrast control Large touchscreen Seven programmable direct-access buttons Backlighting for LCD and direct-access buttons Light sensor with adjustable sensitivity Built-in RC-5 and RC-6 codes Infrared - Philips TS1000 | User manual (English) - Page 76
mm (5.4 in × 3.6 in × 1.5 in) Operating temperature 0°C to 50°C (32°F to 122°F) Accessories The remote control recharge package : NiMH 4.8V rechargeable battery pack Recharging dock 110/220V-to-12V power adapter RS232 cable for PC connection NOTE The specifications and design of this product are - Philips TS1000 | User manual (English) - Page 77
describes the default setup. If a dealer or installation technician programmed the remote control for you, the devices and controls might be different. this chapter have RC codes assigned to them by default. The command description for each active button tells you what the RC code does. For template - Philips TS1000 | User manual (English) - Page 78
Button O M DNR H N W S R U T O F I J « ‡ Command Video output. Text ON / OFF. Stand-by. Movie Expand. Personal Preference. Digital Noise Reduction. Subtitle. 1st of 2nd language. PIP. Freeze. Mosaic. Select. Swap. Shift. Teletext. Cancel picture. TV and text mixed. Main freeze. Page enlargement. - Philips TS1000 | User manual (English) - Page 79
still). Stop. Increase or decrease entry. Navigate through menu. Previous program. Personal preferences. Numeric entry. Add 10 to numeric entry. Select user-definable). Display on-screen commands. Dubbing from deck A to B. Enter numeric entry. Clear last function. Exit on-screen menu. Store programmed - Philips TS1000 | User manual (English) - Page 80
VCR+ Command Confirm entry. Turn LaserDisc player on or off. Program tracks/chapters. No command (user-definable). Randomly play all or programmed chapters. Modify contents of Favorites. Continuously repeat all or programmed chapters. Select RF as input. Shuffle tracks/chapters. Select the source - Philips TS1000 | User manual (English) - Page 81
Available serial port which supports 115200 baud How to receive ProntoEdit To ensure that you receive the most recent version of ProntoEdit you can install it directly from our website. Please visit us at www.pronto.philips.com to download your free copy today.A ProntoEdit users manual will also be - Philips TS1000 | User manual (English) - Page 82
Service and support For service and support, please contact Philips customer service at 888-486-6272 (USA). When you contact Philips customer service, you will be asked for the technical information listed on the third panel of Setup. To view this information: 1 In Use mode, press and hold the icon - Philips TS1000 | User manual (English) - Page 83
Manual Printed in Belgium 8622 405 00006
-
 1
1 -
 2
2 -
 3
3 -
 4
4 -
 5
5 -
 6
6 -
 7
7 -
8
-
9
-
10
-
11
-
12
-
13
-
14
-
15
-
16
-
17
-
18
-
19
-
20
-
21
-
22
-
23
-
24
-
25
-
26
-
27
-
28
-
29
-
30
-
31
-
32
-
33
-
34
-
35
-
36
-
37
-
38
-
39
-
40
-
41
-
42
-
43
-
44
-
45
-
46
-
47
-
48
-
49
-
50
-
51
-
52
-
53
-
54
-
55
-
56
-
57
-
58
-
59
-
60
-
61
-
62
-
63
-
64
-
65
-
66
-
67
-
68
-
69
-
70
-
71
-
72
-
73
-
74
-
75
-
76
-
77
-
78
-
79
-
80
-
81
-
82
-
83
 |
 |
user guide