Philips WAS5/37 User manual - Page 16
Rear connections, Using AC power
 |
View all Philips WAS5/37 manuals
Add to My Manuals
Save this manual to your list of manuals |
Page 16 highlights
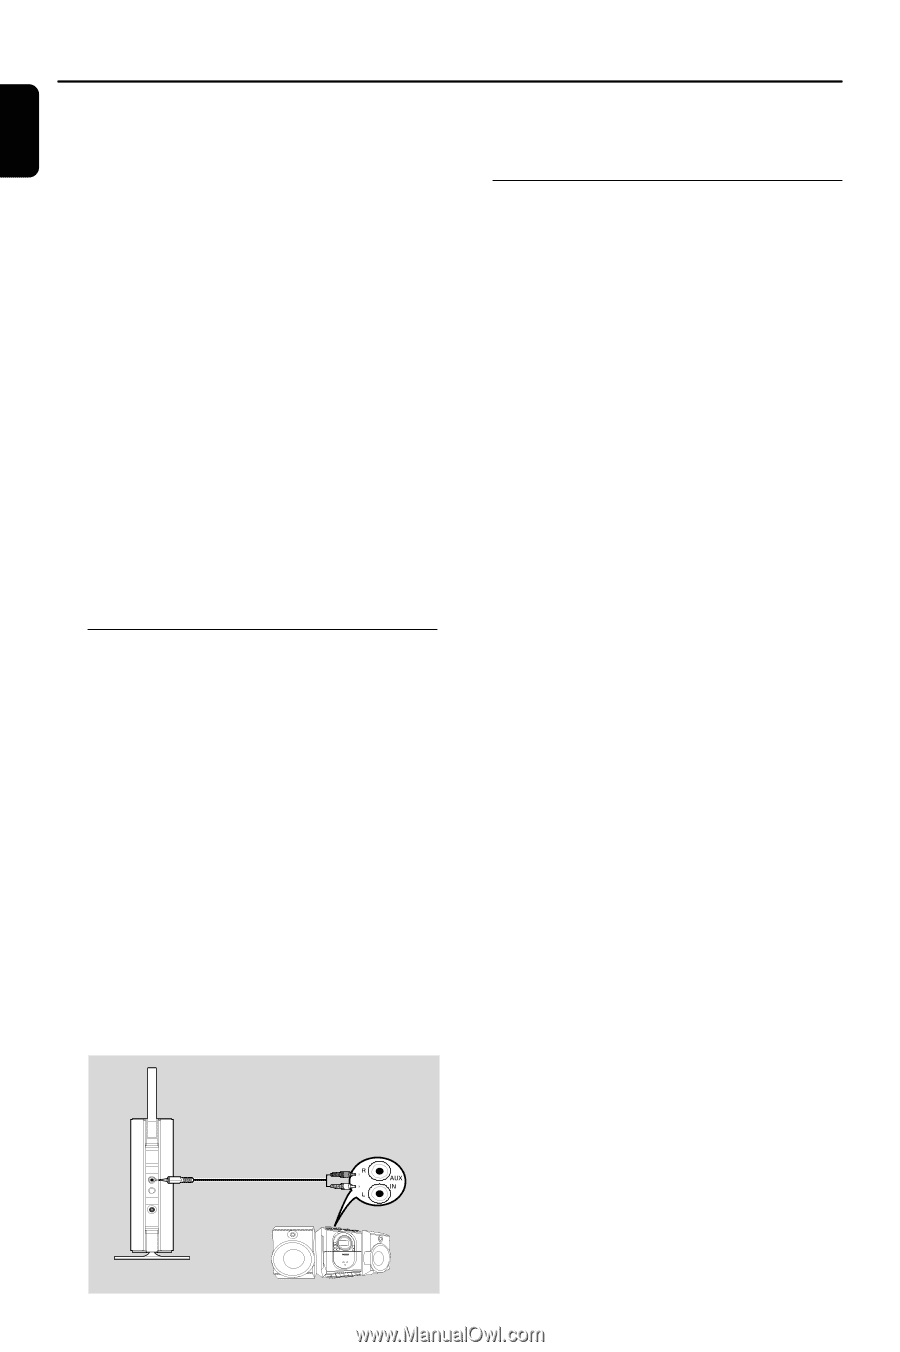
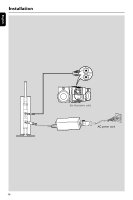
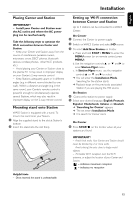
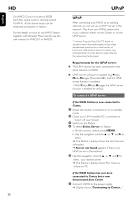
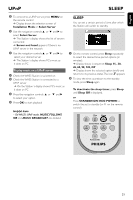
English Installation If there is interference in the neighborhood, the set may pause during playback or respond slowly to your operation. In such cases, - Change the operating channel of your Center and Station when connecting them to an existing wireless PC network.To learn about how to change channels, see the manual Connect to your PC: Option 2. - If possible, change the operating channels of the other Wi-Fi devices at your home. - Turn the above devices in different directions to minimize interference. - Use the WEP* key when connecting your Center and Station to an existing wireless PC network. See the Owner's manual of your router and the manual Connect to your PC: Option 2. * stands for Wired Equivalent Privacy. It is a security protocol for wireless local area network 3 Select AUX mode on the connected audio system Using AC power 1 Make sure all the connections have been made before switching on the power supply 2 Connect the AC power cord to the wall socket. This switches on the power supply When Center or Station is switched to standby, it is still consuming some power. To disconnect the system from the power supply completely, remove the power plug from the wall socket. The type plate is located on the rear of the set. Rear connections Warning: Never make or change connections with the mains supply switched on. Connecting to an audio system You can easily connect your WAS5 to your existing home audio systems, such as the audio/ video receiver, home theatre system, mini/micro system, or multimedia speaker boxes (with builtin amplifier) and audio amplifiers. 1 Insert the one-plug end of the audio cables (supplied) to LINE OUT on Station 2 Connect the two-plug end of the audio cables to the AUX IN (or AUDIO IN) terminals of the additional appliance, red plug to the to the red socket AUX IN R and white plug to the white socket AUX IN L LINE OUT DC (for illustration only) 16
-
 1
1 -
2
-
3
-
4
-
5
-
6
-
7
-
8
-
9
-
10
-
 11
11 -
 12
12 -
 13
13 -
 14
14 -
 15
15 -
 16
16 -
 17
17 -
 18
18 -
 19
19 -
 20
20 -
 21
21 -
22
-
23
-
24
-
25
 |
 |