Pioneer 310-S Owner's Manual
Pioneer 310-S - DVR - DVD Recorder Manual
 |
UPC - 012562656816
View all Pioneer 310-S manuals
Add to My Manuals
Save this manual to your list of manuals |
Pioneer 310-S manual content summary:
- Pioneer 310-S | Owner's Manual - Page 1
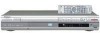
DVD Recorder DVR-310 4.7 Register Your Product on www.pioneerelectronics.com Operating Instructions - Pioneer 310-S | Owner's Manual - Page 2
Thank you for buying this Pioneer product. Please read through these operating instructions so you will know how to operate your model properly. After you have finished reading the instructions, put them away in a safe place for future reference. IMPORTANT NOTICE H006AEn The serial number for - Pioneer 310-S | Owner's Manual - Page 3
- Pioneer 310-S | Owner's Manual - Page 4
a satellite tuner 50 Recording from a DV camcorder 51 Recording from the DV output 52 Playing your recordings on other DVD players . . . . . 52 Initializing a DVD-RW disc 53 07 Editing The Disc Navigator screen 54 Disc Navigator menu options 55 Editing VR mode Original and Video mode content - Pioneer 310-S | Owner's Manual - Page 5
79 13 Additional information Resetting the recorder 83 Setting up the remote to control your TV 83 Screen sizes and disc formats 84 Troubleshooting 85 Frequently asked questions 87 About DV 88 Manual recording modes 89 Language code list 90 Country code list 90 On-screen displays and - Pioneer 310-S | Owner's Manual - Page 6
recording, for the last 30 recordable discs loaded in the recorder. Every time you load a recordable disc, the Disc History is automatically updated picture. You can also adjust the recording picture quality. For example, if you want to make a DVD copy of an old video tape, you can optimize the - Pioneer 310-S | Owner's Manual - Page 7
back on regular DVD players, including computer DVD drives compatible with DVD-Video playback*2. *2 'DVD-Video format' recording: The use of the DVDVideo format for recording on DVD-R and DVD-RW discs is referred to as recording in 'Video mode' on Pioneer's DVD recorders. Supporting playback of - Pioneer 310-S | Owner's Manual - Page 8
Thank you for buying this Pioneer product. Please confirm that the following accessories are in the box when you open it. • Remote control • AA/R6P dry cell batteries x2 • Audio/video cable (red/white/yellow) • RF antenna cable • Power cable • These operating instructions • Warranty card Putting the - Pioneer 310-S | Owner's Manual - Page 9
This recorder is compatible with 44.1 and 48 kHz WMA files encoded with Windows Media Codec 8. Files encoded using Windows Media Codec 9 may be playable, but some parts of the specification are not supported (specifically, Pro, Lossless, Voice and VBR WMA files). WMA files encoded with DRM (Digital - Pioneer 310-S | Owner's Manual - Page 10
guarantee that discs recorded using this recorder will play on other players. *2 'DVD-Video format' recording: The use of the DVDVideo format for recording on DVD-R and DVD-RW discs is referred to as recording in 'Video mode' on Pioneer's DVD recorders. Supporting playback of DVD-R / DVDRW discs is - Pioneer 310-S | Owner's Manual - Page 11
for editing? What kind of editing can I do? Unlike editing video tape, you only need one DVD recorder to edit discs. With DVD, you edit by making a 'Play List' of what to play and when to play it. On playback, the recorder plays the disc according to the Play List. Original Title 1 Title 2 Title - Pioneer 310-S | Owner's Manual - Page 12
monitor with a component video input. 5 DIGITAL OUT OPTICAL A digital audio output for connecting to an AV receiver, Dolby Digital/DTS decoder or other equipment with optical digital input. 6 CONTROL IN Use to control this recorder from the remote sensor of another Pioneer component with a CONTROL - Pioneer 310-S | Owner's Manual - Page 13
VHF/UHF IN 3 VHF/UHF 4 OUT VCR VHF/UHF IN 2 INPUT 1/ IN AUTO REC OUTPUT Y 1 1 DIGITAL CONTROL PB OUT AC IN OUT VHF/UHF R L AUDIO 3 VIDEO S-VIDEO R L AUDIO 2 VIDEO S-VIDEO PR COMPONENT VIDEO OUT OPTICAL IN 1 Antenna/cable TV wall outlet 1 Connect your TV antenna/cable TV - Pioneer 310-S | Owner's Manual - Page 14
2 INPUT 1/ IN AUTO REC OUTPUT Y 1 1 DIGITAL CONTROL PB OUT AC IN OUT VHF/UHF R L AUDIO 3 VIDEO S-VIDEO R L AUDIO 2 VIDEO S-VIDEO PR COMPONENT VIDEO OUT OPTICAL IN 1 Connecting using an S-video output S-video carries the picture as separate color and luminance (brightness - Pioneer 310-S | Owner's Manual - Page 15
REC OUTPUT Y 1 1 PB DIGITAL OUT CONTROL AC IN OUT VHF/UHF R L AUDIO 3 VIDEO S-VIDEO R L AUDIO 2 VIDEO S-VIDEO PR COMPONENT VIDEO OUT OPTICAL IN 1 Antenna/cable TV wall outlet 1 Connect RF antenna cables as shown. This enables you to watch and record TV channels. 2 Connect the - Pioneer 310-S | Owner's Manual - Page 16
recorder 'through' your VCR, satellite receiver or cable box. Always connect each component directly to your TV or AV receiver. TV VHF/UHF IN A/V IN 1 2 1 INPUT 1/ IN AUTO REC OUTPUT Y 1 1 DIGITAL CONTROL PB OUT AC IN OUT VHF/UHF R L AUDIO 3 VIDEO S-VIDEO R L AUDIO 2 VIDEO - Pioneer 310-S | Owner's Manual - Page 17
TV channels. 2 Connect the AUDIO and VIDEO OUTPUT jacks (1 or 2) on this recorder to a set of audio/video inputs on your AV receiver. 3 Use an optical digital audio cable (not supplied) to connect the DIGITAL OUT OPTICAL jack on this recorder to an optical digital input on your AV receiver. This - Pioneer 310-S | Owner's Manual - Page 18
Using the front panel DV IN/OUT jack, it is possible to connect a DV camcorder or video deck, or DVD-R/RW recorder and digitally transfer DV tapes or DVD-R/RW discs to DVD-R/RW. VIDEO/R/RW DV IN/OUT ì DV IN/OUT DV camcorder 1 Use a DV cable (not supplied) to connect the DV in/out jack of your - Pioneer 310-S | Owner's Manual - Page 19
the recorder on/into standby. 2 DISC NAVIGATOR (page 32) Press to directly access the Disc Navigator screen. 3 DVD disc camcorders and other portable equipment. 13 Front panel display See Display on page 20 for details. 13 14 15 14 IR remote sensor (page 8) 15 DV IN/OUT jack (page 12) Digital - Pioneer 310-S | Owner's Manual - Page 20
display is showing the remaining available recording time. 7 (page 74) Lights when the component video output is set to progressive scan. 8 V (page 56) Lights when an unfinalized Video mode disc is loaded. 9 R / RW Indicates the type of recordable DVD loaded: DVD-R or DVD-RW. 10 CH (page 26 - Pioneer 310-S | Owner's Manual - Page 21
(page 40) Changes the audio language or channel. (When the recorder is stopped, press to change the tuner audio.) SUBTITLE (page 40) Displays/changes the subtitles included in multilingual DVD-Video discs. ANGLE (page 41) Switches camera angles on discs with multi-angle scenes. 5 PLAY MODE (page - Pioneer 310-S | Owner's Manual - Page 22
video frame. 16 Recording controls (page 26) ì REC Press to start recording. Press repeatedly to set the recording time in blocks of 30 mins. STOP REC Press to stop recording 58) Press to insert a chapter marker when playing/ recording a VR mode DVD-RW disc. 18 DISPLAY (page 30) Displays/changes the - Pioneer 310-S | Owner's Manual - Page 23
start setting up using the Setup Navigator. ENTER DVD RECORDER Initial Setup Basic Tuner Video Out Audio In Audio Out Language Recording Playback COFrlnooncSktcrPSeaeentnelDCstDioasimprstplpaullyaseyitnegtyhoisusrerteucporbdeefro.re you Remote Control Set Start Setup Mavigator Cancel Please use - Pioneer 310-S | Owner's Manual - Page 24
for automatic time setting, then press ENTER. Initial Setup Basic Tuner Video Out Audio In Audio Out Language Recording Playback Clock SCeltock Setting On Screen Display Front Panel Display Remote Control SetAuto Setup Mavigator Manual Use the / (cursor left/right) buttons to set your time zone - Pioneer 310-S | Owner's Manual - Page 25
'Go Back' if you want to start again. Initial Setup Basic Tuner Video Out Audio In Audio Out Language Recording Playback Clock Set On ScreeSneDtuispplaisycomplete! Front PanEenl jDoiyspulasiyng your DVD recorder! Remote Control Set Setup Mavigator Finish Setup Go Back Other settings you can make - Pioneer 310-S | Owner's Manual - Page 26
started Making your first recording This quick guide shows you how to make a basic recording of a TV program to a recordable DVD. Recording is covered in much more detail in chapter 6 (Recording). STANDBY/ON OPEN/CLOSE CHANNEL 4 Use the CHANNEL +/- buttons on the remote control or the SMART - Pioneer 310-S | Owner's Manual - Page 27
to use your recorder for playback of discs (DVD, CD, etc.). More playback features, such as repeat and program play, are covered in the next chapter. Important • Throughout this manual, the term 'DVD' means playback-only DVD-Video discs and DVD-R/RW. If a function is specific to a particular kind - Pioneer 310-S | Owner's Manual - Page 28
below shows the basic playback controls for DVD-Video, and recordable DVD discs. PLAY Press to start playback. you want to play a DTS audio CD, make sure the recorder is connected to a DTS-compatible amplifier with a digital connection. Noise will be output through the analog outputs. Also make - Pioneer 310-S | Owner's Manual - Page 29
From the Home Menu screen you can access all the features of the recorder. Press HOME MENU to display the Home Menu screen: Timer Recording Disc History PhotoViewer Disc Navigator DV Record Disc Setup Initial Setup Video/Audio Adjust Play Mode Use the / / / (cursor) buttons followed by ENTER to - Pioneer 310-S | Owner's Manual - Page 30
List. 2 Disc type and mode Shows the disc type (DVD-R, DVD-RW, CD, etc.), and the disc mode for recordable DVD, if applicable (VR or Video). 3 Recording mode and time Shows the current recording mode (FINE, SP, LP, etc.), and the total recording time of the disc. 4 Resume Shows Resume if playback - Pioneer 310-S | Owner's Manual - Page 31
'!' if the playback material is copy-once protected. Shows '#' if the current video is 24 fps, progressive scan. Recording display 12 3 4 ì Rec DVD-R Video 3 0. 00. 15 9:00 PM - 10:00 PM FINE (1h00m/DVD) Rem. EVENING NEWS 0h35m WNBC Stereo Copy Once Note • When using the simultaneous - Pioneer 310-S | Owner's Manual - Page 32
provided to help you quickly identify which instructions you need for which kind of disc. DVD Any kind of DVD, DVD-R or DVD-RW DVD-Video Commercially produced DVD or finalized Video mode DVD-R/RW Video mode Video mode DVD-R/RW (unfinalized) VR mode VR mode DVD-RW CD Audio CD Video CD Video CD WMA - Pioneer 310-S | Owner's Manual - Page 33
DVD recordable discs VR mode Video mode When used with a recordable disc, the Disc Navigator gives you access to all the editing features of this recorder recordable discs. 1 Press HOME MENU and select 'Disc Navigator' from the on-screen display. Alternatively, you can press DISC NAVIGATOR (remote - Pioneer 310-S | Owner's Manual - Page 34
on a disc using the number buttons on the remote, or the SMART JOG dial on the front panel. CD Video CD WMA/MP3 1 During playback, use the number few seconds and playback will jump to the new track. CLEAR ENTER DVD-Video Video mode 1 During playback use the number buttons to enter a chapter - Pioneer 310-S | Owner's Manual - Page 35
outputs (and digital output if the sound is Linear PCM below 96kHz). *1 Except during chase playback and simultaneous recording/playback. • Depending on the disc, normal playback may automatically resume when a new chapter is reached on a DVD disc. Playing in slow motion DVD Video CD You can - Pioneer 310-S | Owner's Manual - Page 36
playback may automatically resume when a new chapter is reached on a DVD disc. • No sound is output during slow-motion playback. Frame advance/frame reverse DVD Video CD You can advance or back up a DVD disc frame-by-frame. With Video CDs, you can only use frame advance. PAUSE PLAY STEP/SLOW - Pioneer 310-S | Owner's Manual - Page 37
Alternatively, you can use the / (cursor up/ down) buttons. Time Search (DVD and Video CD only): For example, for 45 minutes into the disc, press 4, 5, 0, difference between the recorded frame rate and the playback frame rate. 4 Press ENTER. • If you searched by frame, the recorder will pause on the - Pioneer 310-S | Owner's Manual - Page 38
also press CLEAR to cancel repeat play if no menu OSD (such as the Disc Navigator) is displayed. Note • If you switch the camera angle during repeat play of a DVD-Video disc, repeat play is canceled. • If there is a program list, you can also select Repeat Program to repeat the program list. 38 - Pioneer 310-S | Owner's Manual - Page 39
the right is a list of titles (DVD), folders (WMA/MP3), or tracks (CD, Video CDs). On the far right is a list of chapters (DVD) or tracks (WMA/MP3). 3 erase the program list (see below), eject the disc or switch off the recorder. Tip • To save your program list and exit the program edit screen - Pioneer 310-S | Owner's Manual - Page 40
see Subtitle Language on page 77. Switching DVD soundtracks DVD-Video When playing a DVD disc recorded with two or more soundtracks (often in both Dolby Digital and DTS soundtracks. There is no analog audio output when DTS is selected. To listen to the DTS soundtrack, connect this recorder to a - Pioneer 310-S | Owner's Manual - Page 41
playing are indicated onscreen. Switching camera angles DVD-Video Some DVD-Video discs feature scenes shot from two DVD-Video disc menus. Press TOP MENU to access. Note • When playing a Dual Mono recording on a VR mode disc, if you are listening to the Dolby Digital soundtrack via the digital - Pioneer 310-S | Owner's Manual - Page 42
play, edit or record on unfinalized DVD-R/ RW discs recorded in Video mode on other DVD recorders. (Likewise, unfinalized Video mode discs recorded on this recorder are not playable on other players/recorders.) • This recorder cannot record onto CD-R or CD-RW discs. • Pioneer takes no responsibility - Pioneer 310-S | Owner's Manual - Page 43
can only be made on CPRM-compatible DVDRW (ver. 1.1 or higher) discs formatted in VR mode. DVD CPRM recordings can only be played on players that are specifically compatible with CPRM. Recording equipment and copyright You may use this product only to reproduce or copy materials for which you own - Pioneer 310-S | Owner's Manual - Page 44
TV VR mode Video mode Follow the instructions below to record a TV program. Recording starts immediately and continues until the disc is full or you stop the recording. AUDIO CHANNEL ENTER PAUSE REC STOPREC REC MODE ì DVD RECORDER 1 Load a recordable disc. • If you load a new blank DVD-RW disc, the - Pioneer 310-S | Owner's Manual - Page 45
unfinalized. • Except for finalized Video mode discs, timer recording will start when the operation preventing timer recording has finished. • The timer CHANNEL ENTER HOME MENU RETURN REC MODE ì EASY TIMER DVD RECORDER 1 Press EASY TIMER. Alternatively, you can also access from the Home - Pioneer 310-S | Owner's Manual - Page 46
Date Start Stop CH Mode Result 12/13 WED 7:00 PM 8:00 PM 32 SP OK New Input DVD Remain 1h00m(FINE) 1/1 • The amount of free space available on the currently loaded recordable DVD is shown towards the bottom of the screen. • In the lower-right corner, the number of timer programs already - Pioneer 310-S | Owner's Manual - Page 47
VCR Plus+® programming system This system makes programming timer recordings very simple. Most TV guides publish PlusCode numbers with their program details. If you want to make a timer recording of a program, you just input the corresponding code. The date, start, stop and channel settings are made - Pioneer 310-S | Owner's Manual - Page 48
digit entered, press CLEAR.) • Press REC MODE to change the recording quality (see also Setting the picture quality/recording time on page 43). If Manual Recording 't set up the guide channels (or at least the guide channel for the PlusCode number that you entered), the recorder will prompt you to - Pioneer 310-S | Owner's Manual - Page 49
are pressed on the remote or front panel, LOCK is briefly displayed again. • To unlock the recorder, press and hold STOP recorder doesn't confirm whether or not it's OK. Why not? Timer confirmation only works for DVD recordings when there is a recordable disc loaded, and it is not currently recording - Pioneer 310-S | Owner's Manual - Page 50
that the component you want to record from is connected properly to the DVD recorder. See Chapter 2 (Connecting up) for connection options. 2 Press INPUT SELECT repeatedly to select one of the external inputs to record from. There are three analog inputs and a DV digital input. The current input is - Pioneer 310-S | Owner's Manual - Page 51
, Auto Start Recording will resume. Recording from a DV camcorder VR mode Video mode You can record from a DV camcorder connected to the DV IN/OUT jack on the front panel of this recorder. Using the recorder's remote, you can control both the camcorder and this recorder. Before recording, make sure - Pioneer 310-S | Owner's Manual - Page 52
you want to start recording from. 3 Start recording on the camcorder. 4 Play the source material. Playing your recordings on other DVD players VR mode Video mode Most regular DVD players can play finalized discs recorded in Video mode. A number of players (including many Pioneer models) can also - Pioneer 310-S | Owner's Manual - Page 53
Pioneer DVR-7000 DVD recorder do not support this feature. These discs will have only a text title menu when finalized on this recorder. Note • By default, the recorder initializes blank DVD-RW discs for VR mode recording. See DVD-RW Auto Init. on page 79 if you want to change the default to Video - Pioneer 310-S | Owner's Manual - Page 54
content is played back (rather like the program play feature found on CD players). The Disc Navigator screen Edit mode Currently selected title Disc recording mode Disc Navigator menu options Disc Navigator Video Mode DVD 1 2 3 Play Erase Ttl Name Lock All Erase Undo 11/04Wed 12:30PM 2ch - Pioneer 310-S | Owner's Manual - Page 55
DVD Remain Play 0h37m(FINE) Erase 4 5 6 Ttl Name Chpt Edit Undo 1/1 On the left side of the screen are the Disc Navigator menu options. The main part commands available from the Disc Navigator for different disc types is shown below. Video mode • Play - Play a title (page 56) • Title Name - Pioneer 310-S | Owner's Manual - Page 56
time will increase accordingly. If you erase titles from a Video mode DVD-R disc, the title will disappear from the list of titles, but the available recording time will not increase. Erasing a title from a Video mode DVD-RW disc increases the available recording time only if it is the last title on - Pioneer 310-S | Owner's Manual - Page 57
name). For other remote control key shortcuts, see Using the remote key shortcuts to input a name below. • For discs formatted on a different DVD recorder, you will see to advance the cursor one space manually between inputting the two characters. Key Characters Key Characters 1 1 6 mno6öôòóøñ - Pioneer 310-S | Owner's Manual - Page 58
markers manually after recording (see also Auto Chapter (Video) on page 79). • When recording in VR mode, the recorder automatically or unlock), then press ENTER. Disc Navigator Original DVD 1 2 3 Lock Erase All 11/15Wed 12:30PM 2ch LP 4 DVD Remain 0h37m(FINE) • For greater control over - Pioneer 310-S | Owner's Manual - Page 59
. Disc Navigator Original DVD 1 2 3 Lock Erase All 4 DVD Remain 0h37m(FINE) Undo Erase all titles? Yes No 1/1 Undo VR mode Video mode If you make from the recorder or switching the recorder into standby. • You can't undo the following operations: initializing, recording or finalizing - Pioneer 310-S | Owner's Manual - Page 60
directly (press and hold for 2 seconds to delete the whole name). For other remote control key shortcuts, see Using the remote key shortcuts to input a name on page 57. • For discs formatted on a different DVD recorder, you will see only a limited character set. 4 Highlight 'OK', then press ENTER to - Pioneer 310-S | Owner's Manual - Page 61
, or select 'Back' from the menu options on the left. 4 Press ENTER to add the title. The new title appears in the updated Play List. Disc Navigator Play List DVD 1 2 3 Create VR mode Use this function to add an Original title to the Play List. When you do this, the whole title - Pioneer 310-S | Owner's Manual - Page 62
to move. After pressing ENTER, the new, updated Play List is displayed. Divide VR mode divide the title. Divide Title Play List DVD Title 2 Create Move Divide Combine Erase All recorder or switching the recorder into standby. • You can't undo the following operations: initializing, recording - Pioneer 310-S | Owner's Manual - Page 63
1 Title 2 Title 3 Today's Football Enjoy Golf! Social dance Lesson DVD Remain 1/2 LP 1h54m 2h35m 1h22m 0h30m 1h38m Titles : 8 DVD-RW Video Recording mode Recording time available Number of titles on disc Disc type and recording mode Disc lock indicator Using the Disc History 1 Press DISC - Pioneer 310-S | Owner's Manual - Page 64
either side (depending on the picture). • If you encounter a disc that will not play, check that the disc and file formats are compatible with this recorder (see JPEG file compatibility on page 10). Reloading files from a disc If you have a disc with a very large number of files and/or folders, you - Pioneer 310-S | Owner's Manual - Page 65
The PhotoViewer 09 Note • You can press HOME MENU to exit the PhotoViewer screen while the recorder is reloading images. (If you enter the PhotoViewer again, it will resume reloading.) Zooming the screen During a slideshow you can zoom in to enlarge a portion - Pioneer 310-S | Owner's Manual - Page 66
directly (press and hold for 2 seconds to delete the whole name). For other remote control key shortcuts, see Using the remote key shortcuts to input a name on page 57. • For discs formatted on a different DVD recorder, you will see only a limited character set. Lock Disc VR mode • Default setting - Pioneer 310-S | Owner's Manual - Page 67
can be played on a regular DVD player or computer equipped with a suitable DVD-ROM drive. See Playing your recordings on other DVD players on page 52 for detailed instructions. Undo Finalize DVD-RW You can undo the finalization on DVD-RW discs recorded on this recorder in Video mode. You need to do - Pioneer 310-S | Owner's Manual - Page 68
above and select one of the user presets (Memory 1, 2 or 3). 2 Select 'Detailed Settings'. 2ch Memory1 Detailed Settings 3 Select the picture quality setting you want to adjust. Timer Recording Disc History PhotoViewer Disc Navigator DV Record Disc Setup Initial Setup Video/Audio Adjust Play Mode - Pioneer 310-S | Owner's Manual - Page 69
adjusted. Creating your own set There are three user presets in which you can save your own set settings: • Pure Cinema - When watching DVD movies, Pure Cinema optimizes the picture quality. that this setting can only be adjusted when the video output is set to progressive.) See also PureCinema - Pioneer 310-S | Owner's Manual - Page 70
DVDs at low volume, it's easy to lose low level sounds completely-including some of the dialog. Switching on Audio DRC (Dynamic Range Control) can help by bringing up the low level sounds, while controlling high level peaks. 1 During playback or when paused, press HOME MENU and select 'Video/Audio - Pioneer 310-S | Owner's Manual - Page 71
to display the clock setting screen. Initial Setup Basic Tuner Video Out Audio In Audio Out Language Recording Playback Clock Setting On Screen Display Front Panel Display Remote Control Set Setup Navigator Auto Manual • Auto clock setting Some TV channels broadcast time signals together with - Pioneer 310-S | Owner's Manual - Page 72
set this if you are using more than one Pioneer DVD recorder in the same room. Initial Setup Basic Tuner Video Out Audio In Audio Out Language Recording Playback Clock Setting On Screen Display Front Panel Display Remote Control Set Setup Navigator Recorder1 Recorder2 Recorder3 Tuner settings - Pioneer 310-S | Owner's Manual - Page 73
to Off, then move down to Level to manually tune to a station. Initial Setup Basic Tuner Video Out Audio In Audio Out Language Recording Playback Auto Channel Setting Manual CH Setting VCR Plus+ CH Setting Next Screen 2 Assign channel numbers to the guide channels as necessary. Look in your TV - Pioneer 310-S | Owner's Manual - Page 74
problems, it is recommended that the user switch the connection to the 'standard definition' output (Interlace). If there are questions regarding our TV set compatibility with this model, please contact our customer service center. This recorder is compatible with the following Pioneer displays - Pioneer 310-S | Owner's Manual - Page 75
, otherwise set to Dolby Digital PCM. Check the manual that came with the connected component if you're unsure whether it is Dolby Digital compatible. Initial Setup Basic Tuner Video Out Audio In Audio Out Language Recording Playback External Audio Dual Mono Recording DV Input Input Level (L1 - Pioneer 310-S | Owner's Manual - Page 76
Setup Basic Tuner Video Out Audio In Audio Out Language Recording Playback Digital Out Dolby Digital Out DTS Out 96kHz PCM Out MPEG Out MPEG MPEG PCM If your AV receiver (or other connected component) is MPEG audio compatible, set to MPEG, otherwise set to MPEG PCM. Check the manual that came - Pioneer 310-S | Owner's Manual - Page 77
'Other' languages on page 78). Subtitle Display • Default setting: On Initial Setup Basic Tuner Video Out Audio In Audio Out Language Recording Playback OSD Language Audio Language Subtitle Language Auto Language DVD Menu Language Subtitle Display On Off Assist Subtitle When set to On, the - Pioneer 310-S | Owner's Manual - Page 78
On Optimized Rec Off Navi Mark Auto Chapter (Video) DVD-RW Auto Init. Manual Recording • Default setting: Off Initial Setup Basic Tuner Video Out Audio In Audio Out Language Recording Playback Manual Recording Optimized Rec Navi Mark Auto Chapter (Video) DVD-RW Auto Init. On (go to setup - Pioneer 310-S | Owner's Manual - Page 79
Lock Angle Indicator Field Frame Auto Initial Setup Basic Tuner Video Out Audio In Audio Out Language Recording Playback Manual Recording Optimized Rec Navi Mark Auto Chapter (Video) DVD-RW Auto Init. VR Mode Video Mode The recorder uses one of two processes when displaying a still frame from - Pioneer 310-S | Owner's Manual - Page 80
DVD-Video discs feature a Parental Lock level. If the recorder is set to a lower level than the disc, it will require you to enter a password before the disc will play. This gives you some control about what your children watch on your DVD recorder. Some discs also support the Country code feature - Pioneer 310-S | Owner's Manual - Page 81
to set the new Parental Lock level. Parental Lock : Country Code You may also want to refer to the Country code list on page 90. 1 Select 'Country Code'. Initial Setup Basic Tuner Video Out Audio In Audio Out Language Recording Playback TV Screen Size Still Picture Frame Search Seamless Playback - Pioneer 310-S | Owner's Manual - Page 82
then use the number buttons to enter the 4-digit country code (you can find the Country code list on page 90.) Initial Setup Basic Tuner Video Out Audio In Audio Out Language Recording Playback TV ScrePeanreSnizteal Lock: Country Code Still Picture Frame SearcPhassword 1 2 3 4 Seamless Playback - Pioneer 310-S | Owner's Manual - Page 83
hold STOP and press STANDBY/ ON. The recorder turns off with all settings reset. Setting up the remote to control your TV You can use the supplied remote to control your TV. To be able to use this feature you first have to program the remote with a maker code from the table below. 1 Press and - Pioneer 310-S | Owner's Manual - Page 84
format of disc Setting 16:9 16:9 Appearance The program is presented in widescreen. 4:3 16:9 Your TV will determine how the picture is presented-check the manual that came with the TV for details. 84 En - Pioneer 310-S | Owner's Manual - Page 85
other components and electrical appliances being used. If the trouble cannot be rectified even after checking the points below, ask your nearest Pioneer authorized service center or your dealer to carry out repair work. General Problem The disc is automatically ejected after closing the disc tray - Pioneer 310-S | Owner's Manual - Page 86
using this • If the disc was recorded in Video mode, make sure that it's finalized (page 52). recorder on another player •Some players will not play recordable DVD discs, even when recorded in Video mode and finalized. • If the disc was recorded in VR mode, the other player must be specifically RW - Pioneer 310-S | Owner's Manual - Page 87
on page 9 for more details. • Can I watch recordings made using this recorder on other DVD players? Yes. Use a DVD-R disc for you recordings (these are always recorded in Video mode). After recording, finalize the disc to make it playable on other DVD players (note that you cannot make further - Pioneer 310-S | Owner's Manual - Page 88
the DV IN/OUT jack; signals from the built-in TV tuner, CD, Video CD and other inputs are not output. • Copy-protected or copy-once DVD video is not output from the DV IN/OUT jack. • Digital camcorders can usually record audio as stereo 16-bit/48kHz, or twin stereo tracks of 12-bit/ 32kHz - Pioneer 310-S | Owner's Manual - Page 89
where there is a noticeable change in picture quality. Audio recording in all manual recording modes is in Dolby Digital 2ch format, except for MN32 which is in Linear PCM mins. 80 mins. 75 mins. 70 mins. 65 mins. 61 mins. EP LP SP FINE Video mode Level Rec. time MN 1 MN 2 MN 3 MN 4 MN 5 MN 6 MN - Pioneer 310-S | Owner's Manual - Page 90
2126 Vietnamese (vi), 2209 Volapük (vo), 2215 Wolof (wo), 2315 Xhosa (xh), 2408 Yoruba (yo), 2515 Zulu (zu), 2621 Country code list Country, Country code, Country code letter Argentina, 0118, ar Australia, 0121, au Austria, 0120, at Belgium, 0205, be Brazil, 0218, br Canada, 0301, ca Chile, 0312 - Pioneer 310-S | Owner's Manual - Page 91
on a non-Pioneer DVD recorder. Undo the finalization in order to recording/editing. The disc may be dirty or damaged. Take out the disc, clean it and retry. If the error persists, use a new disc. If the error appears even with a new disc, please consult a Pioneer Service Center. The video source is - Pioneer 310-S | Owner's Manual - Page 92
DVD player's lens should not become dirty in normal use, but if for some reason it should malfunction due to dust or dirt, consult your nearest Pioneer-authorized service center. Although lens cleaners for CD players instructions that come with discs. Do not load more than one disc into the player. - Pioneer 310-S | Owner's Manual - Page 93
. Use in a kitchen or other room where the player may be exposed to smoke or steam. Use on Photo Film for digital still cameras. Digital cameras from various DVD disc is usually divided into chapters. See also Title. Digital audio An indirect representation of sound by numbers. During recording - Pioneer 310-S | Owner's Manual - Page 94
this method of displaying a picture updates all the lines in one pass, resulting in a more stable, flicker-free image than interlaced video (for a given scanning rate). Regions (DVD only) 1 ALL (example region code marks) Regions associate discs and players with particular areas of the world. This - Pioneer 310-S | Owner's Manual - Page 95
NTSC Recording Recording format DVD Video Recording DVD-VIDEO Recordable discs DVD-RW (DVD Re-recordable disc) DVD-R (DVD Recordable disc) Video recording format Sampling frequency 13.5MHz Compression format MPEG Audio recording format Sampling frequency 48kHz Compression format Dolby Digital - Pioneer 310-S | Owner's Manual - Page 96
96 En - Pioneer 310-S | Owner's Manual - Page 97
97 En - Pioneer 310-S | Owner's Manual - Page 98
Digital 6, 25, 40, 41, 42, 70, 75, 93 Dual mono audio 20, 74 DV camcorder 7, 51, 52, 88 E Easy timer recording 6, 45 Editing recordings 54-62 F Finalizing discs 30, 52, 67 I Initializing discs 42, 53, 66, 79 J JPEG picture files 7, 9, 10, 30, 64-65, 93 M Manual channel setup 73 Manual recording - Pioneer 310-S | Owner's Manual - Page 99
99 En - Pioneer 310-S | Owner's Manual - Page 100
ELECTRONICS OF CANADA, INC. 300 Allstate Parkway, Markham, Ontario L3R OP2, Canada TEL: (905) 479-4411 PIONEER EUROPE NV Haven 1087, Keetberglaan 1, B-9120 Melsele, Belgium TEL: 03/570.05.11 PIONEER ELECTRONICS ASIACENTRE PTE. LTD. 253 Alexandra Road, #04-01, Singapore 159936 TEL: 656-472-1111
-
 1
1 -
 2
2 -
 3
3 -
 4
4 -
 5
5 -
 6
6 -
 7
7 -
8
-
9
-
10
-
11
-
12
-
13
-
14
-
15
-
16
-
17
-
18
-
19
-
20
-
21
-
22
-
23
-
24
-
25
-
26
-
27
-
28
-
29
-
30
-
31
-
32
-
33
-
34
-
35
-
36
-
37
-
38
-
39
-
40
-
41
-
42
-
43
-
44
-
45
-
46
-
47
-
48
-
49
-
50
-
51
-
52
-
53
-
54
-
55
-
56
-
57
-
58
-
59
-
60
-
61
-
62
-
63
-
64
-
65
-
66
-
67
-
68
-
69
-
70
-
71
-
72
-
73
-
74
-
75
-
76
-
77
-
78
-
79
-
80
-
81
-
82
-
83
-
84
-
85
-
86
-
87
-
88
-
89
-
90
-
91
-
92
-
93
-
94
-
95
-
96
-
97
-
98
-
99
-
100
 |
 |

DVD Recorder
DVR-310
Operating Instructions
4.7
4.7
Register Your Product on
www.pioneerelectronics.com