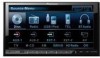
Pioneer AVH P4100DVD Installation Manual - Page 2
Contents - how to install
 |
UPC - 012562911298
View all Pioneer AVH P4100DVD manuals
Add to My Manuals
Save this manual to your list of manuals |
Page 2 highlights
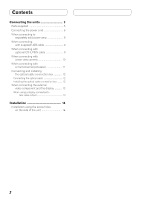
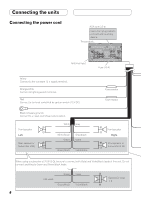
Contents Connecting the units 3 Parts supplied 5 Connecting the power cord 6 When connecting to separately sold power amp 8 When connecting with supplied USB cable 9 When connecting with optional CD-IU200V cable 9 When connecting with a rear view camera 10 When connecting with a multi-channel processor 11 Connecting and installing the optical cable connection box 12 Connecting the optical cable 12 Installing the optical cable connection box ........ 12 When connecting the external video component and the display .......... 13 When using a display connected to rear video output 13 Installation 14 Installation using the screw holes on the side of the unit 14 2
-
 1
1 -
 2
2 -
 3
3 -
 4
4 -
 5
5 -
 6
6 -
 7
7 -
 8
8 -
9
-
10
-
11
-
12
-
13
-
14
-
15
-
16
-
17
-
18
-
19
-
20
-
21
-
22
-
23
-
24
-
25
-
26
-
27
-
28
-
29
-
30
-
31
-
32
-
33
-
34
-
35
-
36
-
37
-
38
-
39
-
40
-
41
-
42
-
43
 |
 |

2
Contents
Connecting the units
............................
3
Parts supplied
.................................................
5
Connecting the power cord
...........................
6
When connecting to
separately sold power amp
.......................
8
When connecting
with supplied USB cable
..........................
9
When connecting with
optional CD-IU200V cable
.........................
9
When connecting with
a rear view camera
..................................
10
When connecting with
a multi-channel processor
......................
11
Connecting and installing
the optical cable connection box
...........
12
Connecting the optical cable
...............................
12
Installing the optical cable connection box
........
12
When connecting the external
video component and the display
..........
13
When using a display connected to
rear video output
..........................................
13
Installation
...........................................
14
Installation using the screw holes
on the side of the unit
.............................
14