Pioneer AVH-P4200DVD Owner's Manual
Pioneer AVH-P4200DVD Manual
 |
UPC - 012562975825
View all Pioneer AVH-P4200DVD manuals
Add to My Manuals
Save this manual to your list of manuals |
Pioneer AVH-P4200DVD manual content summary:
- Pioneer AVH-P4200DVD | Owner's Manual - Page 1
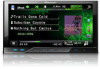
Operation Manual DVD AV RECEIVER AVH-P4200DVD AVH-P3200DVD AVH-P3200BT English - Pioneer AVH-P4200DVD | Owner's Manual - Page 2
exhaustion 6 Before You Start AVH-P4200DVD/AVH-P3200DVD 7 Information to User 7 For Canadian model 7 About this unit 7 About this manual 8 Operating environment 8 After-sales service for Pioneer products 8 Visit our website 8 Resetting the microprocessor 8 Feature demo mode 9 Adjusting the response - Pioneer AVH-P4200DVD | Owner's Manual - Page 3
missed, received and dialed call lists 47 Setting automatic answering 48 Adjusting the other party's listening volume 48 Switching the ring tone 48 Using the preset dial lists 48 Making a call by entering phone number 48 Setting the private mode 49 Pairing from this unit 49 Using a Bluetooth device - Pioneer AVH-P4200DVD | Owner's Manual - Page 4
menus 68 Other Functions Changing the picture adjustment 69 Setting rear monitor output 69 Adjusting the response positions of the touch panels (Touch Panel Calibration) 70 Using an AUX source 70 Using an external unit 71 Additional Information Troubleshooting 72 Error messages 74 Understanding auto - Pioneer AVH-P4200DVD | Owner's Manual - Page 5
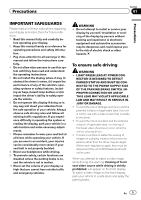
outside traffic and emergency vehicles. WARNING ! Do not attempt to install or service your display by yourself. Installation or servicing of the display by persons without training and experience in electronic equipment and automotive accessories may be dangerous and could expose you to the risk - Pioneer AVH-P4200DVD | Owner's Manual - Page 6
brake again. Please keep the brake pedal pushed down before releasing the parking brake. When using a display connected to V OUT This unit's V OUT is for connection of a display to enable passengers in the rear seats to watch the DVD or Video CD. WARNING NEVER install . ! USE INPUT ONLY FOR REVERSE - Pioneer AVH-P4200DVD | Owner's Manual - Page 7
installed and operated with at least 20 cm and more between the radiator and person's body (excluding extremities: hands, wrists, feet and ankles). This transmitter must not be co-located or operated in conjunction with any other antenna or transmitter. AVH-P4200DVD/AVH accessories CONTROL manual - Pioneer AVH-P4200DVD | Owner's Manual - Page 8
in this manual. Operating environment This unit should be used within the temperature ranges shown below. Operating temperature range: -10 °C to +60 °C (14 °F to 140 °F) EN300328 ETC test temperature: -20 °C and +55 °C (-4 °F and 131 °F) After-sales service for Pioneer products Please contact - Pioneer AVH-P4200DVD | Owner's Manual - Page 9
for the first time after installation ! If the unit fails to operate properly ! When strange or incorrect messages ap- pear on the display 1 Turn the ignition switch OFF. 2 Press RESET with a pen tip or other pointed instrument. RESET button (AVH-P4200DVD) To cancel the feature demo, press and hold - Pioneer AVH-P4200DVD | Owner's Manual - Page 10
, open the USB con- nector lid. AUX input jack (3.5 mm stereo/video c jack) Use to connect an auxiliary device. Auto EQ microphone input jack d Use to connect an auto EQ microphone. CAUTION ! (AVH-P3200DVD/AVH-P3200BT) Use an optional Pioneer USB cable (CD-U50E) to connect the USB audio - Pioneer AVH-P4200DVD | Owner's Manual - Page 11
input ! Disc - Built-in DVD player ! USB/iPod - USB/iPod ! SD - SD memory card ! EXT1 - External unit 1 ! EXT2 - External unit 2 ! AUX - AUX ! TEL/Audio - Bluetooth telephone/audio (Function of AVH-P4200DVD/AVH In this manual, iPod and iPhone will be referred to as "iPod". ! The USB/iPod icon will - Pioneer AVH-P4200DVD | Owner's Manual - Page 12
28 may 12:45 PM 8 12 01:45 1 -02:45 21 Return 3 1 Touch panel keys Perform various operations by touching the panel. 2 Open/close keys Control the touch panel key area by touching these keys. Turning the display to simpli- fied display. Returning to the normal dis- play by touching the - Pioneer AVH-P4200DVD | Owner's Manual - Page 13
menu settings/lists (AVH-P3200BT only) Starting the Bluetooth telephone menu. Refer to Introduction of Bluetooth telephone operations on MENU to display Picture Adjustment. Refer to Changing the picture adjustment on page 69. Adjusting the LCD panel angle (Function of AVH-P4200DVD) 2 Adjust the - Pioneer AVH-P4200DVD | Owner's Manual - Page 14
Section 04 Basic Operations Ejecting an SD (AVH-P3200DVD/AVH-P3200BT) % Press an SD to eject. Setting the clock 1 Switch to Clock Adjustment display. Refer to Basic Operations on page 11. 2 Select the item to set. 3 Touch a or b to set the correct date and time. 14 En - Pioneer AVH-P4200DVD | Owner's Manual - Page 15
to Storing and recalling stations on page 32. Saving song information 6 TAG (tag) from the broadcasting station to your iPod. Refer to Using iTunes tagging on page 33. Manual tuning (step by step) using the buttons 1 Press c or d (TRACK/SEEK). Seek tuning using the buttons 1 Press and hold - Pioneer AVH-P4200DVD | Owner's Manual - Page 16
AVH-P4200DVD) If an iPod with video capabilities is connected to this unit using an interface cable such as the CD-IU200V (sold separately), you can enjoy the video contents of the iPod as an iPod source. ! (AVH-P3200DVD/AVH-P3200BT) If an iPod mode. 3 Refer to Changing the wide screen mode on - Pioneer AVH-P4200DVD | Owner's Manual - Page 17
39. c Returning to the top menu during DVD playback. Conducting operation from your iPod and listening to it Stopping playback. l Stopping e erate the DVD menu. Refer to Using the arrow keys on page 34. Skipping to another title. f Selecting a folder during DivX file playback. En 17 - Pioneer AVH-P4200DVD | Owner's Manual - Page 18
title. Refer to Automatic playback of DVDs on page 61. 1 If a disc has already been inserted, press SRC/ OFF or touch the source icon to select the source. ! While an iPod is connected to this unit, PIONEER, Accessory Attached or (check mark) is displayed on the iPod. ! When the source icon is not - Pioneer AVH-P4200DVD | Owner's Manual - Page 19
:45 -02:45 6 h g cde iPod audio 7 You can control an iPod with this unit by using a cable such as the CD-IU50 (sold separately Switching between media file types on a DVD/CD/USB/SD. Refer to Switching the media file type on page 33. Playing songs on the iPod in random order. Refer to Random play - Pioneer AVH-P4200DVD | Owner's Manual - Page 20
iPod. Refer to Changing audiobook speed on page 39. Switching to Link Search mode to play songs related to the currently playing song on the iPod select the source. ! While an iPod is connected to this unit, PIONEER, Accessory Attached or (check mark) is displayed on the iPod. ! When the source icon - Pioneer AVH-P4200DVD | Owner's Manual - Page 21
the source. ! Disconnect the USB portable audio player/ USB memory when you are done using it. ! When you select Clock or Speana on Selecting the background display on page 67, the artwork is not displayed. Section 07 Playing audio En 21 - Pioneer AVH-P4200DVD | Owner's Manual - Page 22
picture files, this unit starts a slideshow from the first folder/picture on the disc/device. The player displays the pictures in each folder in alphabetical order. The table below shows the controls 34. Changing the screen mode 3 Refer to Changing the wide screen mode on page 40. Displaying - Pioneer AVH-P4200DVD | Owner's Manual - Page 23
Full Capture 6 78 The table below shows the controls for viewing a slideshow. 1 Touch panel keys page 34. Changing the screen mode 3 Refer to Changing the wide screen mode on page 40. 6 Starting files that you want to display. ! Disc - Built-in DVD player ! USB - USB ! SD - SD memory card - Pioneer AVH-P4200DVD | Owner's Manual - Page 24
entering phone number mode You can use Bluetooth telephone (AVH-P3200BT only). brake when performing this operation. 1 Incoming call notice Indicates that an incoming call has been received Bluetooth 7 connection menu. Refer to the instructions from page 49 to page 51. Turning private mode - Pioneer AVH-P4200DVD | Owner's Manual - Page 25
an incoming call Ending a call 1 Press MUTE. Notes ! Private mode can only be operated while you are talking on the phone. ! Bluetooth telephone to this unit. For detailed instructions on connecting your phone to this unit via Bluetooth wireless technology, see following section. Using a Bluetooth - Pioneer AVH-P4200DVD | Owner's Manual - Page 26
8 ab XM tuner You can use this unit to control an XM satellite digital tuner (GEX-P920XM), which is sold manual. ! With this unit, you can operate one addi- tional function: XM/SIRIUS channel direct selection. Refer to Selecting an XM/SIRIUS channel directly on page 42. 1 Touch panel keys Mode - Pioneer AVH-P4200DVD | Owner's Manual - Page 27
name. Refer to Making the MyMix playlist on page 42. Switching to memo edit mode. Refer to Setting up a song b Memo Edit alert on page 43. Refer 7 page 45. Touch and hold for more than two seconds to scroll the text. Manual tuning (step by step) using the buttons 1 Press c or d (TRACK/SEEK). - Pioneer AVH-P4200DVD | Owner's Manual - Page 28
control an HD Radio tuner (e.g. GEX-P20HD), which is sold separately. For details concerning operation, refer to the HD Radio tuner's operation manual the recep- Analog tion mode on page 46. Switching iPod. 1 Digital Radio tuner information 7 Switching the digital radio tuner information. Manual - Pioneer AVH-P4200DVD | Owner's Manual - Page 29
Bluetooth adapter (e.g. Canceling call waiting. CD-BTB200)(sold separately) to AVH- Displaying the received/ P4200DVD/AVH-P3200DVD, you can control Bluetooth Scroll than two seconds to activate connection mode on this unit and establish a Bluetooth wireless connection ing on the cellular phone - Pioneer AVH-P4200DVD | Owner's Manual - Page 30
even after the cellular phone is disconnected. Bluetooth audio operations When you connect a Bluetooth adapter (e.g. CD-BTB200)(sold separately) to AVHP4200DVD/AVH-P3200DVD, you can control Bluetooth audio. Important ! Depending on the Bluetooth audio player connected to this unit, the available - Pioneer AVH-P4200DVD | Owner's Manual - Page 31
market, available operations will vary extensively. When operating your player with this unit, refer to the instruction manual that came with your Bluetooth audio player as well as this manual. ! Information related to a song (such as the elapsed playing time, song title, song index, etc.) cannot - Pioneer AVH-P4200DVD | Owner's Manual - Page 32
instructions Storing assigned to preset tuning keys Preset1 to Preset6 when the Mode All CH mode is selected. (Function of SIRIUS tuner) Storing the strongest of only the strongest stations; while lower settings let you receive progressively weaker stations. Tuning in to strong HD Radio signals - Pioneer AVH-P4200DVD | Owner's Manual - Page 33
the iTunes Store may be different. Make sure to confirm the song before you make the purchase. If you cannot use this function normally, update your iPod firmware. Refer to Introduction of HD Radioä tuner operations on page 28. You can store the information if the TAG indicator is displayed while - Pioneer AVH-P4200DVD | Owner's Manual - Page 34
. Returning to the normal DVD video display. Operating this unit's iPod function from your iPod ! While this function is in use, the iPod will not turn off even if the ignition key is turned off. Operate the iPod to turn off the power. ! When the control mode is set to iPod, the signal can be - Pioneer AVH-P4200DVD | Owner's Manual - Page 35
Switching to iPod video mode. 3 Play the video from the iPod. # If you want to switch to iPod music mode, touch the icon. Music Switching to iPod music mode. Browsing for a video/music on the iPod (Function for iPod) To make operating and searching easy, operations to control an iPod with this - Pioneer AVH-P4200DVD | Owner's Manual - Page 36
instructions iPod) 1 Select a category. Refer to Searching for a video/music by category on the previous page. 2 Switch to alphabet search mode. Switching to alphabet search mode. Alphabet search mode Frame-by-frame playback (Function for DVD video/video CD/DivX file) Images during frame-by-frame - Pioneer AVH-P4200DVD | Owner's Manual - Page 37
instructions Searching for the part you want to play You can use the search function to find the part you want to play. For DVD control). 1 Start the search function. Refer to Playing moving images on page 16. 2 Touch the desired search option (e.g., Chapter). 3 Touch 0 to 9 to input With DVDs/DivX - Pioneer AVH-P4200DVD | Owner's Manual - Page 38
Section 13 Detailed instructions Changing the viewing angle during playback (Multi-angle) With DVDs featuring multi-angle (scenes shot playback (Function for Video CDs) During playback of Video CDs featuring PBC (Playback Control), PBC ON is displayed. 1 Start the search function. Refer to Playing - Pioneer AVH-P4200DVD | Owner's Manual - Page 39
Section 13 Detailed instructions Selecting files from the file name list (Function for USB/SD/DivX) File name list is a list of Displaying lists related to the currently playing song (Link Search) (Function for iPod) 1 Start Link Search. Refer to Introduction of sound playback operations on page - Pioneer AVH-P4200DVD | Owner's Manual - Page 40
, Image saved is displayed. # To cancel the storage process, touch No. Changing the wide screen mode You can select a desired mode for enlarging a 4:3 picture to a 16:9 picture. 1 Display the screen mode. Refer to Introduction of video playback operations on page 16. Refer to Introduction of still - Pioneer AVH-P4200DVD | Owner's Manual - Page 41
of disparity since its proportions are the same as that of the normal picture. Notes ! You cannot operate this function while driving. ! Different settings can be stored for each video source. ! When a video is viewed in a wide screen mode that does not match its original aspect ratio, it may appear - Pioneer AVH-P4200DVD | Owner's Manual - Page 42
instructions Selecting an XM/SIRIUS channel directly You can select an XM/SIRIUS channel directly by entering the desired channel number. 1 Display the preset channel list. Refer to Introduction of XM/SIRIUS tuner operations on page 26. 2 Switch to direct input display. Switching to direct input - Pioneer AVH-P4200DVD | Owner's Manual - Page 43
Detailed instructions Section 13 Detailed instructions ! (XM tuner) If you would rather not to tune in to the other Set the alert to on to receive an alert when the song is broadcast, or set it to off to stop the alert for that song. 1 Switch to memo edit mode. Refer to Introduction of XM/SIRIUS - Pioneer AVH-P4200DVD | Owner's Manual - Page 44
Section 13 Detailed instructions 2 Select the song title that you want to delete. 3 Select a desired team in Team. Selecting the song title that you want to delete. Switching the - Pioneer AVH-P4200DVD | Owner's Manual - Page 45
instructions score will be updated automatically. 3 mode. ! To use this function, a Pioneer SIRIUS bus interface (e.g. CD-SB10) is required. ! To use this function, a SIRIUS plug-and- play unit with an Instant Replay Function is required. ! For details, refer to the SIRIUS plug-andplay unit's manuals - Pioneer AVH-P4200DVD | Owner's Manual - Page 46
page 51. Selecting a number by alphabet search mode (Function of AVH-P3200BT) If a lot of numbers are registered in the phone book, you can search for the phone number by alphabet search mode. 1 Switch to phone book mode. Refer to Introduction of Bluetooth telephone operations on page 24. The phone - Pioneer AVH-P4200DVD | Owner's Manual - Page 47
Section 13 Detailed instructions 3 Touch the first letter of the entry you are looking to Introduction of Bluetooth telephone operations on page 24. Using the missed, received and dialed call lists (Function of AVH-P4200DVD/AVH-P3200DVD) The 80 most recent calls dialed, received, and missed are - Pioneer AVH-P4200DVD | Owner's Manual - Page 48
Section 13 Detailed instructions 4 End the call. Refer to Introduction of Bluetooth telephone operations on page 29. Setting automatic answering If this function is on, this unit automatically answers all incoming calls. % Turn automatic answering on or off. (AVH-P4200DVD/AVH-P3200DVD) Refer to - Pioneer AVH-P4200DVD | Owner's Manual - Page 49
13 Detailed instructions Important Be sure to park your vehicle in a safe place and apply the parking brake when performing this operation. 1 Switch to the entering phone number mode. Refer to Introduction of Bluetooth telephone operations on page 24. 2 Touch the number icons to input the numbers - Pioneer AVH-P4200DVD | Owner's Manual - Page 50
first. Refer to Deleting a paired device. on this page. 4 Use your Bluetooth device to establish a connection. The connection method is different depending on the Bluetooth device. Refer to the manual for your Bluetooth device to establish a connection. While connecting, Pair your phone is displayed - Pioneer AVH-P4200DVD | Owner's Manual - Page 51
this unit. Using a cellular phone to initiate a connection (AVH-P4200DVD/AVH-P3200DVD) A Bluetooth wireless connection can be established from your phone by putting the unit into initiating a connection mode. You may need to refer to the operation manual that came with your phone if you are unsure - Pioneer AVH-P4200DVD | Owner's Manual - Page 52
to the instruction manual that came with your cellular phone for detailed instructions. 1 Start voice recognition. Refer to Introduction of Bluetooth telephone operations on page 29. 2 Say the name of your contact aloud. Connecting a Bluetooth audio player (Function of AVH-P4200DVD/AVH-P3200DVD - Pioneer AVH-P4200DVD | Owner's Manual - Page 53
Detailed instructions % Touch Bluetooth Version to select device information. Refer to Introduction of Bluetooth telephone operations on page 29. The BD address is displayed. Section 13 Detailed instructions En 53 - Pioneer AVH-P4200DVD | Owner's Manual - Page 54
of menu operations 21 Audio Fader/Balance Graphic EQ Auto EQ Sonic Center Control Loudness Subwoofer F/R 0 L/R 0 Super Bass On L/R:0 High Off 34 1 Touch panel keys Video Setup Menu 1 Refer to Setting up the DVD player on page 58. Audio function menu 2 Refer to Audio Adjustments on the next - Pioneer AVH-P4200DVD | Owner's Manual - Page 55
when the rear output setting is Subwoofer. Refer to Setting the rear output and subwoofer controller on page 62. 4 Touch c or d to adjust the left/right speaker balance. selected, the Custom2 curve will be updated. 1 Display the audio function menu. Refer to Introduction of menu operations on the - Pioneer AVH-P4200DVD | Owner's Manual - Page 56
this function if auto EQ has not been carried out. Using sonic center control Sound that is suited for the listening position can easily be created with this Refer to Introduction of menu operations on page 54. 2 Touch Sonic Center Control on the audio function menu. 3 Touch c or d to select a - Pioneer AVH-P4200DVD | Owner's Manual - Page 57
! The AM volume level can also be adjusted with this function. ! Video CD, CD, compressed audio and DivX are automatically set to the same source level adjustment volume. ! iPod and USB storage device are automatically set to the same source level adjustment volume. ! External unit 1 and external - Pioneer AVH-P4200DVD | Owner's Manual - Page 58
Section 14 Menu operations Setting up the DVD player Setting the subtitle language You can set a desired subtitle you select Others A language code input display is shown when Others is selected. Refer to Language code chart for DVD on page 89. 1 Touch 0 to 9 to input the language code. # To cancel - Pioneer AVH-P4200DVD | Owner's Manual - Page 59
manually Setting parental lock Some DVD video discs let you use parental lock to restrict children from viewing violent and adult-oriented scenes. You can set parental lock to the desired level. ! When you have a parental lock level set and play a disc featuring parental lock, code number input - Pioneer AVH-P4200DVD | Owner's Manual - Page 60
Touch 0 to 9 to input a four digit code number. skipped. For details, refer to the instruction manual that came with the disc. Changing DivX subtitle file You can select whether or not to display DivX external subtitles. ! The DivX subtitles will be displayed even when Custom is selected if no DivX - Pioneer AVH-P4200DVD | Owner's Manual - Page 61
to Introduction of menu operations on page 54. 2 Touch DivX VOD on the Video Setup menu. Registration Code and Deactivation Code appear. 3 Touch Registration Code. Your registration code is displayed. Automatic playback of DVDs When a DVD disc with a DVD menu is inserted, this unit will cancel the - Pioneer AVH-P4200DVD | Owner's Manual - Page 62
54. 2 Touch AUX Input on the system menu to turn AUX Input on or off. Setting AV input Activate this setting AV Input on the system menu to turn AV Input on or off. Setting the rear output and subwoofer controller This from equipment with a mute function is received. ! Sound from this system returns - Pioneer AVH-P4200DVD | Owner's Manual - Page 63
System menu - Video Setup - On-screen display - Multi language setting for DivX ! If the embedded language and the selected language setting are not the selected memory, touch Cancel. Updating Bluetooth connection software (AVH-P3200BT only) This function is used to update this unit with the latest - Pioneer AVH-P4200DVD | Owner's Manual - Page 64
Bluetooth Software Update. 3 Touch Start to display the data transfer mode. # Follow the on-screen instructions to finish updating the software. Displaying the Bluetooth system version (AVH the rear view camera (back up camera) CAUTION Pioneer recommends the use of a camera which outputs mirror- - Pioneer AVH-P4200DVD | Owner's Manual - Page 65
to a power amp delivering output higher than the speaker's maximum input power capability. ! If the microphone is placed in an unsuitable this unit is connected to a power amp with input level control, auto EQ may not be possible if the power amp's input level is set below the standard level. ! - Pioneer AVH-P4200DVD | Owner's Manual - Page 66
menu. Refer to Introduction of menu operations on page 54. 5 Touch Auto EQ Measurement to enter auto EQ measurement mode. 6 Plug the microphone into the microphone input jack on this unit. (AVH-P4200DVD) 8 When the 10-second countdown starts, get out of the car and close the door within 10 seconds - Pioneer AVH-P4200DVD | Owner's Manual - Page 67
of menu operations on page 54. 2 Touch Appearance. 3 Touch Screen. 4 Touch one of the colors on the list. Selecting the background display You can switch the background that is displayed when listening to a source. 1 Display the entertainment menu. Refer to Introduction of menu operations on page 54 - Pioneer AVH-P4200DVD | Owner's Manual - Page 68
Section 14 Menu operations Customizing menus 1 Display menu columns to register. Refer to Introduction of menu operations on page 54. You can customize menus except Video Setup Menu. 2 Touch and hold the menu column to register it. # To cancel registration, touch and hold the menu column again. 3 - Pioneer AVH-P4200DVD | Owner's Manual - Page 69
Adjusts phase shifting by dot clock when a Navigation unit is connected # You cannot adjust the picture adjustment for the rear view camera when and sound from the DVD AV - The video and sound from AV input AUX- The source for AUX input Off- No source Note You cannot play DivX files on the rear - Pioneer AVH-P4200DVD | Owner's Manual - Page 70
Operations on page 11. 2 Press and hold MENU to display Picture Adjustment. 3 Press and hold MENU to start Touch Panel cable (AUX) When connecting an auxiliary device using a mini plug cable iPods and portable audio/video players can be connected to this unit via mini plug cable. ! If an iPod - Pioneer AVH-P4200DVD | Owner's Manual - Page 71
AUX input jack on this unit. Refer to the installation manual. Refer to What's what on page 10. Using an external unit An external unit refers to a Pioneer these functions, refer to the owner's manual for the external unit. Basic mode. Refer to Changing the wide screen mode on page 40. En 71 - Pioneer AVH-P4200DVD | Owner's Manual - Page 72
remote control is not possible. The unit does not operate correctly even when the appropriate remote control brake cable is not connected. Connect the parking brake cable, and apply the parking brake. The parking brake is not applied. Connect the parking brake cable, and apply the parking brake - Pioneer AVH-P4200DVD | Owner's Manual - Page 73
ings. You can only Switch the lan- switch between guage using the items indicated disc menu. in the disc menu. No subtitles are displayed. The DVD being played does not feature subtitles. Subtitles are not displayed if they are not recorded on the disc. You can only Switch the lan- switch - Pioneer AVH-P4200DVD | Owner's Manual - Page 74
operate correctly. Cause Action The cables are in- Disconnect the correctly con- cable from the nected. iPod. Once the iPod's main menu is displayed, recon- nect the iPod and reset it. The iPod version Update the iPod is old. version. Bluetooth audio/telephone Symptom Cause Action - Pioneer AVH-P4200DVD | Owner's Manual - Page 75
when you start to hear any sound. Video frame DivX file's frame Select a file that rate not file is Select a file that not sup- not supported on can be played. ported. this unit. External storage memory is enabled. Follow the USB memory instructions to disable security. Format Read/ Ready - Pioneer AVH-P4200DVD | Owner's Manual - Page 76
The USB connec- Check that the tor or USB cable USB connector or has short- USB cable is not circuited. caught in some- thing or playback and sound. when you start to hear any sound. Video frame rate not supported. DivX file's frame Select a file that rate is more than can be played. 30 - Pioneer AVH-P4200DVD | Owner's Manual - Page 77
. Disconnect the cable from the iPod. Once the iPod's main menu is displayed, reconnect the iPod and reset it. iPod failure Disconnect the cable from the iPod. Once the iPod's main menu is displayed, reconnect the iPod and reset it. Error-02-67 The iPod firm- Update the iPod ware versions are - Pioneer AVH-P4200DVD | Owner's Manual - Page 78
nected correctly. tone of a speaker. ! Correct the input level setting of the power amp connected to the speakers image may appear reversed. Translation Pioneer recommends the use of a is being broadcast in stereo. Indicates that a Bluetooth telephone is connected. Indicates that the digital format - Pioneer AVH-P4200DVD | Owner's Manual - Page 79
information (tag) from a radio station is received. Shows when song information (tag) from an HD Radio station is being saved to this unit. Shows while searching a song/ video in alphabet search mode. Shows when song information (tag) is being saved to your iPod. Shows when this unit has the song - Pioneer AVH-P4200DVD | Owner's Manual - Page 80
is on while receiving SIRIUS stations. Shows the genre of the track/song currently being played. Indicates that the feature demo is on. 80 En Handling guideline Discs and player Use only discs featuring any of following logos. Use 12-cm disc. Do not use 8-cm disc or an adapter for 8-cm disc - Pioneer AVH-P4200DVD | Owner's Manual - Page 81
following problems may supports release iPod in places with high temperatures. To ensure proper operation, connect the dock connector cable from the iPod directly to this unit. Firmly secure the iPod when driving. Do not let the iPod fall onto the floor, where it may become jammed under the brake - Pioneer AVH-P4200DVD | Owner's Manual - Page 82
iPod is connected to this unit. DVD-R/DVD-RW discs Unfinalized DVD-R/-RW discs which have been recorded in the Video format (video mode) cannot be played back. Playback of DVD-R/DVD scratches can lead to playback problems on this unit. In picture JPEG compatibility. DivX video files Depending - Pioneer AVH-P4200DVD | Owner's Manual - Page 83
DivX compatibility Compatible format: DivX video format implemented in relation to DivX standards File extensions: .avi or .divx DivX Ultra format: No DivX HD format: No DivX files without video data: No DivX for DVD-R/DVD-RW File system: ISO 9660 Level 1 and 2, Romeo, Joliet, UDF 1.02 (DVD-R/DVD-RW - Pioneer AVH-P4200DVD | Owner's Manual - Page 84
an iPod, iPod Dock Connector to USB Cable is required. Pioneer CD-IU50 interface cable is also available. For details, consult your dealer. About the file/format compatibility, refer to iPod manuals. Audio Book, Podcast: Yes CAUTION Pioneer accepts no responsibility for data lost on the iPod even - Pioneer AVH-P4200DVD | Owner's Manual - Page 85
noise or smell, or any other abnormal signs from the display, turn off the power immediately and consult your dealer or the nearest authorized PIONEER Service Station. Using this unit in this condition may result in permanent damage to the system. ! Do not disassemble or modify this unit, as there - Pioneer AVH-P4200DVD | Owner's Manual - Page 86
SIG, Inc. and any use of such marks by Pioneer Corporation is under license. Other trademarks and trade names are those of their respective owners. ! Bluetooth is a short-range wireless radio connectivity technology that is developed as a cable replacement for mobile phones, handheld PCs and other - Pioneer AVH-P4200DVD | Owner's Manual - Page 87
, and the doubleD symbol are trademarks of Dolby Laboratories. DivX iPod is a trademark of Apple Inc., registered in the U.S. and other countries. "Made for iPod" means that an electronic accessory has been designed to connect specifically to iPod and has been certified by the developer to meet - Pioneer AVH-P4200DVD | Owner's Manual - Page 88
separately) can be controlled by this unit. Please inquire to your dealer or nearest authorized Pioneer service station regarding the satellite radio tuner that can be connected to this unit. For satellite radio tuner operation, please refer to the satellite radio tuner owner's manual. ! The system - Pioneer AVH-P4200DVD | Owner's Manual - Page 89
Additional Information Appendix Additional Information Language code chart for DVD Language (code), input code Japanese (ja), 1001 Dzongkha (dz), 0426 English (en), 0514 Ewe (ee), 0505 French (fr), 0618 Esperanto (eo), 0515 Spanish (es), 0519 Estonian (et), 0520 - Pioneer AVH-P4200DVD | Owner's Manual - Page 90
Dimensions (W × H × D): D Chassis 178 mm × 100 mm × 165 mm (7 in. × 3-7/8 in. × 6-1/2 in.) Nose 171 mm × 97 mm × 18 mm (6-3/4 in.× 3-7/8 in.× 3/4 in.) (AVH-P4200DVD DVD Player System DVD video, Video CD, CD, WMA, MP3, AAC, DivX, JPEG system Usable discs DVD video, Video CD, CD, CD-R/RW, DVD-R/RW - Pioneer AVH-P4200DVD | Owner's Manual - Page 91
encoded only) (Ver. 8.2 and earlier) DivX decoding format Home Theater Ver. 3, 4, 5.2, 6 (.avi, .divx) FM tuner Frequency range 87.9 MHz to 20 dB) Signal-to-noise ratio 62 dB (IEC-A network) Bluetooth (AVH-P3200BT) Version Bluetooth 2.0 certified Output power 4 dBm Max. (Power class 2) CEA2006 - Pioneer AVH-P4200DVD | Owner's Manual - Page 92
- Pioneer AVH-P4200DVD | Owner's Manual - Page 93
- Pioneer AVH-P4200DVD | Owner's Manual - Page 94
- Pioneer AVH-P4200DVD | Owner's Manual - Page 95
- Pioneer AVH-P4200DVD | Owner's Manual - Page 96
. 178-184 Boundary Road, Braeside, Victoria 3195, Australia TEL: (03) 9586-6300 PIONEER ELECTRONICS OF CANADA, INC. 300 Allstate Parkway, Markham, Ontario L3R 0P2, Canada TEL: 1-877-283-5901 TEL: 905-479-4411 PIONEER ELECTRONICS DE MEXICO, S.A. de C.V. Blvd.Manuel Avila Camacho 138 10 piso Col.Lomas
-
 1
1 -
 2
2 -
 3
3 -
 4
4 -
 5
5 -
 6
6 -
 7
7 -
8
-
9
-
10
-
11
-
12
-
13
-
14
-
15
-
16
-
17
-
18
-
19
-
20
-
21
-
22
-
23
-
24
-
25
-
26
-
27
-
28
-
29
-
30
-
31
-
32
-
33
-
34
-
35
-
36
-
37
-
38
-
39
-
40
-
41
-
42
-
43
-
44
-
45
-
46
-
47
-
48
-
49
-
50
-
51
-
52
-
53
-
54
-
55
-
56
-
57
-
58
-
59
-
60
-
61
-
62
-
63
-
64
-
65
-
66
-
67
-
68
-
69
-
70
-
71
-
72
-
73
-
74
-
75
-
76
-
77
-
78
-
79
-
80
-
81
-
82
-
83
-
84
-
85
-
86
-
87
-
88
-
89
-
90
-
91
-
92
-
93
-
94
-
95
-
96
 |
 |

Operation Manual
DVD AV RECEIVER
AVH-P4200DVD
AVH-P3200DVD
AVH-P3200BT
English