Pioneer AVH-X1600DVD Owner's Manual
Pioneer AVH-X1600DVD Manual
 |
View all Pioneer AVH-X1600DVD manuals
Add to My Manuals
Save this manual to your list of manuals |
Pioneer AVH-X1600DVD manual content summary:
- Pioneer AVH-X1600DVD | Owner's Manual - Page 1
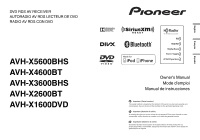
DVD RDS AV RECEIVER AUTORADIO AV RDS LECTEUR DE DVD RADIO AV RDS CON DVD AVH-X5600BHS AVH-X4600BT AVH-X3600BHS AVH-X2600BT AVH-X1600DVD Owner's Manual Mode d'emploi Manual de instrucciones Important (Serial number) The serial number is located on the bottom of this unit. For your own security and - Pioneer AVH-X1600DVD | Owner's Manual - Page 2
is in Your Hands 5 About this unit 5 DVD video disc region numbers 6 About this manual 6 After-sales service for Pioneer products 6 Use and care of the remote control 9 Activating the touch panel keys 10 Using the rear view 10 Using the rear monitor 10 Using sound retriever 10 Changing the wide- - Pioneer AVH-X1600DVD | Owner's Manual - Page 3
amp 51 When connecting the external video component and the display 51 When connecting with a rear view camera 52 iPod with lightning connector 52 iPod with 30-pin connector 53 Optional Smartphone link adaptor (CD- ML100) connection 53 Optional SiriusXM Tuner connection 54 Installation Installation - Pioneer AVH-X1600DVD | Owner's Manual - Page 4
to watch videos. WARNING NEVER install the rear display in a location where the driver can watch videos while driving. When using the rear view camera With an optional rear view camera, this unit can be used as an aid to keep an eye on trailers, or when backing into a tight parking spot. WARNING - Pioneer AVH-X1600DVD | Owner's Manual - Page 5
Bluetooth installation. This equipment generates, uses and can radiate radio frequency energy and, if not installed and used in accordance with the instructions receiver is connected. - Consult the dealer or an experienced radio/ TV technician for help. MODEL NO.: AVH-X1600DVD accessories servicing to - Pioneer AVH-X1600DVD | Owner's Manual - Page 6
maximize your listening enjoyment. ! This manual uses diagrams of actual screens to describe operations. However, the screens on some units may not match those shown in this manual depending on the model used. U.S.A. Pioneer Electronics (USA) Inc. CUSTOMER SUPPORT DIVISION P.O. Box 1760 Long Beach - Pioneer AVH-X1600DVD | Owner's Manual - Page 7
home key or touching . 2 Apps/MirrorLink key Switching to AppRadio Mode/MirrorLink Mode. 3 Rear view key Displaying the rear view image. For details refer to Using the rear view on page 10. 4 Source off key Turning the source off. 5 Bluetooth key Displaying the Bluetooth connection menu. 6 Theme key - Pioneer AVH-X1600DVD | Owner's Manual - Page 8
) ! Radio - Radio tuner (AVH-X4600BT/AVH-X2600BT/AVH-X1600DVD) ! Disc - Built-in DVD and CD player ! USB, iPod, or USB MTP - USB/iPod/MTP ! Pandora - Pandoraâ internet radio ! Bluetooth Audio - Built-in Bluetooth audio (AVH-X5600BHS/AVH-X4600BT/AVHX3600BHS/AVH-X2600BT) ! AUX - AUX ! AV - AV input - Pioneer AVH-X1600DVD | Owner's Manual - Page 9
CDs ! USB storage device Audio data, video data and viewing angle during DVD playback. Common operations Section 03 Common operations for menu settings/lists (Function of AVH-X5600BHS/ AVH-X4600BT/AVH-X3600BHS/ AVH-X2600BT) Starting the Bluetooth telephone menu. For details refer to Bluetooth - Pioneer AVH-X1600DVD | Owner's Manual - Page 10
image will appear coarser when viewed in ZOOM mode. ! This function is enabled for playback on the sources listed below. - Disc: DVD-V, Video-CD, DivX, MPEG-1, MPEG-2, MPEG-4 - USB: DivX, MPEG-1, MPEG-2, MPEG-4, JPEG - iPod: Video - AV: A/V data - AUX: A/V data 1 Display the screen mode. 2 Touch - Pioneer AVH-X1600DVD | Owner's Manual - Page 11
Radioä stations (Function of AVH-X5600BHS/AVH-X3600BHS) HD Radioä stations offer high-quality audio and data services. HD Radio stations are review and and the means purchase from tthoe"tiaTugn" ethsâat conStore. Visual information related to content being played on your HD Radio receiver - Pioneer AVH-X1600DVD | Owner's Manual - Page 12
seek level. 6 Tuning key Tuning up or down manually. Touch and hold down for more than two seconds to . Storing the strongest stations BSM (best stations memory) automatically stores the six are fewer , this unit will be able to receive broadcasts from weaker stations. Using iTunes tagging Note For - Pioneer AVH-X1600DVD | Owner's Manual - Page 13
operations (Function of AVH-X4600BT/AVH-X2600BT/AVHX1600DVD) Touch . 4 Tuning key Tuning up or down manually. Touch and hold down for more than two strongest stations BSM (best stations memory) automatically , this unit will be able to receive broadcasts from weaker stations. You can store - Pioneer AVH-X1600DVD | Owner's Manual - Page 14
service 1 Select SiriusXM as a source. You should be able to tune in to Channel 1. If you cannot get Channel 1, make sure that your SiriusXM Connect Vehicle Tuner is installed correctly as described in the tuner installation guide received the message, "Subscription Updated or down manually. Touch and - Pioneer AVH-X1600DVD | Owner's Manual - Page 15
SiriusXM tuner SiriusXM tuner Section 08 English 4 Touch the close key to close the list screen. Display is closed. Selecting a SiriusXM channel directly You can select a SiriusXM channel directly by entering the desired channel number. Selecting a channel from the category list You can select - Pioneer AVH-X1600DVD | Owner's Manual - Page 16
Section 08 SiriusXM tuner SiriusXM tuner 2 Use the numeric keypad to enter a new four-digit passcode and then touch the Enter key. Touch to confirm the passcode. Once the new passcode is set, the Parental Control screen will open. Note If Check Tuner displays instead, refer to SiriusXM Satellite - Pioneer AVH-X1600DVD | Owner's Manual - Page 17
09 English Introducing movie operations You can use this unit to view DVD/DVD-R/DVDRW/CD/CD-R/CD-RW movie files. Touch panel keys DVD video 1 2 DVD-V 1 JAPNM12:43 01 01 FULL 00'20'' MENU DMoullbtiycDh 48DkoHlzby16Dbit TOP MENU 1 1 1/2 -119'51'' a 987654 L+R 1 07'24'' Return - Pioneer AVH-X1600DVD | Owner's Manual - Page 18
multiple angles, the angle icon is displayed. Use the Video Setup menu to turn the angle icon display on or off. For details, refer to Setting the multi-angle DVD display on page 38. ! You will return to normal playback if you change the viewing angle during fast forward/fast reverse, pause or slow - Pioneer AVH-X1600DVD | Owner's Manual - Page 19
playback is stopped. ! This function cannot be operated during some DVD videos or Video CD playback featuring PBC (playback control). 1 Start the search , refer to the instructions provided with the disc. ! PBC playback of a Video CD cannot be canceled. ! During playback of Video CDs featuring PBC ( - Pioneer AVH-X1600DVD | Owner's Manual - Page 20
DVD) 10 2 Touch your favorite file (or folder) name. # When you have selected a folder, a list of the names of the files (or the folders) in it can be viewed . Playing DivXâ VOD content Some DivX video on demand (VOD) content may only iPod iPod control This manual applies to the following - Pioneer AVH-X1600DVD | Owner's Manual - Page 21
unit, connect a CD-IV203 (sold separately) and Lightning Digital AV Adapter (Apple Inc. products) (sold separately) and install the CarMediaPlayer app on your iPod. Refer to the CarMediaPlayer manual for more information. Refer to AppRadio Mode operation on page 23. Touch panel keys 6 Screen mode - Pioneer AVH-X1600DVD | Owner's Manual - Page 22
key to switch to App Mode. 2 Operate the connected iPod to select a video/song and play. iPhone 4S - iPhone 4 - iPhone 3GS - iPhone 3G - iPhone Shuffle play % Touch the shuffle key. ! Songs - Play back videos "TV show", "Video Podcast" and "Rented Movies" which are downloaded from the iTunes store - Pioneer AVH-X1600DVD | Owner's Manual - Page 23
screen of the system. Install the AppRadio app on your iPhone. WARNING Certain uses of an iPhone or smartphone may not parked. No feature should be used unless it is safe to do so under the driving conditions you are experiencing. CAUTION While driving, you cannot enter text on your iPod. ! Pioneer - Pioneer AVH-X1600DVD | Owner's Manual - Page 24
with optional CDIU201S cable on page 53. Starting procedure 1 Install the AppRadio app on your iPhone. 2 Set Device connection. Device connection can be set when all of the following conditions are met. - The iPhone is not connected. - No Bluetooth connection. - The source is turned off. 1 Turn the - Pioneer AVH-X1600DVD | Owner's Manual - Page 25
MSC (Mass Storage Class) and USB MTP (Media Transfer Protocol). You can also use USB MTP (connecting to MTPcompatible Android devices using a USB cable); however some functions are not supported for MTP connection. Touch panel keys 1 USB 01 2 1 JAPNM12:43 01 USB MSC MP3 1 WMA 1 WAV 1 AAC - Pioneer AVH-X1600DVD | Owner's Manual - Page 26
10. ! You can also switch between languages/ audio systems using Video Setup menu. For details, refer to Setting the audio language on page 37. list on page 61. MTP connection USB MTP (connecting to MTP-compatible Android devices using a USB cable) is supported only for MP3/WMA/AAC files in - Pioneer AVH-X1600DVD | Owner's Manual - Page 27
unit off. It may cause loss of data on your USB storage device. ! If you switch to video or JPEG image display while a database is being created, Still image playback operations (Function for USB MSC) You can use this unit to view still images saved on a USB storage device. 3 Capture key Capturing - Pioneer AVH-X1600DVD | Owner's Manual - Page 28
(Audio/Video Remote Control Profile): You can perform playback, pause playback, select songs, etc. ! As there is a wide variety of Bluetooth audio players run a Bluetooth audio player using this unit, refer to the instruction manual that came with the player as well as to this manual for assistance. - Pioneer AVH-X1600DVD | Owner's Manual - Page 29
. ! If the characters recorded on your Bluetooth audio player are not compatible with this unit unit to play iPod/USB audio files. MIXTRAX EZ is used to add a variety of sound USB storage device or a song on an iPod is being played. ! This function is not available when the control mode is set to App - Pioneer AVH-X1600DVD | Owner's Manual - Page 30
car audio/video products: Connect an iPod to USB input or an Android device using Bluetooth to play Pandora on this unit. ! Please update the firmware of the Pandora appli- cation to the latest version before use. ! The latest version of the Pandora application can be downloaded on iTunes App Store - Pioneer AVH-X1600DVD | Owner's Manual - Page 31
Add station key A new station is created. 7 Pause and play key Pausing and starting playback. Basic operations Playing tracks 1 Connect an iPhone to USB input. For an Android device, a Bluetooth skips allowed on their service. If you attempt displayed, manually connect a registered Bluetooth device - Pioneer AVH-X1600DVD | Owner's Manual - Page 32
driving. Be sure to park your vehicle in a safe place and apply the parking brake before proceeding. ! Bluetooth connection menu cannot be need to connect a Bluetooth telephone to this unit. For detailed instructions on connecting your phone to this unit via Bluetooth wireless technology, refer to - Pioneer AVH-X1600DVD | Owner's Manual - Page 33
, is displayed. # If the inversion fails, "Invert Name Error" appears. In such cases, try again from the beginning. Note Inverting the names of your contacts from this unit does not affect the data on your Bluetooth device. Using the missed, received and dialed call lists The 80 most recent calls - Pioneer AVH-X1600DVD | Owner's Manual - Page 34
Vol ON Note Entering phone number mode cannot be operated unless a Bluetooth telephone is connected to this unit. Setting the private mode During phone. Refer to the instruction manual that came with your cellular phone for detailed instructions. ! When an iPhone running iOS 6.1 or later - Pioneer AVH-X1600DVD | Owner's Manual - Page 35
on page 45. Notes ! You can display the Video Setup menu when a Disc or USB source is selected. ! If you start the Video Setup menu, playback is stopped. Audio adjustments Section 18 19 Using fader/balance adjustment Fader/Balance displays when Rear Speaker is set to Full on the System Menu - Pioneer AVH-X1600DVD | Owner's Manual - Page 36
sources can be created. If you make adjustments when the Custom2 curve is selected, the Custom2 curve will be updated. 1 Press the home button to switch to the home display. 2 Touch the audio function key to open the than those in the selected range are output from the front or rear speakers. 36 En - Pioneer AVH-X1600DVD | Owner's Manual - Page 37
code chart for DVD on page 68. % Touch 0 to 9 to input the language code. # To cancel the entered numbers, touch C. # To register the code, touch the following touch panel key. 2 Touch the video setup key to open the video setup menu. 3 Touch Audio Language on the Video Setup menu. An audio - Pioneer AVH-X1600DVD | Owner's Manual - Page 38
Manual - JPEG images can be switched manually Setting parental lock Some DVD video discs let you use parental lock to restrict children from viewing the instruction manual that came with the disc. Changing the level You can change the set parental lock level. 3 Touch Parental on the Video Setup menu - Pioneer AVH-X1600DVD | Owner's Manual - Page 39
this function is not fully operable, turn this function off and start playback. 1 Press the home button to switch to the home display. 2 Touch the video setup key to open the video setup menu. 3 Touch DVD Auto Play to turn automatic playback on. # To turn automatic playback off, touch - Pioneer AVH-X1600DVD | Owner's Manual - Page 40
unit off and never disconnect the USB storage device while the firmware is being updated. ! You can only start the firmware update when the vehicle is stopped and the parking brake is engaged. 1 Downloading the firmware update files. 2 Connect a blank (formatted) USB storage device to your computer - Pioneer AVH-X1600DVD | Owner's Manual - Page 41
some rear view cameras, picture adjustment may not be possible. 3 If you are adjusting the Picture Adjustment, select the unit. NAVI Apps MirrorLink Completing Picture Adjustment for the Navigation system when Device connection is set to NAVI. Completing Picture Adjustment for the AppRadio Mode - Pioneer AVH-X1600DVD | Owner's Manual - Page 42
menu - System menu - Video Setup menu - Bluetooth menu - Language for cautions equipment with a mute function is received. ! Sound from this system rear speaker lead outputs and RCA rear output are switched simultaneously in this setting. Using the keyboard Keyboard is available only in AppRadio - Pioneer AVH-X1600DVD | Owner's Manual - Page 43
view camera (back up camera) CAUTION Pioneer recommends the use of a camera which outputs mirror-reversed images. Otherwise, the screen image will appear reversed. This unit features a function that automatically switches to the rear view camera video (R.C IN) when a rear view camera is installed - Pioneer AVH-X1600DVD | Owner's Manual - Page 44
occur. - The LPF on active subwoofers or external amps delay the lower sounds. ! Auto EQ changes the Video Signal Setting on the system menu. Video Signal Setting items are displayed. ! AV - Adjusts the AV video signal ! AUX - Adjusts the AUX video signal ! Camera - Adjusts the rear view camera video - Pioneer AVH-X1600DVD | Owner's Manual - Page 45
customize menus except Video Setup menu. 2 Touch Bluetooth wireless connection on page 46. For further details concerning the procedures for establishing Bluetooth wireless connections, refer to the instruction manual your device support SSP (Secure If the connection fails, Error is displayed. In such - Pioneer AVH-X1600DVD | Owner's Manual - Page 46
other device. Initially, this function is set to on. 1 Press the home button to switch to the home display. 2 Touch the Bluetooth key to open the Bluetooth connection menu. 3 Touch Visibility to select visibility off. # To turn visibility on, touch Visibility again. 3 Touch PIN Code Input to select - Pioneer AVH-X1600DVD | Owner's Manual - Page 47
can view make fine-adjustments on the entire screen. ! Park your car in a safe place and use this cannot be adjusted properly, consult your local Pioneer dealer. 5 Press the home button to cable (AUX) When connecting an auxiliary device using a mini plug cable iPods and portable audio/video players - Pioneer AVH-X1600DVD | Owner's Manual - Page 48
with moving parts of the vehicle, such as the shift lever, parking brake or seat sliding mechanism. ! The black cable is ground. When installing this unit or power amp (sold separately), make sure to connect the ground wire first. Make sure that the ground cable is properly connected to metal - Pioneer AVH-X1600DVD | Owner's Manual - Page 49
is limited. - Use a fuse of the rating prescribed. - Never wire the negative speaker cable directly to ground. - Never band together negative cables cable. Connect this cable to the system remote control of an external power amp or the vehicle's auto-antenna relay control terminal (max. 300 mA 12 - Pioneer AVH-X1600DVD | Owner's Manual - Page 50
Pioneer Add-on Navigation system (sold separately) 26 pin cable (Supplied with navigation unit) Insert the 26 pin cable in the direction indicated in the figure. RGB input Please contact your dealer to inquire about the connectable navigation unit. This product Antenna input Fuse (10 A) AUX - Pioneer AVH-X1600DVD | Owner's Manual - Page 51
component. Refer to Setting AV input on page 40. This product's rear video output is for connection of a display to enable passengers in the rear seats to watch the DVD, etc. WARNING Never install a rear display in a location that is visible to the driver while the vehicle is in motion. Display - Pioneer AVH-X1600DVD | Owner's Manual - Page 52
may appear closer or more distant than they actually are. Rear view camera input (R.C IN) This product RCA cable (sold separately) To video output Rear view camera (sold separately) Violet/white Of the two lead wires connected to the back lamp, connect the one in which the voltage changes when - Pioneer AVH-X1600DVD | Owner's Manual - Page 53
AUX input (AUX) USB/iPod input This is wired remote input. Please note that this is not AUX input. iPod with video capabilities (sold separately) Dock connector 1.5 m (4 ft. 11 in.) USB for updating Smartphone link adaptor firmware Even if music and/or image files are saved on the USB storage - Pioneer AVH-X1600DVD | Owner's Manual - Page 54
screw holes of the bracket, and tighten the screws at three locations on each side. 2 1 ! When installing, to ensure proper heat dispersal when using this unit, make sure you leave ample space behind the rear panel and wrap any loose cables so they are not blocking the vents. Leave ample space - Pioneer AVH-X1600DVD | Owner's Manual - Page 55
clip. To detach the microphone base from the microphone clip, slide the microphone base. 1 2 Install the microphone on the steering column. 1 2 1 Double-sided tape 2 Install the microphone on the rear side of the steering column. Adjusting the microphone angle 1 2 3 2 1 Microphone lead 2 Groove - Pioneer AVH-X1600DVD | Owner's Manual - Page 56
Troubleshooting install parking brake cable is not connected. Connect the parking brake cable, and apply the parking brake. The parking brake is not applied. Connect the parking brake cable, and apply the parking brake and video rear view camera is not connected. Connect a rear view camera. Camera DVD - Pioneer AVH-X1600DVD | Owner's Manual - Page 57
and subtitle language settings selected in Video Setup menu. The DVD being played does not feature dialog Bluetooth connection between this unit and the cellular phone. Error messages When you contact your dealer or your nearest Pioneer Service Center, be sure to note the error message. Error - Pioneer AVH-X1600DVD | Owner's Manual - Page 58
DVD with one bearing the correct region number. Error Video frame rate not supported DivX file's frame rate is more than 30 fps. Select a file that can be played. Audio Format not supported This type of file is not supported on this unit. Select a file that can be played. External storage device (USB - Pioneer AVH-X1600DVD | Owner's Manual - Page 59
Pioneer Service Station. Skip limit reached. Skip limit reached. Do not exceed the skip limit. This version of the Pandora Application is not supported. This version of the Pandora application is not supported. Connect an iPhone that has a compatible version of the Pandora application installed - Pioneer AVH-X1600DVD | Owner's Manual - Page 60
above action, reset the smartphone. If the error message is still displayed after performing the above action, please contact your dealer or an authorized Pioneer Service Station. There is no supported application on your MirrorLink device. No supported applications can be found. ! Disconnect the - Pioneer AVH-X1600DVD | Owner's Manual - Page 61
in the battery strength indicator area. Indicates that the connected Bluetooth device only supports Bluetooth telephone. Appendix Indicates that the connected Bluetooth device only supports Bluetooth audio. Show the album title when receiving the tag information. Shows the album title of the song - Pioneer AVH-X1600DVD | Owner's Manual - Page 62
play back some DVD video discs. This unit is not compatible with discs recorded in AVCHD (Advanced Video Codec High Definition) format. Do not insert AVCHD discs as you may not be able to eject the disc. When using discs that can be printed on label surfaces, check the instructions and the warnings - Pioneer AVH-X1600DVD | Owner's Manual - Page 63
unit. Incompatible text saved on the iPod will not be displayed by the unit. DVD-R/RW discs Unfinalized DVD-R/RW discs which have been recorded in the Video format (video mode) cannot be played back. Playback of DVD-R/RW discs may not be possible, due to disc characteristics, scratches or dirt on - Pioneer AVH-X1600DVD | Owner's Manual - Page 64
format: DivX video format implemented in relation to DivX standards File extensions: .avi or .divx DivX Ultra format: Not compatible DivX HD format: Not compatible DivX files without video storage device (USB) or iPod in places with high temperatures. iPod compatibility This unit supports only the - Pioneer AVH-X1600DVD | Owner's Manual - Page 65
Store. The tagged songs and the song that you can buy from the iTunes Store may be different. Make sure to confirm the song before you make the purchase. If you cannot use this function normally, update your iPod firmware. CAUTION Pioneer accepts no responsibility for data lost on the iPod, even - Pioneer AVH-X1600DVD | Owner's Manual - Page 66
the nearest authorized PIONEER Service Station. Keeping the Bluetooth profiles In order to use Bluetooth wireless Video Remote Control Profile) 1.3 ! SPP (Serial Port Profile) 1.1 License, Warranty Disclaimer & Limitation of Liability SAFETY PROVISIONS Disclaimer THE WARRANTIES SET FORTH IN PIONEER - Pioneer AVH-X1600DVD | Owner's Manual - Page 67
Bluetooth SIG, Inc. and any use of such marks by PIONEER CORPORATION is under license. Other trademarks and trade names are those of their respective owners. DVD video is a trademark of DVD Format this accessory with iPod or iPhone may affect wireless performance. Androidä & Google Play Android and - Pioneer AVH-X1600DVD | Owner's Manual - Page 68
Appendix Additional information Additional information Language code chart for DVD Language (code), input code Japanese (ja), 1001 Dzongkha (dz), 0426 English (en), 0514 Ewe (ee), 0505 French (fr), 0618 Esperanto (eo), 0515 Spanish (es), 0519 - Pioneer AVH-X1600DVD | Owner's Manual - Page 69
91 dB (1 kHz) (IHF-A network) (RCA level) (AVH-X3600BHS/AVH-X2600BT/AVH-X1600DVD) Output level: Video 1.0 Vp-p/75 W (±0.2 V) Number of channels ........ 2 (stereo) MP3 decoding format ...... MPEG-1 & 2 Audio Layer 3 WMA decoding format ..... Ver. 7, 7.1, 8, 9, 10, 11, 12 (2 ch audio) (Windows - Pioneer AVH-X1600DVD | Owner's Manual - Page 70
liaison) 94 AppRadio Mode Utilisation de AppRadio Mode Démarrage de la procédure Réglage du clavier 95 94 95 Utilisation de l'adaptateur de liaison de smartphone Démarrage de la procédure 96 USB Utilisation des images de vidéos 96 Utilisation de la lecture audio 97 Mode de navigation Musique 98 - Pioneer AVH-X1600DVD | Owner's Manual - Page 71
111 Lecture automatique des DVD 111 Réglages système Mise en service ou hors service de l'entrée auxiliaire 111 Réglage de l'entrée AV 111 Réglage du système de navigation 111 Réglage du mode de connexion Pandora 111 Sélection du mode MirrorLink 111 Mise à jour du firmware de l'adaptateur de liaison - Pioneer AVH-X1600DVD | Owner's Manual - Page 72
les instructions concernant parking. Lors de l'utilisation d'un écran connecté à la sortie moniteur arrière La sortie moniteur arrière de cet appareil (V OUT) est utilisée pour connecter un écran arrière qui permet aux passagers assis à l'arrière de regarder des vidéos. ATTENTION NE JAMAIS installer - Pioneer AVH-X1600DVD | Owner's Manual - Page 73
AVH-X5600BHS, AVH-X4600BT, AVH-X3600BHS, AVH-X2600BT IC : 775E-K071 Le présent appareil est conforme aux Bluetooth ne peut pas etre supprime (ou remplace) par l'utilisateur. Cet équipement est conforme aux limites d'exposition aux doit être installé et utilisé votre ouïe s'adapte vous permettra de - Pioneer AVH-X1600DVD | Owner's Manual - Page 74
gion des disques DVD vidéo Seuls les disques DVD vidéo qui Pioneer Electronics (USA) Inc. CUSTOMER SUPPORT DIVISION P.O. Box 1760 Long Beach, CA 90801-1760 800-421-1404 CANADA Pioneer Électroniques du Canada, Inc. DÉPARTEMENT DE SERVICE AUX nationaux ou les instructions locales en vigueur dans - Pioneer AVH-X1600DVD | Owner's Manual - Page 75
de navigation. ! Lorsqu'un iPhone exécutant une application qui prend en charge AppRadio Mode est connecté, appuyez sur MODE pour basculer sur l'écran des applications. Vous pouvez utiliser l'application en touchant l'écran. ! Quand un smartphone compatible avec la fonction MirrorLink est connect - Pioneer AVH-X1600DVD | Owner's Manual - Page 76
Radio - Syntoniseur radio (AVH-X4600BT/AVH-X2600BT/AVH-X1600DVD) ! Disc - Lecteur de DVD et CD intégré ! USB, iPod, ou USB MTP - USB/iPod/MTP ! Pandora - Radio Pandoraâ sur Internet ! Bluetooth Audio - Audio Bluetooth intégré (AVH-X5600BHS/AVH-X4600BT/AVHX3600BHS/AVH-X2600BT) ! AUX - AUX ! AV - Entr - Pioneer AVH-X1600DVD | Owner's Manual - Page 77
utilisant le système d'exploitation Android 4.0 ou version supérieure) peut être connecté via une connexion MTP à l'aide d'un câble USB. Télécommande Réglage du volume % Appuyez sur +/- (VOLUME/VOL) pour régler le volume. 1 +/- (VOLUME/VOL) 2 MODE Mise hors service de l'écran d'information. 3 SRC - Pioneer AVH-X1600DVD | Owner's Manual - Page 78
AVH-X5600BHS/ AVH-X4600BT/AVH-X3600BHS/ AVH-X2600BT) Ouverture du menu du téléphone Bluetooth. Pour les détails, reportez-vous à la page 103, Téléphone Bluetooth du clavier tactile Touches du clavier tactile DVD-V 1 JAPNM12:43 01 01 FULL 00 arrière via la mise en service de l'image de la vue - Pioneer AVH-X1600DVD | Owner's Manual - Page 79
service USB : DivX, MPEG-1, MPEG-2, MPEG-4, JPEG - iPod : Vidéo - AV : Données A/V - AUX : Données A/V Opérations de base Section 04 05 Réglage de l'angle du panneau Éjection d'un disque LCD et éjection du support (Fonction de AVH-X3600BHS/AVH-X2600BT/ AVH-X1600DVD lectionner le format de la date - Pioneer AVH-X1600DVD | Owner's Manual - Page 80
Fonction de AVH-X5600BHS/AVH-X3600BHS) Les stations HD Radioä offre des services de transmission FM ! Services de données Son numérique de qualité CD. La technologie HD Radio permet aux stations de ète, les codes d'identification des stations, le guide des canaux HD2/HD3, ainsi que d'autres flux - Pioneer AVH-X1600DVD | Owner's Manual - Page 81
fréquences à l'aide de la fonction BSM peut provoquer le remplacement d'autres fréquences déjà conservées grâce aux touches d'accord sur présélection. 2 Touchez BSM pour mettre en service BSM. Les six stations d'émission des plus fortes sont enregistrées dans les touches d'accord sur présélection - Pioneer AVH-X1600DVD | Owner's Manual - Page 82
07 Syntoniseur Syntoniseur Utilisation du syntoniseur (Fonction de AVH-X4600BT/AVH-X2600BT/AVHX1600DVD) Touches du clavier tactile 12 aux stations de radio dont le signal reçu est suffisamment puissant pour garantir une réception de bonne qualité. FM : Hors service - - - - AM : Hors service - Pioneer AVH-X1600DVD | Owner's Manual - Page 83
SiriusXM (Fonction de AVH-X5600BHS/AVH-X3600BHS) Vous pouvez utiliser cet appareil pour commander un syntoniseur de véhicule SiriusXM Connect, vendu séparément. Pour plus d'informations sur l'installation d'un syntoniseur de véhicule SiriusXM Connect, consultez le guide d'installation fourni avec le - Pioneer AVH-X1600DVD | Owner's Manual - Page 84
Section 08 Syntoniseur SiriusXM Syntoniseur SiriusXM 2 Touche d'informations Changement des informations SiriusXM. Nom de la catégorie-Informations sur le contenu 3 Touche de bande Sélection d'une bande à partir de SXM1, SXM2 ou de SXM3. 4 Touche d'étiquetage des plages musicales iTunesâ - Pioneer AVH-X1600DVD | Owner's Manual - Page 85
l'accès de n'importe quel canal SiriusXM, y compris ceux réservés aux adultes. Lorsqu'elle est activée, la fonction Contrôle parental vous demander Tune Start sur le menu système pour mettre SiriusXM Tune Start en ou hors service. Marche : la plage musicale en cours est lue à partir du début de la - Pioneer AVH-X1600DVD | Owner's Manual - Page 86
initialisation des réglages par défaut Les réglages SiriusXM reprennent leurs réglages par défaut. 86 Fr 1 Mettez la source hors service. Reportez-vous à la page 76, Mise en/hors service de la source. 2 Appuyez sur la touche accueil pour passer à l'écran d'accueil. 3 Touchez la touche système pour - Pioneer AVH-X1600DVD | Owner's Manual - Page 87
de retour rapide. 2 Touche de recherche Exécution de la fonction de recherche. 3 Touche de changement de langue des sous-titres Avec les DVD/DivX supportant des enregistrements multi-sous-titres, vous pouvez changer de langue des sous-titres pendant la lecture. 4 Touche de changement de langue audio - Pioneer AVH-X1600DVD | Owner's Manual - Page 88
icône d'angle en service ou hors service. Pour les détails, reportez-vous à la page 109, Réglage de l'affichage des DVD sous plusieurs angles. lectionner les fichiers. 3 Touche de support Commutation entre les types de fichiers média pour lire les informations des supports DVD ou CD. 4 Touche Sound - Pioneer AVH-X1600DVD | Owner's Manual - Page 89
ou un retour rapide, la plage de répétition est mise automatiquement hors service. ! Si pendant la répétition Track, vous recherchez une plage ou êtée. ! Cette fonction ne peut pas être utilisée pen- dant la lecture de vidéo DVD ou CD vidéo disposant de la fonction PBC (contrôle de la lecture). 1 Ex - Pioneer AVH-X1600DVD | Owner's Manual - Page 90
la sortie audio Lors de la lecture de disques DVD vidéo enregistrés avec audio LPCM, vous pouvez changer les détails, reportez-vous aux instructions fournies avec le disque. ! La lecture PBC d'un CD Vidéo ne peut pas être annulée. ! Pendant la lecture de CD vidéo supportant la fonction PBC (contrôle - Pioneer AVH-X1600DVD | Owner's Manual - Page 91
Rtrv AAppppr -05'29'' a98 7 6 Audio iPod (App Mode) FULL fe 1 Titre de la plage musicale pour Bluetooth (Fonction de AVH-X5600BHS/AVH-X4600BT/ AVH-X3600BHS/AVH-X2600BT) iPhone n'est pas connecté. - Il n'y a pas de connexion Bluetooth. - La source est hors tension. 1 Mettez la source hors service - Pioneer AVH-X1600DVD | Owner's Manual - Page 92
audio via une connexion Bluetooth. Utilisation des images de Reportez-vous à la page 94, Utilisation de AppRadio Mode. Touches du clavier tactile 1 2 iPod service même lorsque le contact est coupé. Pour le mettre hors service, utilisez l'iPod. 1 Touchez le mode de commande iPod pour passer à App - Pioneer AVH-X1600DVD | Owner's Manual - Page 93
3ème génération - iPod nano 2ème génération - iPhone 4S - iPhone 4 - iPhone 3GS - iPhone 3G - iPhone ! Cet appareil peut lire des "Films", "Vidéos 3 Lisez la vidéo à partir de l'iPod. ROOT Video Playlists Movies Music Videos TV Shows Video Podcasts Rented Movies # Si vous voulez afficher le mode - Pioneer AVH-X1600DVD | Owner's Manual - Page 94
cran du système. Installez l'application AppRadio sur votre iPhone. ATTENTION Certaines utilisations d'un iPhone ou smartphone en conduisant peuvent être et non par Pioneer. ! AppRadio Mode permet d'accéder aux applications qui ne figurent pas sur la liste (conformément aux limitations en vigueur - Pioneer AVH-X1600DVD | Owner's Manual - Page 95
l'application AppRadio sur votre iPhone. 2 Réglez Connexion smartphone . Connexion smartphone peut être réglé lorsque toutes les conditions suivantes sont satisfaites. - L'iPhone n'est pas connecté. - Il n'y a pas de connexion Bluetooth. - La source est hors tension. 1 Mettez la source hors service - Pioneer AVH-X1600DVD | Owner's Manual - Page 96
les instructions à MirrorLink. Pour des détails, reportez-vous à la page 75, Appareil central. USB Cet appareil est compatible avec les protocoles USB MSC (Mass Storage Class) et MTP (Media Transfer Protocol). Vous pouvez également utiliser le protocole USB MTP (connexion aux périphériques Android - Pioneer AVH-X1600DVD | Owner's Manual - Page 97
USB. Connexion MTP USB MTP (connexion à des périphériques Android compatibles MTP à l'aide d'un câble USB service ou hors service. ! Si les caractères enregistrés sur le périphérique de stockage USB ne support Commutation entre les types de fichiers média pour lire les informations des supports USB - Pioneer AVH-X1600DVD | Owner's Manual - Page 98
effectuée" s'affiche. Le mode de navigation Musique démarre. Mode de navigation Musique (Fonction pour USB MSC) Cet appareil crée un index Touche de support Basculement entre les types de fichiers média lorsque plusieurs types de fichiers média sont enregistrés sur le périphérique USB. Cette touche - Pioneer AVH-X1600DVD | Owner's Manual - Page 99
périphériques USB en mode de navigation Musique. Lecture AVH-X5600BHS/AVH-X4600BT/ AVH-X3600BHS/AVH-X2600BT) Vous pouvez utiliser cet appareil pour écouter des fichiers audio Bluetooth. Remarques ! Selon le lecteur audio Bluetooth connecté à cet appareil, les opérations disponibles sont limitées aux - Pioneer AVH-X1600DVD | Owner's Manual - Page 100
en service ou hors service. ! Si les caractères enregistrés sur votre lecteur audio Bluetooth ne lorsqu'un fichier sur un périphérique de stockage USB ou une plage musicale sur un iPod est en cours disponible lorsque le mode de commande est défini sur App Mode. ! Selon le fichier/la plage musicale, - Pioneer AVH-X1600DVD | Owner's Manual - Page 101
ès à la radio Pandora à l'aide d'appareils audio/vidéo pour véhicule Pioneer : Connectez un iPod à l'entrée USB ou un périphérique Android via la technologie Bluetooth pour écouter Pandora sur cet appareil. ! Veuillez mettre à jour le firmware de l'application Pandora vers la dernière version avant - Pioneer AVH-X1600DVD | Owner's Manual - Page 102
des plages 1 Connectez un iPhone à l'entrée USB. Une connexion Bluetooth est également requise pour un périphérique Android. Reportez-vous à la page Liste des indicateurs. ! Pandora limite le nombre de sauts autorisés sur son service. Si vous tentez de passer des plages au-delà de cette limite, - Pioneer AVH-X1600DVD | Owner's Manual - Page 103
stations indiquées par partagées. sont des stations Téléphone Bluetooth Section 16 17 Utilisation du téléphone Bluetooth (Fonction de AVH-X5600BHS/AVH-X4600BT/ AVH-X3600BHS/AVH-X2600BT) Vous pouvez utiliser le téléphone Bluetooth. Touches du clavier tactile Affichage de l'attente téléphone de - Pioneer AVH-X1600DVD | Owner's Manual - Page 104
volume d'écoute du destinataire. b Touche de mode privé Mise en ou hors service du mode privé. c Touche décroché Acceptation d'un appel entrant. Exécution Vous devez, tout d'abord, connecter un téléphone Bluetooth à cet appareil. Pour des instructions détaillées sur la connexion de votre téléphone - Pioneer AVH-X1600DVD | Owner's Manual - Page 105
partir de cet appareil n'affecte pas les données contenues sur votre appareil Bluetooth. 3 Touchez un numéro de téléphone dans la liste pour le sélectionner d'un appel par saisie d'un numéro de téléphone Mise en service ou hors service de la sonnerie Vous pouvez choisir d'utiliser ou non la sonnerie de - Pioneer AVH-X1600DVD | Owner's Manual - Page 106
silencieux est en service ou lors de la lecture d'un fichier JPEG. 1 Appuyez sur la touche accueil pour passer à l'écran d'accueil. 2 Touchez n'importe quelle touche du clavier tactile pour sélectionner le menu à régler. Video Audio Settings System Theme Favorites Bluetooth 1 Touche de - Pioneer AVH-X1600DVD | Owner's Manual - Page 107
(égalisation automatique)). Vous pouvez mettre l'égalisation automatique en service ou hors service. Si vous connectez un microphone en option à cet me. 3 Touchez Égal. auto pour mettre l'égalisation automatique en service ou hors service. # Vous ne pouvez pas utiliser cette fonction si les réglages - Pioneer AVH-X1600DVD | Owner's Manual - Page 108
Utilisation de la sortie hautparleur d'extrêmes graves Cet appareil est équipé d'une sortie haut-parleur d'extrêmes graves qui peut être mise en service ou hors service. ! La fréquence de coupure et le niveau de sor- tie peuvent être réglés lorsque la sortie hautparleur d'extrêmes graves est activ - Pioneer AVH-X1600DVD | Owner's Manual - Page 109
aspect TV, l'affichage de l'appareil s'adapte en fonction de ce réglage. 4 affichée. Réglage de l'affichage des DVD sous plusieurs angles L'icône d'angle en ou hors service. 1 Appuyez sur la touche Format TV sur le menu Réglage vidéo pour choisir le ratio d'aspect TV. Touchez répétitivement Format - Pioneer AVH-X1600DVD | Owner's Manual - Page 110
d'aspect TV de certains disques. Pour les détails, reportez-vous aux instructions du disque. Réglage de l'intervalle du diaporama Il est possible désormais être défini. Réglage du verrouillage parental Certains disques DVD vidéo vous permettent d'utiliser le verrouillage parental pour empêcher les - Pioneer AVH-X1600DVD | Owner's Manual - Page 111
lors de la connexion d'un système de navigation Pioneer auxiliaire (vendu séparément). Connexion smartphone peut être réglé lorsque toutes les conditions suivantes sont satisfaites. - L'iPhone n'est pas connecté. - Il n'y a pas de connexion Bluetooth. 2 Touchez la touche système pour ouvrir le - Pioneer AVH-X1600DVD | Owner's Manual - Page 112
PIONEER le plus proche. ! Vous ne pouvez pas mettre à jour lors d'une connexion Bluetooth. 2 Connectez un périphérique de stockage USB vide (format le périphérique de stockage USB conformément aux messages à l'écran. 8 Suivez les instructions à l'écran pour finir la mise à jour du firmware. # - Pioneer AVH-X1600DVD | Owner's Manual - Page 113
sélectionnez l'unité. NAVI Apps Exécution de Ajustment image pour le système de navigation lorsque Connexion smartphone est réglé sur NAVI. Exécution de Ajustment image pour le AppRadio Mode lorsque Connexion smartphone est réglé sur iPhone via USB ou iPhone via Bluetooth. MirrorLink Exécution de - Pioneer AVH-X1600DVD | Owner's Manual - Page 114
par ce réglage. Utilisation du clavier Clavier est uniquement disponible avec AppRadio Mode. Reportez-vous à la page 95, Réglage du clavier. ou hors service. Réglage de l'audio Bluetooth (Fonction de AVH-X5600BHS/AVH-X4600BT/ AVH-X3600BHS/AVH-X2600BT) Pour utiliser un lecteur audio Bluetooth, vous - Pioneer AVH-X1600DVD | Owner's Manual - Page 115
service de la source. 2 Appuyez sur la touche accueil pour passer à l'écran d'accueil. 3 Touchez la touche système pour ouvrir le menu système. 4 Touchez MAJ logiciel Bluetooth. 5 Touchez Démar. pour afficher le mode de transfert des données. # Suivez les instructions CAUTION Pioneer install - Pioneer AVH-X1600DVD | Owner's Manual - Page 116
-X2600BT et AVH- X1600DVD Câble d'extension Microphone auto EQ (Vendu séparément) Entrée AUX (AUX) (Panneau arrière) 3 Placez le contact d'allumage sur ON ou ACC. Si la climatisation ou le chauffage de la voiture sont en service, coupez-les. Le bruit du ventilateur de la climatisation ou du - Pioneer AVH-X1600DVD | Owner's Manual - Page 117
Réglage signal vidéo sur le menu système. Les éléments de Réglage signal vidéo s'affichent. ! AV - Règle le signal vidéo AV ! AUX - Règle le signal vidéo AUX ! Camera - Règle le signal vidéo de la caméra de vue arrière 4 Touchez c ou d pour sélectionner le signal vidéo désiré. Automatique-PAL - Pioneer AVH-X1600DVD | Owner's Manual - Page 118
supprimer le périphérique. Suppression d'un périphérique appairé. # Ne mettez jamais l'appareil hors service lorsque le téléphone Bluetooth appairé est en cours de suppression. Connexion automatique à un périphérique Bluetooth Si cette fonction est activée, la connexion entre votre périphérique - Pioneer AVH-X1600DVD | Owner's Manual - Page 119
. 3 Touchez Information appareil pour afficher les informations sur le périphérique. L'adresse du périphérique Bluetooth s'affiche. Menu de thème Section 23 24 Choix de la couleur de l'éclairage 5 Touchez la barre de couleurs pour personnaliser la couleur. Cet appareil - Pioneer AVH-X1600DVD | Owner's Manual - Page 120
consultez votre distributeur local Pioneer. 1 Mettez la source hors service. Reportez-vous à la page 76, Mise en/hors service de la source. prolongée sur la touche accueil pour effectuer le réglage. Utilisation d'une source AUX Un appareil auxiliaire ou portable vendu séparément peut être connecté à - Pioneer AVH-X1600DVD | Owner's Manual - Page 121
dans le jack d'entrée AUX de cet appareil. Reportez-vous cet appareil après son instal- lation ! En cas AppRadio Mode, le son de navigation par exemple, depuis l'appareil. Réglez sur OFF si vous souhaitez émettre le son pour le AppRadio Mode, la musique par exemple, en tant que son principal. 3 App - Pioneer AVH-X1600DVD | Owner's Manual - Page 122
être respectée, et les fonctions DVD de cet appareil ne doivent pas levier de vitesse, le frein de parking ou le mécanisme de glissement des masse est connecté correctement aux parties métalliques de la instructions suivantes. - Déconnectez la borne négative de la batterie avant l'installation - Pioneer AVH-X1600DVD | Owner's Manual - Page 123
pouvant être raccordées. Câble 26 broches (fourni avec l'unité de navigation) Insérez le câble 26 broches dans la direction indiquée sur la figure. Entrée RGB Cet appareil Entrée d'antenne Fusible (10 A) Prise AUX (3,5 ø) Utilisez un câble a fiches mini pour raccorder un appareil auxiliaire. Jaune - Pioneer AVH-X1600DVD | Owner's Manual - Page 124
ment) Entrée audio Cet appareil (R IN, L IN) Entrée vidéo (V IN) Aux sorties audio À la sortie vidéo Câbles à fiches Cinch (RCA) (vendu sépar prévue pour connecter un écran afin de permettre aux passagers des sièges arrières de regarder des DVD, etc. ATTENTION N'installez jamais d'écran arrière - Pioneer AVH-X1600DVD | Owner's Manual - Page 125
Lors de la connexion avec le câble CD-IV203 en option Cet appareil Entrée USB/iPod Entrée RGB Câble USB (fourni avec cette unité) Connectez à un périphérique USB vendu séparément. Câble Lightning vers USB (CD-IU52) (vendu séparément) iPod avec connecteur lightning (vendu séparément) Câble RGB - Pioneer AVH-X1600DVD | Owner's Manual - Page 126
AUX. Entrée AUX (AUX) iPod avec capacité vidéo (vendu séparément) Connecteur Dock 1,5 m Câble USB (Fourni avec cet appareil) Connectez à un périphérique USB adaptateur pour connexion Smartphone) Connexion pour la mise à jour du firmware de l'adaptateur de liaison de smartphone Même si de la - Pioneer AVH-X1600DVD | Owner's Manual - Page 127
appareil de sorte que les trous des vis soient alignés avec les trous des vis sur le support, puis serrez les vis aux trois emplacements de chaque côté de l'appareil. ! Lors de l'installation, pour assurer une dispersion correcte de la chaleur quand cet appareil est utilisé, assurez-vous de laisser - Pioneer AVH-X1600DVD | Owner's Manual - Page 128
le support de montage. 4 Tableau de bord ou console 2 Installez le clip microphone sur le paresoleil. Avec le pare-soleil relevé, installez le clip microphone. (Abaisser le pare-soleil réduit le taux de reconnaissance vocale.) Installation du microphone (Fonction de AVH-X5600BHS/AVH-X4600BT/ AVH - Pioneer AVH-X1600DVD | Owner's Manual - Page 129
Assurez-vous de bien installer un fusible de même service. Saut dans l'audio et la vidéo. L'appareil n'est pas fixé fermement. Fixez fermement l'appareil. La taille de fichier et le débit de transmission sont supérieurs aux sous-titres). Le DVD en cours de lecture ne supporte pas les enregistrements - Pioneer AVH-X1600DVD | Owner's Manual - Page 130
dans le menu Réglage vidéo. Le DVD en cours de lecture ne comporte pas Bluetooth et USB sont utilisées simultanément. Changez la direction de sortie audio sur l'iPod. Audio/Téléphone Bluetooth Le son de la source audio Bluetooth distributeur ou le Service d'entretien agréé par Pioneer le plus proche, - Pioneer AVH-X1600DVD | Owner's Manual - Page 131
. Transférez les fichiers audio vers le lecteur audio portable USB ou la mémoire USB et effectuez la connexion. La sécurité de la mémoire USB connectée est activée. Suivez les instructions de la mémoire USB pour désactiver la sécurité. Lecture format Le début de la lecture et le début de l'émission - Pioneer AVH-X1600DVD | Owner's Manual - Page 132
puis connectez un lecteur audio portable USB ou la mémoire USB compatible. Error-02-9X/-DX Panne de communication. de données. (Page 98) iPod Lecture format Le début de la lecture et le début é, reconnectez et réinitialisez l'iPod. Error-02-67 La version du firmware de l'iPod est ancienne. Mettez - Pioneer AVH-X1600DVD | Owner's Manual - Page 133
à l'écran. Déconnexion Appuyer sur "Connect" pour reconnecter l'appareil Connexion Bluetooth perdue. Suivez les instructions qui s'affichent à l'écran. MirrorLink There is no supported application on your MirrorLink device. Impossible de trouver des applications prises en charge. ! Déconnectez le - Pioneer AVH-X1600DVD | Owner's Manual - Page 134
USB. Mettez le contact sur OFF, puis sur ACC ou ON. Si le message d'erreur s'affiche encore après l'exécution de cette action, consultez votre distributeur ou un centre d'entretien agréé par Pioneer. ! Corrigez le réglage du niveau d'entrée de l'amplificateur de puissance connecté aux ée. Error. - Pioneer AVH-X1600DVD | Owner's Manual - Page 135
l'appareil Bluetooth connecté prend en charge uniquement l'audio Bluetooth. Indique sont reçues. Touchez pour mettre BSM en service. Indique que EQ auto est activé. Indique lorsque créer la base de DB données en mode de navigation Musique. Indique quand enregistrer la DB base de données - Pioneer AVH-X1600DVD | Owner's Manual - Page 136
celui-ci s'adapter à la DVD vidéo. Il peut ne pas être possible de lire certains disques vidéo DVD. Cet appareil n'est pas compatible avec des disques enregistrés au format AVCHD (Advanced Video Selon les périphériques de stockage USB connectés, du bruit radio peut ê répétition hors service sur l'iPod - Pioneer AVH-X1600DVD | Owner's Manual - Page 137
8 et 16 (LPCM), 4 (MS ADPCM) Fréquence d'échantillonnage : 16 kHz à 48 kHz (LPCM), 22,05 kHz et 44,1 kHz (MS ADPCM) Formats de fichiers compressés compatibles (disque, USB) WMA Extension de fichier : .wma Débit binaire : 48 kbit/s à 320 kbit/s (CBR), VBR Fréquence d'échantillonnage : 32 kHz à 48 kHz - Pioneer AVH-X1600DVD | Owner's Manual - Page 138
de stockage USB avec de nombreuses hiérarchies de dossiers. Disque (CD/DVD) Dossiers pouvant ration) ! iPhone 5 ! iPhone 4S ! iPhone 4 ! iPhone 3GS ! iPhone 3G ! iPhone Selon la format, reportez-vous aux manuels de l'iPod. Livre audio, podcast : compatible PRÉCAUTION Pioneer firmware de votre iPod. - Pioneer AVH-X1600DVD | Owner's Manual - Page 139
audio portables USB, la séquence peut provoquer la formation d'humidité à d'Entretien agréé par PIONEER le plus proche. Comment Bluetooth, les appareils doivent pouvoir interpréter certains profils. Cet appareil est compatible avec les profils suivants. ! GAP (Generic Access Profile) ! SDP (Service - Pioneer AVH-X1600DVD | Owner's Manual - Page 140
PERMISE PAR LA LOI EN VIGUEUR, LA PLEINE RESPONSABILITÉ DE PIONEER OU DE SES CONCÉDANTS DE LICENCE DÉCOULANT DE OU LI de la bibliothèque ou contre les infractions aux droits des tiers. Il n'y a aucune garantie les garanties de valeur marchande et d'adaptation à un usage quelconque. Les auteurs - Pioneer AVH-X1600DVD | Owner's Manual - Page 141
mot et les logos Bluetoothâ sont des marques déposées appartenant à Bluetooth SIG, Inc. et toute utilisation de ces marques par PIONEER CORPORATION est faite sous licence. Les autres marques de commerce ou noms commerciaux sont la propriété de leur propriétaire respectif. DVD vidéo est une marque - Pioneer AVH-X1600DVD | Owner's Manual - Page 142
Annexe Informations complémentaires Informations complémentaires Tableau des codes de langue pour les DVD Langue (code), code d'entrée Japonais (ja), 1001 Dzonga (dz), 0426 Anglais (en), 0514 Ewé (ee), 0505 Français (fr), 0618 Espéranto (eo), 0515 Espagnol ( - Pioneer AVH-X1600DVD | Owner's Manual - Page 143
W à 8 W (2 W pour 1 canal) possible) Niveau de sortie maximum de la sortie préamp 4,0 V (AVH-X5600BHS/AVH-X4600BT) Niveau de sortie maximum de la sortie préamp 2,0 V (AVH-X3600BHS/AVH-X2600BT/AVH-X1600DVD) Égaliseur (Égaliseur graphique à 8 bandes) : Fréquence 40 Hz/80 Hz/200 Hz/400 Hz/ 1 kHz - Pioneer AVH-X1600DVD | Owner's Manual - Page 144
DVD vídeo 147 Acerca de este manual 147 Servicio posventa para productos Pioneer AppRadio Mode 168 Procedimiento de inicio 168 Configuración del teclado 168 Funciones del adaptador de conexión de teléfonos inteligentes Procedimiento de inicio 169 USB fono Bluetooth Funciones del teléfono Bluetooth 177 - Pioneer AVH-X1600DVD | Owner's Manual - Page 145
comprimido (disco, USB) 211 Compatibilidad con iPod 211 Secuencia de archivos de audio 212 Uso correcto del display 212 Perfiles Bluetooth 213 Licencia, exención de responsabilidad sobre la garantía y limitación de responsabilidad 213 Tabla de códigos de idioma para el DVD 215 Especificaciones 216 - Pioneer AVH-X1600DVD | Owner's Manual - Page 146
PIONEER. Lea con detenimiento este manual manual en un lugar seguro y a mano para poder consultarlo en el futuro. INSTRUCCIONES DE SEGURIDAD IMPORTANTES Lea íntegramente estas instrucciones sobre el display y consérvelas para consultarlas en el futuro. 1 No instale fuente de video del asiento - Pioneer AVH-X1600DVD | Owner's Manual - Page 147
otras áreas puede causar una recepción deficiente. PRECAUCIÓN DVD vídeo Este reproductor sólo admite discos DVD vídeo con números de región compatibles. Podrá encontrar aquellas mostradas en el manual en función del modelo empleado. Servicio posventa para productos Pioneer Póngase en contacto con - Pioneer AVH-X1600DVD | Owner's Manual - Page 148
EE.UU. Pioneer Electronics (USA) Inc. CUSTOMER SUPPORT DIVISION P.O. Box 1760 Long Beach, CA 90801-1760 800-421-1404 CANADÁ Pioneer Electronics of Canada se produzcan fugas de la pila, limpie completamente el mando a distancia e instale una pila nueva. ! Para desechar las pilas usadas, cumpla con los - Pioneer AVH-X1600DVD | Owner's Manual - Page 149
el manual de instrucciones respectivo. ! Para información adicional sobre cómo conectar un iPod o un dispositivo de almacenamiento USB a AUX AV SiriusXM Video Audio Apps RearView OFF Settings System Theme Favorites Bluetooth 76 5 2 Tecla Apps/MirrorLink Cambio a AppRadio Mode/MirrorLink - Pioneer AVH-X1600DVD | Owner's Manual - Page 150
de radio (AVH-X4600BT/AVH-X2600BT/AVH-X1600DVD) ! Disc - Reproductor de DVD y CD incorporado ! USB, iPod o USB MTP - USB/iPod/MTP ! Pandora - Pandoraâ internet radio ! Bluetooth Audio - Audio Bluetooth incorporado (AVH-X5600BHS/AVH-X4600BT/AVHX3600BHS/AVH-X2600BT) ! AUX - AUX ! AV - Entrada - Pioneer AVH-X1600DVD | Owner's Manual - Page 151
MODO MIXTO (MIXED-MODE CD) ! Dispositivo de almacenamiento USB Datos de audio, datos de vídeo y datos de DVD-V 1 JAPNM12:43 01 01 (Función de AVH-X5600BHS/ AVH-X4600BT/AVH-X3600BHS/ AVH-X2600BT) Inicio del menú del teléfono Bluetooth. Para obtener más información, consulte Teléfono Bluetooth - Pioneer AVH-X1600DVD | Owner's Manual - Page 152
táctil Teclas del teclado táctil DVD-V 1 JAPNM12:43 01 01 FULL USB/MTP - Archivos MP3/WMA/AAC/WAV en dispositivos de almacenamiento USB función MIXTRAX en el modo de fuente USB. Cambio del modo panorámico Selección de Disc: DVD-V, CD de vídeo, DivX, MPEG-1, MPEG-2, MPEG-4 - USB: DivX, MPEG-1, - Pioneer AVH-X1600DVD | Owner's Manual - Page 153
) o 24hr (reloj de 24 horas). Indica que el display está cerrado. Expulsión de un disco. 06 Acerca de las emisoras HD Radioä (Función de AVH-X5600BHS/AVH-X3600BHS) Las emisoras de HD Radio ä ofrecen servicios de audio y datos de alta calidad que las emisoras de FM/AM locales ponen a su disposici - Pioneer AVH-X1600DVD | Owner's Manual - Page 154
búsqueda normal. 5 Tecla local Ajuste del nivel de búsqueda local. 6 Tecla de sintonía Sintonización en sentido ascendente o descendente de forma manual. Mantenga la tecla pulsada durante más de dos segundos para saltarse emisoras. La sintonización por búsqueda comienza en cuanto se suelta la tecla - Pioneer AVH-X1600DVD | Owner's Manual - Page 155
normal). ALL-HD 07 Funciones del sintonizador (Función de AVH-X4600BT/AVH-X2600BT/AVHX1600DVD) 5 Tecla de lista Visualización de la Tecla de sintonía Sintonización en sentido ascendente o descendente de forma manual. Mantenga la tecla pulsada durante más de dos segundos para saltarse emisoras - Pioneer AVH-X1600DVD | Owner's Manual - Page 156
Sección 07 Sintonizador Sintonizador 2 Mantenga pulsada una de las teclas de ajuste de presintonías para almacenar la frecuencia seleccionada en la memoria. La frecuencia de la emisora de radio seleccionada se ha almacenado en la memoria. 3 Toque la tecla apropiada de ajuste de presintonías para - Pioneer AVH-X1600DVD | Owner's Manual - Page 157
ón a las funciones del sintonizador SiriusXM (Función de AVH-X5600BHS/AVH-X3600BHS) Se puede usar esta unidad para controlar un b Tecla de sintonía Sintonización en sentido ascendente o descendente de forma manual. Mantenga la tecla pulsada durante más de dos segundos para saltarse emisoras. - Pioneer AVH-X1600DVD | Owner's Manual - Page 158
Sección 08 Sintonizador SiriusXM Sintonizador SiriusXM 2 Mantenga pulsada una de las teclas de ajuste de presintonías para almacenar el canal seleccionado en la memoria. El canal seleccionado se ha almacenado en la memoria. 3 Toque la tecla apropiada de canal presintonizado para seleccionar la - Pioneer AVH-X1600DVD | Owner's Manual - Page 159
Sintonizador SiriusXM Sintonizador SiriusXM Sección 08 Español La contraseña por defecto es 0000. Si se introduce una contraseña válida, aparece la lista de canales en la pantalla Control de padres junto con un icono de bloqueo o desbloqueo. 3 Las funciones siguientes se pueden completar desde - Pioneer AVH-X1600DVD | Owner's Manual - Page 160
Tecla de cambio del idioma de los subtítulos En el caso de los archivos DVD/DivX que vienen con grabaciones multi-subtítulos, se puede cambiar entre los idiomas ón. 4 Tecla de cambio del idioma de audio Con los archivos de DVD/DivX que permitan la reproducción del audio en distintos idiomas y con - Pioneer AVH-X1600DVD | Owner's Manual - Page 161
que se cargue el disco. ! Se puede establecer un marcador para cada DVD vídeo. En total, se pueden establecer hasta cinco marcadores. ! Para borrar cambiar entre los idiomas/sistemas de audio utilizando el menú Ajuste de Video. Para obtener más información, consulte Ajuste del idioma del audio en - Pioneer AVH-X1600DVD | Owner's Manual - Page 162
ngulos, se visualiza el icono de ángulo. Use el menú Ajuste de Video para activar o desactivar la visualización del icono de ángulo. Para obtener datos de audio (CD-DA) en discos DVD-R/RW/ROM. Uso del menú de DVD (Función para DVD vídeo) Algunos DVD le permiten seleccionar una opción del contenido - Pioneer AVH-X1600DVD | Owner's Manual - Page 163
realizar su selección. Consulte Introducción de funciones para películas en la página 160. Selección de la salida de audio Cuando se reproducen discos de DVD vídeo grabados con audio LPCM, es posible cambiar la salida de audio. Cuando se reproducen discos de vídeo CDs, puede cambiar entre la salida - Pioneer AVH-X1600DVD | Owner's Manual - Page 164
DVD 164 Es iPod Control de iPod Este manual se aplica a los siguientes modelos iPod iPhone 4S - iPhone 4 - iPhone 3GS - iPhone 3G - iPhone iPod con conector Lightning - iPod touch de 5ª generación - iPod nano de 7ª generación - iPhone '29'' a98 7 6 Audio de iPod (App Mode) FULL fe 1 Título de la - Pioneer AVH-X1600DVD | Owner's Manual - Page 165
AV digital Lightning (productos de Apple Inc.) (se vende por separado) e instale la aplicación CarMediaPlayer en su iPod. Consulte el manual de CarMediaPlayer para información adicional. Consulte Operación de AppRadio Mode en la página 168. Teclas del teclado táctil 1 2 Toque para cambiar - Pioneer AVH-X1600DVD | Owner's Manual - Page 166
los altavoces del automóvil cuando está seleccionado App Mode. Esta función no es compatible con ón 166 Es - iPhone 4S - iPhone 4 - iPhone 3GS - iPhone 3G - iPhone Tecla de selección aleatoria tienda de iTunes. ROOT Video Playlists Movies Music Videos TV Shows Video Podcasts Rented Movies # - Pioneer AVH-X1600DVD | Owner's Manual - Page 167
categorías en que desee buscar un vídeo/tema musical. Listas de categoría (para vídeo) ! Video Playlists (listas de reproducción de vídeo) ! Movies (películas) ! Music Videos (vídeos musicales) ! TV Shows (programas de TV) ! Video Podcasts (podcasts de vídeo) ! Rented Movies (películas alquiladas - Pioneer AVH-X1600DVD | Owner's Manual - Page 168
/AVH-X3600BHS/AVH-X2600BT) ! iPhone 4S ! iPhone 4 Procedimiento de inicio 1 Instale la app AppRadio en su iPhone. 2 Ajuste Conexión de dispositivo. Conexión de dispositivo se puede ajustar cuando se cumplen todas las condiciones siguientes. - El iPhone no está conectado. - Sin conexión Bluetooth - Pioneer AVH-X1600DVD | Owner's Manual - Page 169
aplicación del iPhone. Toque para ocultar el teclado. 1 Pulse el botón de inicio dos veces para cambiar desde la pantalla de AppRadio Mode a la ón. - Pulse el botón de inicio: se visualiza la pantalla de inicio de MirrorLink. - Pulse dos veces el botón de inicio: se visualiza la pantalla de - Pioneer AVH-X1600DVD | Owner's Manual - Page 170
puede cambiar entre los idiomas/sistemas de audio utilizando el menú Ajuste de Video. Para obtener más información, consulte Ajuste del idioma del audio en la pá de audio USB. Conexión MTP En esta función, USB MTP (la conexión a dispositivos Android compatibles con MTP a través de un cable USB) es - Pioneer AVH-X1600DVD | Owner's Manual - Page 171
visualice correctamente. ! Desconecte el reproductor de audio portátil USB / memoria USB cuando no los esté utilizando. ! Al seleccionar Speana la unidad; podría provocar la pérdida de datos de su dispositivo de almacenamiento USB. ! Si cambia a visualización de imagen JPEG o vídeo mientras se está - Pioneer AVH-X1600DVD | Owner's Manual - Page 172
puede reproducir una subcarpeta de esa carpeta. ! Si se selecciona una fuente USB, la gama de repetición cambia a All. Selección de ficheros de la de desplazamiento para desplazarse. ! Esta función está disponible para dispositivos USB en el modo Búsqueda de música. Reproducción del contenido DivXâ - Pioneer AVH-X1600DVD | Owner's Manual - Page 173
Video Remote Control Profile): puede reproducir, detener la reproducción, seleccionar canciones, etc. ! Como hay diversos reproductores de audio Bluetooth . Consulte el manual de instrucciones de su reproductor, así como este manual, mientras utilice un reproductor de audio Bluetooth con esta unidad - Pioneer AVH-X1600DVD | Owner's Manual - Page 174
función solo está disponible si se está reproduciendo un archivo en un dispositivo de almacenamiento USB o una canción en un iPod. ! Esta función no está disponible cuando el modo de control se ajusta a App Mode. ! Según el archivo/canción, es posible que los efectos de sonido no estén disponibles - Pioneer AVH-X1600DVD | Owner's Manual - Page 175
iPhone - Conecte un iPod a la entrada USB. - Ajuste Conexión Pandora en iPhone. (Función de AVH-X5600BHS/AVH-X4600BT/ AVH-X3600BHS/AVH- Pioneer: Conecte un iPod a la entrada USB o un dispositivo Android que utilice Bluetooth para reproducir Pandora en esta unidad. ! Por favor, actualice el firmware - Pioneer AVH-X1600DVD | Owner's Manual - Page 176
y reproducción Pausa e inicio de la reproducción. Funcionamiento básico Reproducción de pistas 1 Conecte un iPhone a una salida USB. Para un dispositivo Android, también se necesita una conexión Bluetooth. Consulte Funciones de Pandora en la página 175. 2 Cambie la fuente a Pandora. Saltar pistas - Pioneer AVH-X1600DVD | Owner's Manual - Page 177
Sección 17 Español Funciones del teléfono Bluetooth (Función de AVH-X5600BHS/AVH-X4600BT/AVHX3600BHS/AVH-X2600BT) Se puede usar un teléfono Bluetooth. Importante ! Si deja la unidad en espera para conectar su teléfono por Bluetooth mientras el motor no está encendido puede agotar la bater - Pioneer AVH-X1600DVD | Owner's Manual - Page 178
se invierten los nombres, aparece . # Si la inversión, aparece "Error al invertir nombre.". En tal caso, vuelva a intentarlo desde el nombres de sus contactos desde esta unidad no afecta a los datos de su dispositivo Bluetooth. 3 Toque el número de lista para seleccionar un número de teléfono. - Pioneer AVH-X1600DVD | Owner's Manual - Page 179
número de teléfono solo se puede utilizar si hay un teléfono Bluetooth conectado a esta unidad. Ajuste del modo privado Durante una conversación puede de teléfono móvil. Consulte el manual de su teléfono móvil para ver más instrucciones. ! Cuando se utiliza un iPhone con iOS 6.1 o posterior. Siri - Pioneer AVH-X1600DVD | Owner's Manual - Page 180
para seleccionar el menú que desea ajustar. Video Audio Settings System Theme Favorites Bluetooth 54 1 Tecla de configuración de vídeo ! Puede visualizar el menú Ajuste de Video al seleccionar la fuente Disc o USB. ! Si inicia el menú Ajuste de Video, se detendrá la reproducción. 180 Es - Pioneer AVH-X1600DVD | Owner's Manual - Page 181
Ajustes de audio Ajustes de audio Sección 19 Español ! En el caso de Plano, no se hacen ajustes al sonido. Puede verificar el efecto de las curvas de ecualización al alternar entre Plano y otra curva de ecualización. 1 Pulse el botón de inicio para cambiar a la pantalla de inicio. 4 Toque el - Pioneer AVH-X1600DVD | Owner's Manual - Page 182
configuración de vídeo. 3 Toque Lenguaje de Subtítulos en el menú Ajuste de Video. Se visualizará un menú de idiomas de los subtítulos. 4 Toque el idioma idioma al seleccionar Otros. Consulte Tabla de códigos de idioma para el DVD en la página 215. Ajuste del idioma del audio Se puede definir el - Pioneer AVH-X1600DVD | Owner's Manual - Page 183
de configuración de vídeo. 3 Toque Menú de Lenguaje en el menú Ajuste de Video. Se visualiza un menú de idiomas de menús. 4 Toque el idioma deseado. El 15 segundos ! Manual - Las imágenes JPEG pueden cambiarse manualmente Ajuste del control de padres Algunos discos de DVD vídeo permiten utilizar - Pioneer AVH-X1600DVD | Owner's Manual - Page 184
escenas. Para obtener detalles, consulte el manual de instrucciones que se incluye con el configuración de vídeo. 3 Toque Parental en el menú Ajuste de Video. 4 Toque 0 a 9 para introducir el número de código título. ! Es posible que algunos DVD no funcionen correctamente. Si no puede utilizar - Pioneer AVH-X1600DVD | Owner's Manual - Page 185
Pioneer Add-on (se vende por separado). Conexión de dispositivo se puede ajustar cuando se cumplen todas las condiciones siguientes. - El iPhone no está conectado. - Sin conexión Bluetooth USB mientras se esté actualizando el firmware. ! Sólo se puede iniciar la actualización de firmware cuando - Pioneer AVH-X1600DVD | Owner's Manual - Page 186
ón de la versión del firmware Si se produce un fallo Apps Completar Ajuste de Imagen para el sistema de navegación cuando Conexión de dispositivo está en NAV. Completar Ajuste de Imagen para AppRadio Mode cuando Conexión de dispositivo está en iPhone via USB o iPhone via Bluetooth. MirrorLink - Pioneer AVH-X1600DVD | Owner's Manual - Page 187
El idioma se puede cambiar para las siguien- tes opciones: - Menú de audio - Menú del sistema - Menú de configuración de vídeo - Menú de Bluetooth - Idioma de avisos Esta prohibido el uso de algunas operaciones de esta unidad mientras se conduce, o bien es necesario prestar especial atención cuando - Pioneer AVH-X1600DVD | Owner's Manual - Page 188
gina 150. Uso del teclado Teclado sólo está disponible en AppRadio Mode. Consulte Configuración del teclado en la página 168. Ajuste Bluetooth (Función de AVH-X5600BHS/AVH-X4600BT/AVHX3600BHS/AVH-X2600BT) Es necesario activar la fuente Bluetooth Audio para utilizar un reproductor de audio Bluetooth - Pioneer AVH-X1600DVD | Owner's Manual - Page 189
(cámara posterior) PRECAUCIÓN Pioneer recomienda utilizar una cámara mostrar imágenes de la cámara retrovisora por error mientras está avanzando. ! Para dejar de ver AVH-X3600BHS, AVHX2600BT o AVH-X1600DVD, conecte primero un cable de extensión de micrófono (adquirido por separado) a la entrada AUX - Pioneer AVH-X1600DVD | Owner's Manual - Page 190
el conector de entrada de esta unidad. AVH-X5600BHS y AVH-X4600BT AVH-X3600BHS, AVH-X2600BT y AVH- X1600DVD Cable de extensión (Se vende por separado Señal de Video en el menú del sistema. Se muestran los elementos de Configurar Señal de Video. ! AV - Ajusta la señal de vídeo AV ! AUX - Ajusta la - Pioneer AVH-X1600DVD | Owner's Manual - Page 191
de Video. 2 Bluetooth Sección 22 23 Funciones del menú de conexión Bluetooth (Función de AVH-X5600BHS/AVH-X4600BT/AVHX3600BHS/AVH Bluetooth en la página 192. Para más información relacionada con el proceso para establecer las conexiones inalámbricas Bluetooth, consulte el manual aparece Error. - Pioneer AVH-X1600DVD | Owner's Manual - Page 192
de unos metros de distancia entre sí. El ajuste inicial de esta función es activado. Para conectar su dispositivo Bluetooth a esta unidad a través de tecnología inalámbrica Bluetooth, debe introducir el código PIN en su teléfono para verificar la conexión. El código predefinido es 0000, aunque - Pioneer AVH-X1600DVD | Owner's Manual - Page 193
el panel táctil no puede ajustarse correctamente, consulte a su concesionario local Pioneer. 4 Pulse el botón de inicio para completar el ajuste de cuatro simultáneamente, toque ambas. Acerca de los métodos de conexión AUX Puede conectar equipos auxiliares a esta unidad. 3 Toque cada una de - Pioneer AVH-X1600DVD | Owner's Manual - Page 194
estéreo en el conector de entrada AUX en esta unidad. Consulte Conexión del OFF (apagado). 1 Conecte el iPhone o teléfono inteligente a la unidad '17'' x 12 Mix ON OFF S.Rtrv All App Sound AAppppr Vol.12 -05'29'' 1 2 cuando desee emitir sonido para el AppRadio Mode, como el sonido de navegaci - Pioneer AVH-X1600DVD | Owner's Manual - Page 195
aplicables, estas normas deben respetarse y no deben usarse las funciones de DVD de esta unidad. PRECAUCIÓN ! No haya un agujero en el compartimento los asientos. ! El cable negro es el cable a tierra. Cuando instale esta unidad o el amplificador de potencia (vendido por separado), asegúrese - Pioneer AVH-X1600DVD | Owner's Manual - Page 196
navegación adicional Pioneer (vendida Cable conectarse. Fusible (10 A) Toma AUX (3,5 ø) Utilice un cable con AVH-X5600BHS/AVH-X4600BT/AVH-X3600BHS/AVH-X2600BT) (Función de AVH-X5600BHS/AVH-X4600BT/AVH-X3600BHS/AVH manual de operación). La salida de altavoz de subgraves de esta unidad es monof - Pioneer AVH-X1600DVD | Owner's Manual - Page 197
. La salida de vídeo posterior de este producto sirve para conectar un display que permita a los pasajeros de los asientos traseros ver un DVD, etc. ADVERTENCIA No instale jamás un display trasero en una ubicación que sea visible para el conductor mientras el vehículo está en marcha. Pantalla con - Pioneer AVH-X1600DVD | Owner's Manual - Page 198
conector lightning (vendido separadamente) Cable RGB a VGA (CD-IV203) (vendido separadamente) Cable USB (Suministrado con esta unidad) Conecte a dispositivo USB vendido por separado. Cable Lighting a USB (CD-IV203) (vendido separadamente) Adaptador de conector Lightning a VGA (productos Apple Inc - Pioneer AVH-X1600DVD | Owner's Manual - Page 199
Entrada USB/iPod Este producto Entrada AUX (AUX) Ésta es una entrada remota conectada. Tenga en cuenta que ésta no es la entrada AUX. iPod con el adaptador de vínculo del smartphone) Conexión para actualizar el firmware del adaptador de conexión de teléfono inteligente Incluso si se guarda - Pioneer AVH-X1600DVD | Owner's Manual - Page 200
Conexión del sintonizador opcional SiriusXM (Función de AVH-X5600BHS/AVH-X3600BHS) Este producto Entrada SiriusXM BUS Cable un frenazo brusco. ! El láser semiconductor se dañará si se sobrecalienta. Instale esta unidad alejada de zonas que alcancen altas temperaturas, como cerca de la salida - Pioneer AVH-X1600DVD | Owner's Manual - Page 201
abrazadera del micrófono en el parasol. Levante el parasol e instale la pinza del micrófono (si lo baja reduce la capacidad del reconocimiento de voz). Instalación del micrófono (Función de AVH-X5600BHS/AVH-X4600BT/AVH- 1 X3600BHS/AVH-X2600BT) PRECAUCIÓN Es muy peligroso que el cable del micr - Pioneer AVH-X1600DVD | Owner's Manual - Page 202
del mando a distancia. La batería tiene poca energía. Instale una batería nueva. Algunas operaciones están prohibidas con determinados la fuente y seleccione el ajuste correcto para Polaridad de Camara. (Página 189) DVD No se puede reproducir el disco. El disco cargado tiene un número de regi - Pioneer AVH-X1600DVD | Owner's Manual - Page 203
seleccionados en el menú Ajuste de Video. El DVD que se está reproduciendo no tiene di Bluetooth entre esta unidad y el teléfono móvil. Mensajes de error Anote el mensaje de error antes de contactar con su concesionario o con el servicio técnico oficial de Pioneer más cercano. Los mensajes de error - Pioneer AVH-X1600DVD | Owner's Manual - Page 204
o con el Servicio técnico oficial Pioneer. No hay señal El sintonizador SiriusXM Cambie el DVD por uno que tenga el número de región correcto. Error-02-XX/ oiga sonido. Tasa de cuadros de video no es soportada La velocidad de cuadros de audio portátil USB/memoria USB conectado contiene archivos WMA - Pioneer AVH-X1600DVD | Owner's Manual - Page 205
un reproductor de audio portátil USB/memoria USB compatible. Error-02-9X/-DX Error de comunicación. Realice una de desaparezca y oiga sonido. Tasa de cuadros de video no es soportada La velocidad de cuadros del el iPod y reinícielo. Error-02-67 La versión de firmware del iPod es antigua. Actualice - Pioneer AVH-X1600DVD | Owner's Manual - Page 206
éfono inteligente. Si el mensaje de error se sigue mostrando después de hacer lo mencionado anteriormente, no dude en contactar con el distribuidor o con el servicio técnico oficial de Pioneer. There is no supported application on your MirrorLink device. No se han encontrado aplicaciones compatibles - Pioneer AVH-X1600DVD | Owner's Manual - Page 207
en contactar con el distribuidor o con el servicio técnico oficial de Pioneer. USB connection was temporarily disabled for device protection. Do not connect this USB device to the unit. To restart USB, restart the unit. Hay un error de sobre corriente. No utilice este dispositivo de almacenamiento - Pioneer AVH-X1600DVD | Owner's Manual - Page 208
potencia de la batería. 208 Es Información adicional Indica que el dispositivo Bluetooth conectado solo es compatible con teléfonos Bluetooth. Indica que el dispositivo Bluetooth conectado solo es compatible con audio Bluetooth. Muestra el título del álbum cuando se recibe información de etiqueta - Pioneer AVH-X1600DVD | Owner's Manual - Page 209
móvil. Indica que hay un teléfono Bluetooth conectado. Utilice discos de 12 cm. Los Discos CD-R/RW y DVD-R/RW que no estén finalizados ! DVD-RAM No toque la para que se adapte a la temperatura USB Se pueden producir los siguientes problemas según el dispositivo de almacenamiento externo (USB - Pioneer AVH-X1600DVD | Owner's Manual - Page 210
reproducir correctamente. No deje el reproductor de audio portátil USB/memoria USB expuestos a la luz solar directa durante un largo periodo de sido finalizados (cerrados). Es posible que no se puedan reproducir los discos DVD-R/RW debido a sus características, por las ralladuras y la suciedad que - Pioneer AVH-X1600DVD | Owner's Manual - Page 211
: hasta 3 500 para DVD-R/ RW Sistema de archivos: ISO 9660 Nivel 1 y 2, Romeo, Joliet, UDF 1.02 (DVD-R/RW) Reproducción multisesión: (MMC). PRECAUCIÓN ! Pioneer no asume ninguna responsabilidad por la pérdida de datos en la memoria USB/ el reproductor de audio portátil USB incluso si la pérdida - Pioneer AVH-X1600DVD | Owner's Manual - Page 212
manuales del iPod. Audiolibro, podcast: compatible PRECAUCIÓN Pioneer 3ª generación - iPhone 5 - iPhone 4S - iPhone 4 - iPhone 3GS - iPhone 3G - iPhone La información de esta función, actualice el firmware de su iPod. Secuencia dispositivo de almacenamiento externo (USB). Sin embargo, dependiendo - Pioneer AVH-X1600DVD | Owner's Manual - Page 213
Para utilizar la tecnología inalámbrica Bluetooth, los dispositivos deben ser capaces de interpretar ciertos perfiles. Esta unidad es compatible con los siguientes: ! GAP (Generic Access Profile) ! SDP (Service Discovery Protocol) ! OPP (Object Push Profile) ! HFP (Hands Free Profile) ! HSP - Pioneer AVH-X1600DVD | Owner's Manual - Page 214
Bluetooth La marca literal y los logotipos Bluetoothâ son marcas registradas propiedad de Bluetooth SIG, Inc., y cualquier uso de dichas marcas por PIONEER ni distribuir sin una licencia de Microsoft Licensing, Inc. iPod y iPhone iPhone, iPod, iPod classic, iPod nano y iPod touch son marcas - Pioneer AVH-X1600DVD | Owner's Manual - Page 215
iPod o iPhone puede afectar la operación inalámbrica. Androidä & Google Play Android y Google Play a vídeo DivX. ACERCA DE DIVX VIDEO-ON-DEMAND (VÍDEO BAJO DEMANDA): este PIONEER CORPORATION. MirrorLink MirrorLink Certifiedä, el logotipo de Design Onlyä, MirrorLinkä y el logotipo de MirrorLink - Pioneer AVH-X1600DVD | Owner's Manual - Page 216
5 Hz a 44 000 Hz (con DVD, a una frecuencia de muestreo de 96 kHz) Relación de señal a ruido 96 dB (1 kHz) (red IHF-A) (nivel RCA) (AVH-X5600BHS/AVH-X4600BT) Relación de señal a ruido 91 dB (1 kHz) (red IHF-A) (nivel RCA) (AVH-X3600BHS/AVH-X2600BT/AVH-X1600DVD) Nivel de salida: Vídeo 1,0 Vp - Pioneer AVH-X1600DVD | Owner's Manual - Page 217
USB Especificación de la norma USB USB 1.1, USB 2.0 velocidad máxima (para archivos de vídeo) USB 2.0 velocidad alta (para archivos de audio) Consumo máximo de corriente 1,0 A USB IHF-A) Bluetooth (AVH-X5600BHS/AVH-X4600BT/AVH-X3600BHS/AVHX2600BT) Versión Certificada para Bluetooth 3.0 Potencia - Pioneer AVH-X1600DVD | Owner's Manual - Page 218
218 Es - Pioneer AVH-X1600DVD | Owner's Manual - Page 219
Es 219 Español - Pioneer AVH-X1600DVD | Owner's Manual - Page 220
theft. 2 Receive updates on the latest products and technologies. 3 Download owner's manuals, order product fabrication optimales de produits répondant aux attentes des clients. 1 Registre TEL: 1-877-283-5901 TEL: 905-479-4411 PIONEER ELECTRONICS DE MEXICO, S.A. de C.V. Blvd.Manuel Avila Camacho
-
 1
1 -
 2
2 -
 3
3 -
 4
4 -
 5
5 -
 6
6 -
 7
7 -
8
-
9
-
10
-
11
-
12
-
13
-
14
-
15
-
16
-
17
-
18
-
19
-
20
-
21
-
22
-
23
-
24
-
25
-
26
-
27
-
28
-
29
-
30
-
31
-
32
-
33
-
34
-
35
-
36
-
37
-
38
-
39
-
40
-
41
-
42
-
43
-
44
-
45
-
46
-
47
-
48
-
49
-
50
-
51
-
52
-
53
-
54
-
55
-
56
-
57
-
58
-
59
-
60
-
61
-
62
-
63
-
64
-
65
-
66
-
67
-
68
-
69
-
70
-
71
-
72
-
73
-
74
-
75
-
76
-
77
-
78
-
79
-
80
-
81
-
82
-
83
-
84
-
85
-
86
-
87
-
88
-
89
-
90
-
91
-
92
-
93
-
94
-
95
-
96
-
97
-
98
-
99
-
100
-
101
-
102
-
103
-
104
-
105
-
106
-
107
-
108
-
109
-
110
-
111
-
112
-
113
-
114
-
115
-
116
-
117
-
118
-
119
-
120
-
121
-
122
-
123
-
124
-
125
-
126
-
127
-
128
-
129
-
130
-
131
-
132
-
133
-
134
-
135
-
136
-
137
-
138
-
139
-
140
-
141
-
142
-
143
-
144
-
145
-
146
-
147
-
148
-
149
-
150
-
151
-
152
-
153
-
154
-
155
-
156
-
157
-
158
-
159
-
160
-
161
-
162
-
163
-
164
-
165
-
166
-
167
-
168
-
169
-
170
-
171
-
172
-
173
-
174
-
175
-
176
-
177
-
178
-
179
-
180
-
181
-
182
-
183
-
184
-
185
-
186
-
187
-
188
-
189
-
190
-
191
-
192
-
193
-
194
-
195
-
196
-
197
-
198
-
199
-
200
-
201
-
202
-
203
-
204
-
205
-
206
-
207
-
208
-
209
-
210
-
211
-
212
-
213
-
214
-
215
-
216
-
217
-
218
-
219
-
220
 |
 |
Owner
’
s Manual
Mode d
’
emploi
Manual de instrucciones
DVD RDS AV RECEIVER
AUTORADIO AV RDS LECTEUR DE DVD
RADIO AV RDS CON DVD
AVH-X5600BHS
AVH-X4600BT
AVH-X3600BHS
AVH-X2600BT
AVH-X1600DVD
Important (Serial number)
The serial number is located on the bottom of this unit. For your own security and
convenience, be sure to record this number on the enclosed warranty card.
Important (Numéro de série)
Le numéro de série se trouve au bas de cet appareil. Pour votre sécurité et votre
commodité, veillez à noter ce numéro sur la carte de garantie fournie.
Importante (Número de serie)
El número de serie se encuentra en la parte inferior de esta unidad. Por su
propia seguridad y comodidad, asegúrese de anotar este número en la tarjeta de
garantía que se adjunta.
English
Español
Français