Pioneer CNDV-1000HD Operation Manual - Page 6
Time restrictions, 2D Twin Map View, Twin Map View, Address Book Icon, 3D Landmark - map update
 |
View all Pioneer CNDV-1000HD manuals
Add to My Manuals
Save this manual to your list of manuals |
Page 6 highlights
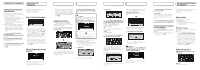
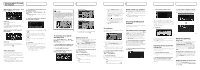
Renewed points through this upgrade Input screen for "Address Book", "Phone Book", "LIBRARY (Music Library)" Others, 0-9: Touch to toggle the selection. Small, Caps.: This is a new feature. Either lowercase or uppercase letters can be selected. Touch to toggle the selection. Input screen for "Edit VIN" and "Edit Policy Number" Small, Caps.: This is a new feature. Either lowercase or uppercase letters can be selected. Touch to toggle the selection. Time restrictions This is a new feature. This setting controls whether streets or bridges have traffic restrictions during a certain time should be taken into account. p If you want to set your route to avoid raised draw bridges, select "On". p Settings marked with an asterisk (*) show that these are default or factory settings. 1 Touch the key in the following order in the navigation menu. [Destination] d [Route Overview] d [Options] p "Route Overview" is active only when the route is set. 2 Touch [Time restrictions] to change the route calculation conditions. Touching this option switches the setting "On" or "Off". On*: Calculates a route while avoiding streets or bridges with traffic restrictions during a certain time. Off: Calculates a route while ignoring traffic restrictions. 3 Touch [OK]. The route is recalculated, and the Route confirmation screen appears. p The system may calculate a route that includes streets or bridges that are subject to traffic restrictions during a certain time even if "On" is selected. CAUTION If the time difference is not set correctly, the navigation system cannot consider traffic regulations correctly. Set the time difference correctly (For details, refer to the Operation Manual of your navigation system.) shows for routes that contain streets or bridges that are subject to traffic regulations during a certain time when the setting "Time restrictions" is "On". 2D Twin Map View The 2D map appears on the left screen. 3D Twin Map View 2D Twin Map View and 3D Twin Map View Either "2D Twin Map View" or "3D Twin Map View" can directly be selected in "View Mode Selection" screen. 1 Press the MAP button to display a map of the area around your current position. 2 Press the MAP button again. 3 Touch the mode name to select the mode you want to display. The 3D map appears on the left screen. p Touching anywhere on the map changes the map to the Scroll mode. Address Book Icon You can select whether to display the icons for the entries of "Address Book" on the map. p When you select "Address Book Icon Dis- play" in "Short-Cut Selection", you can switch this setting with the shortcut menu. p Settings marked with an asterisk (*) show that these are default or factory settings. 1 Touch the key in the following order in the navigation menu. [Map] d [Displayed Info] 2 Touch [Address Book Icon]. Each time you touch the key changes that setting. ! On*: Displays the icon on the map. ! Off: Hides the icon from the map. p Even if "Address Book Icon" is set to "Off", the alarm sounds when you approach the registered location and the set image pops up. To turn off the sound output and image pop up, select "No Sound" and "No Picture" for the entry. p If you set (dot), the registered name of that entry can be displayed on the map. The registered name does not appear if "Address Book Icon" is set to "Off". 3D Landmark You can select whether to display the 3D landmark on the map. p 3D landmark only appears when the view mode is "3D Twin Map View" and the map scale is set to 0.25 mile (200 m) or lower. p Settings marked with an asterisk (*) show that these are default or factory settings. 1 Touch the key in the following order in the navigation menu. [Map] d [Displayed Info] 2 Touch [3D Landmark]. Each time you touch the key changes that setting. ! On*: Displays the 3D landmark on the map. ! Off: Hides the 3D landmark on the map. Traffic event icon and line p Middle-sized icon is displayed on the map scale between 1 mile to 2.5 miles (2 km to 5 km). p The traffic-related items can be shown on the detailed city map. Browsing the XM special contents The following features have been modified to enhance ease of operation. Storing browsable information XM special contents can be stored as "My Favorites" so that it can be accessed without searching every time an update is needed. p The displayed items depend on the infor- mation that is sent from each station. p "My Favorites" can store up to 50 items. 1 Touch [Information] in the navigation menu, then touch [Set My Favorites]. The screen will display a list of categories. The information appearing on screen is automatically updated at regular intervals. 2 Touch a category you want to browse from the list. 3 Touch an item you wish to store. 3 Touch an item to display the contents. The texts appear on each items show the process of storing in a hierarchical way. If an item is divided into more detail categories, select the one from the list to narrow down the category. After narrowing down, the message confirming whether or not to register the item will appear. 4 Touch [OK]. If the storing step is successful, the confirmation screen will appear. Touch [OK] to complete the storing and return to the previous screen. Displaying favorite browsable Information You can check and delete the browsable information you registered. 1 Store the desired item (topic). = For details, refer to Storing browsable information. 2 Touch [Information] in the navigation menu, and then touch [My Favorites]. A list of registered items (topics) appears on the screen. Hands-free phoning Device name The default device name displayed on the cellular phone changes "PIONEER NAVI" to "PIONEER HDD NAVI". (If you already connected the Bluetooth unit, the name already set remains. If you restore the default setting, the device name becomes "PIONEER HDD NAVI".) The display of an unknown user's call Depending on the caller ID service, the phone number of the received call may not be displayed. [Unknown] appears instead in that case. Editing the entry in "Phone Book" You can edit [Pronunciation] to be used for voice recognition along with [Name], [Phone #], or [Picture].
-
 1
1 -
 2
2 -
 3
3 -
 4
4 -
 5
5 -
 6
6 -
 7
7 -
 8
8
 |
 |
