Pioneer DJM-350 Owner's Manual - Page 12
Press one of the [MASTER EFFECT GATE, CRUSH, JET - effects
 |
UPC - 884938111232
View all Pioneer DJM-350 manuals
Add to My Manuals
Save this manual to your list of manuals |
Page 12 highlights
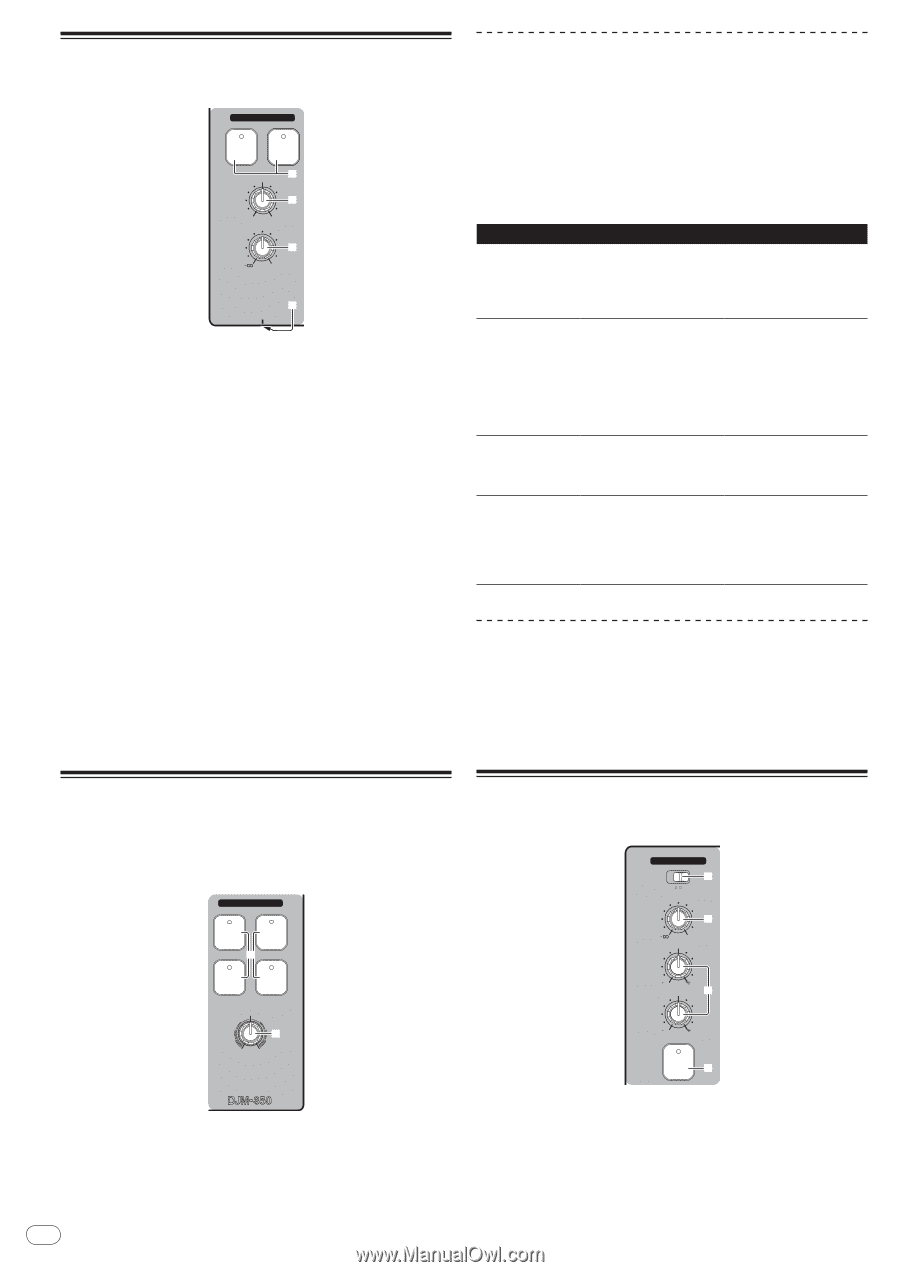
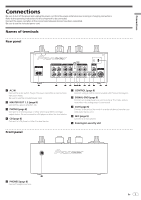
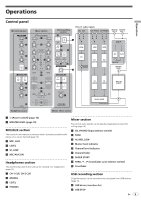
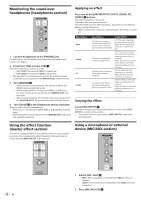
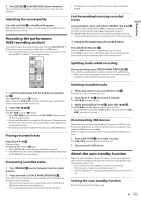
Monitoring the sound over headphones (headphones section) HEADPHONES CH-1 CUE CH-2 CUE 7 MIXING 8 CUE MASTER LEVEL 9 0 a PHONES 1 Connect headphones to the [PHONES] jack. For instructions on connections, see Connecting the input/output terminals on page 8. 2 Press [CH-1 CUE] or [CH-2 CUE] 7. Select the channel you want to monitor. - [CH-1 CUE]: The sound of [CH-1] is monitored. - [CH-2 CUE]: The sound of [CH-2] is monitored. ! This operation is not necessary to monitor the master channel sound (the sound output from the [MASTER OUT 1, 2] terminals). 3 Turn [MIXING] 8. - When turned counterclockwise: The volume of [CH-1] and [CH-2] becomes relatively louder. - At the center position: The sound of [CH-1] and [CH-2] has the same volume as the sound from the [MASTER OUT 1, 2] terminals. - When turned clockwise: The volume of the sound output from the [MASTER OUT 1, 2] terminals becomes relatively louder. 4 Turn [LEVEL] 9 in the headphones section clockwise. Sound is output from the headphones. ! Monitoring is canceled when [CH-1 CUE] or [CH-2 CUE] is pressed again. ! Monitoring of the sound output from the [MASTER OUT 1, 2] termi- nals cannot be canceled. Applying an effect Press one of the [MASTER EFFECT (GATE, CRUSH, JET, FILTER)] q buttons. The effect is applied to the sound. The button that was pressed flashes. The effect differs for the different buttons. For details on the different effects, see the table below. ! When a button that is flashing is pressed again, the effect is turned off. Effect Name GATE CRUSH JET FILTER Descriptions LEVEL/DEPTH The distinctive range is cut from the sound of the track's rhythm section to give variation to the rhythm. Left: The high range (high hat, etc.) is given variation. Right: The low range (bass drum, etc.) is given variation. The sound is moderately crushed, adding accent. Left: The sound is crushed and an effect as if the high range was gradually cut is achieved. Right: The sound is crushed and an effect as if the low range was gradually cut is achieved. An effect like a jet ascending and descending is achieved. Left: An effect like a jet descending is achieved. Right: An effect like a jet ascending is achieved. The sound of the high or low range is filtered out, greatly changing the tone. Left: An effect as if the high range was gradually cut is achieved. Right: An effect as if the low range was gradually cut is achieved. Varying the effect Turn [LEVEL/DEPTH] r. The effect changes according to the direction in which the [LEVEL/ DEPTH] is turned and its position. ! The original sound is output when [LEVEL/DEPTH] is set to the center position. Using the effect function (master effect section) This unit is equipped with four effect buttons. When an effect button is pressed, the corresponding effect is applied to the audio signals output from the [MASTER OUT 1, 2] terminals. MASTER EFFECT GATE JET q CRUSH FILTER LEVEL/DEPTH r 2 CHANNEL DJ MIXER 12 En Using a microphone or external device (MIC/AUX section) MIC /AUX 3 MIC AUX LEVEL 4 0 HI 12 12 LOW 5 12 12 MIC/AUX ON 6 1 Switch [MIC, AUX] 3. - [MIC]: The microphone connected to the [MIC] terminal is selected. - [AUX]: The external device connected to the [AUX] terminals is selected. 2 Press [MIC/AUX ON] 6.
-
 1
1 -
2
-
3
-
4
-
5
-
6
-
 7
7 -
 8
8 -
 9
9 -
 10
10 -
 11
11 -
 12
12 -
 13
13 -
 14
14 -
 15
15 -
 16
16 -
 17
17 -
18
-
19
-
20
 |
 |