Pioneer GEX-P920XM Owner's Manual - Page 3
Press FUNCTION to select MODE. - xm
 |
UPC - 012562759272
View all Pioneer GEX-P920XM manuals
Add to My Manuals
Save this manual to your list of manuals |
Page 3 highlights
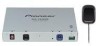
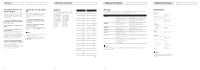
XM tuner Power supply for this unit When the head unit's power supply is OFF, this unit is also OFF. (Selecting a source other than XM tuner will not turn this product off.) This unit's power supply can be turned OFF if the ignition switch is turned OFF. If for any reason you want to switch the power of the unit OFF, switch the vehicle's ignition off (turn the ACC of your vehicle to OFF). Selecting the XM source 1 Press SOURCE to turn the head unit on. 2 Press SOURCE to select "XM" source. Press SOURCE repeatedly to switch between the following sources: XM tuner-Tuner-Television-DVD player/Multi-DVD player-Built-in CD player-Multi-CD player-External unit 1-External unit 2-AUX Note To quit listening to the XM tuner, press SOURCE to switch to another source or press SOURCE and hold until the head unit turns off. XM tuner Listening to XM These are the basic steps necessary to operate the XM. XM channel select setting indicator Shows what channel select setting has been selected. CH.No is displayed when CH NUMBER is selected, and CAT is displayed when CATEGORY is selected. XM channel number indicator Shows which XM channel number the tuner is tuned to. XM band indicator Shows the XM band which has been selected. XM preset number indicator Shows what XM preset has been selected. XM channel name Shows the channel name of broadcast channel. 1 Press SOURCE to select a XM source. 2 Press BAND to select a band. Press BAND until the desired band is displayed, XM1, XM2 or XM3. 3 Press or to select the desired channel. The channel number moves up or down successively. Channels that cannot currently be selected are skipped, and the next channel is selected. If you press and hold or , you can increase or decrease channel number continuously. You can also select a channel from a desired channel category. (Refer to "Switching the channel select mode".) 4 Press SOURCE and hold until the head unit turns off or press SOURCE to select another source. Notes • When you turn the power on, change the source to XM tuner, or select a channel, it may take a few seconds while this unit acquires and processes the satellite signal before you can hear anything. • Depending on the head unit, it may be possible to switch to channel number direct input mode using the allocated button on the remote control (e.g. DIRECT). For details, refer to the manual of the head unit. XM tuner Storing and recalling channels If you press any of the preset tuning buttons 1-6 you can easily store up to six channels for later recall with the touch of a button. • Memory and recall are for broadcasts. If you recall a memorized broadcast that has been moved to another channel, the channel to which the broadcast was moved is selected. When you find a channel that you want to store in memory, press one of the preset tuning buttons 1-6 and hold until the preset number stops flashing. The number you have pressed will flash in the preset number indicator and then remain lit. The selected channel has been stored in memory. The next time you press the same preset tuning button, the channel is recalled from memory. Switching the XM display XM channels each have a channel number and channel name. XM programing also carries the song or program title, the artist name and category when available. Press DISPLAY. Press DISPLAY repeatedly to switch between the following settings: Channel name-Artist name/feature- Song/program title-Channel category Notes • Up to 18 channels, six for each of the three XM bands, can be stored in memory. • When channel number select mode is selected, you can also use and to recall channels assigned to preset tuning buttons 1-6. • If a channel you have recalled cannot be selected, a message is displayed for 2 seconds and the unit returns to the operating status before the channel was recalled. XM tuner Introduction of advanced tuner operation Function display Shows the function status. Press FUNCTION to display the function name. Press FUNCTION to display the following function: MODE (Channel select mode) To return to the XM display, press BAND. Switching the channel select mode When selecting a channel, you can switch between selecting a channel by channel number or by channel category. Initially, channel number select mode is selected. 1 Press FUNCTION to select MODE. Press FUNCTION until MODE appears in the display. 2 Press or to select the desired channel select mode. Press or repeatedly to switch between the following settings: CH NUMBER (Channel number select mode)-CATEGORY (Channel category select mode) Note Depending on the head unit you are using, it may be possible to directly switch between the channel select mode using the allocated button (e.g. CLOCK). For details, refer to the manual of the head unit. En En En En
-
 1
1 -
 2
2 -
 3
3 -
 4
4
 |
 |