Pioneer SC-25 Owner's Manual
Pioneer SC-25 - Elite 7.1 Channels A/V THX Receiver Manual
 |
UPC - 012562957456
View all Pioneer SC-25 manuals
Add to My Manuals
Save this manual to your list of manuals |
Pioneer SC-25 manual content summary:
- Pioneer SC-25 | Owner's Manual - Page 1
Operating Instructions audio/video multi-channel receiver - Pioneer SC-25 | Owner's Manual - Page 2
MULTI-CHANNEL RECEIVER Model Number: SC-27 / SC-25 Responsible Party Name: PIONEER ELECTRONICS SERVICE, INC. for a Class B digital device, pursuant to Part 15 of the FCC Rules. These limits are installed and used in accordance with the instructions, may cause harmful interference to radio - Pioneer SC-25 | Owner's Manual - Page 3
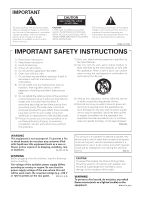
COVER (OR BACK). NO USER-SERVICEABLE PARTS INSIDE. REFER SERVICING TO QUALIFIED SERVICE PERSONNEL. The exclamation point within an equilateral triangle is intended to alert the user to the presence of important operating and maintenance (servicing) instructions in the literature accompanying the - Pioneer SC-25 | Owner's Manual - Page 4
and appropriate one fitted. Replacement and mounting of an AC plug on the power supply cord of this unit should be performed only by qualified service personnel. If connected to an AC outlet, the cut-off plug can cause severe electrical shock. Make sure it is properly disposed of after removal - Pioneer SC-25 | Owner's Manual - Page 5
(In case of SC-27 12 Remote control (In case of SC-25 15 Front panel 17 Display 18 03 Connecting your equipment Rear panel 20 Determining the speakers' application 22 Other speaker connection 22 Placing the speakers 23 THX speaker system setup 23 Some tips for improving sound quality 23 - Pioneer SC-25 | Owner's Manual - Page 6
Checking about the Accounts 81 Software update 82 Glossary 82 08 KURO supports the KURO LINK function . . . . . 85 KURO LINK Setup case of SC-27) Operating multiple receivers 96 Setting the remote to control case of SC-25) Operating multiple receivers 103 Setting the remote to control - Pioneer SC-25 | Owner's Manual - Page 7
Setup 129 Power ON Level Setup 129 Volume Limit Setup 129 Remote Control Mode Setup 130 Flicker Reduction Setup 130 13 Additional information Speaker Setting Guide 131 Positional relationship between speakers and monitor 132 Troubleshooting 132 Power 132 No sound 133 Other audio problems - Pioneer SC-25 | Owner's Manual - Page 8
EQ, Sound retriever or Dialog Enhancement ( setup (page 123) 14 Making maximum use of the remote control • SC-27 - Operating multiple receivers (page 96) • SC-27 - Setting the remote to control other components (page 96) • SC-25 - Operating multiple receivers (page 103) • SC-25 - Setting the remote - Pioneer SC-25 | Owner's Manual - Page 9
performance (high output of 770 W (SC-27)/700 W (SC-25) simultaneous) with high sound quality and reproduces the latest in multi-channel digital contents. • Easy setup using Advanced MCACC The Auto MCACC Setup provides a quick but accurate surround sound setup, which includes the advanced features - Pioneer SC-25 | Owner's Manual - Page 10
that you've received the following supplied accessories: • Setup microphone (cable: 5 m (16.4 ft.)) • Remote control unit • Dry cell batteries x2 • AM loop antenna • FM wire antenna • iPod cable • Power cord • Warranty card • These operating instructions Installing the receiver • When installing - Pioneer SC-25 | Owner's Manual - Page 11
SC-27 In case of SC-25 Operating range of remote control unit The remote control may not work properly if: • There are obstacles between the remote control and the receiver's remote please comply with governmental regulations or environmental public instruction's rules that apply in your country or - Pioneer SC-25 | Owner's Manual - Page 12
Remote control (In case of SC-27) 1 RECEIVER MAIN SOURCE 2 ZONE2 3 12 3 MULTI OPERATION DVD BD TV DVR HOME MEDIA VIDEO1 VIDEO2 HDMI GALLERY 4 USB iPod remote to control other components (see Controlling the rest of your system (In case of SC-27) on page 96): SETUP - Indicates the setup - Pioneer SC-25 | Owner's Manual - Page 13
, then switching to mono will improve the sound quality (page 56). NOISE CUT MODE 1 to 2 can be selected when receiving AM broadcasts. Set the remote control operation selector switch to RECEIVER first to access: STATUS - Press to check selected receiver settings (page 94). PHASE CTRL - Press to - Pioneer SC-25 | Owner's Manual - Page 14
of some of the buttons and the LCD light.1 14 Remote control operation selector switch Set to RECEIVER to operate the receiver, TV or SOURCE to operate the TV or the source device. When this switch is set to RECEIVER, the receiver can be controlled (used to select the white commands above - Pioneer SC-25 | Owner's Manual - Page 15
Controls and displays 02 Remote control (In case of SC-25) 12 1 2 3 4 5 6 7 8 9 10 11 RECEIVER SOURCE DVD BD DVR HDMI HOME MEDIA TV CD CD-R GALLERY iPod USB TUNER XM SIRIUS INPUT SELECT 12 HDMI OUT 3 SIGNAL SEL MCACC 45 SLEEP 6 SBch A.ATT DIMMER 789 D.ACCESS CH LEVEL /CLR 0 - Pioneer SC-25 | Owner's Manual - Page 16
for DVD/DVR units. 9 REMOTE SETUP Use to input the preset code when making remote control settings and to set the remote control mode (page 103). 10 sound or restores the sound if it has been muted (adjusting the volume also restores the sound). 16 RECEIVER Switches the remote to control the receiver - Pioneer SC-25 | Owner's Manual - Page 17
iPod iPhone (TUNE) HOME MENU RETURN HDMI 4 USB VIDEO CAMERA MCACC SETUP MIC PHONES 16 17 18 1 STANDBY/ON Switches the receiver between on and standby. Power indicator lights when the receiver Remote sensor Receives the signals from the remote control (see Operating range of remote - Pioneer SC-25 | Owner's Manual - Page 18
iPod as an audio and video source, or connect a USB device for audio and photo playback (page 43). 20 MCACC SETUP MIC jack Use to connect the supplied microphone (page 46). 21 PHONES jack Use to connect headphones. When the headphones are connected, there is no sound output from the receiver. L/R - - Pioneer SC-25 | Owner's Manual - Page 19
received. STEREO - Lights when a stereo FM broadcast is being received in auto stereo mode. MONO - Lights when the mono mode is set using MPX. 13 SOUND Remote control mode indicator Lights to indicate the receiver's remote control mode setting. (Not displayed when set to 1.) (SC-27: page 96, SC-25: - Pioneer SC-25 | Owner's Manual - Page 20
SEE INSTRUCTION MANUAL Class SC-27), x2 (SC-25)) Use for digital audio sources, including DVD players/ recorders, digital satellite receivers, CD players, etc. See also The Input Setup menu on page 48 to assign the inputs. 5 Optical digital audio inputs (x4)/outputs (x2) Use the OUT jack - Pioneer SC-25 | Owner's Manual - Page 21
Connecting a SiriusConnect™ tuner on page 37. 8 Remote inputs/output Use for connection to an external remote control sensor for use in a MULTI-ZONE setup, for example. See Connecting an IR receiver on page 40. 9 Control input/output Use to connect other Pioneer components so that you can control - Pioneer SC-25 | Owner's Manual - Page 22
of the connections shown below other than [1] (see Selecting the Surr Back system on page 27). [1] 7.1ch surround connection (Simple connection & Best surround) *Default setting These connections prioritize surround sound with a speaker layout like that in a movie theater. • Surr Back System setting - Pioneer SC-25 | Owner's Manual - Page 23
THX speaker system setup If you are using a THX certified subwoofer use the THX INPUT jack on the subwoofer (if your subwoofer has one) or switch the filter position to THX on your subwoofer. See also THX Audio Setting on page 127 to make the settings that will give you the best sound - Pioneer SC-25 | Owner's Manual - Page 24
on the receiver comprises a power cord before touching any uninsulated parts. • Make sure that all speakers are securely installed. This not only improves sound quality, but also reduces the risk of damage terminal. Important • Please refer to the manual that came with your speakers for details on - Pioneer SC-25 | Owner's Manual - Page 25
SURROUND SURROUND BACK L R SPEAKERS Class 2 Wiring R SURROUND BACK/ B L (Single) SELECTABLE SEE INSTRUCTION MANUAL CAUTION: SPEAKER IMPEDANCE 6 Ω - 16 Ω . ATTENTION: ENCEINTE D'IMPEDANCE DE 6 Ω - 16 - Left Speaker B - Right ZONE 2 setting ZONE 2 - Left ZONE 2 - Right Surround right 25 en - Pioneer SC-25 | Owner's Manual - Page 26
SURROUND BACK/ B L (Single) SELECTABLE SEE INSTRUCTION MANUAL CAUTION: SPEAKER IMPEDANCE 6 Ω - 16 Ω . Your speakers can also be bi-wired if they support biamping. • With these connections, the Surr Back speaker cords to the speaker terminal on the receiver. Using a banana plug for the second - Pioneer SC-25 | Owner's Manual - Page 27
25. 2 Select 'Speaker B' from the Surr Back System menu. See Surround back speaker setting on page 124 to do this. Bi-Amping setup Bi-amping connection of the front speakers for high sound quality with 5.1-channel surround sound output terminals on this receiver. The receiver selects the first 27 en - Pioneer SC-25 | Owner's Manual - Page 28
OUT jacks. The only exception is HDMI: since this resolution cannot be downsampled, you must connect your monitor/TV to the receiver's HDMI video outputs when connecting this video source.1 If several video components are assigned to the same input function (see The Input Setup - Pioneer SC-25 | Owner's Manual - Page 29
connect it to this receiver using a commercially available HDMI cable. If the TV and playback components support the Pioneer KURO LINK feature, Class 2 Wiring R SURROUND BACK/ B L (Single) R SELECTABLE SEE INSTRUCTION MANUAL CAUTION: SPEAKER IMPEDANCE 6 Ω - 16 Ω . ATTENTION: ENCEINTE D'IMPEDANCE - Pioneer SC-25 | Owner's Manual - Page 30
BACK/ B L (Single) SELECTABLE SEE INSTRUCTION MANUAL CAUTION: SPEAKER IMPEDANCE 6 Ω - 16 Ω . ATTENTION: ENCEINTE D'IMPEDANCE DE 6 Ω - 16 Ω . SELECTABLE VOIR LE MODE D'EMPLOI RS-232C • If you want to listen to the sound of the TV over the receiver, connect the receiver and TV with audio cables - Pioneer SC-25 | Owner's Manual - Page 31
HDMI input) and DVD player (or other playback component) to the receiver. • With these connections, the picture is not output to the SPEAKERS Class 2 Wiring R SURROUND BACK/ B L (Single) SELECTABLE SEE INSTRUCTION MANUAL CAUTION: SPEAKER IMPEDANCE 6 Ω - 16 Ω . ATTENTION: ENCEINTE D'IMPEDANCE - Pioneer SC-25 | Owner's Manual - Page 32
receiver's different input terminals. Refer to The Input Setup COAX-2 OPT-4 a.SC-27 only About HDMI1 problem with displaying video this is not a malfunction. • Depending on the component you have connected, using a DVI connection may result in unreliable signal transfers. • This receiver supports - Pioneer SC-25 | Owner's Manual - Page 33
up the receiver you'll need to tell the receiver which input you connected the recorder to (see also The Input Setup menu on page SPEAKERS Class 2 Wiring R SURROUND BACK/ B L (Single) SELECTABLE SEE INSTRUCTION MANUAL CAUTION: SPEAKER IMPEDANCE 6 Ω - 16 Ω . ATTENTION: ENCEINTE D'IMPEDANCE DE - Pioneer SC-25 | Owner's Manual - Page 34
receiver which input you connected the set-top box to (see The Input Setup menu on page 48). STB Connecting the multichannel analog inputs For DVD Audio and SACD playback, your DVD player may have 5.1, 6.1 or 7.1 channel analog outputs (depending on whether your player supports INSTRUCTION MANUAL - Pioneer SC-25 | Owner's Manual - Page 35
receiver you'll need to tell the receiver which input you connected the component to (see also The Input Setup R SURROUND BACK/ B L (Single) SELECTABLE SEE INSTRUCTION MANUAL CAUTION: SPEAKER IMPEDANCE 6 Ω - 16 Ω . countries. • With WMA9 Pro, sound problems may occur depending on your computer - Pioneer SC-25 | Owner's Manual - Page 36
hear sound only from the pre-outs, switch the speaker system to OFF, or simply disconnect any speakers that are connected directly to the receiver. in a direction giving the best reception. 5 Connect the FM wire antenna in the same way as the AM loop antenna. For best results, extend the FM antenna - Pioneer SC-25 | Owner's Manual - Page 37
service to begin receiving broadcasts. 75 Ω coaxial cable ANTENNA FM UNBAL 75 AM LOOP To improve AM reception, connect a 5 m to 6 m (16 ft. to 20 ft.) length of vinyl-coated wire to the AM LOOP terminals without disconnecting the supplied AM loop antenna. For the best INSTRUCTION MANUAL - Pioneer SC-25 | Owner's Manual - Page 38
L R SPEAKERS SELECTABLE SEE INSTRUCTION MANUAL CAUTION: SPEAKER IMPEDA ATTENTIO jack is connected. d.SC-27 only: The video convert function does not work for ZONE 2. Connect the composite video and component video to the same types of jacks for the inputs and outputs. Note 1 You can't use sound - Pioneer SC-25 | Owner's Manual - Page 39
IN IR IN 1 IN 2 OUT IN CONTROL OUT VIDEO ZONE 2 ZONE 3 OUT OUT L R SPEAKERS SELECTABLE SEE INSTRUCTION MANUAL CAUTION SPEAKER IMPE ATTENTIO ENCEINTE D'IM SELECTABLE VOIR LE MOD D'EMPLOI RS-232C Note 1 SC-27 only: COMPONENT VIDEO ZONE 2 OUT can be used to output clear images. 39 en - Pioneer SC-25 | Owner's Manual - Page 40
Pioneer S component RS-232C CONTROL OUT IN IR receiver 2 Connect the IR IN jack of another component to the IR OUT jack on the rear of this receiver to link it to the IR receiver. Please see the manual supplied with your IR receiver SPEAKERS SELECTABLE SEE INSTRUCTION MANUAL CAUTION: SPEAKER - Pioneer SC-25 | Owner's Manual - Page 41
the The Input Setup menu on 3D jack on the back panel of this receiver (the cable must be cross type, female-female). The software to output the results is available from the support area of the Pioneer website (http:// www.pioneerelectronics.com/PUSA/ Home+Entertainment+Custom+Install). Instructions - Pioneer SC-25 | Owner's Manual - Page 42
jack on your computer to the 9-pin RS-232C jack on this receiver L R SPEAKERS SELECTABLE SEE INSTRUCTION MANUAL CAUTION SPEAKER IMPE ATTENTI ENCEINTE input using HDMI, INPUT SELECT (remote) or the INPUT SELECTOR dial ( iPod iPhone USB MULTI-ZONE SPEAKERS MCACC SETUP MIC PHONES This receiver - Pioneer SC-25 | Owner's Manual - Page 43
instructions on playing the USB device, see Playing a USB device on page 53. CONTROL ON/OFF TUNER EDIT BAND AUTO SURR/ALC/ HOME STANDARD ADVANCED STEREO STREAM DIRECT THX SURROUND SURROUND HDMI 4 VIDEO CAMERA iPod iPhone USB MULTI-ZONE SPEAKERS MCACC SETUP MIC PHONES This receiver CONTROL - Pioneer SC-25 | Owner's Manual - Page 44
on the back of the receiver. 2 Plug the other end into a power outlet.1 CAUTION • Handle the power cord by the plug part. Do not pull out once in a while. If you find it damaged, ask your nearest Pioneer authorized independent service company for a replacement. • Do not use any power cord other than - Pioneer SC-25 | Owner's Manual - Page 45
remote controls included with the SC-27 and SC-25. For the SC-27's remote control, set the remote control operation selector switch to RECEIVER. For the SC-25's remote control, press the RECEIVER button. When "set the remote control to the receiver operation mode" is indicated in these instructions - Pioneer SC-25 | Owner's Manual - Page 46
• The test tones used in the Auto MCACC Setup are output at high volume. SC-27: RECEIVER MAIN ZONE2 SOURCE 3 MULTI OPERATION DVD BD TV DVR HOME MEDIA VIDEO1 VIDEO2 HDMI GALLERY USB iPod CD CD-R TUNER MULTI CH PHONO IN XM SIRIUS SC-25: TV SOURCE RECEIVER CH VOL VOL TV CONTROL INPUT AUDIO - Pioneer SC-25 | Owner's Manual - Page 47
connections. If there doesn't seem to be a problem, you can simply use / to select the receiver upon completion of the Auto MCACC Setup. The settings made in the Auto MCACC Setup should give you excellent surround sound from your system, but it is also possible to adjust these settings manually - Pioneer SC-25 | Owner's Manual - Page 48
so the buttons on the remote control correspond to the components you've connected. SC-27: RECEIVER MAIN ZONE2 SOURCE 3 MULTI OPERATION DVD BD TV DVR HOME MEDIA VIDEO1 VIDEO2 HDMI GALLERY USB iPod CD CD-R TUNER MULTI CH PHONO IN XM SIRIUS SC-25: TV SOURCE RECEIVER CH VOL VOL TV CONTROL - Pioneer SC-25 | Owner's Manual - Page 49
Setup A/V RECEIVER Input Setup menu. Input function default and possible settings The terminals on the receiver receiver differently from (or in addition to) the defaults below, see The Input Setup menu on page 48 to tell the receiver (HDMI-4)b HOME MEDIA GALLERY iPod/USB XM CD COAX-2 CD - Pioneer SC-25 | Owner's Manual - Page 50
remote controls included with the SC-27 and SC-25. For the SC-27's remote control, set the remote control operation selector switch to RECEIVER. For the SC-25's remote control, press the RECEIVER button. When "set the remote control to the receiver operation mode" is indicated in these instructions - Pioneer SC-25 | Owner's Manual - Page 51
For details, see Switching the iPod controls on page 52. 2 SC-27 only: Set the remote control operation selector switch to SOURCE. 3 Press iPod USB on the remote control to switch the receiver to the iPod/USB. Loading appears in the GUI screen while the receiver verifies the connection and retrieves - Pioneer SC-25 | Owner's Manual - Page 52
to return to the iPod top menu screen. Switching the iPod controls2 You can switch over the iPod controls between the iPod and the receiver. 1 Press iPod CTRL to switch the iPod controls.3 This enables operation and display on your iPod, and this receiver's remote control and GUI screen become - Pioneer SC-25 | Owner's Manual - Page 53
receiver. 1 Switch on the receiver and your TV. See Connecting a USB device on page 43.2 2 SC-27 only: Set the remote control operation selector switch to SOURCE. 3 Press iPod USB on the remote control to switch the receiver to the iPod USB playback. • Pioneer cannot guarantee compatibility ( - Pioneer SC-25 | Owner's Manual - Page 54
for your USB memory device. Press iPod USB to switch the remote control to the iPod/USB operation mode. Button What it does Use / to select 'Photos' from the USB Top menu. USB Top A/V RECEIVER Music Photos Slideshow Setup 2/3 2 Use / to select a folder, then press ENTER to browse that - Pioneer SC-25 | Owner's Manual - Page 55
About playable file formats The USB function of this receiver supports the following file formats. Note that some file encoded using Windows Media Codec 9 may be playable but some parts of the specification are not supported; specifically, Pro, Lossless, Voice. Photo files Category JPEG Extension - Pioneer SC-25 | Owner's Manual - Page 56
BAND T.EDIT GUIDE PRESET ENTER PRESET CATEGORY HOME MENU TUNE iPod CTRL RETURN DIRECT PGM HDD THX STEREO STANDARD ADV SURR DVD PHASE CTRL STATUS ANT MPX PQLS MEMORY AUDIO INFO CH DISP MULTI OPE TV CTRL RECEIVER REMOTE SETUP 1 SC-27 only: Set the remote control operation selector - Pioneer SC-25 | Owner's Manual - Page 57
already. 1 SC-27 only: Set the remote control operation setup instructions are provided with the satellite tuners. Whichever service you choose, there are a variety of programming packages available, including the option of adding "The Best of SIRIUS" programming to your XM tuner or "The Best - Pioneer SC-25 | Owner's Manual - Page 58
25 Channel Number Category : Hits Channel Guide A/V RECEIVER 0 RADIO ID 1 Preview 2 Highway 4 America 5 Hank's Place 6 Fifties (50's) 7 Sixties (60's) 8 Seventies (70's) Category Exit 1 SC-27 only: Set the remote achieve optimal surround sound from XM radio. XM HD Surround Sound is available on - Pioneer SC-25 | Owner's Manual - Page 59
features.1 1 Set the remote control operation selector switch to SOURCE (SC-27 only), then press TOP best reception, you may need to move the SiriusConnect™ tuner antenna near a window (refer to the manual receiver to the SiriusConnect™ tuner. After connecting, you will be able to use this receiver - Pioneer SC-25 | Owner's Manual - Page 60
Channel Number Category : Decades Composer : Chuck Berry Channel Guide A/V RECEIVER 184 Weather 185 TWN 186 Hardcore Sports 187 InfoPlus 188 RCI Plus 192 Rock Velours 193 energie2 198 Playboy Category Exit 1 SC-27 only: Set the remote control operation selector switch to SOURCE. 2 Press / to - Pioneer SC-25 | Owner's Manual - Page 61
remote controls included with the SC-27 and SC-25. For the SC-27's remote control, set the remote control operation selector switch to RECEIVER. For the SC-25's remote control, press the RECEIVER button. When "set the remote control to the receiver operation mode" is indicated in these instructions - Pioneer SC-25 | Owner's Manual - Page 62
modes provide basic surround sound for stereo and multichannel sources.1 SC-27: iPod CTRL STATUS TUNE PHASE CTRL CH LEVEL SOURCE TV RECEIVER CH VOL VOL THX MPX PQLS MEMORY AUTO/ALC/ DIRECT STEREO STANDARD ADV SURR PGM MENU SIGNAL SEL SLEEP DIMMER AUDIO SC-25: TV CONTROL A.ATT SBch - Pioneer SC-25 | Owner's Manual - Page 63
iPod CTRL TUNE STATUS PHASE CTRL RETURN CH LEVEL THX MPX PQLS MEMORY AUTO/ALC/ DIRECT STEREO STANDARD ADV SURR PGM MENU SC-25: TV CONTROL SIGNAL SEL SLEEP DIMMER AUDIO PGM HDD THX DVD PHASE CTRL STATUS ANT MPX PQLS MEMORY AUDIO INFO CH DISP MULTI OPE TV CTRL RECEIVER REMOTE SETUP - Pioneer SC-25 | Owner's Manual - Page 64
06 Listening to your system SC-25: AUTO/ALC/ MENU DIRECT STEREO STANDARD ADV SURR PGM HDD DVD THX PHASE CTRL STATUS ANT MPX PQLS MEMORY AUDIO INFO CH DISP MULTI OPE TV CTRL RECEIVER REMOTE SETUP 1 Set the remote control to the receiver operation mode. 2 Press ADV SURR (ADVANCED - Pioneer SC-25 | Owner's Manual - Page 65
left with the pure analog or digital sound source. SC-27: MENU iPod CTRL TUNE STATUS PHASE CTRL CH LEVEL THX MPX PQLS MEMORY SOURCE TV RECEIVER CH VOL VOL AUTO/ALC/ DIRECT STEREO STANDARD ADV SURR PGM MENU SIGNAL SEL SLEEP DIMMER AUDIO SC-25: TV CONTROL A.ATT SBch MCACC INFO AUTO - Pioneer SC-25 | Owner's Manual - Page 66
OUT D.ACCESS CLASS CH ENTER SC-25: SELECT 12 HDMI OUT 3 SIGNAL SEL MCACC 45 SLEEP 6 SBch A.ATT DIMMER 789 D.ACCESS CH LEVEL /CLR 0 CLASS ENTER INPUT MASTER VOLUME ANT MPX PQLS MEMORY AUDIO INFO CH DISP MULTI OPE TV CTRL RECEIVER REMOTE SETUP ZONE 2 ZONE 3 MAIN 1 Set the - Pioneer SC-25 | Owner's Manual - Page 67
speakers and the sound source, in SC-27: PGM MENU SOURCE TV RECEIVER CH VOL VOL SC-25 RECEIVER REMOTE SETUP ZONE 2 ZONE 3 MAIN 1 Set the remote control to the receiver iPod iPhone USB MULTI-ZONE SPEAKERS MCACC SETUP MIC PHONES 1 Switch the receiver up for surround sound (Auto MCACC - Pioneer SC-25 | Owner's Manual - Page 68
48). CH VOL VOL SC-25: TV CONTROL A.ATT SBch MCACC INFO DISP HDMI OUT INPUT SELECT 12 HDMI OUT 3 SIGNAL SEL MCACC 45 SLEEP 6 SBch A.ATT DIMMER 789 D.ACCESS CH LEVEL /CLR 0 CLASS ENTER ANT MPX PQLS MEMORY AUDIO INFO CH DISP MULTI OPE TV CTRL RECEIVER REMOTE SETUP ZONE 2 ZONE - Pioneer SC-25 | Owner's Manual - Page 69
Control switched on for all sound sources. SC-27: PRESET PRESET SOURCE TV RECEIVER CATEGORY HOME MENU iPod CTRL TUNE STATUS PHASE CTRL RETURN CH LEVEL CH VOL THX MPX PQLS MEMORY VOL AUTO/ALC/ DIRECT STEREO STANDARD ADV SURR PGM MENU TV CONTROL SC-25: PGM HDD THX DVD PHASE - Pioneer SC-25 | Owner's Manual - Page 70
sound due to group delay. Full Band Phase Control ON Tweeter Midrange Woofer Group Delay Characteristics ms SC-27: SC-25: TV SOURCE RECEIVER CH VOL VOL TV CONTROL PRESET PRESET CATEGORY HOME MENU iPod TV CTRL RECEIVER REMOTE SETUP 1 Set the remote control to the receiver operation mode - Pioneer SC-25 | Owner's Manual - Page 71
setup, and playback procedures required to enjoy these features. It is advisory that you also refer to the operation manual supplied with your network component. Features of Home Media Gallery This receiver by the vTuner database service exclusively for use with the Pioneer products. See Playback - Pioneer SC-25 | Owner's Manual - Page 72
step. • Illustration shows the SC-27, however connections for the SC-25 are the same except where noted Connect the LAN terminal on this receiver to the LAN terminal on your manually. For details, see Setting up the network on page 79. The specifications of a LAN terminal LAN terminal Ethernet jack - Pioneer SC-25 | Owner's Manual - Page 73
to the PC. If not, please authorize this receiver manually on the PC. The authorization (or permission) method for access varies depending on the type of server currently being connected. For more information on authorizing this receiver, refer to the instruction manual of your server. 73 en - Pioneer SC-25 | Owner's Manual - Page 74
MEDIA GALLERY inputs Playback with Home Media Gallery SC-27: RECEIVER MAIN ZONE2 SOURCE 3 MULTI OPERATION DVD BD TV DVR HOME MEDIA VIDEO1 VIDEO2 HDMI GALLERY USB iPod CD CD-R TUNER MULTI CH PHONO IN XM SIRIUS INPUT SELECT SC-25: SOURCE TV RECEIVER CH VOL VOL TV CONTROL INPUT MUTE MUTE - Pioneer SC-25 | Owner's Manual - Page 75
back the desired song. For detailed operating instructions, refer to the section shown below. • following operations with the remote control of this receiver. Note that some service transmitted via the Internet. There are a large number of Internet radio stations broadcasting a variety of services - Pioneer SC-25 | Owner's Manual - Page 76
broadcast stations not on the vTuner list from the special Pioneer site With the receiver, broadcast stations not included on the list of station A list of Internet radio stations provided by the vTuner database service is subject to change or deletion without notice due to various reasons - Pioneer SC-25 | Owner's Manual - Page 77
www.radio-pioneer.com Access the above site and use the access code in step 3 to perform user registration, following the instructions on the the receiver as favorite broadcast stations and can be played. Listening to Rhapsody About Rhapsody Rhapsody is a paid digital music broadcast service provided - Pioneer SC-25 | Owner's Manual - Page 78
07 Playback with HOME MEDIA GALLERY inputs About playable file formats The Home Media Gallery feature of this receiver supports the following file formats. Note that some file formats are not available for playback although they are listed as playable file formats. Also, the compatibility - Pioneer SC-25 | Owner's Manual - Page 79
SC-27: SOURCE TV RECEIVER CH VOL VOL TV CONTROL SC-25: INPUT AUDIO PARAMETER LIST TOP MENU BAND PRESET MUTE TUNE MUTE VIDEO PARAMETER TOOLS ENTER T.EDIT GUIDE PRESET CATEGORY HOME MENU iPod 2 to 4 on page 74. 1 SC-27 only: Set the remote control operation selector switch to SOURCE. 2 - Pioneer SC-25 | Owner's Manual - Page 80
screen. SC-27: HOME MEDIA VIDEO1 VIDEO2 HDMI GALLERY USB iPod CD CD-R TUNER MULTI CH PHONO IN XM SIRIUS INPUT SELECT SOURCE TV RECEIVER CH VOL SC-25: TV CONTROL INPUT MUTE AUDIO PARAMETER LIST TUNE MUTE VIDEO PARAMETER TOOLS TOP MENU BAND PRESET ENTER T.EDIT GUIDE PRESET CATEGORY - Pioneer SC-25 | Owner's Manual - Page 81
to complete the network setup procedure. The Top Menu screen appears. 15 Switch off the receiver. Use RECEIVER to switch off. Checking confirm your selection. The Firmware Version (for the Home Media Gallery of this receiver) screen appears. Top Menu Firmware Version A/V RECEIVER X.X.XX.XXX 1/ 6 - Pioneer SC-25 | Owner's Manual - Page 82
HOME MEDIA GALLERY inputs Software update Information on software updates may be posted on the Pioneer website. http://www.pioneerelectronics. -based computer networking technology for local area networks (LANs). This player supports 100BASE-TX and 10BASE-T. FLAC FLAC (Free Lossless Audio Codec) is - Pioneer SC-25 | Owner's Manual - Page 83
IP address is divided into the network address part and the host address part. The subnet mask is expressed as '255 the following website: http://www.radio-pioneer.com "This product is protected by certain be played back on a component supporting the WMDRM service. Windows Media Player 11/ Windows - Pioneer SC-25 | Owner's Manual - Page 84
remote controls included with the SC-27 and SC-25. For the SC-27's remote control, set the remote control operation selector switch to RECEIVER. For the SC-25's remote control, press the RECEIVER button. When "set the remote control to the receiver operation mode" is indicated in these instructions - Pioneer SC-25 | Owner's Manual - Page 85
. For more information see the operating instructions for each component. SC-27: RECEIVER MAIN ZONE2 SOURCE 3 MULTI OPERATION DVD BD TV DVR HOME MEDIA VIDEO1 VIDEO2 HDMI GALLERY USB iPod CD CD-R TUNER MULTI CH PHONO IN XM SIRIUS INPUT SELECT SC-25: SOURCE TV RECEIVER CH VOL VOL TV CONTROL - Pioneer SC-25 | Owner's Manual - Page 86
VOL DIRECT STEREO STANDARD ADV SURR VOL PGM MENU SC-25: TV CONTROL SIGNAL SEL SLEEP DIMMER AUDIO THX PHASE CTRL STATUS ANT MPX PQLS MEMORY AUDIO INFO CH DISP MULTI OPE TV CTRL RECEIVER REMOTE SETUP 1 Set the remote control to the receiver operation mode, then press PQLS to select PQLS - Pioneer SC-25 | Owner's Manual - Page 87
instructions of the KURO LINK-compatible TV. Synchronized amp mode operations When using the synchronized amp mode, the KURO LINK-compatible component connected to the receiver operates in sync as described below. • The receiver's volume can be set and the sound can be muted using the TV's remote - Pioneer SC-25 | Owner's Manual - Page 88
remote controls included with the SC-27 and SC-25. For the SC-27's remote control, set the remote control operation selector switch to RECEIVER. For the SC-25's remote control, press the RECEIVER button. When "set the remote control to the receiver operation mode" is indicated in these instructions - Pioneer SC-25 | Owner's Manual - Page 89
receiver (amp) or through to a TV or flat panel TV. When THROUGH is selected, no sound is output from this receiver ON. d.With the iPod/USB and HOME MEDIA GALLERY problems using this with most SACD discs, but if the sound distorts, it is best SC-27 only) The SC-27 is designed for jitterless high sound - Pioneer SC-25 | Owner's Manual - Page 90
receiver. • These functions do not affect inputs other than DVD, TV/SAT, DVR, VIDEO1, and VIDEO2. 1 Set the remote control to the receiver (Digital Video from the MONITOR OUT jacks OFF Conversion) (including HDMI OUT certain PAL movie video (576i, 25 frames/second STB video output or DVD - Pioneer SC-25 | Owner's Manual - Page 91
HDMI 4 VIDEO CAMERA iPod iPhone USB MULTI-ZONE SPEAKERS MCACC SETUP MIC PHONES 1 Press toggle between ZONE 2 and ZONE 3. • When the receiver is on,2 make sure that any operations for the you made in Manual speaker setup on page 124. However, if SPB is selected above, no sound is heard from - Pioneer SC-25 | Owner's Manual - Page 92
an HDD/DVD recorder, VCR and other video sources on page 33. SC-27: MULTI OPERATION DVD BD TV DVR HOME MEDIA VIDEO1 VIDEO2 HDMI GALLERY USB iPod CD CD-R TUNER MULTI CH PHONO IN XM SIRIUS INPUT SELECT SC-25: TV SOURCE RECEIVER CH VOL VOL TV CONTROL INPUT MUTE MUTE THX MPX PQLS MEMORY - Pioneer SC-25 | Owner's Manual - Page 93
level automatically-check the component's instruction manual if you're unsure. 4 hear distortion in the sound.1 SC-27: DC S O PGM MENU SOURCE TV RECEIVER CH VOL VOL SC-25: TV CONTROL SELECT CTRL RECEIVER REMOTE SETUP ZONE 2 ZONE 3 MAIN • Set the remote control to the receiver operation - Pioneer SC-25 | Owner's Manual - Page 94
MCACC preset. SC-27: SC-25: TV SOURCE RECEIVER CH VOL VOL TV CONTROL PRESET ENTER PRESET CATEGORY HOME MENU iPod CTRL TUNE MEMORY AUDIO INFO CH DISP MULTI OPE TV CTRL RECEIVER REMOTE SETUP 1 Set the remote control to the receiver operation mode, then press STATUS to check the - Pioneer SC-25 | Owner's Manual - Page 95
to the factory default. Use the front panel controls to do this. Set MULTI-ZONE to OFF. • Disconnect the iPod and USB memory device from the receiver beforehand. 1 Switch the receiver into standby. 2 While holding down ENTER on the front panel, press STANDBY/ON. The display shows RESET NO - Pioneer SC-25 | Owner's Manual - Page 96
case of SC-27) Important • This section includes explanations for the SC-27's remote control. For instructions for the SC-25's remote control, see Controlling the rest of your system (In case of SC-25) on page 103. Operating multiple receivers The remote control included with this receiver can be - Pioneer SC-25 | Owner's Manual - Page 97
flat panel TV released prior to summer 2005, please select preset code 644. 2 The remote can store about 200 preset codes (this has been tested with codes of Pioneer format only). 3 • You can't assign TUNER, HOME MEDIA GALLERY, iPod USB, XM or SIRIUS. • The TV CONTROL buttons (TV, TV VOL +/-, TV CH - Pioneer SC-25 | Owner's Manual - Page 98
Controlling the rest of your system (In case of SC-27) 6 To program additional signals for the current component pressing MULTI OPERATION, press HOME MENU. The remote LCD display shows SETUP. 2 Use / to select RENAME, then press ENTER. The LCD on the remote prompts you for the button of the input - Pioneer SC-25 | Owner's Manual - Page 99
VIDEO PARAMETER TOOLS TOP MENU BAND PRESET ENTER T.EDIT GUIDE PRESET CATEGORY HOME MENU iPod CTRL TUNE STATUS PHASE CTRL RETURN CH LEVEL THX MPX PQLS MEMORY 1 While pressing MULTI OPERATION, press HOME MENU. The remote LCD display shows SETUP. 2 Use / to select MULTI OP or SYS OFF - Pioneer SC-25 | Owner's Manual - Page 100
(In case of SC-27) RECEIVER MAIN ZONE2 SOURCE 3 MULTI OPERATION DVD BD TV DVR HOME MEDIA VIDEO1 VIDEO2 HDMI GALLERY USB iPod CD CD-R TUNER MULTI CH PHONO IN XM SIRIUS INPUT SELECT AUDIO PARAMETER LIST TOP MENU BAND PRESET TUNE VIDEO PARAMETER TOOLS ENTER T.EDIT GUIDE PRESET CATEGORY HOME - Pioneer SC-25 | Owner's Manual - Page 101
SC-27) 10 Controls for TVs This remote control can control components after entering the proper codes or teaching the receiver the commands (see Operating multiple receivers on page 103 for more on this). Set the remote GUIDE USER MENU TOOLSa GUIDE - GUIDE Yellow Blue - AUTO SETUP FREEZE - - AV - Pioneer SC-25 | Owner's Manual - Page 102
10 Controlling the rest of your system (In case of SC-27) Button(s) SOURCE Number buttons • (dot) ENTER (CLASS) LD CD/CD-R/SACD MD/DAT TAPE POWER ON/OFF POWER ON/OFF POWER ON/OFF POWER ON/ - Pioneer SC-25 | Owner's Manual - Page 103
SC-25) Important • This section includes explanations for the SC-25's remote control. For instructions for the SC-27's remote control, see Controlling the rest of your system (In case of SC-27) on page 96. Operating multiple receivers The remote control included with this receiver REMOTE SETUP, - Pioneer SC-25 | Owner's Manual - Page 104
of SC-25) 4 Repeat steps 1 through 3 for the other components you want to control. To try out the remote iPod CTRL AUTO/ALC/ MENU DIRECT STEREO STANDARD ADV SURR PGM HDD DVD THX PHASE CTRL STATUS ANT MPX PQLS MEMORY AUDIO INFO CH DISP MULTI OPE TV CTRL RECEIVER TV CONTROL REMOTE SETUP - Pioneer SC-25 | Owner's Manual - Page 105
your system (In case of SC-25) 10 Multi Operation and GUIDE PRESET CATEGORY HOME MENU TUNE iPod CTRL RETURN AUTO/ALC/ MENU DIRECT STEREO STANDARD ADV SURR PGM HDD DVD THX PHASE CTRL STATUS ANT MPX PQLS MEMORY AUDIO INFO CH DISP MULTI OPE TV CTRL RECEIVER TV CONTROL REMOTE SETUP - Pioneer SC-25 | Owner's Manual - Page 106
the rest of your system (In case of SC-25) Using System off RECEIVER SOURCE DVD BD DVR HDMI HOME MEDIA TV CD CD-R GALLERY iPod USB TUNER XM SIRIUS ANT MPX PQLS MEMORY AUDIO INFO CH DISP MULTI OPE TV CTRL RECEIVER REMOTE SETUP ZONE 2 ZONE 3 MAIN 1 Press MULTI OPE. 2 Press SOURCE - Pioneer SC-25 | Owner's Manual - Page 107
of SC-25) 10 Button(s) SOURCE Number buttons • (dot) ENTER (CLASS) TV POWER ON/OFF numerics • (dot) CH ENTER EXIT/INFO TOOLS/GUIDE TV - ANT - AUDIO DISPLAY CH+/- + - Red Green Yellow Blue - AUTO SETUP FREEZE - - AV SELECTION SCREEN SIZE AUDIO DISPLAY CH+/- - - - - MENU AUDIO DISPLAY - Pioneer SC-25 | Owner's Manual - Page 108
10 Controlling the rest of your system (In case of SC-25) Button(s) SOURCE Number buttons • (dot) ENTER (CLASS) LD CD/CD-R/SACD MD/DAT TAPE POWER ON/OFF POWER ON/OFF POWER ON/OFF POWER ON/ - Pioneer SC-25 | Owner's Manual - Page 109
remote controls included with the SC-27 and SC-25. For the SC-27's remote control, set the remote control operation selector switch to RECEIVER. For the SC-25's remote control, press the RECEIVER button. When "set the remote control to the receiver operation mode" is indicated in these instructions - Pioneer SC-25 | Owner's Manual - Page 110
EQ (see Manual MCACC setup on page 112). • Demo - No settings are saved and no errors occur. When the speakers are connected to this receiver, the test Automatically setting up for surround sound (Auto MCACC & Full Band Phase Control) on page 46, you can customize your setup options below. You can - Pioneer SC-25 | Owner's Manual - Page 111
to the MCACC SETUP MIC jack on the CAMERA iPod iPhone USB MULTI-ZONE SPEAKERS MCACC SETUP MIC press ENTER. 5 Follow the instructions on-screen. • Make SW : 10 OK 1b.Auto MCACC A/V RECEIVER YES YES YES YES YES YES YES YES RETRY correct), there may be a problem with the speaker connection. If - Pioneer SC-25 | Owner's Manual - Page 112
RETURN to go back to the HOME MENU. Be sure to disconnect the microphone from this receiver upon completion of the Auto MCACC Setup. Manual MCACC setup You can use the settings in the Manual MCACC setup menu to make detailed adjustments when you're more familiar with the system. Before making these - Pioneer SC-25 | Owner's Manual - Page 113
Problems when using the Auto MCACC Setup on page 48 for notes regarding high background noise levels and other possible interference. • If you're using a subwoofer, switch it on and turn up the volume to the middle position. 1 Select 'Manual MCACC' from the Advanced MCACC menu. See Making receiver - Pioneer SC-25 | Owner's Manual - Page 114
Try to make the two tones sound as if they are arriving simultaneously at a position slightly Manual MCACC setup menu. 1c.Manual MCACC A/V RECEIVER 1. Fine Channel Level 2. Fine SP Distance 3. Standing Wave 4. EQ Adjust 5. EQ Professional 6. Precision Distance Exit Return Precision Distance is only for SC-27 - Pioneer SC-25 | Owner's Manual - Page 115
tastes.2 1 Select 'EQ Adjust' from the Manual MCACC setup menu. 1c.Manual MCACC A/V RECEIVER 1. Fine Channel Level 2. Fine SP Distance 3. Standing Wave 4. EQ Adjust 5. EQ Professional 6. Precision Distance Exit Return Precision Distance is only for SC-27. 2 Select the channel(s) you want and - Pioneer SC-25 | Owner's Manual - Page 116
ENTER. 1c.Manual MCACC A/V RECEIVER 1. Fine Channel Level 2. Fine SP Distance 3. Standing Wave 4. EQ Adjust 5. EQ Professional 6. Precision Distance 1c5.EQ Professional A/V RECEIVER a. Reverb Measurement b. Reverb View c. Advanced EQ Setup • Reverberance of high vs. low frequencies - Depending - Pioneer SC-25 | Owner's Manual - Page 117
without reverb measurement, it is best to use the measurement results as a reference for your time setting. For an optimal system calibration based on the direct sound coming from the speakers, we recommend using the 30-50ms setting. 1c5c.Adv.EQ Setup A/V RECEIVER MCACC : M1.MEMORY 1 Time - Pioneer SC-25 | Owner's Manual - Page 118
Manual MCACC setup on page 112, you can check your calibrated settings using the GUI screen or, if a computer is connected, on the computer's screen. 1 Set the remote control to the receiver to the test pulses output at the Precision Distance (SC-27 only) on page 117 (the test pulses will be - Pioneer SC-25 | Owner's Manual - Page 119
. See Standing Wave on page 114 for more on this. 1 Select 'Standing Wave' from the MCACC Data Check menu. Filter Channel 2d.Standing Wave A/V RECEIVER Filter 1 Filter 2 Filter 3 Freq Q ATT Freq Q ATT Freq Q ATT TRIM [Hz] [dB] [Hz] [dB] [Hz] [dB] [dB] SW 63 5.0 10 120 5.0 10 201 5.0 10 - Pioneer SC-25 | Owner's Manual - Page 120
2e.Acoustic Cal EQ A/V RECEIVER dB 0.0 -8.0 -6.0 0.0 +3.0 +8.5 +8.5 +3.0 0.0 0.0 MCACC M1.MEMORY1 63 125 250 500 1k 2k 4k 8k 16k TRIM [Hz computer.1 The 3D graphs of RECEIVER Start the MCACC application on your PC. Exit Cancel 2 Start the MCACC application on your computer. Follow the instructions - Pioneer SC-25 | Owner's Manual - Page 121
EQ (see Manual MCACC setup on page 112), we recommend copying your current settings2 to an unused MCACC preset. Instead of just a flat EQ curve, this will give you a reference point from which to start. 1 Select 'MCACC Memory Copy' from the Data Management setup menu. 3.Data Management A/V RECEIVER - Pioneer SC-25 | Owner's Manual - Page 122
settings of that preset. 1 Select 'MCACC Memory Clear' from the Data Management setup menu. 3.Data Management A/V RECEIVER a. Memory Rename b. MCACC Memory Copy c. MCACC Memory Clear Clear 3c.MCACC Memory Clear A/V RECEIVER : M1.MEMORY 1 OK Exit Return Exit Cancel 2 Select the MCACC preset - Pioneer SC-25 | Owner's Manual - Page 123
remote controls included with the SC-27 and SC-25. For the SC-27's remote control, set the remote control operation selector switch to RECEIVER. For the SC-25's remote control, press the RECEIVER button. When "set the remote control to the receiver operation mode" is indicated in these instructions - Pioneer SC-25 | Owner's Manual - Page 124
12 The system and the other setup Manual speaker setup This receiver allows you to make detailed settings to optimize the surround sound performance. You only need to make these settings once (unless you change the placement of your current speaker system or add new speakers). These settings - Pioneer SC-25 | Owner's Manual - Page 125
system. 1 Select 'Channel Level' from the Manual SP Setup menu. 4a.Manual SP Setup A/V RECEIVER 1. Surr Back System 2. Speaker Setting 3. Channel let your ears judge which sounds best. If you're having problems, the easiest option is to route all the bass sounds to the subwoofer by selecting - Pioneer SC-25 | Owner's Manual - Page 126
Manual SP Setup menu. Tip • You can change the channel levels by set the remote control to the receiver operation mode, then press CH LEVEL, and then using / on the remote control.2 Speaker Distance For good sound return to the Manual SP Setup menu. Tip • For best surround sound, make sure the - Pioneer SC-25 | Owner's Manual - Page 127
. 1 Select 'THX Audio Setting' from the Manual SP setup menu. 4a.Manual SP Setup A/V RECEIVER 1. Surr Back System 2. Speaker Setting 3. Channel RECEIVER Loudness Plus : SB SP Position : THX Ultra2 SW : BGC : ON 4 ft< YES OFF Exit Finish Note 1 Ultra2 for the SC-27, Select2 for the SC-25. - Pioneer SC-25 | Owner's Manual - Page 128
Remote Control Mode Setup 7. Flicker Reduction Setup Exit Return Exit Return 4 Select the setting you want to adjust. If you are doing this for the first time, you may want to adjust these settings in order: • KURO LINK Setup - Synchronizes this receiver with your Pioneer component supporting - Pioneer SC-25 | Owner's Manual - Page 129
1 Select 'ZONE Audio Setup' from the Other Setup menu. 4d.Other Setup A/V RECEIVER 1. KURO LINK Setup 2. Multi Ch In Setup 3. ZONE Audio Setup 4. Power ON Level Setup 5. Volume Limit Setup 6. Remote Control Mode Setup 7. Flicker Reduction Setup 4d3.ZONE Audio Setup A/V RECEIVER ZONE 2 Volume Level - Pioneer SC-25 | Owner's Manual - Page 130
control mode. 4 Follow the instructions on the screen to change the remote control's setting. See Operating multiple receivers (SC-27: page 96, SC-25: page 103). 5 When you're finished, press RETURN. You will return to the Other Setup menu. Flicker Reduction Setup • Default setting: 4 The GUI - Pioneer SC-25 | Owner's Manual - Page 131
position, the sound field will seem cramped. Testing by the Pioneer Multi-channel Research Group has shown that a good sense of sound positioning can MCACC Setup (auto sound field correction) function It is more effective to perform the Auto MCACC Setup (page 46) (and Precision Distance (SC-27 only - Pioneer SC-25 | Owner's Manual - Page 132
blinks. • The receiver may have a serious problem. Disconnect from the power and call a Pioneer authorized independent service company. During loud playback the power suddenly switches off. • Turn down the volume. • Lower the 63 Hz and 125 Hz equalizer levels in the Manual MCACC setup on page - Pioneer SC-25 | Owner's Manual - Page 133
problem with the receiver's power unit. The receiver may have a serious problem. Unplug the receiver from the wall and call a Pioneer authorized independent service input function is selected. No sound output from the front • Check that the MCACC setup microphone is disconnected. speakers. • - Pioneer SC-25 | Owner's Manual - Page 134
is selected, sound is muted until exiting the HOME MENU. Other audio problems Symptom Remedy Broadcast stations cannot be selected automatically, or there is considerable noise in radio broadcasts. For FM broadcasts • Fully extend the FM wire antenna, adjust the position for best reception and - Pioneer SC-25 | Owner's Manual - Page 135
the setting where you think it has the best overall effect on the sound). • Make sure the speaker distance setting on the Input Setup menu is set to OFF (page 48). dial or INPUT SELECT on remote control. Video 90), you must connect your TV to this receiver using the same type of video cable as you - Pioneer SC-25 | Owner's Manual - Page 136
also Problems when using the Auto MCACC Setup on page 48). If the noise level cannot be kept low enough, you will have to set up the surround sound manually ( KEY LOCK ON when you try to make settings. • With the receiver in standby, press STANDBY/ON while holding down SPEAKERS to disable the - Pioneer SC-25 | Owner's Manual - Page 137
sound. • Areas of the graph may appear identical (before and after) when there is little or no adjustment needed. • The graph may appear to have shifted vertically when comparing before and after measurements. EQ adjustments made using the Manual MCACC setup receiver. • Make sure that the receiver - Pioneer SC-25 | Owner's Manual - Page 138
Operating multiple receivers on page 96). • SC-25 - Set a 5-digit preset code corresponding to the receiver to be operated in the remote control (see Operating multiple receivers on page 103). • Check whether the receiver's remote control mode is properly set (see Remote Control Mode Setup on page - Pioneer SC-25 | Owner's Manual - Page 139
setting (see KURO LINK Setup on page 85). • Turn the TV's power on before turning on this receiver's power. • Set the sending audio to the receiver. See the operating instructions for more on audio switch functions on both the receiver and your display unit. • Since the sound is muted on the display - Pioneer SC-25 | Owner's Manual - Page 140
. Refer to the operation manual supplied with your server. format playable on this receiver. format supported by this receiver. Check whether the folder and consult with your network service provider if necessary (page this receiver (page 75 and 141). The Home Media Gallery The remote control - Pioneer SC-25 | Owner's Manual - Page 141
Connect the USB memory device and switch on this receiver (page 43). A USB hub is currently being used. This receiver does not support a USB hub (page 53). This receiver recognizes the USB memory device Switch off and on again this receiver. as a fraud. A USB memory device is Some formats of - Pioneer SC-25 | Owner's Manual - Page 142
Aiming option to optimize the antenna properly aimed. position. See instructions supplied with the XM Mini-Tuner and Home Dock for antenna received with your XM subscription package. Consult the latest channel guide at www.xmradio.com for the current list of channels. For information on receiving - Pioneer SC-25 | Owner's Manual - Page 143
not Select another channel. exist. Firmware Updating The SiriusConnect™ tuner's firmware is being updated. Wait for updating to finish. If the problem is not solved after the troubleshooting above, if the screen freezes unexpectedly or if the buttons on the remote control or front panel stop - Pioneer SC-25 | Owner's Manual - Page 144
receivers but remains fully compatible with all current A/V receivers. Dolby Digital Plus delivers multi-channel audio programs of up to 7.1 channels (*) and supports the ".1" subwoofer channel is generated by bass management in the receiver). Two modes (Cinema and Music) are available using DTS Neo - Pioneer SC-25 | Owner's Manual - Page 145
original sound. DTS-HD Master Audio is an irreplaceable technology that can reproduce sound faithfully SC-27 Windows Media and the Windows logo are trademarks or registered trademarks of Microsoft Corporation in the United States and/or other countries. In case of SC-25 About iPod "Made for iPod - Pioneer SC-25 | Owner's Manual - Page 146
, but in a home theatre there are usually only two speakers. This can make the surround speakers sound like headphones that lack spaciousness and envelopment. The surround sounds will also collapse into the closest speaker as you move away from the middle seating position. Adaptive Decorrelation - Pioneer SC-25 | Owner's Manual - Page 147
below Reference Level is that certain sound elements can be lost or perceived all 8 speakers giving you the best possible movie watching experience. In encoded in Surround EX, you can manually select the THX Surround EX playback mode Corporation and THX Ltd. PIONEER Corporation hereby grants the user - Pioneer SC-25 | Owner's Manual - Page 148
a one-time activation fee may apply. XM tuners and home docks or SIRIUS tuners (each sold separately) are required to receive the SIRIUS or XM satellite radio service. All programming and fees subject to change. It is prohibited to copy, decompile, disassemble, reverse engineer, hack, manipulate or - Pioneer SC-25 | Owner's Manual - Page 149
Additional information 13 Auto Surround, ALC and Stream Direct with different input signal formats The following charts show what you will hear with different input signal formats, depending on the Stream Direct mode (see Using Stream Direct on page 65) you have selected. Stereo (2 channel) - Pioneer SC-25 | Owner's Manual - Page 150
Furnished Parts Number MCACC Setup microphone (APM7009 1 Remote control unit (SC-27: AXD7539/SC-25: AXD7542). . . 1 AA/IEC R6 dry cell batteries 2 iPod cable (ADE7129 1 AM loop antenna 1 FM wire antenna 1 Power cord (ADG7111 1 Warranty card 1 These operating instructions Note • Specifications - Pioneer SC-25 | Owner's Manual - Page 151
settings 49 Input Setup 48-49 Input signal 68 iPod 43, 51-52, 145 Switching controls 52 IR jack 40 K KURO Dimension 89 Display 18, 93, 137 Dolby 62, 143 DTS 62, 144 Dual Mono 88 M Manual MCACC 112 Manual speaker setup 124 MCACC Data 118 MCACC preset 67, 88, 121 Midnight 88 Multi Zone 22, 25, 27 - Pioneer SC-25 | Owner's Manual - Page 152
Remote control 11, 15, 96-102, 103-108, 130, 138 Reset 95 Resolution 90 S SACD Gain 89 Setup microphone 111 Sharpness 90 Sleep timer 93 Sound Delay 88 Sound Retriever 88 Speaker 22-27, 131 Speaker B 22, 25, 27 Setup 123 T THX 23, 110, 127, 145 Home THX 63 Tone Control 88 Treble 88 Troubleshooting - Pioneer SC-25 | Owner's Manual - Page 153
damage or loss in the future. After all, we want you listening for a lifetime. We Want You Listening For A Lifetime Used wisely, your new sound equipment will provide a lifetime of fun and enjoyment. Since hearing damage from loud noise is often undetectable until it is too late, this manufacturer - Pioneer SC-25 | Owner's Manual - Page 154
to purchase replacement parts, operating instructions, service manuals, or accessories, please call the number shown below. Si ce produit doit être réparé au Canada, veuillez vous adresser à un distributeur autorisé Pioneer du Canada pour obtenir le nom du Centre de Service Autorisé Pioneer le plus
-
 1
1 -
 2
2 -
 3
3 -
 4
4 -
 5
5 -
 6
6 -
 7
7 -
8
-
9
-
10
-
11
-
12
-
13
-
14
-
15
-
16
-
17
-
18
-
19
-
20
-
21
-
22
-
23
-
24
-
25
-
26
-
27
-
28
-
29
-
30
-
31
-
32
-
33
-
34
-
35
-
36
-
37
-
38
-
39
-
40
-
41
-
42
-
43
-
44
-
45
-
46
-
47
-
48
-
49
-
50
-
51
-
52
-
53
-
54
-
55
-
56
-
57
-
58
-
59
-
60
-
61
-
62
-
63
-
64
-
65
-
66
-
67
-
68
-
69
-
70
-
71
-
72
-
73
-
74
-
75
-
76
-
77
-
78
-
79
-
80
-
81
-
82
-
83
-
84
-
85
-
86
-
87
-
88
-
89
-
90
-
91
-
92
-
93
-
94
-
95
-
96
-
97
-
98
-
99
-
100
-
101
-
102
-
103
-
104
-
105
-
106
-
107
-
108
-
109
-
110
-
111
-
112
-
113
-
114
-
115
-
116
-
117
-
118
-
119
-
120
-
121
-
122
-
123
-
124
-
125
-
126
-
127
-
128
-
129
-
130
-
131
-
132
-
133
-
134
-
135
-
136
-
137
-
138
-
139
-
140
-
141
-
142
-
143
-
144
-
145
-
146
-
147
-
148
-
149
-
150
-
151
-
152
-
153
-
154
 |
 |

Operating Instructions
audio/video multi-channel receiver