Pioneer VSX-1018AH-K Owner's Manual
Pioneer VSX-1018AH-K Manual
 |
View all Pioneer VSX-1018AH-K manuals
Add to My Manuals
Save this manual to your list of manuals |
Pioneer VSX-1018AH-K manual content summary:
- Pioneer VSX-1018AH-K | Owner's Manual - Page 1
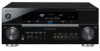
AUDIO/VIDEO MULTI-CHANNEL RECEIVER VSX-1018AH-K Register your product at http://www.pioneerelectronics.com (US) http://www.pioneerelectronics.ca (Canada) • Protect your new investment The details of your purchase will be on file for reference in the event of an insurance claim such as loss - Pioneer VSX-1018AH-K | Owner's Manual - Page 2
AUDIO/VIDEO MULTI-CHANNEL RECEIVER Model Number: VSX-1018AH-K Responsible Party Name: PIONEER ELECTRONICS SERVICE, TV technician for help. D8-10-1-2_En This Class B digital apparatus complies with Canadian ICES-003. Cet appareil numérique de la Classe B est conforme à la norme NMB-003 du Canada - Pioneer VSX-1018AH-K | Owner's Manual - Page 3
to the presence of important operating and maintenance (servicing) instructions in the literature accompanying the appliance. D3-4-2-1-1_En-A 1) Read these instructions. 2) Keep these instructions. 3) Heed all warnings. 4) Follow all instructions. 5) Do not use this apparatus near water. 6) Clean - Pioneer VSX-1018AH-K | Owner's Manual - Page 4
mounting of an AC plug on the power supply cord of this unit should be performed only by qualified service personnel. If connected to an AC outlet, the cut-off plug can cause severe electrical shock. Make or the Electronics Industries Alliance : www.eiae.org. K057_En For U.S. and Australia Model - Pioneer VSX-1018AH-K | Owner's Manual - Page 5
your model properly. After you have finished reading the instructions, put them away in a safe place for future reference. Contents 01 Before you start Features 7 Checking what's in the box 8 Installing the receiver 8 Loading the batteries 8 02 5 minute guide Introduction to home theater - Pioneer VSX-1018AH-K | Owner's Manual - Page 6
. . . 76 Selecting preset codes directly 76 Preset code list 76 Controls for TVs 77 Controls for other components 78 Operating other Pioneer components with this receiver's sensor 79 13 Additional information Troubleshooting 80 Power 80 No sound 80 Other audio problems 82 Video 83 Settings - Pioneer VSX-1018AH-K | Owner's Manual - Page 7
digital video/ audio via a single cable. High-quality sound formats such as DTS-HD and Dolby TrueHD are supported while this receiver is also compatible with the DeepColor feature. You can operate this receiver in synchronization with your Pioneer component that supports the HDMI Control function by - Pioneer VSX-1018AH-K | Owner's Manual - Page 8
Please check that you've received the following supplied accessories: • Setup microphone (cable: 5 m (16.4 ft.)) • Remote control unit • AA/IEC R6P dry cell batteries x2 • AM loop antenna • FM wire antenna • Warranty card • These operating instructions Installing the receiver • When installing this - Pioneer VSX-1018AH-K | Owner's Manual - Page 9
02 Chapter 2: 5 minute guide Introduction to home theater Home theater refers to the use of multiple audio tracks to create a surround sound effect, making you feel like you're in the middle of the action or concert. The surround sound you get from a home theater system depends not only on your - Pioneer VSX-1018AH-K | Owner's Manual - Page 10
function should not be selected as an input source. Caution • The test tones used in the Auto MCACC Setup are output at high volume. RECEIVER SOURCE DVD BD TV HDMI DVR 1 DVR 2 CD CD-R FM/AM XM SIRIUS iPod USB INPUT AUDIO PARAMETER EXIT VIDEO PARAMETER TUNE TOOLS TOP MENU MENU T.EDIT ST - Pioneer VSX-1018AH-K | Owner's Manual - Page 11
adjust these settings manually using the System Setup menu (starting on page 38).3 Playing a source Here are the basic instructions for playing a source (such as a DVD disc) with your home theater system. 4 5 6 RECEIVER SOURCE SR+ SBch A.ATT 7 8 9 CATEGORY RETURN DVD BD TV HDMI DVR - Pioneer VSX-1018AH-K | Owner's Manual - Page 12
well as low-frequency signals in each channel are assigned to the subwoofer or other the AUDIO DISPLAY MPX SIGNAL SEL MEM CH TV CTRL RECEIVER • Press RECEIVER, then press PHASE (PHASE CONTROL) to switch on phase correction. The PHASE CONTROL indicator on the front panel lights. Phase Control - Pioneer VSX-1018AH-K | Owner's Manual - Page 13
digital audio sources, including DVD players/recorders, digital satellite receivers, CD players, etc. See also The Input Setup menu on page 67 to assign the inputs. 5 Control input/output Use to connect other Pioneer components so that you can control all your equipment from a single IR remote - Pioneer VSX-1018AH-K | Owner's Manual - Page 14
Using SIRIUS Radio on page 56. 12 ZONE 2 audio/video outputs Use to connect a second receiver in a separate room. See MULTI-ZONE listening on monitor or TV. See Using the component video jacks on page 19. 14 Stereo analog audio source inputs/(outputs) (x3) Use for connection to audio sources - Pioneer VSX-1018AH-K | Owner's Manual - Page 15
you must connect your monitor/TV to the receiver's HDMI video outputs when connecting this video source.1 If several video components are assigned to the same input function owners. Use of this copyright protection technology must be authorized by Macrovision Corporation, and is intended for home - Pioneer VSX-1018AH-K | Owner's Manual - Page 16
- IN TROL OUT IN 2 (DVR1) IN 2 ASSIGNABLE 1-2 ASSIGNABLE 1-2 OUT IR ZONE2 IN OUT DIGITAL VIDEO IN IN OUT IN OUT DVD AUDIO IN TV SAT IN DVR1 OUT IN L DVR OUT R MULTI CH IN SPEA A FRONT CENTER SURROUND SURROUND BACK L R SUBWOOFER VSX-1018AH HDMI/DVI-equipped component HDMI OUT - Pioneer VSX-1018AH-K | Owner's Manual - Page 17
VIDEO IN TV 1 VSX-1018AH HDMI COAXIAL ASSIGNABLE 1 - 2 OUT IN 1 (DVD) BD IN IN 2 (CD) XM IN OPTICAL IN 1 IN 1 (TV SAT) CON- IN TROL OUT IN 2 (DVR1) IN 2 ASSIGNABLE 1-2 ASSIGNABLE 1-2 OUT IR ZONE2 IN OUT DIGITAL VIDEO IN OU MONITOR IN OUT IN OUT IN OUT DVD AUDIO IN TV SAT - Pioneer VSX-1018AH-K | Owner's Manual - Page 18
other video sources This receiver has two sets of audio/video inputs and outputs suitable for connecting analog or digital video devices, including DVD/HDD recorders and VCRs. VSX-1018AH HDMI COAXIAL ASSIGNABLE 1 - 2 OUT IN 1 (DVD) BD IN IN 2 (CD) XM IN OPTICAL IN 1 IN 1 (TV SAT) CON- IN - Pioneer VSX-1018AH-K | Owner's Manual - Page 19
L R SURROUND BACK / B LR L (Single) Y PB PR 1 COMPONENT VIDEO SELECTABLE SEE INSTRUCTION MANUAL SELECTABLE VOIR LE MODE D'EMPLOI VSX-1018AH 1 Connect the component video outputs of your source to a set of ASSIGNABLE COMPONENT VIDEO inputs. Connect using a three-way component video cable - Pioneer VSX-1018AH-K | Owner's Manual - Page 20
(remote) to select VIDEO. SELECTABLE SEE INSTRUCTION MANUAL SELECTABLE VOIR LE MODE D'EMPLOI VSX-1018AH OUT PLAY IN REC R L AUDIO IN/OUT Tape deck, etc. Note 1 • If your digital component only has an optical digital output, you can connect it to one of the optical inputs on this receiver - Pioneer VSX-1018AH-K | Owner's Manual - Page 21
2 (DVR1) IN 2 ASSIGNABLE 1-2 ASSIGNABLE 1-2 OUT IR ZONE2 IN OUT DIGITAL VSX-1018AH VIDEO IN OUT COMPONENT VIDEO IN 1 IN 2 IN 3 MONITOR OUT ANTENNA Y MONITOR IN OUT IN OUT IN OUT PB FM UNBAL 75 AM LOOP DVD TV SAT DVR1 DVR2 SIRIUS ZONE 2 PR ASSIGNABLE 1-3 AUDIO IN IN OUT - Pioneer VSX-1018AH-K | Owner's Manual - Page 22
refer to the manual that came with channel is localized at the TV screen. Also, make sure the center speaker does not cross the line formed by the leading edge of the front left and right speakers. • It is best Audio, the speakers should be more directly behind the listener than for home theater - Pioneer VSX-1018AH-K | Owner's Manual - Page 23
(16 ft. to 20 ft.) length of vinyl-coated wire to the AM LOOP terminals without disconnecting the supplied AM loop antenna. For the best possible reception, suspend horizontally outdoors. Outdoor antenna ANTENNA FM UNBAL 75 5 m to 6 m (16 ft. to 20 ft.) AM LOOP Indoor antenna (vinyl-coated wire - Pioneer VSX-1018AH-K | Owner's Manual - Page 24
or give you an electric shock. Check the power cord once in a while. If you find it damaged, ask your nearest Pioneer authorized independent service company for a replacement. • The receiver should be disconnected by removing the mains plug from the wall socket when not in regular use, e.g., when on - Pioneer VSX-1018AH-K | Owner's Manual - Page 25
and displays 04 Chapter 4: Controls and displays Front panel 12 3 4 56 AUDIO/VIDEO MULTI-CHANNEL RECEIVER VSX-1018AH INPUT SELECTOR STANDBY/ON PHASE CONTROL ADVANCED MCACC DIGITAL PRECISION PROCESSING DIGITAL VIDEO SCALER HDMI DVD BD TV SAT DVR 1/DVR 2 VIDEO HDMI 1/HDMI 2 CD - Pioneer VSX-1018AH-K | Owner's Manual - Page 26
32). SOUND RETRIEVER - Press to restore CD quality sound to compressed audio sources. STANDARD SURROUND - Press for Standard decoding and to switch of remote control unit The remote control may not work properly if: • There are obstacles between the remote control and the receiver's remote sensor. - Pioneer VSX-1018AH-K | Owner's Manual - Page 27
when the receiver is set to select the input signal automatically (page 33). 2 Program format indicators These change according to which channels are active in digital sources. L - Left front channel C - Center channel R - Right front channel SL - Left surround channel S - Surround channel (mono) SR - Pioneer VSX-1018AH-K | Owner's Manual - Page 28
A.L.C. STANDARD ADV SURR HDD DVD THX STATUS PHASE ANT AUDIO DISPLAY MPX SIGNAL SEL MEM CH TV CTRL RECEIVER 12 13 14 15 16 MAIN ZONE 2 RECEIVER The remote has been conveniently color-coded according to component control using the following system (press the corresponding input source - Pioneer VSX-1018AH-K | Owner's Manual - Page 29
36). 9 AUDIO - Changes the audio or channel on DVD discs. DISPLAY - Switches between named station presets and radio frequencies (page 37). CH +/- - Use to select channels for DVD/DVR units. 10 TV CTRL Use this button to set preset code of your TV's manufacturer when controlling TV (see Selecting - Pioneer VSX-1018AH-K | Owner's Manual - Page 30
you connected surround back speakers, see also Using surround back channel processing on page 33. Standard surround sound The following modes provide THX STATUS PHASE ANT AUDIO DISPLAY MPX SIGNAL SEL MEM CH TV CTRL RECEIVER • While listening to a source, press RECEIVER, then press STANDARD ( - Pioneer VSX-1018AH-K | Owner's Manual - Page 31
TV CTRL RECEIVER • While listening to a source, press RECEIVER, then press STEREO/A.L.C. for stereo playback. Press repeatedly to switch between: • STEREO - The audio is heard with your surround settings and you can still use the Midnight, Loudness, and bass/treble controls back channel processing - Pioneer VSX-1018AH-K | Owner's Manual - Page 32
ANT AUDIO DISPLAY MPX SIGNAL SEL MEM CH TV CTRL RECEIVER 1 While listening to a source, press RECEIVER, . You will hear sources according to the number of channels in the signal. • PURE DIRECT - Analog and AUTO SURROUND or DIRECT if this is a problem. 3 Different presets might also have separate - Pioneer VSX-1018AH-K | Owner's Manual - Page 33
surround back channel processing • Default setting: SBch ON You can have the receiver automatically use instruction manual supplied with your DVD player. 3 When the HDMI option in Setting the Audio options on page 71 is set to THROUGH, the sound will be heard through your TV, not from this receiver - Pioneer VSX-1018AH-K | Owner's Manual - Page 34
Audio/DTS-HD/ DTS-EXPRESS encoded 5.1 ch sources ON d AUTO d Neo:6 Advanced surround c c c c c c Note 1 • You can't use the Virtual Surround Back mode when the headphones are connected to this receiver or when any of the stereo, Front Stage Surround Advance, Auto level control - Pioneer VSX-1018AH-K | Owner's Manual - Page 35
on a Pioneer DVD recorder supporting HDMI Control connected to this receiver via HDMI.1 For details on HDMI Control, see About HDMI Control on page 66. INPUT SELECT 1 2 GENRE 4 MCACC 5 SR+ SBch 7 8 D.ACCESS CH LEVEL 0 DIMMER 3 SLEEP 6 A.ATT 9 CLASS ENTER AUDIO DISPLAY MEM CH TV CTRL - Pioneer VSX-1018AH-K | Owner's Manual - Page 36
radio broadcasts using the automatic (search) and manual (step) tuning functions. If you already know the frequency directly using the number buttons on the remote control. 1 Press the FM/AM button to select PHASE ANT AUDIO DISPLAY MPX SIGNAL SEL MEM CH TV CTRL RECEIVER TV CONTROL id SETUP - Pioneer VSX-1018AH-K | Owner's Manual - Page 37
. Press repeatedly to cycle through classes A, B and C. 3 Press ST / to select the station preset you want. • You can also use the number buttons on the remote control to recall the station preset. 37 En - Pioneer VSX-1018AH-K | Owner's Manual - Page 38
receiver (see The Other Setup menu on page 68). 2 Press RECEIVER on the remote control, then press the SETUP.2 An on-screen display (OSD) appears on your TV of inactivity. Caution • The test tones used in the Auto MCACC Note that when editing items in the Manual MCACC menu, you will need to first - Pioneer VSX-1018AH-K | Owner's Manual - Page 39
SURROUND STEREO/ A.L.C. PHONES MULTI-ZONE CONTROL ON/OFF SPEAKERS ST - ST + VIDEO VIDEO INPUT L AUDIO R DIGITAL IN iPod DIRECT USB occur. When the speakers are connected to this receiver, the test tone is output repeatedly. Press RETURN to cancel the test tone. 5 • The EQ Pro. & S- - Pioneer VSX-1018AH-K | Owner's Manual - Page 40
isn't correct), there may be a problem with the speaker connection. If selecting receiver outputs more test tones to determine the optimum receiver settings for channel Standing Wave - Filter settings to control lower 'boomy' frequencies (see the setting manually using the Manual speaker setup - Pioneer VSX-1018AH-K | Owner's Manual - Page 41
receiver upon completion of the Auto MCACC setup. Surround back speaker setting • Default setting: Normal There are several ways you can use the surround back speaker channels with this system. In addition to a normal home theater • The test tones used adjust manually. 3.Manual See Problems when - Pioneer VSX-1018AH-K | Owner's Manual - Page 42
setup menu. The volume increases to the 0.0 dB reference level. 3.Manual MCACC a . Fine Channel Level b . Fine SP Distance c . Standing Wave d . EQ Adjust e . EQ Professional :Return 3a.Fine Channel Level Please wait... 20 CAUTION Loud test tones will be output. :Cancel 2 Adjust the level of the - Pioneer VSX-1018AH-K | Owner's Manual - Page 43
Control for each of your MCACC presets.3 1 Select 'Standing Wave' from the Manual MCACC setup menu. 3.Manual MCACC a . Fine Channel the subwoofer emits a continuous test tone (oscillating pulses are heard Wave Control and Acoustic Cal EQ feature in the AUDIO PARAMETER menu. See Setting the Audio - Pioneer VSX-1018AH-K | Owner's Manual - Page 44
using test tones with the TRIM feature. Use / to select TRIM, then use / to raise or lower the channel level for the current speaker. 4 When you're finished, press RETURN. You will return to the Manual MCACC setup menu. Acoustic Calibration EQ Professional This setup minimizes the unwanted - Pioneer VSX-1018AH-K | Owner's Manual - Page 45
to see the results on-screen. See Professional Calibration EQ graphical output on page 84 for troubleshooting information. 4 If you selected 'Reverb View', you can check the reverb characteristics for each channel. Press RETURN when you're done. 3e2.Reverb View M1 : EQ OFF Ch L Fq [ dB 125Hz - Pioneer VSX-1018AH-K | Owner's Manual - Page 46
it is best to use will be applied to all channels during calibration. When you're video game close to the TV). From this menu you System Setup menu. See Making receiver settings from the System Setup menu . Surround Back System 3 . Manual MCACC 4 . Data Management 5 . Manual SP Setup 6 . Input Setup - Pioneer VSX-1018AH-K | Owner's Manual - Page 47
Copying MCACC preset data If you want to manually adjust the Acoustic Calibration EQ (see Manual MCACC setup on page 41), we recommend copying selected MCACC preset memory. • LEVEL & DISTANCE - Copies only the channel level and speaker distance settings of the selected MCACC preset memory. 3 Select - Pioneer VSX-1018AH-K | Owner's Manual - Page 48
Manual speaker setup This receiver settings. Caution • The test tones used in the System Setup are output at high volume. 1 Select 'Manual SP Setup', then press Select 'Speaker Setting' from the Manual SP Setup menu. 5.Manual SP Setup a . Speaker Setting b . Channel Level c . Speaker Distance d - Pioneer VSX-1018AH-K | Owner's Manual - Page 49
of each speaker as the test tone is emitted.3 5 When you're finished, press RETURN. You will return to the Manual SP Setup menu. Tip • You can change the channel levels at any time by press RECEIVER, then press CH LEVEL, and then using / on the remote control. :Return ENTER:Next :Cancel Note - Pioneer VSX-1018AH-K | Owner's Manual - Page 50
listening position. The receiver can then add the home theater listening, and restores proper tonal balance of movie soundtracks. 1 Select 'X-Curve' from the Manual SP Setup menu. 5.Manual SP Setup a . Speaker Setting b . Channel finish. Tip • For best surround sound, make sure the surround back speakers - Pioneer VSX-1018AH-K | Owner's Manual - Page 51
from your iPod using the controls of this receiver.1 ON DIGITAL VIDEO SCALER HDMI CD/CD-R FM /AM XM /SIRIUS iPod USB MULTI CH IN MASTER VOLUME VIDEO VIDEO INPUT L AUDIO R DIGITAL IN iPod DIRECT USB MCACC SETUP MIC USB cable (for iPod connection) VSX-1018AH iPod MENU Connecting your - Pioneer VSX-1018AH-K | Owner's Manual - Page 52
The iPod that is not supported is connected. Check whether the iPod was supported by this receiver (page 51). When the iPod controls between the iPod and the receiver. 1 Press iPod CTRL to switch the iPod controls.3 This enables operation and display on your iPod, and this receiver's remote control - Pioneer VSX-1018AH-K | Owner's Manual - Page 53
/OFF SPEAKERS ST - ST + VIDEO VIDEO INPUT L AUDIO R DIGITAL IN iPod DIRECT USB MCACC SETUP MIC USB mass storage device Connecting your USB device to the receiver 1 Switch on the receiver and your TV. 2 Press iPod USB on the remote control to switch the receiver to the iPod USB. No Device - Pioneer VSX-1018AH-K | Owner's Manual - Page 54
SURROUND BACK L R SUBWOOFER VSX-1018AH SATELLiTE RADiO SATELLiTE RADiO XM Mini-Tuner 1 Connect an XM Mini-Tuner to the XM IN jack on the rear of this receiver. You will also need to activate the XM Radio service. 2 Press XM to switch to the XM Radio input. For best reception, you may need to - Pioneer VSX-1018AH-K | Owner's Manual - Page 55
pressing ENTER, the preset class and number stop blinking and the receiver stores the XM channel. Tip • You can also press MEM (Memory) during reception / to select the channel preset you want. You can also use the number buttons on the remote control to recall the channel preset. Using the XM - Pioneer VSX-1018AH-K | Owner's Manual - Page 56
for the most complete and up-to-date channel lineup and product information. Connecting your SiriusConnect™ Tuner To receive SIRIUS Satellite Radio broadcasts, you will need to activate your SiriusConnect™ tuner.1 VSX-1018AH HDMI COAXIAL ASSIGNABLE 1 - 2 OUT IN 1 (DVD) BD IN IN 2 (CD) XM - Pioneer VSX-1018AH-K | Owner's Manual - Page 57
the receiver stores the SIRIUS channel.1 Using remote control to recall the channel preset. Connecting the multichannel analog inputs For DVD Audio and SACD playback, your DVD player may have 5.1, 6.1 or 7.1 channel analog outputs (depending on whether your player supports surround back channels - Pioneer VSX-1018AH-K | Owner's Manual - Page 58
AUDIO/VIDEO MULTI-CHANNEL RECEIVER VSX-1018AH on page 21. Make sure to review Placing the speakers on page 22 CONTROL ON/OFF SPEAKERS ST - ST + VIDEO VIDEO INPUT L AUDIO Manual speaker setup on page 48. However, if SPB is selected above, no sound is heard from the subwoofer (the LFE channel - Pioneer VSX-1018AH-K | Owner's Manual - Page 59
speaker terminal on the receiver. Using a banana plug for the second connection is recommended. High SELECTABLE SEE INSTRUCTION MANUAL SELECTABLE VOIR LE MODE D'EMPLOI Low Since both front and surround back speaker terminals output the same audio, it - Pioneer VSX-1018AH-K | Owner's Manual - Page 60
SEE INSTRUCTION MANUAL SELECTABLE VOIR LE MODE D'EMPLOI ANALOG INPUT L R ANALOG INPUT ANALOG INPUT L R ANALOG INPUT L R ANALOG INPUT Front channel amplifier Center channel amplifier (mono) Surround channel amplifier Surround back channel amplifier Powered subwoofer VSX-1018AH • You - Pioneer VSX-1018AH-K | Owner's Manual - Page 61
sub zone volume and select sources. See MULTIZONE remote controls on page 62. INPUT SELECTOR AUDIO/VIDEO MULTI-CHANNEL RECEIVER VSX-1018AH STANDBY/ON PHASE CONTROL ADVANCED MCACC DIGITAL PRECISION PROCESSING DIGITAL VIDEO SCALER HDMI DVD BD TV SAT DVR 1/DVR 2 VIDEO HDMI 1/HDMI 2 CD/CD - Pioneer VSX-1018AH-K | Owner's Manual - Page 62
IN CONTROL Pioneer component IN OUT IR receiver HDMI COAXIAL ASSIGNABLE 1 - 2 OUT IN 1 (DVD) BD IN IN 2 (CD) XM IN OPTICAL IN 1 IN 1 (TV SAT) CON- IN TROL OUT IN 2 (DVR1) IN 2 ASSIGNABLE 1-2 ASSIGNABLE 1-2 OUT IR ZONE2 IN OUT DIGITAL 2VIDEO IN D) IN OUT IN OU N DVD AUDIO IN - Pioneer VSX-1018AH-K | Owner's Manual - Page 63
Setup menu on page 67 and SR+ Setup for Pioneer flat panel TVs on page 70 for detailed instructions. DVD AUDIO IN TV SAT AUDIO IN INPUT SELECTOR AUDIO/VIDEO MULTI-CHANNEL RECEIVER VSX-1018AH STANDBY/ON PHASE CONTROL ADVANCED MCACC DIGITAL PRECISION PROCESSING DIGITAL VIDEO SCALER HDMI - Pioneer VSX-1018AH-K | Owner's Manual - Page 64
ATT 9 CLASS ENTER MASTER VOLUME ANT AUDIO DISPLAY MPX SIGNAL SEL MEM CH TV CTRL RECEIVER MAIN ZONE 2 1 Make sure that the flat panel TV and this receiver are switched on and that they are connected with the SR+ cable. See Using this receiver with a Pioneer flat panel TV on page 63 for more on - Pioneer VSX-1018AH-K | Owner's Manual - Page 65
IN OUT DVD AUDIO IN TV SAT IN DVR1 OUT IN L DVR OUT R MULTI CH IN SPEA A FRONT CENTER SURROUND SURROUND BACK L R SUBWOOFER VSX-1018AH HDMI-equipped component HDMI OUT Setting the HDMI options You must adjust the settings of this receiver as well as HDMI Control-compatible connected - Pioneer VSX-1018AH-K | Owner's Manual - Page 66
Enables the HDMI Control function. When this receiver's power is turned off and you have a supported source begin playback while using the HDMI Control function, the audio and video output from the HDMI connection are output from the flat panel TV.1 • OFF - The HDMI Control is disabled. Synchronized - Pioneer VSX-1018AH-K | Owner's Manual - Page 67
jack on the display to the CONTROL IN jack on this receiver (opposite from the setup in Using this receiver with a Pioneer flat panel TV on page 63). Note that to control this receiver using the remote, you will have to point it at the flat panel TV's remote sensor after making this connection. 67 - Pioneer VSX-1018AH-K | Owner's Manual - Page 68
-ZONE setup (see ZONE Audio Setup on page 69). • SR+ Setup - Specifies how you want to control your Pioneer flat panel TV (see SR+ Setup for Pioneer flat panel TVs on page 70). • HDMI Control Setup - Synchronizes this receiver with your Pioneer component supporting HDMI Control (see Setting the HDMI - Pioneer VSX-1018AH-K | Owner's Manual - Page 69
adjust the volume. • Fixed - Use this setting if you've connected a fully integrated amplifier (such as another Pioneer VSX receiver) in the sub room and want to use that receiver's volume controls. (This setting is not available if the surround back system setting is set to ZONE 2.) With the Fixed - Pioneer VSX-1018AH-K | Owner's Manual - Page 70
. See also Using this receiver with a Pioneer flat panel TV on page 63 and Using the SR+ mode with a Pioneer flat panel TV on page 64. 1 Select 'SR+ Setup' from the Other Setup menu. 7.Other Setup a . Multi Ch In Setup b . ZONE Audio Setup c . SR+ Setup d . HDMI Control Setup e . OSD Adjustment 7c - Pioneer VSX-1018AH-K | Owner's Manual - Page 71
Audio Parameter menu, it is unavailable due to the current source, settings and status of the receiver. 1 Press RECEIVER, then press AUDIO ON (Standing Standing Wave Control only for Wave) compressed 2-channel audio by channel to make it stand out from Enhancement) other background sounds in a TV - Pioneer VSX-1018AH-K | Owner's Manual - Page 72
on in order to play the receiver's HDMI audio and video input signals from the TV with the receiver's power in the standby mode. See Synchronized amp mode on page 66. f. This feature is only available when the connected display supports the automatic audio/video synchronizing capability ('lip-sync - Pioneer VSX-1018AH-K | Owner's Manual - Page 73
DIMMER 3 AUDIO DISPLAY MEM CH TV CTRL RECEIVER GENRE MCACC audio recording level automatically-check the component's instruction manual if you're unsure. 4 Start recording, then start playback of the source component. Note 1 • The receiver's volume, Audio parameters (the bass/treble controls - Pioneer VSX-1018AH-K | Owner's Manual - Page 74
being left on all night. Use the remote control to set the sleep timer. INPUT SELECT 1 2 GENRE 4 MCACC 5 SR+ SBch 7 8 D.ACCESS CH LEVEL 0 DIMMER 3 SLEEP 6 A.ATT 9 CLASS ENTER AUDIO DISPLAY MEM CH TV CTRL RECEIVER MAIN ZONE 2 • Press RECEIVER, then press SLEEP repeatedly to set the - Pioneer VSX-1018AH-K | Owner's Manual - Page 75
saved, even if the receiver is unplugged. Default system settings Setting HDMI Audio HDMI Control Digital Video Conversion Speakers SR+ SR+ Control On/Off OFF SR+ Volume Control On/Off OFF Monitor Out OFF DSP Surround back channel Processing ON Phase Control ON Sound Retriever - Pioneer VSX-1018AH-K | Owner's Manual - Page 76
cases where only certain functions may be controllable after assigning the proper preset code, or the codes for the manufacturer in the remote control will not work for the model that you are using. Note • You can cancel or exit any of the steps by pressing RECEIVER. To go back a step, press RETURN - Pioneer VSX-1018AH-K | Owner's Manual - Page 77
607 PIONEER 600, codes or teaching the receiver the commands (see Setting the remote to control other components on page 76 for more on this). Use the input source buttons to select the component. • The TV CONTROL buttons on the remote control are dedicated to control the TV assigned to the TV - Pioneer VSX-1018AH-K | Owner's Manual - Page 78
Controlling the rest of your system Button(s) Function Components TV Press to switch the component Cable TV/ assigned to the TV CTRL button Satellite TV/TV/ on or off. DTV INPUT Switches the TV input. (Not possible with all models.) Cable TV/ Satellite TV/TV/ DTV CH +/- Selects channels - Pioneer VSX-1018AH-K | Owner's Manual - Page 79
, refer to Setting the remote to control other components on page 76. If you have connected a remote control to the CONTROL IN jack (using a mini-plug cable), you won't be able to control this receiver using the remote sensor. • See Using this receiver with a Pioneer flat panel TV on page 63 if you - Pioneer VSX-1018AH-K | Owner's Manual - Page 80
set of off or the PHASE CONTROL wires. If so, re-attach the speaker wires, making sure there are no stray strands. indicator blinks. • The receiver may have a serious problem. Disconnect from the power and call a Pioneer authorized independent service company. During loud playback the power - Pioneer VSX-1018AH-K | Owner's Manual - Page 81
channel is not set to OFF, or a very quiet setting (see Setting the Audio options on page 71). • Check the speaker level settings (see Channel sure that the digital input is assigned correctly for the input jack the the source component has a digital volume control, make sure this is not turned - Pioneer VSX-1018AH-K | Owner's Manual - Page 82
13 Additional information Other audio problems Symptom Remedy Broadcast stations cannot be selected automatically, or there is considerable noise in radio broadcasts. For FM broadcasts • Fully extend the FM wire antenna, adjust the position for best reception and secure to a wall, etc. • Use - Pioneer VSX-1018AH-K | Owner's Manual - Page 83
switched off (in Setting the Video options on page 72), you must connect your TV to this receiver using the same type of video cable as you used to connect your video component. • Make sure the input assignment is correct for components connected using component or HDMI cables (see The Input Setup - Pioneer VSX-1018AH-K | Owner's Manual - Page 84
, the Dolby Digital or DTS is selected. When playing certain discs, none of the receiver's format indicators light. • The disc may not contain 5.1/6.1 channel material. Check the disc packaging for more on what audio tracks are recorded on the disc. When playing a disc with the • Make sure that - Pioneer VSX-1018AH-K | Owner's Manual - Page 85
light shining on to the remote sensor. • Check the connections of the CONTROL IN jack (see Operating other Pioneer components with this receiver's sensor on page 79). Other components can't be operated with the system remote. • If the battery ran down, the preset codes may have been cleared. Re - Pioneer VSX-1018AH-K | Owner's Manual - Page 86
jacks between source and receiver. • If the problem still persists when connecting your HDMI component directly to your monitor, please consult the component or monitor manual or contact the manufacturer for support. • If video images do not appear on your TV or flat panel TV, try adjusting the - Pioneer VSX-1018AH-K | Owner's Manual - Page 87
to the display using an HDMI cable. Then use the most convenient connection (digital is recommended) for sending audio to the receiver. See the operating instructions for more on audio connections. Set the display volume to minimum when using this configuration. Note • If your display only has one - Pioneer VSX-1018AH-K | Owner's Manual - Page 88
not available. The channel Consult the latest channel guide at may have been reassigned to a different channel www.xmradio.com for the current list of channels. number. For cases of a new radio or a radio that has not This message may occur initially with a new radio or received XM's signal for - Pioneer VSX-1018AH-K | Owner's Manual - Page 89
home theater experience with stunning sound and high-definition picture. It supports bit rates of up to 18 Mbps and records up to 8 full-range channels (*) individually with 24-bit/96 kHz audio. It also features extensive metadata including dialogue normalization and dynamic range control. Supported - Pioneer VSX-1018AH-K | Owner's Manual - Page 90
are explained below. See www.dtstech.com for more detailed information. DTS Digital Surround DTS Digital Surround is a 5.1-channel audio coding system from DTS Inc. now widely used for DVD-Video, DVD-Audio, 5.1 music discs, digital broadcasts, and video games. It can deliver up to six discrete - Pioneer VSX-1018AH-K | Owner's Manual - Page 91
Home Dock to your XM Ready® audio system, and installed the antenna, you are ready to subscribe and begin receiving XM programming. There are three places to find your eight character XM Radio ID: On the XM MiniTuner, on the XM Mini-Tuner package, and on XM Channel Radio service in Canada online - Pioneer VSX-1018AH-K | Owner's Manual - Page 92
processing and decoding method you have selected. Stereo (2 channel) signal formats SBch Processing SBch Processing ON/AUTO (Automatically selects 6.1/7.1 channel decoding) Input signal format Dolby Digital Plus Dolby TrueHD DTS-HD Master Audio DTS-HD DTS-EXPRESS Dolby Digital Surround DTS - Pioneer VSX-1018AH-K | Owner's Manual - Page 93
Additional information 13 SBch Processing SBch Processing OFFc Input signal format Dolby Digital Plus Dolby TrueHD DTS-HD Master Audio DTS-HD DTS-EXPRESS Dolby Digital Surround DTS Surround SACD XM Radio Other stereo sources Standard 2 Pro Logic ll MOVIE 2 Pro Logic ll MUSIC 2 Pro - Pioneer VSX-1018AH-K | Owner's Manual - Page 94
Dolby Digital Plus Dolby TrueHD DTS-HD DTS-HD Master Audio WMA9 Pro PCM (6.1/7.1 channel) Dolby Digital Plus Dolby TrueHD (5.1 channel) DTS-EXPRESS DTS-HD DTS-HD Master Audio (5.1 channel) Dolby Digital EX (6.1 channel flagged) DTS-ES (6.1 channel sources/ 6.1 channel flagged) DTS and DTS 96/24 - Pioneer VSX-1018AH-K | Owner's Manual - Page 95
Master Audio WMA9 Pro PCM (6.1/7.1 channel) Dolby Digital EX (6.1 channel flagged) SBch Processing OFFb DTS-ES (6.1 channel sources/6.1 channel flagged) Other 5.1 channel sources (5.1 channel encoding) SACD (5.1 channel encoding) SACD (5.1 channel) Other 5.1/6.1/7.1 channel sources a.Unavailable - Pioneer VSX-1018AH-K | Owner's Manual - Page 96
input signal formats, depending on the Stream Direct mode (see Using Stream Direct on page 32) you have selected. Stereo (2 channel) signal formats Surround Back speaker(s) Connected Input signal format Dolby Digital Surround DTS Surround Other stereo sources Analog sources Not connected Dolby - Pioneer VSX-1018AH-K | Owner's Manual - Page 97
Furnished Parts Setup microphone (for Auto MCACC setup 1 AA/IEC R6P dry cell batteries 2 Remote control unit 1 AM loop antenna 1 FM wire antenna 1 Warranty card 1 These operating instructions Composite Video Section Input (Sensitivity/Impedance 1 Vp-p/75 Ω Output (Level/Impedance 1 Vp-p/75 - Pioneer VSX-1018AH-K | Owner's Manual - Page 98
13 Additional information Cleaning the unit • Use a polishing cloth or dry cloth to wipe off dust and dirt. • When the surface is dirty, wipe with a soft cloth dipped in some neutral cleanser diluted five or six times with water, and wrung out well, and then wipe again with a dry cloth. Do not use - Pioneer VSX-1018AH-K | Owner's Manual - Page 99
Additional information 13 Selecting fine audio equipment such as the unit you've just purchased is at a safe level BEFORE your hearing adapts. To establish a safe level: • Start your volume control at a low setting. • Slowly increase the sound until you can hear it comfortably and clearly, and - Pioneer VSX-1018AH-K | Owner's Manual - Page 100
, or if you wish to purchase replacement parts, operating instructions, service manuals, or accessories, please call the number shown below. 1 - 8 0 0 - 4 2 1 - 1 4 0 4 Please do not ship your product to Pioneer without first calling the Customer Support at the above listed number for assistance
-
 1
1 -
 2
2 -
 3
3 -
 4
4 -
 5
5 -
 6
6 -
 7
7 -
8
-
9
-
10
-
11
-
12
-
13
-
14
-
15
-
16
-
17
-
18
-
19
-
20
-
21
-
22
-
23
-
24
-
25
-
26
-
27
-
28
-
29
-
30
-
31
-
32
-
33
-
34
-
35
-
36
-
37
-
38
-
39
-
40
-
41
-
42
-
43
-
44
-
45
-
46
-
47
-
48
-
49
-
50
-
51
-
52
-
53
-
54
-
55
-
56
-
57
-
58
-
59
-
60
-
61
-
62
-
63
-
64
-
65
-
66
-
67
-
68
-
69
-
70
-
71
-
72
-
73
-
74
-
75
-
76
-
77
-
78
-
79
-
80
-
81
-
82
-
83
-
84
-
85
-
86
-
87
-
88
-
89
-
90
-
91
-
92
-
93
-
94
-
95
-
96
-
97
-
98
-
99
-
100
 |
 |
AUDIO/VIDEO MULTI-CHANNEL
RECEIVER
VSX-1018AH
-K
Operating Instructions
• Protect your new investment
The details of your purchase will be on file for reference in the event of an
insurance claim such as loss or theft.
• Improve product development
Your input helps us continue to design products that meet your needs.
• Receive a free Pioneer newsletter
Registered customers can opt in to receive a monthly newsletter.
• Receive free tips, updates and service bulletins on
your new product
Register your product at
http://www.pioneerelectronics.ca (Canada)