Pioneer VSX-42 Owner's Manual
Pioneer VSX-42 Manual
 |
View all Pioneer VSX-42 manuals
Add to My Manuals
Save this manual to your list of manuals |
Pioneer VSX-42 manual content summary:
- Pioneer VSX-42 | Owner's Manual - Page 1
. • Receive free tips, updates and service bulletins on your new product • Improve product development Your input helps us continue to design products that meet your needs. • Receive a free Pioneer newsletter Registered customers can opt in to receive a monthly newsletter. Operating Instructions - Pioneer VSX-42 | Owner's Manual - Page 2
user to the presence of important operating and maintenance (servicing) instructions receiving antenna. - Increase the separation between the equipment and receiver. - Connect the equipment into an outlet on a circuit different from that to which the receiver Cable should be used for connection with - Pioneer VSX-42 | Owner's Manual - Page 3
wall socket when left unused for a long period of time (for example, when on vacation). D3-4-2-2-1a_A1_En 11) Only use attachments/accessories specified by the manufacturer. 12) Use only with the cart, stand, tripod, bracket, or table specified by the manufacturer, or sold with the apparatus. When - Pioneer VSX-42 | Owner's Manual - Page 4
42 Firmware Update 42 Factory Reset 42 System Information 42 About network playback 43 Content playable over a network 43 About playback behavior over a network 44 Glossary 44 About playable file formats 45 07 Home Menu Using the Home Menu 46 Manual speaker setup 46 Speaker Setting - Pioneer VSX-42 | Owner's Manual - Page 5
HDMI Setup 52 Before using synchronization 53 About synchronized operations 53 Cautions on the Control with HDMI function 53 09 Using the MULTI-ZONE feature MULTI-ZONE listening 54 Making MULTI-ZONE connections 54 Using the MULTI-ZONE controls 54 10 Controlling the rest of your system Setting - Pioneer VSX-42 | Owner's Manual - Page 6
receiver. Check the manual that came with the TV if you don't know how to do this. 4 The Speaker System setting (page 49) (Specify either using the surround back or front height speaker.) The Input Assign menu (page 49) (When using connections other than the recommended connections.) HDMI Setup - Pioneer VSX-42 | Owner's Manual - Page 7
Blinks when connecting an HDMI-equipped component; lights when the component is connected (page 16). 8 iPod iPhone iPad indicator Lights when an iPod/iPhone/iPad is connected and iPod/USB input is selected (page 27). 9 Remote sensor Receives the signals from the remote control (see Operating - Pioneer VSX-42 | Owner's Manual - Page 8
audio signal is selected and selected audio input is not provided. HDMI - Lights when an HDMI signal is selected. Blinks when an HDMI signal is selected and selected HDMI input is not provided. 29 Up Mix/DIMMER indicator Lights when the Up Mix function is set to ON (page 35). Also, lights when - Pioneer VSX-42 | Owner's Manual - Page 9
between standby and on. To switch ZONE 2 on/off, press and hold SHIFT button, then press RECEIVER button. 3 RECEIVER Switches the remote to control the receiver (used to select the white commands above the number buttons (MIDNIGHT, etc)). Also use this button to set up surround sound (page 46) or - Pioneer VSX-42 | Owner's Manual - Page 10
components connected to the receiver (page 55). 12 TV CONTROL buttons These setting or input name can be checked by selecting an input source. • The Speaker System setting may or may not be displayed, depending on the input source you have selected. 17 SHIFT This button is used for operating ZONE - Pioneer VSX-42 | Owner's Manual - Page 11
-used in home theaters. To achieve the best setting on page 49). ZONE 2 connection (Multi Zone) With these connections you can simultaneously enjoy the surround sound in the main zone with stereo playback on another component in ZONE 2 (The selection of input devices is limited). See MULTI-ZONE - Pioneer VSX-42 | Owner's Manual - Page 12
see Setting the Up Mix function on page 35). • For the best stereo CRT TV, use shielded speakers (OUTPUT 5 V 0.1 A MAX) L ZONE 2 ANTENNA OUT A R FRONT L R INSTRUCTION MANUAL SELECTABLE VOIR LE MODE D'EMPLOI R L Surround right Surround back right Surround back left Surround left When using - Pioneer VSX-42 | Owner's Manual - Page 13
receiver will work with just two stereo speakers (the front speakers in the diagram) but using at least three speakers is recommended, and a complete setup is best .Back setting only. Use the SPEAKERS button on the front panel to select a speaker terminal setting. SPEAKERS CONTROL - MULTI-ZONE - - Pioneer VSX-42 | Owner's Manual - Page 14
and the TV via this receiver, for both connections, use HDMI cables. HDMI Be careful to connect the terminal in the proper direction. Note • Set the HDMI parameter in Setting the Audio options on page 36 to THRU (THROUGH) and set the input signal in Selecting the audio input signal on page 25 to - Pioneer VSX-42 | Owner's Manual - Page 15
IN IN HDMI Y PB PR COMPONENT VIDEO VIDEO Yellow VIDEO Component video cables Use component video cables to get the best possible color priority to HDMI, component, then composite (in that order). • If the video signal does not appear on your TV, try adjusting the resolution settings on - Pioneer VSX-42 | Owner's Manual - Page 16
with audio cables (as shown). - If the TV supports the HDMI Audio Return Channel function, the sound of the TV can be input to the receiver via the HDMI terminal, so there is no need to connect an audio cable. In this case, set ARC at HDMI Setup to ON (see HDMI Setup on page 52). Note • In order to - Pioneer VSX-42 | Owner's Manual - Page 17
. Please refer to the operating instructions supplied with your player for more information. Important • When the receiver and TV are connected by composite cable, the OSD function allowing display of the receiver's settings, operations, etc., on the TV's screen cannot be used. In this case, watch - Pioneer VSX-42 | Owner's Manual - Page 18
with audio cables (as shown). - If the TV supports the HDMI Audio Return Channel function, the sound of the TV can be input to the receiver via the HDMI terminal, so there is no need to connect an audio cable. In this case, set ARC at HDMI Setup to ON (see HDMI Setup on page 52). Note • In order to - Pioneer VSX-42 | Owner's Manual - Page 19
of your router. In case your router does not have the built-in DHCP server function, it is necessary to set up the network manually. For details, see The Network Setup menu on page 41. Note • Refer to the operation manual of the equipment you have as the connected equipment and connection method may - Pioneer VSX-42 | Owner's Manual - Page 20
on the IR receiver remote sensor window. • Note that other manufacturers may not use the IR terminology. Refer to the manual that came with your component to check for IR compatibility. IR receiver Other component IR IN HDMI OUT DVD SAT/CBL IR IN OUT 12 V TRIGGER (OUTPUT 12 V 50 mA MAX - Pioneer VSX-42 | Owner's Manual - Page 21
this receiver so that they switch on or off using 12 volt triggers when you select an input function. However, you must specify which input functions switch on the trigger using the The 12 V Trigger Setting on page 51. Note that this will only work with components that have a standby mode. HDMI OUT - Pioneer VSX-42 | Owner's Manual - Page 22
initialization process begins. You cannot carry out any operations during this process. The HDMI indicator in the front panel display blinks during this process, and you can turn on this receiver once it has stopped blinking. When you set the Control with HDMI to OFF, you can skip this process. For - Pioneer VSX-42 | Owner's Manual - Page 23
will not appear if you have connected using the composite output to your TV. Use HDMI connection for Auto MCACC setup. • The Auto MCACC setup will overwrite any existing speaker settings you've made. • Before using the Auto MCACC setup, the NETRADIO, PANDORA, M.SERVER, FAVORITE, iPod/USB or ADAPTER - Pioneer VSX-42 | Owner's Manual - Page 24
OK Return • With error messages (such as Too much ambient noise) select RETRY after checking for ambient noise (see Other problems when using the Auto MCACC setup below). If the speaker configuration displayed isn't correct, use / to select the speaker and / to change the setting. When you're - Pioneer VSX-42 | Owner's Manual - Page 25
operate other components using the remote control. To operate the receiver, first press RECEIVER on the remote control, then press the appropriate button to operate. • The input source can also be selected by using INPUT SELECT buttons on the remote control, or by using the front panel INPUT - Pioneer VSX-42 | Owner's Manual - Page 26
SUB WOOFER IR IN OUT Audio DVD SAT/CBL RECEIVER SIGNAL SEL 3 12 V TRIGGER (OUTPUT 12 V 50 mA MAX) Video VIDEO MONITOR SAT/CBL DVD SAT/CBL DVD OUT IN IN AUDIO AA L ZONE 2 OUT R ADAPTER PORT ADAPTER Audio 1. TV (TV input) (OUTPUT 5 V 0.1 A MAX) ANTENNA A R FRONT L AM LOOP 2. Other than - Pioneer VSX-42 | Owner's Manual - Page 27
the songs by a particular artist. Basic playback controls This receiver's remote control buttons can be used for basic playback of files stored on an iPod. • Press iPod/USB to switch the remote control to the iPod/ USB operation mode. MUTE AUDIO PARAMETER TUNE TOOLS MENU PRESET PRESET ENTER - Pioneer VSX-42 | Owner's Manual - Page 28
to the TV through the corresponding HDMI cable. 3 Press iPod/USB on the remote control to switch the receiver to the iPod/USB input. When the display shows the names of folders and files, you're ready to play from the USB device. If a USB Error message lights in the display, try following the - Pioneer VSX-42 | Owner's Manual - Page 29
receiver supports Supported/Supported .flac Sampling frequency 32 kHz, 44.1 kHz, 48 kHz, 88.2 kHz, 96 kHz, 176.4 kHz, 192 kHz Quantization bitrate 16 bit, 24 bit Channel 2 ch a. MPEG Layer-3 audio decoding technology licensed from Fraunhofer IIS and Thomson multimedia. b. Files encoded using - Pioneer VSX-42 | Owner's Manual - Page 30
receiver Remote control operation Wireless music play When the Bluetooth ADAPTER (Pioneer using any other PIN code cannot be used with this system. 5 Switch on the Bluetooth wireless technology device that you want to make pairing, place it near the system and set it into the pairing mode. 6 Check - Pioneer VSX-42 | Owner's Manual - Page 31
ADAPTER to switch the receiver to ADAPTER input. 2 Press TOP MENU to select Bluetooth Setup. 3 Use / to select 'Air Jam', then press ENTER. 4 Use / to select 'Air Jam ON', then press ENTER. For more details on using Air Jam, access our website. http://pioneer.jp/support/soft/iapp_airjam/en.html - Pioneer VSX-42 | Owner's Manual - Page 32
broadcasts using the automatic (search) and manual (step signal is weak, set the receiver to the mono reception use the number buttons. 4 Press ENTER. The preset number stop blinking and the receiver stores the station. Note • If the receiver also use the number buttons on the remote control to 32 - Pioneer VSX-42 | Owner's Manual - Page 33
PARAMETER TOOLS MENU ULTI-ZONE - ON/OFF BAND decoding or playback format). Check the digital format indicators in Using this receiver, you can listen to any source in surround sound. However, the options available will depend on your speaker setup on your speaker settings). Dolby Digital and - Pioneer VSX-42 | Owner's Manual - Page 34
STREAM DIRECT Use the Stream Direct modes when you want to hear the truest possible reproduction of a source. All unnecessary signal processing is bypassed. AUTO SURROUND See Auto playback on page 33. DIRECT Sources are heard according to the settings made in the Manual SP Setup (speaker setting - Pioneer VSX-42 | Owner's Manual - Page 35
phase matching for an optimal sound image at your listening position. The default setting is on and we recommend leaving Phase Control switched on for all sound sources. RECEIVER SLEEP SOURCE 1 2 3 DISP 4 5 6 CH INPUT 7 8 9 CH SHIFT CLR 0 ENTER While listening to a source, press - Pioneer VSX-42 | Owner's Manual - Page 36
the receiver. RECEIVER SLEEP SOURCE INPUT 1 Press RECEIVER , then press AUDIO PARAMETER. 2 Use / to select the setting you want to adjust. Depending on the current status/mode of the receiver, certain options may not be able to be selected. Check the table below for notes on this. 3 Use / to set - Pioneer VSX-42 | Owner's Manual - Page 37
You shouldn't have any problems using this with most SACD discs, but if the sound distorts, it is best to switch the gain setting back to 0 dB. g. This feature is only available when the connected display supports the automatic audio/video synchronizing capability ('lip-sync') for HDMI. If you find - Pioneer VSX-42 | Owner's Manual - Page 38
switch the remote control to the network operation mode.) *1: For more information, see the Apple website (http:// www.apple.com). *2: The receiver's power automatically turns on when Network Standby is set to ON (page 51). Note • A network environment is required to use AirPlay. • AirPlay provided - Pioneer VSX-42 | Owner's Manual - Page 39
perform the following operations with the remote control of this receiver. Note that some buttons are not available for operation depending on the category currently being played back. Press NETWORK to switch the remote control to the NETRADIO, PANDORA, M.SERVER or FAVORITE operation mode. MUTE - Pioneer VSX-42 | Owner's Manual - Page 40
know. For details, check the website: http://www.pandora.com • You must have a registered account in order to listen to songs using Pandora Internet Radio. Select PANDORA, then follow the instructions on the screen to make the account settings. • As of April 2011, the Pandora service is only offered - Pioneer VSX-42 | Owner's Manual - Page 41
(page 42). • Firmware Update - Use to update the receiver's software and check the version (page 42). • Factory Reset - Use to reset all network connection settings to their initial, factory-setting condition (page 42). • System Info - You can check the network settings of this receiver (page 42 - Pioneer VSX-42 | Owner's Manual - Page 42
device is a newer version. • Updating may reset the receiver's settings to the initial, factory-setting condition. Whether this is applicable to your receiver can be confirmed at our Pioneer website. 1 Select 'Firmware Update' from the Network Setup menu. The receiver checks whether the USB memory - Pioneer VSX-42 | Owner's Manual - Page 43
server software or other DLNA compatible device is connected to this player, some setting changes of software or other devices may be required. Please refer to the operating instructions for the software or device for more information. DLNA™, the DLNA Logo and DLNA CERTIFIED™ are trademarks, service - Pioneer VSX-42 | Owner's Manual - Page 44
If there are problems within the network environment ). For best performance, setting of such software, network connection may be blocked. Pioneer used. The WMDRM-protected content can only be played back on a component supporting the WMDRM service. Windows Media Player 11/ Windows Media Player 12 - Pioneer VSX-42 | Owner's Manual - Page 45
The NETWORK feature of this receiver supports the following file formats. Note that some file formats are not available for playback although they are listed as playable file formats. Also, the compatibility of file formats varies depending on the type of server. Check with your server to ensure the - Pioneer VSX-42 | Owner's Manual - Page 46
audio output. (see The ZONE2 Setup on page 51). • 12V Trigger - Sets the input function that enables the signal output from the 12 V trigger terminal (see The 12 V Trigger Setting on page 51). Manual speaker setup This receiver allows you to make detailed settings to optimize the surround sound - Pioneer VSX-42 | Owner's Manual - Page 47
. • For more on selecting the speaker sizes, see Speaker Setting on page 46. 1 Select 'Manual SP Setup' from the Home Menu. 2 Select 'X.Over' from the Manual SP Setup menu. 2 . Manual SP Setup a . Speaker Setting b . X.Over c . Channel Level d . Speaker Distance 2b . X.Over Frequency 100Hz - Pioneer VSX-42 | Owner's Manual - Page 48
, press RETURN. You return to the Manual SP Setup menu. Tip • You can change the channel levels at any time by press RECEIVER , then press CH SELECT and LEV +/- on the remote control. You can also press CH SELECT and use / to select the channel, and then use / to adjust the channel levels - Pioneer VSX-42 | Owner's Manual - Page 49
Menu 1 . Auto MCACC 2 . Manual SP Setup 3 . Input Assign 4 . Speaker System 5 . Video Parameter 6 . HDMI Setup 7 . Auto Power Down 8 . Network Standby 9 . ZONE2 Setup 10 . 12V Trigger 4 . Speaker System SP System Surr. Back Return 2 Select the speaker system setting using Surr. Back - Sound is - Pioneer VSX-42 | Owner's Manual - Page 50
the receiver after a specified time has passed (when the power has been on with no operation for several hours). • Default setting: OFF 1 Select 'Auto Power Down' from the Home Menu. Home Menu 1 . Auto MCACC 2 . Manual SP Setup 3 . Input Assign 4 . Speaker System 5 . Video Parameter 6 . HDMI Setup - Pioneer VSX-42 | Owner's Manual - Page 51
over to the input function set here, a control signal is output from the receiver's 12 V trigger terminal, and operations such as power coupling with other devices and equipment can be achieved. 1 Select '12V Trigger' from the Home Menu. Home Menu 1 . Auto MCACC 2 . Manual SP Setup 3 . Input Assign - Pioneer VSX-42 | Owner's Manual - Page 52
directly to the HDMI terminal on this receiver. HDMI Setup You must adjust the settings of this receiver as well as the connected Control with HDMI-compatible components in order to make use of the Control with HDMI function. For more information see the operating instructions for each component - Pioneer VSX-42 | Owner's Manual - Page 53
components (Blu-ray Disc player, etc.) directly to this receiver. Interrupting a direct connection with other amps or an AV converter (such as an HDMI switch) can cause operational errors. • When the receiver's Control is turned ON, even if the receiver's power is in the standby mode, it is possible - Pioneer VSX-42 | Owner's Manual - Page 54
the possible MULTI-ZONE remote controls: Button What it does RECEIVER Switches on/off power in the sub zone. INPUT SELECT Use to select the input source in the sub zone. Input function buttons VOLUME +/-a MUTEa Use to select the input source directly in the sub zone. Use to set the listening - Pioneer VSX-42 | Owner's Manual - Page 55
. Clearing all the remote control settings You can clear all presets and restore the factory default settings. While pressing RECEIVER , press and hold the '0' button for three seconds. Default preset codes Input function button Preset code BD DVD DVR/BDR SAT/CBL GAME VIDEO CD TV TV CONTROL - Pioneer VSX-42 | Owner's Manual - Page 56
TV) after entering the proper codes or teaching the receiver the commands (see Controlling the rest of your system on page 55 for more on this). Use the input function buttons to select the component. • The TV CONTROL buttons on the remote control are dedicated to control the TV assigned to the - Pioneer VSX-42 | Owner's Manual - Page 57
Yamaha 0004, 0005, 0006, 0100 Zenith 0001, 0004, 0011, 0015, 0099 DVD If operations are not possible using the preset codes below, you may be able to conduct operations with the preset codes for the BD, DVR (BDR, HDR). Pioneer 2014, 2197, 2256 Accurian 2092 Advent 2072 Aiwa 2012 Akai 2066 Alco 2070 - Pioneer VSX-42 | Owner's Manual - Page 58
HDR) If operations are not possible using the preset codes below, you may be able to conduct operations with the preset codes for the DVD, BD. Pioneer 2078, 2099, 1005 Yamaha 1000, 1001 Zenith 1013, 1018 ZT Group 1017 Satellite Set Top Box Pioneer 6097, 6098, 6325, 6328, 6329 ADB 6035, 6001 Akai - Pioneer VSX-42 | Owner's Manual - Page 59
Set Top Box (Cable/ PVR Combination) Pioneer 6029 Pioneer 5001, 5053, 5071 Philips 5054 Yamaha 5055 Tuner Pioneer 5060 Laser Disc Player Pioneer 5002, 5003 Casette Deck Pioneer 5058, 5059 Digital Tape Pioneer 5057 MD Pioneer 5056 Network Audio Player Pioneer 5063 Game X-Box 2313 AV Receiver Pioneer - Pioneer VSX-42 | Owner's Manual - Page 60
and electrical appliances being used, because sometimes the problem may lie there. If the trouble isn't sorted out even after going through the checks below, ask your nearest Pioneer authorized independent service company to carry out repair work. • If the unit does not operate normally due to - Pioneer VSX-42 | Owner's Manual - Page 61
be played back on Windows Media Player 11 or Windows Media Player 12. Try using another server. Refer to the operation manual supplied with your server. The component connected to the network is not properly operated. - Check whether the component is affected by special circumstances or is in the - Pioneer VSX-42 | Owner's Manual - Page 62
HDMI function. Check the HDMI connections. The cable may be damaged. Select ON for the Control with HDMI setting (see HDMI Setup on page 52). Turn the TV's power on before turning on this receiver's power. Set the TV side Control with HDMI setting to on (see TV's operating instructions - Pioneer VSX-42 | Owner's Manual - Page 63
HDMI-equipped component directly to the display using an HDMI cable. Then use the most convenient connection (digital is recommended) for sending audio to the receiver. See the operating instructions for more on audio connections. Set OF SUBSTITUTE GOODS OR SERVICES; LOSS OF USE, DATA, OR PROFITS; - Pioneer VSX-42 | Owner's Manual - Page 64
already full. Resetting the main unit Use this procedure to reset all the receiver's settings to the factory default. Use the front panel controls to do this. • For instructions on resetting the network connection settings, see Factory Reset on page 42. 1 Switch the receiver into standby. 2 While - Pioneer VSX-42 | Owner's Manual - Page 65
Level: 2.0 V) 12 V Trigger terminal 3.5 Mini-jack (MONO) 12 V Trigger output type 12 V, 50 mA setup 1 Remote control 1 Dry cell batteries (AAA size IEC R03 2 AM loop antenna 1 FM wire antenna 1 iPod cable 1 Warranty card 1 Quick start guide 1 Safety Brochure 1 These operating instructions - Pioneer VSX-42 | Owner's Manual - Page 66
To register your product, find the nearest authorized service location, to purchase replacement parts, operating instructions, or accessories, please go to one of following URLs : Pour enregistrer votre produit, trouver le service après-vente agréé le plus proche et pour acheter des pièces de
-
 1
1 -
 2
2 -
 3
3 -
 4
4 -
 5
5 -
 6
6 -
 7
7 -
8
-
9
-
10
-
11
-
12
-
13
-
14
-
15
-
16
-
17
-
18
-
19
-
20
-
21
-
22
-
23
-
24
-
25
-
26
-
27
-
28
-
29
-
30
-
31
-
32
-
33
-
34
-
35
-
36
-
37
-
38
-
39
-
40
-
41
-
42
-
43
-
44
-
45
-
46
-
47
-
48
-
49
-
50
-
51
-
52
-
53
-
54
-
55
-
56
-
57
-
58
-
59
-
60
-
61
-
62
-
63
-
64
-
65
-
66
 |
 |
Register your product on
http://www.pioneerelectronics.ca (Canada)
•
Protect your new investment
The details of your purchase will be on file for reference in the event of an insurance claim such as loss or theft.
•
Improve product development
Your input helps us continue to design products that meet your needs.
•
Receive a free Pioneer newsletter
Registered customers can opt in to receive a monthly newsletter.
•
Receive free tips, updates and service bulletins on your new product
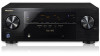
AV Receiver
VSX-42
Operating Instructions