Polaroid 545i User Guide - Page 6
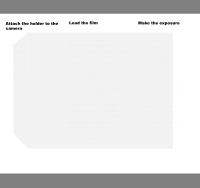
Attach the holder to the, camera, Make the exposure, Load the film
 |
View all Polaroid 545i manuals
Add to My Manuals
Save this manual to your list of manuals |
Page 6 highlights
English 6 Attach the holder to the camera Before use, open the roller cover and inspect the processing rollers. Clean them if necessary (see Cleaning the rollers). Slide the holder into the back of the camera, just as you would a standard film holder. If your camera has slide locks, use them in addition to the spring back; the locks fit into slots on the sides of the holder. Load the film 1 Move the control arm to L (2). 2 Hold the envelope as shown (3) and insert the cap end into the holder. Be sure that the side marked THIS SIDE TOWARD LENS faces the lens. Do not hold the envelope by the end when first inserting it into the holder, as you may buckle the envelope (4) and damage the film. Do not press on the area marked DO NOT PRESS HERE, where the pod of developer chemicals is located. 3 Push the envelope in halfway (5), then shift your grip to the end, and push it in the rest of the way (6). When the envelope is fully inserted the tabs (6-j) will be visible in the recess along the edge of the film holder. Make the exposure 1 Gently withdraw the envelope from the holder until it comes to a firm stop (7). It will come out almost 6 inches (15cm), then stop. The negative will remain inside the holder, ready for exposure. To prevent possible light leak, the envelope should not be removed for longer than necessary. If outdoors, protect the envelope from bright sunlight and also from bending in the wind. 2 Lightly run your thumb and forefinger over the area marked DO NOT PRESS HERE (8). It should be perfectly flat and smooth. If you can feel the pod, the negative was withdrawn accidentally with the envelope. Push the envelope in again, withdraw it, and check again.
-
 1
1 -
 2
2 -
 3
3 -
 4
4 -
 5
5 -
 6
6 -
 7
7 -
 8
8 -
 9
9 -
 10
10 -
 11
11 -
 12
12 -
13
-
14
 |
 |
