ProForm 310 E Elliptical English Manual - Page 10
Assemble the Left Upper Body Arm 8
 |
View all ProForm 310 E Elliptical manuals
Add to My Manuals
Save this manual to your list of manuals |
Page 10 highlights
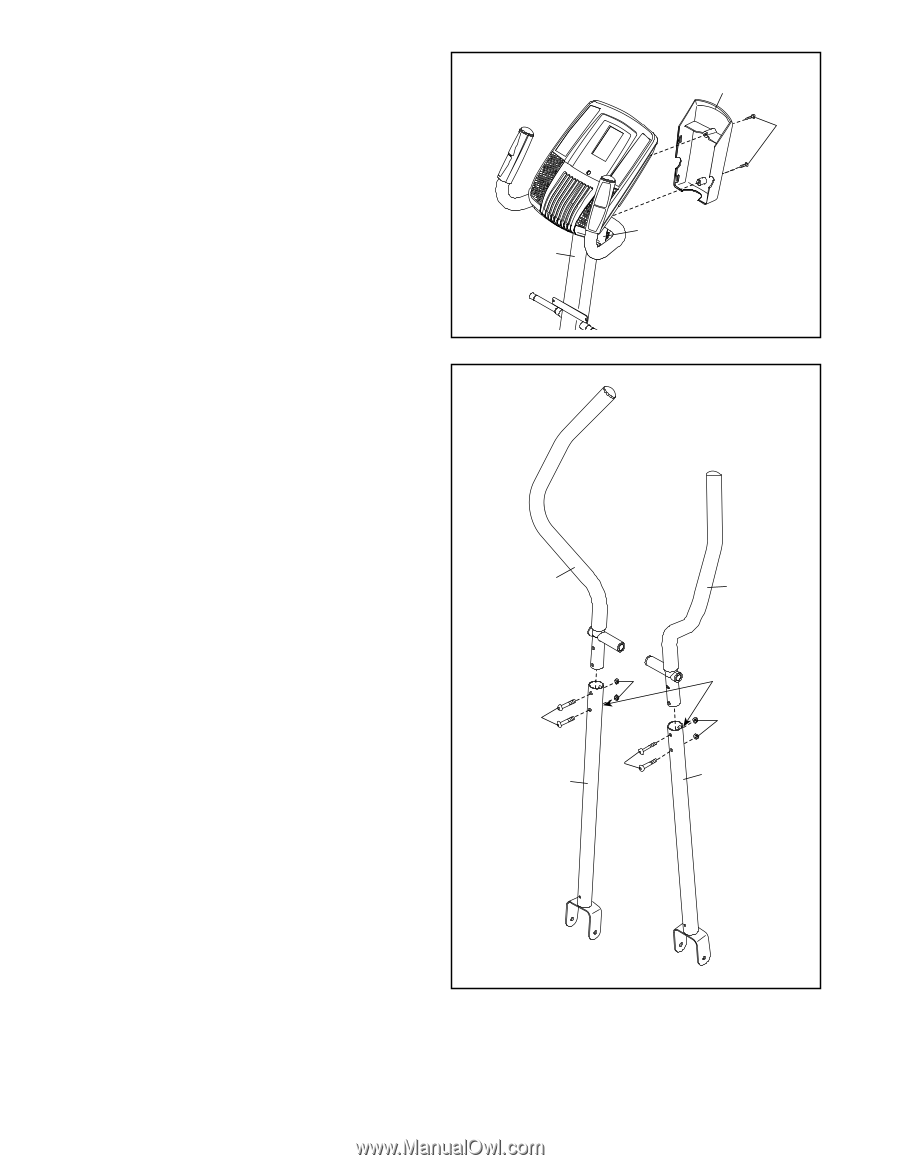
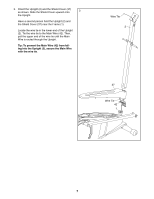
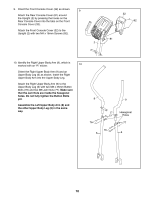
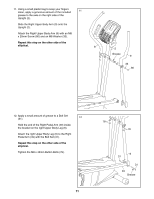
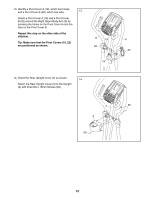
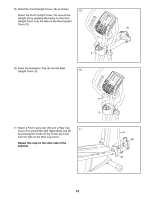
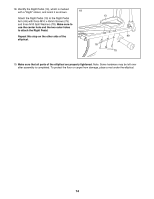
9. Orient the Front Console Cover (32) as shown. 9 Attach the Rear Console Cover (81) around the Upright (2) by pressing the hooks on the Rear Console Cover into the tabs on the Front Console Cover (32). Attach the Front Console Cover (32) to the Upright (2) with two M4 x 16mm Screws (92). 2 32 92 81 10. Identify the Right Upper Body Arm (9), which is marked with an “"R”" sticker. 10 Orient the Right Upper Body Arm (9) and an Upper Body Leg (6) as shown. Insert the Right Upper Body Arm into the Upper Body Leg. Attach the Right Upper Body Arm (9) to the Upper Body Leg (6) with two M8 x 45mm Button Bolts (76) and two M8 Jam Nuts (77). Make sure that the Jam Nuts are inside the hexagonal holes. Do not fully tighten the Button Bolts yet. Assemble the Left Upper Body Arm (8) and the other Upper Body Leg (6) in the same way. 8 76 6 77 76 9 Hexagonal Holes 77 6 10
-
 1
1 -
2
-
3
-
4
-
 5
5 -
 6
6 -
 7
7 -
 8
8 -
 9
9 -
 10
10 -
 11
11 -
 12
12 -
 13
13 -
 14
14 -
 15
15 -
16
-
17
-
18
-
19
-
20
-
21
-
22
-
23
-
24
-
25
-
26
-
27
-
28
 |
 |