ProForm 370e Treadmill User Manual
ProForm 370e Treadmill Manual
 |
View all ProForm 370e Treadmill manuals
Add to My Manuals
Save this manual to your list of manuals |
ProForm 370e Treadmill manual content summary:
- ProForm 370e Treadmill | User Manual - Page 1
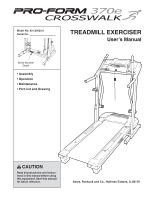
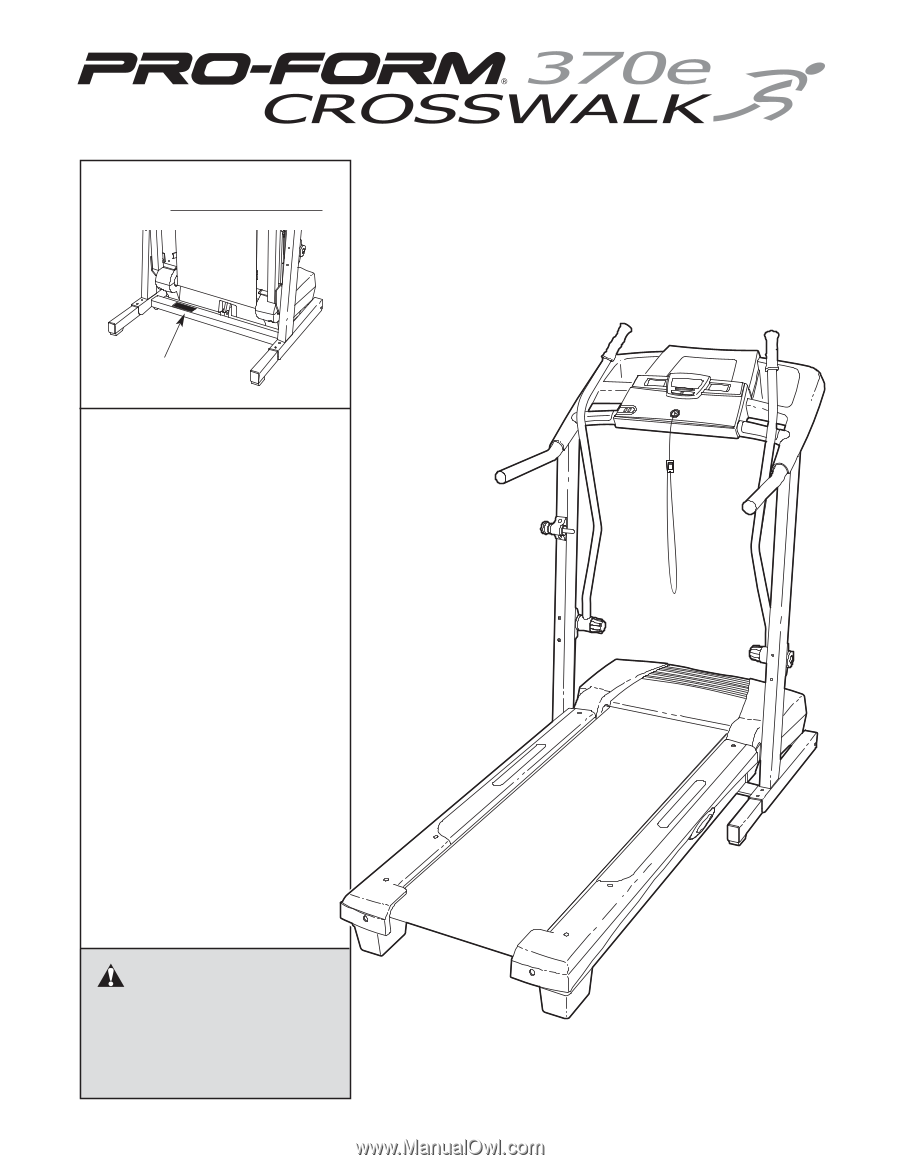
.29623.0 Serial No. TREADMILL EXERCISER User's Manual Serial Number Decal • Assembly • Operation • Maintenance • Part List and Drawing CAUTION Read all precautions and instructions in this manual before using this equipment. Save this manual for future reference. Sears, Roebuck and Co., Hoffman - ProForm 370e Treadmill | User Manual - Page 2
3 BEFORE YOU BEGIN 5 ASSEMBLY 6 OPERATION AND ADJUSTMENT 10 HOW TO FOLD AND MOVE THE TREADMILL 16 TROUBLESHOOTING 17 CONDITIONING GUIDELINES 19 ORDERING REPLACEMENT PARTS Back Cover FULL 90 DAY WARRANTY Back Cover Note: An EXPLODED DRAWING and a PART LIST are attached in the center of this - ProForm 370e Treadmill | User Manual - Page 3
belt. Always hold the handrails or the upper body arms while using the treadmill. 8. Never allow more than one person on the treadmill at a time. 9. Wear appropriate exercise clothes when using the treadmill. Do not wear loose clothes that could become caught in the treadmill. Athletic support - ProForm 370e Treadmill | User Manual - Page 4
adjustment procedures described in this manual. Never remove the motor hood unless instructed to do so by an authorized service representative. Servicing other than the procedures in this manual should be performed by an authorized service representative only. 25. This treadmill is intended for in - ProForm 370e Treadmill | User Manual - Page 5
attached to the treadmill (see the front cover of this manual for the location). Before reading further, please review the drawing below and familiarize yourself with the labeled parts. Accessory Tray Upper Body Arm Handrail Storage Latch Bookrack Console Key/Clip Upright Walking Belt Foot Rail - ProForm 370e Treadmill | User Manual - Page 6
materials until assembly is completed. Note: The underside of the treadmill walking belt is coated with high-performance lubricant. During shipping, a small the drawings below. If a part is not in the parts bag, first check to see if it has been pre-assembled. If a part is missing, call toll-free - ProForm 370e Treadmill | User Manual - Page 7
) and a Wheel Nut (32) as shown. Do not overtighten the Bolt; the Wheel should turn freely. With the help of a second person, carefully tip the treadmill onto its other side. See assembly steps 1 and 2, and attach the other Extension Leg (63), Base Pads (57), and Wheel (66). With the help of - ProForm 370e Treadmill | User Manual - Page 8
5. Touch the Right Handrail (72) to discharge any static. Slide the sleeve off the connector on the Upright Wire (42) as shown in the inset drawing. Next, press the end of the Upright Wire into the socket in the bottom of the Console Base (47). The connector should slide easily into the socket and - ProForm 370e Treadmill | User Manual - Page 9
(29), and tighten the knob back onto the pin. 9 29 Knob 2 69 Spring Collar Pin Large Hole 10.Make sure that all parts are properly tightened before you use the treadmill. Note: Extra hardware may be included. Keep the included allen wrenches in a secure place; the large allen wrench is used to - ProForm 370e Treadmill | User Manual - Page 10
treadmill being damaged, always use a surge suppressor with your treadmill (see drawing 1 at the right). To purchase a surge suppressor, see your local Sears store or call 1-800-366-7278 and order part system of the treadmill. If the control system is damaged, the walking belt may change speed, - ProForm 370e Treadmill | User Manual - Page 11
Programming As you exercise on the treadmill, the center display the treadmill as it guides you through an effective workout. To use the manual mode key can be pulled from the console, causing the walking belt to slow to a stop. Test the clip by carefully taking a few steps backward; if the key - ProForm 370e Treadmill | User Manual - Page 12
belt. When the Start button or the Speed increase button is pressed, the walking belt will begin to move at 1 mph. As you exercise, change the speed of the walking belt instructions in this section refer to miles. The center display- When the manual When you use the treadmill's upper body arms, press - ProForm 370e Treadmill | User Manual - Page 13
thumb on the pulse sensor. Remember to stand still while measuring your heart rate. 8 When you are finished exercising, remove the key. Step onto the foot rails, press the Stop button, and adjust the incline of the treadmill to the lowest setting. The incline must be at the lowest setting when the - ProForm 370e Treadmill | User Manual - Page 14
to 2 miles per hour. After another minute, the walking belt will slow to a stop. 4 Follow your progress with the displays. See step 6 on page 12. 5 Measure your heart rate if desired. See step 7 on page 13. 6 When you are finished exercising, remove the key from the console. See step 8 on page 13 - ProForm 370e Treadmill | User Manual - Page 15
completed, remove the key from the console. As you walk on the treadmill, you can hold the handrails or use the upper body arms. To exercise your arms, total number of hours that the treadmill has been used and the total number of miles (or kilometers) that the walking belt has moved. An "E" (for - ProForm 370e Treadmill | User Manual - Page 16
permanently damaged. Next, unplug the power cord. CAUTION: You must be able to safely lift 45 pounds (20 kg) to raise, lower, or move the treadmill. 1. Hold the metal frame firmly in the location shown by the arrow at the right. CAUTION: To decrease the possibility of injury, do not lift - ProForm 370e Treadmill | User Manual - Page 17
TROUBLESHOOTING Most treadmill problems can be solved by following the simple steps below. Find the symptom that applies, and follow the steps listed. If further assistance is needed, call toll-free 1-800-4-MY-HOME® (1-800-469-4663). PROBLEM: The power does not turn on SOLUTION: a. Make sure that - ProForm 370e Treadmill | User Manual - Page 18
belt centered. Then, plug in the power cord, insert the key, and carefully walk on the treadmill for a few minutes. Repeat until the walking belt is properly tightened. PROBLEM Resistance Cone (107). Then, reattach all parts in the order shown at the right. 105 24 107 112 111 108 109 27 113 - ProForm 370e Treadmill | User Manual - Page 19
be found by using your heart rate as a guide. The chart below shows recommended heart rates for fat burning and aerobic exercise. begin to use stored fat calories for energy. If your goal is to burn fat, adjust the speed and incline of the treadmill until your heart rate is near the lowest - ProForm 370e Treadmill | User Manual - Page 20
PART LIST-Model No. 831.29623.0 R1005A Key No. Qty. Description Key No. Qty. Description Key No. Qty. Description 1 1 Hood 2 16 3/4" Screw 3 1 Motor Belt 4 1 Motor Tension Bolt 5 4 3/8" Washer 6 1 Motor Star Washer 7 1 Flywheel 8 1 Drive Motor Belly Pan Belt Guide Belt Guide Screw Isolator - ProForm 370e Treadmill | User Manual - Page 21
EXPLODED DRAWING-Model No. 831.29623.0 R1005A 47 28 43 6 34 22 3 7 20 103 28 99 76 22 48 104 106 58 67 44 38 92 41 105 107 108 21 58 74 11 15 58 22 1 24 27 112 111 109 9 113 5 101 58 30 58 84 82 83 85 96 58 98 58 58 58 10 12 58 91 19 13 14 15 18 17 9 58 58 97 15 84 - ProForm 370e Treadmill | User Manual - Page 22
failure occurs due to defect in material or workmanship in this Sears Treadmill Exerciser, contact the nearest Sears Service Center throughout the United States and Sears will repair or replace the Treadmill Exerciser, free of charge. The drive motor is warranted for three (3) years from the date of
-
 1
1 -
 2
2 -
 3
3 -
 4
4 -
 5
5 -
 6
6 -
 7
7 -
8
-
9
-
10
-
11
-
12
-
13
-
14
-
15
-
16
-
17
-
18
-
19
-
20
-
21
-
22
 |
 |
Model No. 831.29623.0
Serial No.
CAUTION
Read all precautions and instruc-
tions in this manual before using
this equipment. Save this manual
for future reference.
Sears, Roebuck and Co., Hoffman Estates, IL 60179
TREADMILL EXERCISER
User’s Manual
• Assembly
• Operation
• Maintenance
• Part List and Drawing
Serial Number
Decal