ProForm 520 Trainer Treadmill English Manual
ProForm 520 Trainer Treadmill Manual
 |
View all ProForm 520 Trainer Treadmill manuals
Add to My Manuals
Save this manual to your list of manuals |
ProForm 520 Trainer Treadmill manual content summary:
- ProForm 520 Trainer Treadmill | English Manual - Page 1
complete customer satisfaction. If you have questions, or if parts are missing, PLEASE DO NOT CONTACT THE STORE; please contact precautions and instructions in this manual before using this equipment. Save this manual for future reference. USER'S MANUAL Visit our website at www.proform.com - ProForm 520 Trainer Treadmill | English Manual - Page 2
FOLD AND MOVE THE TREADMILL 21 TROUBLESHOOTING 23 EXERCISE GUIDELINES 25 PART LIST 27 EXPLODED DRAWING 28 ORDERING REPLACEMENT PARTS cover of this manual and request a free replacement decal. Apply the decal in the location shown. Note: The decals may not be shown at actual size. PROFORM is a - ProForm 520 Trainer Treadmill | English Manual - Page 3
suppressor, see your local PROFORM dealer or call the telephone number on the front cover of this manual and order part number 146148, or see your the treadmill if the power cord or plug is damaged, or if the treadmill is not working properly. (See TROUBLESHOOTING on page 23 if the treadmill is not - ProForm 520 Trainer Treadmill | English Manual - Page 4
cord immediately after use, before cleaning the treadmill, and before performing the maintenance and adjustment procedures de- scribed in this manual. Never remove the motor hood unless instructed to do so by an authorized service representative. Servicing other than the procedures in this - ProForm 520 Trainer Treadmill | English Manual - Page 5
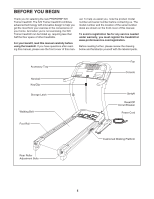
for selecting the new PROFORM® 520 Trainer treadmill. The 520 Trainer treadmill combines advanced technology with innovative design to help you get the most from your exercise in the convenience of your home. And when you're not exercising, the 520 Trainer treadmill can be folded up, requiring less - ProForm 520 Trainer Treadmill | English Manual - Page 6
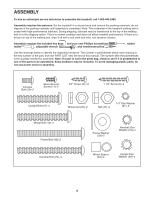
an authorized service technician to assemble the treadmill, call 1-800-445-2480. Assembly requires two persons. Set the treadmill in a part, from the PART LIST near the end of this manual. The number after the parentheses is the quantity needed for assembly. Note: If a part is not in the parts - ProForm 520 Trainer Treadmill | English Manual - Page 7
1. Attach a Wheel (45) to one side of the Base (48) with a Wheel Bolt (14), two Wheel Spacers (44), 1 45 and a Wheel Nut (35) as shown. Do not overtighten the Wheel Nut; the Wheel should turn 45 44 6 freely. 44 Hole 37 6 Attach the other Wheel (45) to the other side of the Base (48) in - ProForm 520 Trainer Treadmill | English Manual - Page 8
Star Washers (39); do not tighten the Upright Bolts yet. Bend 36 48 39 27 39 4. Set the Base (48) near the front of the treadmill, 4 with the Power Cord (13) on the Hood (1) as shown. Cut the small tie (not shown) holding the Upright Wire (28) in a bundle. See the - ProForm 520 Trainer Treadmill | English Manual - Page 9
5. See the left inset drawing. Identify the two 5 Frame Spacers (34). Open the included packet of grease, and apply grease to both sides of both Frame Spacers. Then, identify the outer side of each Frame Spacer. Next, hold a Frame Spacer (34) between the Right Upright (36) and the Lift Frame ( - ProForm 520 Trainer Treadmill | English Manual - Page 10
Right Upright (36) and the Left Upright (not shown) with four Handrail Bolts (20) and four Handrail Star Washers (19) (only one side of the treadmill is shown). Start all four Handrail Bolts before tightening any of them. 9 18 36 19 20 19 20 10 26 Console Wire 28 Console Wire - ProForm 520 Trainer Treadmill | English Manual - Page 11
(74) is centered between the Uprights. See steps 2, 3, 5, and 6. Firmly tighten the Upright Bolts (27) and the Frame Bolt (32) on each side of the treadmill. Do not overtighten the Frame Bolts. 31 Side View 32 27 74 31, 36 View from Above 74 36 11. Raise the Uprights (31, 36 - ProForm 520 Trainer Treadmill | English Manual - Page 12
the plastic packaging from the bottom of the Belly Pan (not shown). 31 30 Spring Collar Pin 14. Make sure that all parts are properly tightened before you use the treadmill. Note: Extra hardware may be included. Keep the included hex keys in a secure place; the large hex key is used to - ProForm 520 Trainer Treadmill | English Manual - Page 13
treadmill (see drawing 1 at the right). To purchase a surge suppressor, see your local PROFORM dealer or call the telephone number on the front cover of this manual and order part The surge suppressor must have a UL suppressed voltage rating of 400 volts or less and a minimum surge dissipation - ProForm 520 Trainer Treadmill | English Manual - Page 14
to make your workouts more effective. When the manual mode of the console is selected, the speed and incline of the treadmill can be changed with the touch of a button. As you exercise, the console will display continuous exercise feedback. You can even measure your heart rate using the built - ProForm 520 Trainer Treadmill | English Manual - Page 15
TURN ON THE POWER 3. Select the manual mode. IMPORTANT: If the treadmill has been exposed to cold temperatures, allow Reset Position IMPORTANT: The console features a display demo mode, designed to be used if the treadmill is displayed in a store. If the displays light as soon as you plug in the - ProForm 520 Trainer Treadmill | English Manual - Page 16
the display. 7. Measure your heart rate if desired. When the manual mode is selected, Track the upper part of the display will show a track incline of the treadmill to the lowest setting. The incline must be at the lowest setting or you may damage the treadmill when you fold it to the - ProForm 520 Trainer Treadmill | English Manual - Page 17
: To change the speed of the walking belt or the incline of the treadmill at any time during the program, press the Speed or Incline buttons. See handrails and begin walking. See step 6 on page 16. 5. Measure your heart rate if desired. Near the end of the second minute of the program, the speed - ProForm 520 Trainer Treadmill | English Manual - Page 18
display. See step 6 on page 16. 5. Measure your heart rate if desired. Note: To find an appropriate starting goal, walk on the treadmill with the manual mode selected (see page 15), and note the number of steps that you walk during your workout. Then, round that number up to the nearest 500 steps - ProForm 520 Trainer Treadmill | English Manual - Page 19
burn will depend on your weight. In addition, if you manually change the speed or incline of treadmill during the program, the number of calories you burn will be 6. Measure your heart rate if desired. See step 7 on page 16. 7. Turn on the fan if desired. During the workout, the profile will show - ProForm 520 Trainer Treadmill | English Manual - Page 20
display. To change the unit of measurement, press the Speed increase button. Note: The console features a display demo mode, designed to be used if the treadmill is displayed in a store. While the demo mode is turned on, the console will function normally when you plug in the power cord, switch the - ProForm 520 Trainer Treadmill | English Manual - Page 21
HOW TO FOLD AND MOVE THE TREADMILL HOW TO FOLD THE TREADMILL FOR STORAGE Before folding the treadmill, adjust the incline to the lowest position. If you do not do this, you may damage the treadmil when you fold it. Next, unplug the power cord. CAUTION: You must be able to safely lift 45 lbs. (20 kg) - ProForm 520 Trainer Treadmill | English Manual - Page 22
HOW TO LOWER THE TREADMILL FOR USE 1. Hold the treadmill with your right hand as shown. Pull the latch knob to the left and hold it. Pivot the frame down until it is past the - ProForm 520 Trainer Treadmill | English Manual - Page 23
TROUBLESHOOTING Most treadmill problems can be solved by following the steps below. Find the symptom that applies, and follow the steps listed. If further assistance is needed, please see the front cover of this manual. PROBLEM: The power does not turn on SOLUTION: a. Make sure that the power - ProForm 520 Trainer Treadmill | English Manual - Page 24
power cord, insert the key, and run the treadmill for a few minutes. Repeat until the walking belt is properly tightened. b 2-3 in. Rear Roller Bolts c. If the walking belt still slows when walked on, please see the front cover of this manual. PROBLEM: The walking belt is off-center or slips when - ProForm 520 Trainer Treadmill | English Manual - Page 25
problems. The pulse sensor is not a medical device. Various factors may affect the accuracy of heart rate rate as a guide to find the proper intensity level. The chart below shows recommended heart rates your heart rate is near the highest number in your training zone. WORKOUT GUIDELINES Warming up - ProForm 520 Trainer Treadmill | English Manual - Page 26
SUGGESTED STRETCHES The correct form for several basic stretches is shown at the right. Move slowly as you stretch-never bounce. 1. Toe Touch Stretch Stand with your knees bent slightly and slowly bend forward from 1 your hips. Allow your back and shoulders to relax as you reach down toward - ProForm 520 Trainer Treadmill | English Manual - Page 27
Hex Key Caution Decal Console Support Bracket Warning Decal Wheel Spacer 68 2 Belt Guide 69 2 Rear Roller Bracket 70 2 Isolator 71 4 Belt Guide Screw 72 1 * - 4" Red Wire, M/F * - User's Manual *These parts are not illustrated. Specifications are subject to change without notice - ProForm 520 Trainer Treadmill | English Manual - Page 28
EXPLODED DRAWING A-Model No. PFTL49807.0 R0707A 28 15 4 4 3 4 94 66 68 76 62 63 86 24 38 61 67 60 98 4 70 96 99 20 2 43 71 72 35 64 65 94 73 11 77 69 81 76 82 83 38 40 84 85 20 11 79 81 82 77 11 80 4 69 76 38 70 15 4 74 75 99 35 86 66 35 24 4 76 68 71 4 2 2 49 - ProForm 520 Trainer Treadmill | English Manual - Page 29
EXPLODED DRAWING B-Model No. PFTL49807.0 R0707A 92 1 87 5 39 8 5 10 9 57 53 33 47 58 59 35 93 56 47 55 47 93 13 11 12 78 11 100 11 12 97 95 53 33 38 38 2 51 38 50 38 29 - ProForm 520 Trainer Treadmill | English Manual - Page 30
EXPLODED DRAWING C-Model No. PFTL49807.0 17 R0707A 46 18 17 2 29 88 89 21 22 2 52 42 2 19 20 46 2 88 90 30 18 41 41 31 17 34 32 6 33 91 2 2 17 2 52 2 22 21 28 19 20 36 37 6 14 44 2 45 44 35 37 7 39 27 34 2 28 11 48 54 6 35 44 45 2 14 37 44 33 32 6 37 39 2 - ProForm 520 Trainer Treadmill | English Manual - Page 31
EXPLODED DRAWING D-Model No. PFTL49807.0 2 26 25 2 2 2 2 16 2 R0707A 2 23 2 11 31 - ProForm 520 Trainer Treadmill | English Manual - Page 32
part(s) (see the PART LIST and the EXPLODED DRAWING near the end of this manual) LIMITED WARRANTY ICON Health & Fitness, Inc. (ICON) warrants this product to be free from defects in workmanship and material, under normal use and service or repairs not provided by an ICON authorized service center;
-
 1
1 -
 2
2 -
 3
3 -
 4
4 -
 5
5 -
 6
6 -
 7
7 -
8
-
9
-
10
-
11
-
12
-
13
-
14
-
15
-
16
-
17
-
18
-
19
-
20
-
21
-
22
-
23
-
24
-
25
-
26
-
27
-
28
-
29
-
30
-
31
-
32
 |
 |
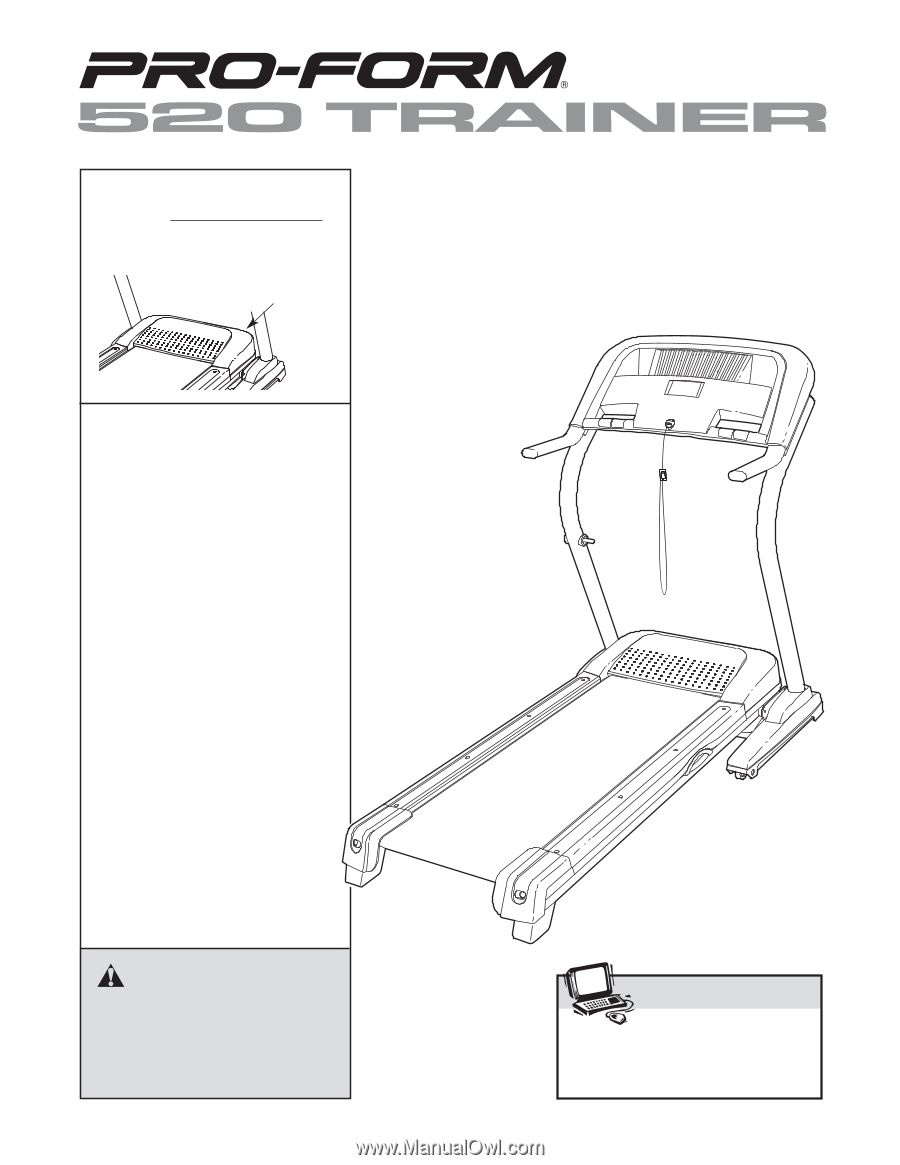
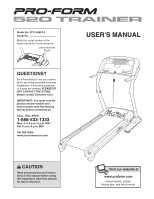
Model No. PFTL49807.0
Serial No.
CAUTION
Read all precautions and instruc-
tions in this manual before using
this equipment. Save this manual
for future reference.
Serial Number
Decal
USER'S MANUAL
QUESTIONS?
As a manufacturer, we are commit-
ted to providing complete customer
satisfaction. If you have questions,
or if parts are missing,
PLEASE DO
NOT CONTACT THE STORE;
please contact Customer Care.
IMPORTANT: You must note the
product model number and
serial number (see the drawing
above) before contacting us:
CALL TOLL-FREE:
1-888-533-1333
Mon.–Fri. 6 a.m.–6 p.m. MST
Sat. 8 a.m.–4 p.m. MST
ON THE WEB:
www.proformservice.com
Visit our website at
www.proform.com
new products, prizes,
fitness tips, and much more!
Write the serial number in the
space above for future reference.