ProForm 7.25q Uk Manual
ProForm 7.25q Manual
 |
View all ProForm 7.25q manuals
Add to My Manuals
Save this manual to your list of manuals |
ProForm 7.25q manual content summary:
- ProForm 7.25q | Uk Manual - Page 1
, Ltd. Customer Service Department Unit 4 Revie Road Industrial Estate Revie Road, Beeston Leeds, LS118JG UK email: [email protected] CAUTION Read all precautions and instructions in this manual before using this equipment. Save this manual for future reference. USER'S MANUAL Visit our website - ProForm 7.25q | Uk Manual - Page 2
OPERATION AND ADJUSTMENT 9 HOW TO FOLD AND MOVE THE TREADMILL 13 TROUBLESHOOTING 15 CONDITIONING GUIDELINES 17 ORDERING REPLACEMENT PARTS Back Cover Note: An EXPLODED DRAWING and a PART LIST are attached in the centre of this manual. PROFORM is registered trademark of ICON Health & Fitness, Inc - ProForm 7.25q | Uk Manual - Page 3
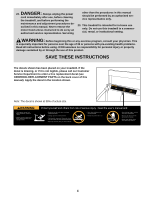
It is the responsibility of the owner to ensure that all users of this treadmill are adequately informed of all warnings and precautions. 2. Use the treadmill only as described in this manual. 3. Place the treadmill on a level surface, with at least 2 m (8 ft.) of clearance behind it and 0.5 m (2 ft - ProForm 7.25q | Uk Manual - Page 4
procedures de- scribed in this manual. Never remove the motor hood unless instructed to do so by an authorised service representative. Servicing other than the procedures in this manual should be performed by an authorised service representative only. 23. This treadmill is intended for in-home - ProForm 7.25q | Uk Manual - Page 5
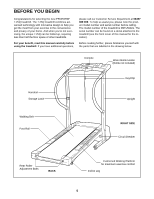
you're not exercising, the unique 7.25Q can be folded up, requiring less than half the floor space of other treadmills. For your benefit, read this manual carefully before using the treadmill. If you have additional questions, please call our Customer Service Department at 08457 089 009. To help - ProForm 7.25q | Uk Manual - Page 6
amount of lubricant may be transferred to the top of the walking belt or the shipping carton. This is a normal condition and does not affect treadmill performance. If there is lubricant on top of the walking belt, simply wipe off the lubricant with a soft cloth and a mild, non-abrasive cleaner - ProForm 7.25q | Uk Manual - Page 7
3. Align the hole in the Handrail (1) with the indicated hole 3a in the right Upright (11). Thread a Handrail Screw (53) two turns into the Upright and the Handrail at the angle shown in drawing 3b. It may be helpful to lift up and push down on the Handrail as you thread the Handrail Screw. 3b - ProForm 7.25q | Uk Manual - Page 8
. Remove the plastic ties used in step 6. 4 Batteries 3 1 46 66 Tie 46 3 4 Tab 9. Make sure that all parts are properly tightened before you use the treadmill. Keep the included allen wrench in a secure place. The allen wrench is used to adjust the walking belt (see page 16). To protect the floor - ProForm 7.25q | Uk Manual - Page 9
included. Select the one that will fit your outlet. Refer to drawing 1. Plug the indicated end of the power cord into the socket on the treadmill. Next, lift the tab on the ferrite box and clamp the ferrite box around the power cord. The ferrite box should not be allowed to - ProForm 7.25q | Uk Manual - Page 10
the sensor unit to a position against your chest. CHEST PULSE SENSOR TROUBLESHOOTING The instructions on the following pages explain how the chest pulse sensor is used with suspected that this is a problem, try relocating the treadmill. • The CR2032 battery may need to be replaced (see page 16). - ProForm 7.25q | Uk Manual - Page 11
power. • Always wear the clip (see the drawing above) whilst using the treadmill. When the key is removed, the walking belt will stop. • Adjust the speed in (see page 9). Next, Clip step onto the foot rails of the treadmill. Find the clip attached to the key, and slide the clip onto the - ProForm 7.25q | Uk Manual - Page 12
as desired. To change the incline of the treadmill, press the top or bottom of the incline control until the desired incline level is reached. 4 Follow your progress with the four displays. Speed display- - ProForm 7.25q | Uk Manual - Page 13
the power cord. CAUTION: You must be able to safely lift 20 kg (45 lbs.) in order to raise, lower, or move the treadmill. 1. Hold the treadmill with your hands in the locations shown at the right. To decrease the possibility of injury, bend your legs and keep your back straight. As - ProForm 7.25q | Uk Manual - Page 14
until the frame and foot rail are past the storage latch. 2. Hold the treadmill firmly with both hands, and lower the treadmill to the floor. Do not drop the treadmill frame to the floor. CAUTION: To decrease the possibility of injury, bend your legs and keep your back straight. Storage Latch - ProForm 7.25q | Uk Manual - Page 15
TROUBLESHOOTING Most treadmill problems can be solved by following the steps below. Find the symptom that applies, and follow the steps listed. If further assistance is needed, please call our Customer Service Department. PROBLEM: The power does not turn on SOLUTION: a. Make sure that the power - ProForm 7.25q | Uk Manual - Page 16
carefully walk on the treadmill for a few minutes. Repeat until the walk- ing belt is properly tightened. PROBLEM: The heart rate monitor does not function properly SOLUTION: a. If the heart rate monitor does not function properly, refer to CHEST PULSE SENSOR TROUBLESHOOTING on page 10. b. If - ProForm 7.25q | Uk Manual - Page 17
by using your heart rate as a guide. The chart below shows recommended heart rates aerobic exercise, adjust the speed and incline of the treadmill until your heart rate is near the highest number your muscles and will help prevent post-exercise problems. To measure your heart rate during exercise, - ProForm 7.25q | Uk Manual - Page 18
SUGGESTED STRETCHES The correct form for several basic stretches is shown at the right. Move slowly as you stretch-never bounce. 1. Toe Touch Stretch Stand with your knees bent slightly - ProForm 7.25q | Uk Manual - Page 19
NOTES 19 - ProForm 7.25q | Uk Manual - Page 20
give the following information: • the MODEL NUMBER of the product (PETL59021) • the NAME of the product (PROFORM® 7.25Q treadmill) • the SERIAL NUMBER of the product (see the front cover of this manual) • the KEY NUMBER and the DESCRIPTION of the part(s) (see the PART LIST and the EXPLODED DRAWING - ProForm 7.25q | Uk Manual - Page 21
REMOVE THIS EXPLODED DRAWING AND PART LIST FROM THE MANUAL Save this EXPLODED DRAWING and PART LIST for future reference. Note: Specifications are subject to change without notice. For information about ordering replacement parts, see the back cover of the User's Manual. 34 - ProForm 7.25q | Uk Manual - Page 22
2 14 1 15 1 16 7 17 1 18 1 19 1 20* 1 21 1 22 1 23 1 24 1 25 16 26 1 27 1 28 1 29 1 30 1 31 2 32 1 33 9 34 2 35 1 36 2 37 Power Cord Set Console Screw/ Endcap Screw Guide Belt Screw Filter Wires Base Leg Assembly Console Pigtail User's Manual * Includes all parts shown in the box. # These parts - ProForm 7.25q | Uk Manual - Page 23
29 93 90 94 90 28 56 26 70 64 96 96 70 41 49 71 42 31 91 54 25 6 87 38 81 86 32 38 84 48 100 73 67 54 89 5 15 68 48 51 72 108 57 1 34 58 65 100 38 102* 37 39 107 73 49 40 36 40 25 25 39 83 83 77 7 52 85 104 104 69 7 79 35 79 82 16 52 70 79 77
-
 1
1 -
 2
2 -
 3
3 -
 4
4 -
 5
5 -
 6
6 -
 7
7 -
8
-
9
-
10
-
11
-
12
-
13
-
14
-
15
-
16
-
17
-
18
-
19
-
20
-
21
-
22
-
23
 |
 |
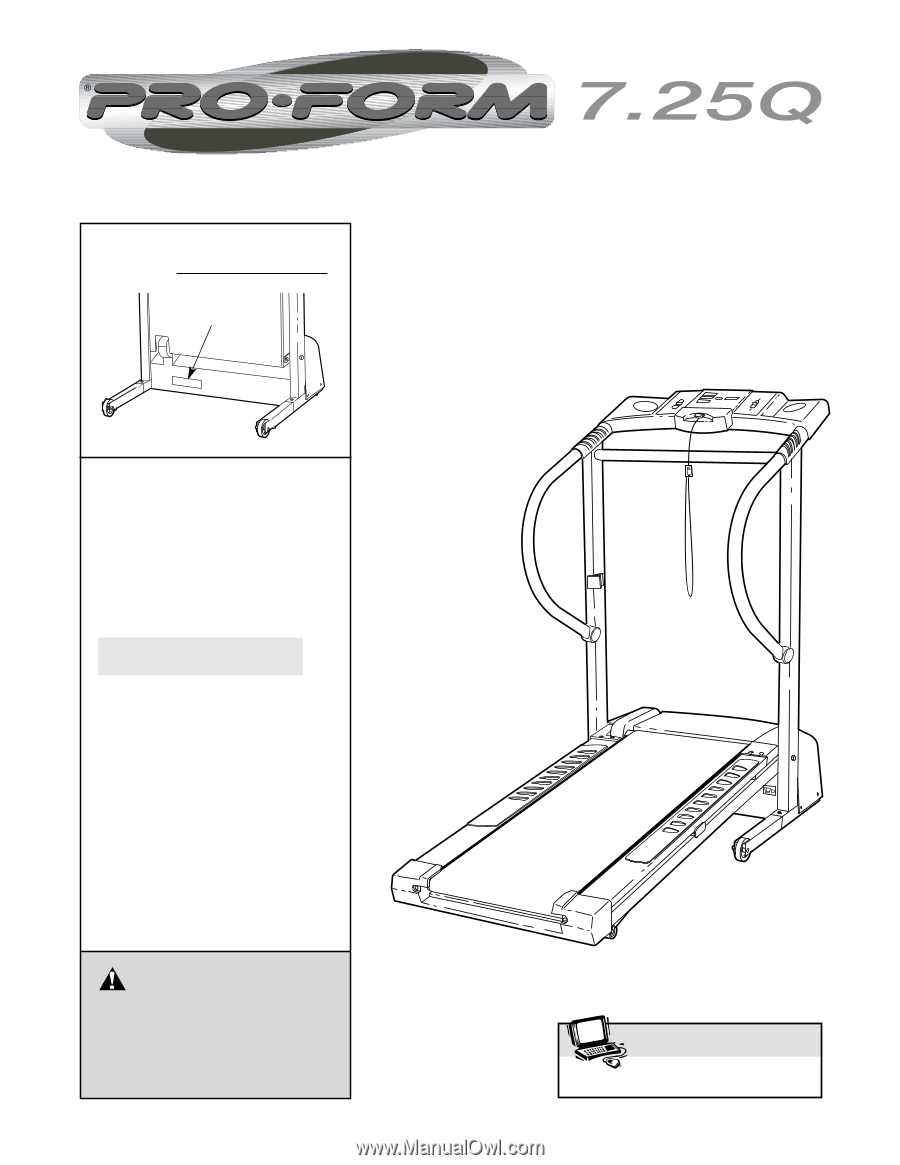
Serial Number
Decal
USER'S MANUAL
Model No. PETL59021
Serial No.
CAUTION
Read all precautions and instruc-
tions in this manual before using
this equipment. Save this manual
for future reference.
www.iconeurope.com
Visit our website at
QUESTIONS?
As a manufacturer, we are com-
mitted to providing complete
customer satisfaction. If you
have questions, or if there are
missing or damaged parts,
please call:
Or write:
ICON Health & Fitness, Ltd.
Customer Service Department
Unit 4
Revie Road Industrial Estate
Revie Road, Beeston
Leeds, LS118JG
UK
email: [email protected]
08457 089 009