ProForm Crosswalk 2.5 Treadmill English Manual - Page 6
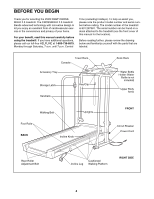
Before moving the treadmill, see HOW TO MOVE
 |
View all ProForm Crosswalk 2.5 Treadmill manuals
Add to My Manuals
Save this manual to your list of manuals |
Page 6 highlights
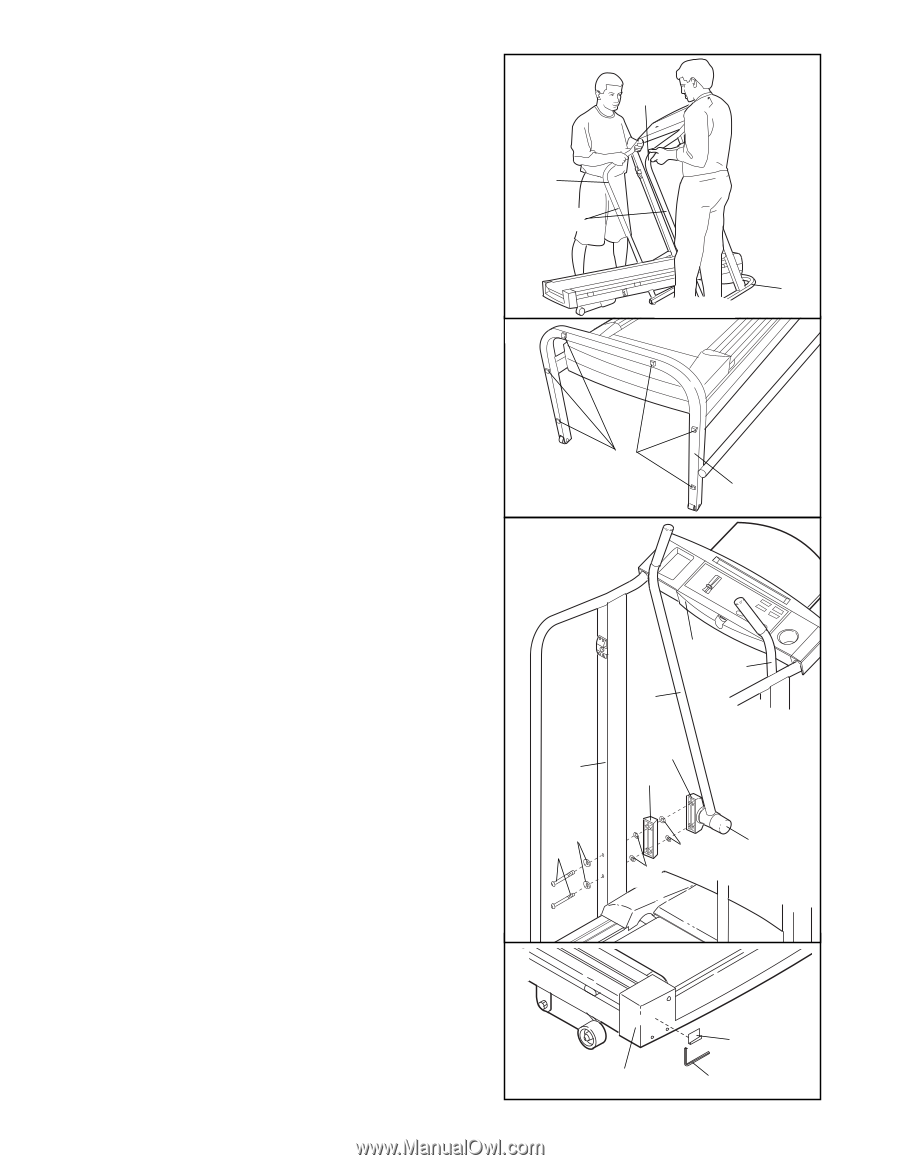
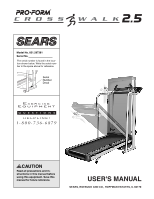
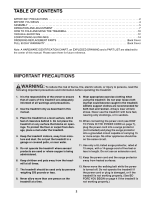
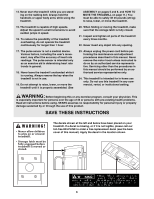
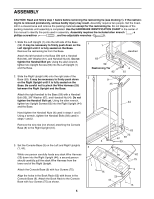
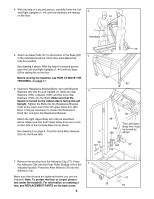
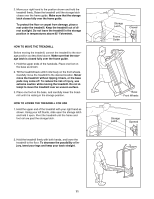
4. With the help of a second person, carefully lower the Left 4 and Right Uprights (1, 44) until the handrails are resting on the floor. 44 1 Handrails 5. Attach six Base Pads (57) to the bottom of the Base (59) in the indicated locations. Note: One extra Base Pad may be included. See drawing 4 above. With the help of a second person, raise the Left and Right Uprights (1, 44) until the Base (59) is resting flat on the floor. Before moving the treadmill, see HOW TO MOVE THE TREADMILL on page 11. 6. Insert two Resistance Bracket Bolts (107) with Bracket Washers (70) into the Left Upright (1). Slide two Star Washers (103), a Spacer (106), and two more Star Washers (103) onto the Bolts. Make sure that the Spacer is turned so the widest side is facing the Left Upright. Tighten the Bolts into the Resistance Bracket (104) at the lower end of the left Upper Body Arm (96). Note: It may be necessary to loosen the Resistance Knob (97) and pivot the Resistance Bracket. Attach the right Upper Body Arm (96) as described above. Make sure that both Upper Body Arms are on the correct side of the Console Base (9) as shown. See drawing 2 on page 5. Feed the slack Wire Harness (25) into the Base (59). 59 5 57 59 6 1 70 107 9 96 96 104 106 The Left Upper Body Arm must be turned as shown 103 97 103 7. Remove the backing from the Adhesive Clip (77). Press the Adhesive Clip onto the Rear Roller Endcap (78) in the 7 indicated location. Press the Allen Wrench (76) into the Adhesive Clip. Make sure that all parts are tightened before you use the treadmill. Note: To protect the floor or carpet, place a mat under the treadmill. For information on ordering a mat, see REPLACEMENT PARTS on the back cover. 6 77 78 76
-
 1
1 -
 2
2 -
 3
3 -
 4
4 -
 5
5 -
 6
6 -
 7
7 -
 8
8 -
 9
9 -
 10
10 -
 11
11 -
 12
12 -
13
-
14
-
15
-
16
-
17
-
18
-
19
 |
 |