ProForm Xp Thinline 480 Elliptical Canadian English Manual - Page 11
Arm 8 and the Left Upper Body Leg 6.
 |
View all ProForm Xp Thinline 480 Elliptical manuals
Add to My Manuals
Save this manual to your list of manuals |
Page 11 highlights
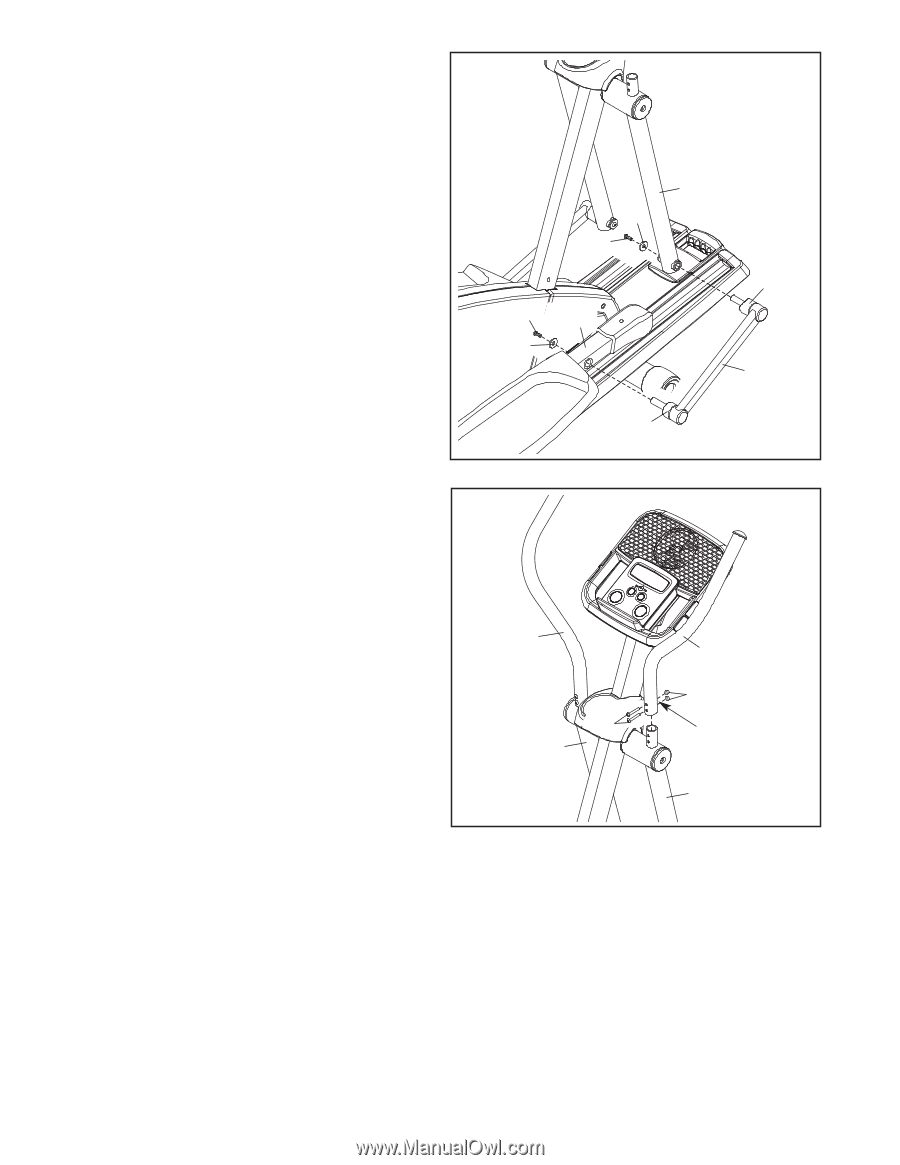
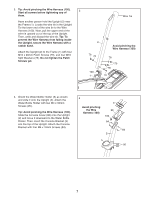
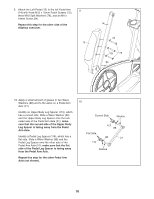
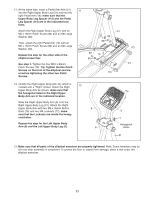
11. At the same time, insert a Pedal Arm Axle (21) 11 into the Right Upper Body Leg (31) and into the right Pedal Arm (14); make sure that the Upper Body Leg Spacer (113) and the Pedal Leg Spacer (114) are in the indicated loca- tions. Attach the Right Upper Body Leg (31) with an M6 x 16mm Patch Screw (80) and an M6 Large Washer (90). Then, attach the right Pedal Arm (14) with an M6 x 16mm Patch Screw (80) and an M6 Large Washer (90). Repeat this step for the other side of the elliptical exerciser. 31 90 80 80 14 90 See step 3. Tighten the four M10 x 20mm Patch Screws (79). Tip: Tighten the two Patch Screws on the front of the elliptical exerciser before tightening the other two Patch 114 Screws. 113 21 12. Identify the Right Upper Body Arm (9), which is marked with a "Right" sticker. Orient the Right 12 Upper Body Arm as shown; make sure that the hexagonal holes in the Right Upper Body Arm are in the indicated location. Slide the Right Upper Body Arm (9) onto the Right Upper Body Leg (31). Attach the Right Upper Body Arm with two M6 x 38mm Button Bolts (76) and two M6 Locknuts (77); make sure that the Locknuts are inside the hexagonal holes. Repeat this step for the Left Upper Body Arm (8) and the Left Upper Body Leg (6). 8 76 6 9 77 Hexagonal Holes 31 13. Make sure that all parts of the elliptical exerciser are properly tightened. Note: Some hardware may be left over after assembly is completed. To protect the floor or carpet from damage, place a mat under the elliptical exerciser. 11
-
 1
1 -
2
-
3
-
4
-
5
-
 6
6 -
 7
7 -
 8
8 -
 9
9 -
 10
10 -
 11
11 -
 12
12 -
 13
13 -
 14
14 -
 15
15 -
 16
16 -
17
-
18
-
19
-
20
-
21
-
22
-
23
-
24
-
25
-
26
-
27
-
28
 |
 |