RCA ANT700R User Guide - Page 1
RCA ANT700R Manual
 |
View all RCA ANT700R manuals
Add to My Manuals
Save this manual to your list of manuals |
Page 1 highlights
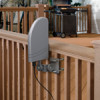
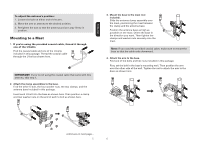
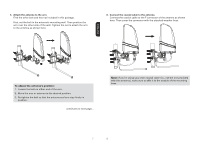
ANT700R Digital Amplified Indoor/Outdoor Antenna User's Guide BEFORE YOU START!!! Please read the IMPORTANT SAFETY INFORMATION sheet included in this package. Getting Started Remove the antenna and the hardware bag from package. Make sure the following parts are in the package: • Antenna • Amplifier Insert • Mounting Base • Hardware bag: (2) U-Bolts (4) Plastic Anchors (4) Washer Nuts (2) Hex Nuts • Power Adapter • Mounting Arm (2) Bolts (2) Clamps (4) Wood screws (1) Coaxial cable Finding the Right Location Before you mount the ANT700R, consider the following factors in reception performance: • The ANT700R usually performs best when mounted horizontally • The ANT700R should be mounted on the side of your house that faces most of your local broadcast towers. Visit www.antennaweb.org to see the locations of your local broadcast towers. • The higher the elevation of the antenna, the better the reception performance will be. ENGLISH Mounting the Antenna The ANT700R mounting base and arm give you flexibility in mounting the antenna. The ANT700R can be mounted: • To a surface, such as a rooftop, eaves, siding, or rafters in an attic -OR- • To a standard mast (not included) WARNING: Never hang anything from the ANT700R; never attach foreign objects to the ANT700R. NOTES: Do not install the ANT700R on any metal surface, including aluminum siding. Mounting on a metal surface will seriously degrade reception quality. In most cases, the ANT700R provides the best performance when mounted outdoors in a high location (such as on the roof or high up on the side of your house). The ANT700R can also be mounted in an attic. Mounting to a Surface 1. Mount the base to the surface. Find the four wood screws included in this package. Using these screws, attach the base to the surface as shown here. 1 2
-
 1
1 -
 2
2 -
 3
3 -
 4
4 -
 5
5
 |
 |