RCA JNICAM24 Quick Start Guide - Page 1
RCA JNICAM24 Manual
 |
View all RCA JNICAM24 manuals
Add to My Manuals
Save this manual to your list of manuals |
Page 1 highlights
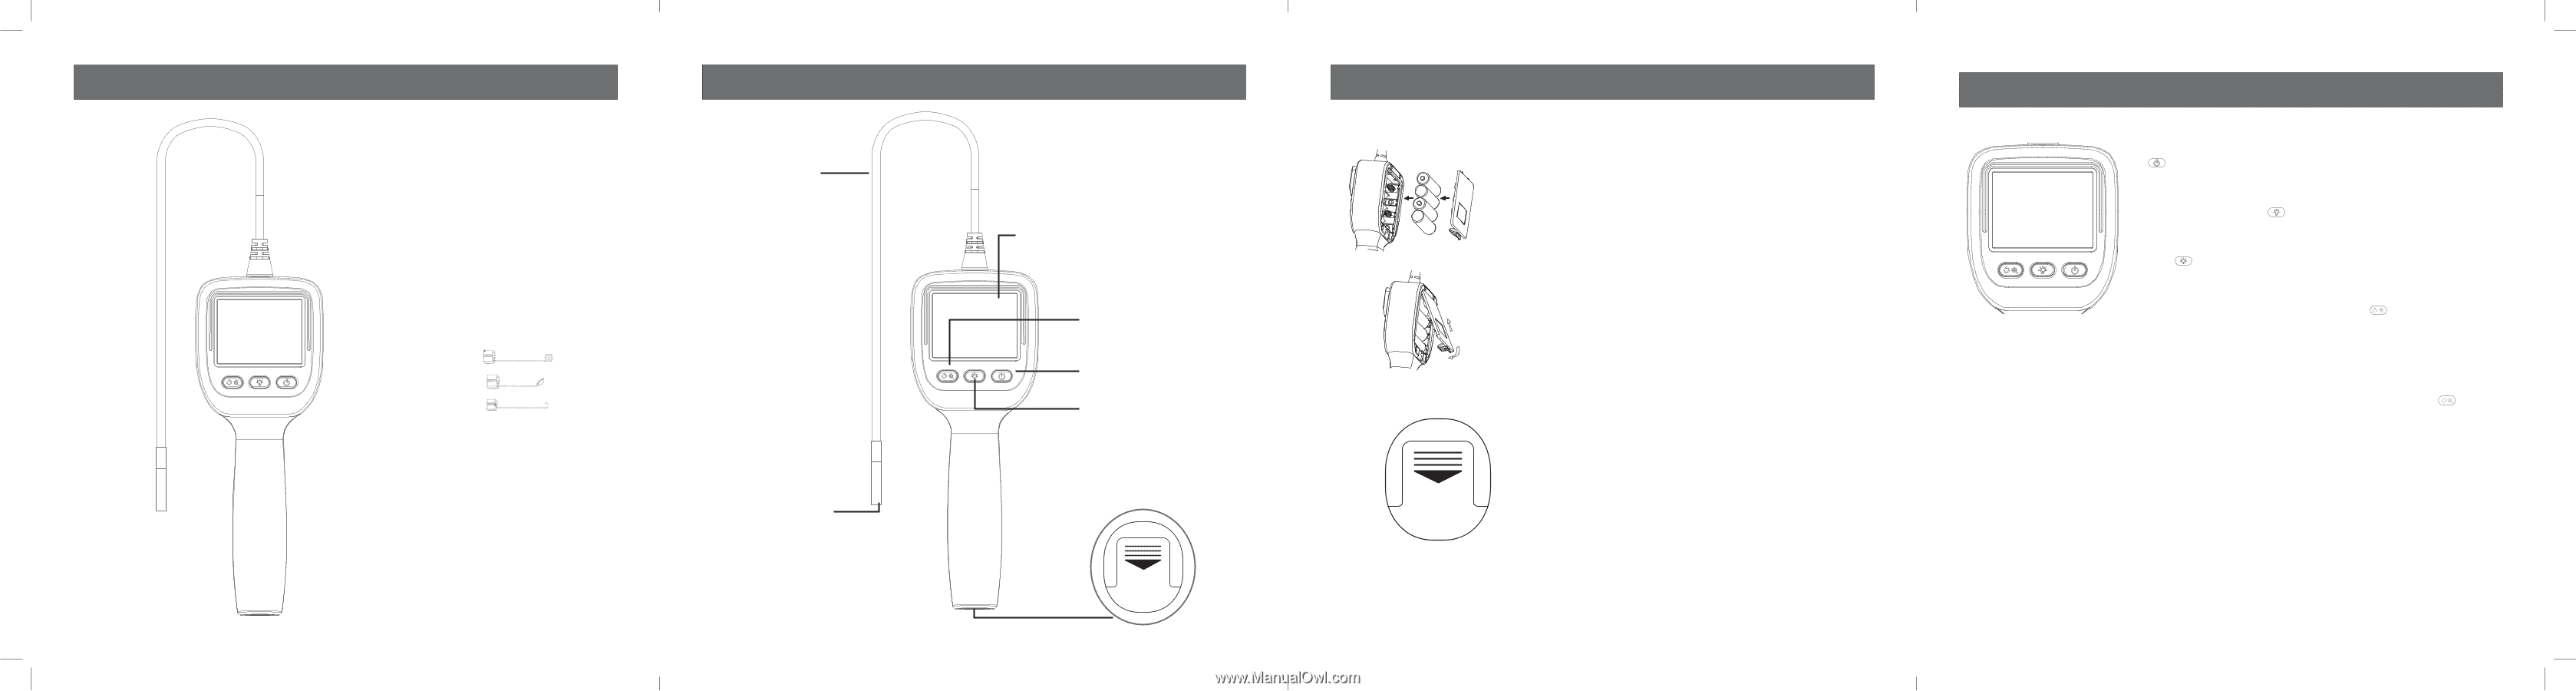
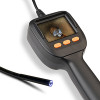
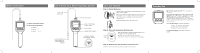
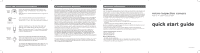
What's in the Box? (1) Micro-Inspection Camera (3) Accessory Attachments (1) Magnet (1) Mirror (1) Hook Get to Know Your Micro-Inspection Camera Flexible 4ft probe cable 5.2mm waterproof camera with builtin adjustable LED lighting 2.4" color LCD screen Zoom / 180º image rotation button Power button Camera lighting button Accessory storage compartment (bottom) ACC. Let's Get Started! Step 1: Install Batteries Lift the latch on the battery compartment door on the back of your camera. Remove the battery compartment door and install four AA batteries (not included). Make sure the batteries match the + and - markings on the inside of the compartment. Replace the battery door as shown here. Step 2: Store the Accessory Attachments Camera handle, bottom ACC. Open the accessory storage compartment door on the bottom of the camera's handle. Remove the door and place the accessory attachments inside the compartment for storage. Step 3: Remove the LCD Screen's Protective Film Carefully remove the protective film covering the LCD screen. Everyday Use To turn the display on/off: Press and hold the button. To adjust the brightness of the camera's LED lights: Press the button repeatedly to increase LED lighting to the level you want. After the brightest setting, the lighting returns to off. Press the button repeatedly again until you get to the level you want. To zoom the image: Press the button. 1 press = 1.5 times image zoom 2 presses = 2 times image zoom 3 presses = returns to no zoom To rotate the image: Press and hold the button.
-
 1
1 -
 2
2
 |
 |