RCA l46wd250 User Guide & Warranty
RCA l46wd250 - LCD Scenium Flat HDTV Manual
 |
UPC - 846042060592
View all RCA l46wd250 manuals
Add to My Manuals
Save this manual to your list of manuals |
RCA l46wd250 manual content summary:
- RCA l46wd250 | User Guide & Warranty - Page 1
reality: reproduced. LCD User's Guide Connections page 7 Menus page 36 Remote page 19 FAQs page 44 Features page 27 Warranty page 50 - RCA l46wd250 | User Guide & Warranty - Page 2
sales receipt to obtain warranty parts and service and for proof of purchase. Attach it here and record the serial and model numbers in case you need them. These numbers are located on the product. Model No Serial No Purchase Date Dealer/Address/Phone Licensed by BBE Sound, Inc. under one or - RCA l46wd250 | User Guide & Warranty - Page 3
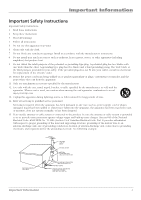
Install in accordance with the manufacturer's instructions. 8. Do not install near any SERVICE EQUIPMENT ANTENNA LEAD IN WIRE GROUND CLAMP ANTENNA DISCHARGE UNIT (NEC SECTION 810-20) GROUNDING CONDUCTORS (NEC SECTION 810-21) GROUND CLAMPS POWER SERVICE GROUNDING ELECTRODE SYSTEM (NEC ART 250, PART - RCA l46wd250 | User Guide & Warranty - Page 4
5: Other Information Frequently Asked Questions (FAQs 44 Troubleshooting 45 Mounting Your TV to the Wall 47 V-Chip Rating Explanations 48 US V-Chip Rating System 48 Canadian English V-Chip Rating System 48 Canadian French V-Chip Rating System 49 Limited Warranty 50 Care and Cleaning 51 4 - RCA l46wd250 | User Guide & Warranty - Page 5
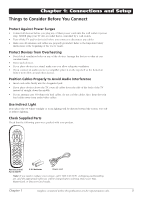
were packed with your product. ON•OFF TV PIP SAT•AUX DVD GO BACK VOL CH MENU MUTE INFO + CH CTRL ZOOMCLEAR PRESETS ZOOM+ GUIDE ?!+- DEF ABC GHI MNO JKL PQRS INPUT TUV _,.:=$ WXYZ SUB CH Remote control Part # R301F1 2 AA batteries Power cord Note: If you need to replace - RCA l46wd250 | User Guide & Warranty - Page 6
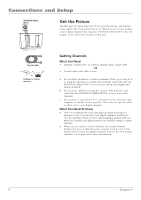
part of connecting your TV is to get the picture, also known as the signal. The back panel of your TV antenna with coaxial cable OR • Coaxial cable with cable service A. Do you have an indoor or outdoor antenna? If the bottom of the screen for digital channels; look for an A for analog channels. - RCA l46wd250 | User Guide & Warranty - Page 7
Connections and Setup Choose Your Connection For additional assistance while using your RCA product, please visit www.rca.com/customersupport. There are several ways to connect your TV. Please use the following chart to determine which connection is best for you. Proceed to the appropriate page - RCA l46wd250 | User Guide & Warranty - Page 8
. 1 AUDIO/VIDEO INPUT 1 (VID1) Don't forget: If necessary, connect antenna or cable to get a picture. Go to page 6 for instructions. R AUDIO L VIDEO 3 2 INPUT VIDEO L AUDIO R S-VIDEO OUTPUT COMPONENT VIDEO L AUDIO R Y Pb Pr VIDEO L AUDIO R S-VIDEO Component Video (Advanced) Connection - RCA l46wd250 | User Guide & Warranty - Page 9
TV PIP SAT•AUX DVD GO BACK VOL CH MENU MUTE INFO + CH CTRL ZOOMCLEAR PRESETS ZOOM+ GUIDE instructions remote control until you see VID1 (if connected to the VIDEO INPUT 1 jack) or CMP1 (if connected to the CMP1 jacks) displayed at the bottom of the TV's screen. To go back to viewing TV - RCA l46wd250 | User Guide & Warranty - Page 10
an example of a connection using the HDMI/DVI jack. * *Don't forget: If necessary, connect antenna or cable to get a picture. Go to page 6 for instructions. HDMI 1/DVI INPUT R DVI AUDIO INPUT L C A Device with HDMI Y Pb Pr Video Out R L Audio Out HDMI Out OR B DVI Out L R Audio Out - RCA l46wd250 | User Guide & Warranty - Page 11
TV's screen. To go back to viewing TV channels, use the number buttons to enter the channel or press CH+ or CH- buttons. • If you're done connecting devices to your TV, go to page 15 to complete the Initial Setup. • If you experience HDMI problems, go to the HDMI Troubleshooting section on page 46 - RCA l46wd250 | User Guide & Warranty - Page 12
GO BACK VOL CH MENU MUTE INFO + CH CTRL ZOOMCLEAR PRESETS ZOOM+ GUIDE ?!+- DEF ABC GHI MNO JKL PQRS INPUT TUV _,.:=$ WXYZ SUB CH 1. Plug in the TV and the USB device, if they aren't already plugged in. 2. Turn on the TV and the device. 3. To access and adjust the options of the - RCA l46wd250 | User Guide & Warranty - Page 13
instructions Sound source and press the right arrow to choose TV tuner. Viewing the PC 1. Plug in the TV and the PC, if they aren't already plugged in. 2. Turn on the TV and the PC. 3. Repeatedly press the INPUT button on the remote control until you see VGA displayed at the bottom of the TV's screen - RCA l46wd250 | User Guide & Warranty - Page 14
TV Turn on your TV by pressing the Power button on the front of the TV or ON•OFF on the remote control. ON•OFF TV PIP SAT•AUX DVD GO BACK VOL CH MENU MUTE INFO + CH CTRL ZOOMCLEAR PRESETS ZOOM+ GUIDE buttons on the remote to highlight one of the items listed on the screen. Use the up - RCA l46wd250 | User Guide & Warranty - Page 15
and Setup Complete the Initial Setup The menu system in your TV allows the TV's features to work properly. The first time you turn on your TV, the language screen appears. English Français Español Set the Menu Language The first part of the setup allows you to select your preferred language for - RCA l46wd250 | User Guide & Warranty - Page 16
bottom of the screen to see if you're watching a digital channel. What To Expect Watching TV • Remember: Look for an A at the bottom of the screen to see if and press OK. • Depending upon the type of signals you have connected to your HDTV, you might notice that the channels change slower than you - RCA l46wd250 | User Guide & Warranty - Page 17
Video) Provides optimum picture quality because the video is separated into three signals. Use three video-grade or component video cables for the connection. When to connect your TV to a compatible audio receiver. Make sure you set the Audio Output option correctly in the Advanced Sound menu. Go to - RCA l46wd250 | User Guide & Warranty - Page 18
page 12 for more information. Side Panel Buttons If you cannot locate your remote, you can use the side panel buttons of your TV to operate many of the TV's features. POWER Turns the TV on and off. MENU/OK Brings up the TV Main menu. When in the menu system, displays sub-menus and selects - RCA l46wd250 | User Guide & Warranty - Page 19
Chapter 2: Using the Remote Control ON•OFF TV PIP SAT•AUX DVD GO BACK VOL CH MENU MUTE INFO + CH CTRL ZOOMCLEAR PRESETS ZOOM+ GUIDE ?!+- DEF ABC GHI MNO JKL PQRS INPUT TUV _,.:=$ WXYZ SUB CH Remote control part number R301F1 Note: If you need to replace your remote, call 1-800 - RCA l46wd250 | User Guide & Warranty - Page 20
programmed to operate your television, it's already programmed to operate some RCA devices. Notes: The TV button can't be programmed on this remote to control any device; it controls only this TV. The remote may not be compatible with all models of all brands of devices. It also may not operate all - RCA l46wd250 | User Guide & Warranty - Page 21
Remote Control ON•OFF TV PIP SAT•AUX DVD GO BACK VOL CH Programming the Remote There are three ways to program the remote control to operate other devices: Direct Entry, Manual to try the manual code search first. MENU MUTE INFO + CH CTRL ZOOMCLEAR PRESETS ZOOM+ GUIDE ?!+- DEF ABC - RCA l46wd250 | User Guide & Warranty - Page 22
compatible with all brands and models of devices. Modes of Operation The button corresponding to the mode the remote is in lights up when you press any button that works in that mode. For example, if you're in TV mode and you press the VOL+ button, the TV button lights up. This tells - RCA l46wd250 | User Guide & Warranty - Page 23
Therefore, after you've successfully set up the Volume Punchthrough feature, whenever the TV remote is in DVD mode (press the DVD button) and you want to adjust the volume, you only have to press the VOL +/- or MUTE buttons. Follow the instructions below to set up Volume Punchthrough. 1. On your - RCA l46wd250 | User Guide & Warranty - Page 24
(SAT•AUX or DVD) on the remote. Audio Codes AIWA 839 842 851 860 506 493 494 PULSAR 486 RADIO SHACK 505 534 525 RCA 460 471 507 REALISTIC 469 REGAL 482 REGENCY 477 REMBRANDT ..... 498 497 506 535 512 466 496 SHAW 511 SIGNAL 474 SIGNATURE 463 SL MARX 474 SPRUCER 460 STANDARD 499 - RCA l46wd250 | User Guide & Warranty - Page 25
Using the Remote Control HARMAN KARDON 427 HITACHI 404 407 419 428 HITEKER 655 647 EXPRESSVU 647 655 FORTEC STAR 569 555 556 HUGHES NETWORK 621 580 RCA 653 PHILIPS 621 PROSCAN 653 SAMSUNG 583 SONY 657 659 ULTIMATE TV 653 659 ZENITH 656 Home Theatre in a Box Where the code is listed - RCA l46wd250 | User Guide & Warranty - Page 26
Remote Control SHARP 604 SKY NETWORK 614 615 646 SIERRA I II III 561 SONY 623 657 659 602 STARCHOICE 640 645 627 STAR SIGHT 633 STAR TRAK 608 STS 568 570 571 SUPER GUIDE 609 SYLVANIA 581 TOSHIBA .... 641 632 638 629 630 607 572 624 625 631 ULTIMATE TV 245 RANDEX 245 RCA ...[225] 245 - RCA l46wd250 | User Guide & Warranty - Page 27
the ZOOM buttons on the remote. Go to page 33 for more information on screen formats. Current time left on sleep timer, if the sleep timer is set. Current time. Autotuning Note: This feature only works with other RCA devices. The Autotuning feature automatically tunes the TV to the correct video - RCA l46wd250 | User Guide & Warranty - Page 28
jack on the back of the TV, and you want the TV to tune to channel 3 when you press the corresponding button on the remote. Reminder: make sure the device's HDTV tuner or satellite receiver, is connected to the three COMPONENT VIDEO INPUT jacks (Y Pb Pr) on the back of the TV and you want the TV - RCA l46wd250 | User Guide & Warranty - Page 29
entering a password. By default, the software inside your TV is turned off or unlocked. For instructions to lock V-Chip, see below. Note: Parental forget your password, turn off the TV. Simultaneously press and hold VOL v on the side panel and CLEAR on the remote for 10 seconds. Next time you - RCA l46wd250 | User Guide & Warranty - Page 30
the Parental Control menu for rating limits to take effect. Note: If you forget your password, turn off the TV. Simultaneously press and hold VOL v on the side panel and CLEAR on the remote for 10 seconds. Next time you enter the Parental control menu enter a new password. To view age-based - RCA l46wd250 | User Guide & Warranty - Page 31
language S Sexual situations V Violence FV Fantasy Violence TV ratings Go back TV-MA TV-14 TV-PG TV-G TV-Y7 TV-Y Status D L S V FV View View View (Content is represented by the D, L, S, V and FV on your screen.) When you block a content theme for a particular rating, you automatically block - RCA l46wd250 | User Guide & Warranty - Page 32
Set movie rating limits by blocking movies rated above a specified level. To access the Movie Rating Limit menu: 1. Press MENU on the remote control (the TV's Main Menu appears). 2. Select Parental Control. 3. Select US V-Chip. 4. Select Movie Ratings. Blocking Movie Ratings Once you are in the Movie - RCA l46wd250 | User Guide & Warranty - Page 33
enhancement, and multi-axis color space correction. Go to page 38 to adjust picture settings. Screen Formats Screen format is the way the picture is displayed on your TV. Press the ZOOM +/- button on your remote to see if a different format is available for the video you are viewing. The format - RCA l46wd250 | User Guide & Warranty - Page 34
TV PIP SAT•AUX DVD GO BACK VOL CH MENU MUTE INFO + CH CTRL ZOOMCLEAR PRESETS ZOOM+ GUIDE remote control and the PIP window appears on the screen. 2. Press the CH CTRL (Channel Control) button on the remote remote control and go to PC Sound source. Choose PC if you want to hear sound - RCA l46wd250 | User Guide & Warranty - Page 35
Using the TV's Features PIP Problems? • If you are channel surfing or changing inputs in the main window and PIP disappears, you may have tuned to an input that doesn't support PIP. • If you press PIP and the PIP window is gray, you may have activated the Parental Control feature and the program - RCA l46wd250 | User Guide & Warranty - Page 36
Press the CLEAR button. The menus are cleared from the screen and you return to TV viewing. • Press the MENU button repeatedly until the menus disappear menu. Sound Menu The Sound menu lets you adjust audio output. To access the Sound menu, press MENU on the remote, and then select Sound from the - RCA l46wd250 | User Guide & Warranty - Page 37
provides the mono or stereo sound provided by the signal you're watching. Wide (available only for mono signals) "Widens" sound from mono broadcasts and mono devices connected to your TV for a fuller, more spacious sound. Stereo Wide Available only for stereo signals. Gives a surround effect with - RCA l46wd250 | User Guide & Warranty - Page 38
jacks to a receiver or amplifier. With the Fixed Output, the TV's volume control, graphic equalizer, and mute are disabled. This output is ideal when connecting to an audio receiver or amplifier that has its own remote control for controlling the volume. Default Audio Language Choose the language you - RCA l46wd250 | User Guide & Warranty - Page 39
Right. Setup Menu The Setup menu lets you configure the TV to fit its surroundings and your preferences. To access the Setup menu, press MENU on the remote, and then select Setup from the Main Menu. Channel Setup Signal Type Choose the type of signal you have connected to the ANTENNA/CABLE INPUT. Auto - RCA l46wd250 | User Guide & Warranty - Page 40
. Channel Number Use the number buttons on your remote to enter the channel number. In Channel List portion of a program as text on the TV screen. Note: Closed caption settings are not TV's sound is muted by pressing the MUTE button. The captioning information is not displayed when the sound - RCA l46wd250 | User Guide & Warranty - Page 41
Digital CC Back. Color Black... Using the TV's Menu System Analog CC Type If available, If available, lets you select a closed caption service mode (1-6) for digital channels. Digital CC Lets you choose the color of the area of the screen behind the digital closed-caption text: White, Black, Red - RCA l46wd250 | User Guide & Warranty - Page 42
. Press and hold OK to hear the maximum volume you set. Power Save Mode If no signal is detected from the VGA input jack for 5 minutes, puts the TV in power save mode. Message Set a message that appears at the bottom of the TV screen. Press the CLEAR button to clear the message. If Display is - RCA l46wd250 | User Guide & Warranty - Page 43
the pictures available on your device, highlight a folder and press PLAY. Music If you have .mp3 audio files on your USB device connected to your TV, this menu allows you to play files individually by pressing the up/down arrow buttons to highlight the song. For slideshow options, go to the - RCA l46wd250 | User Guide & Warranty - Page 44
there's nothing there? Some channels are enabled by the cable company that don't carry programming, such as videoon-demand. When channels are unavailable, your TV's screen is blank or appears like snow. You probably want to get rid of these so they no longer appear in your channel list. Remove these - RCA l46wd250 | User Guide & Warranty - Page 45
consulting the following troubleshooting list. TV Problems TV won't turn on • Make sure the TV is plugged in. • Check the wall receptacle (or extension cord) to make sure it is "live" by plugging in something else. • The front panel controls may be locked (disabled). Use the remote control to unlock - RCA l46wd250 | User Guide & Warranty - Page 46
• Press the TV button and then try to change channels. Noisy stereo reception • May be a weak station. Use Sound menu to choose mono sound. Black box appears on the screen • Closed-captioning might be on. Check Closed Caption in the Setup menu. Go to page 40 for more instructions. Problems with HDMI - RCA l46wd250 | User Guide & Warranty - Page 47
5 minutes. Then plug the TV back in, turn on the TV, and see if the problem is fixed. If the problem remains, then please visit www.rca.com/television for updated FAQs or contact RCA Customer Support at the support number provided in your Warranty under How To Get Service. Bottom of the base Remove - RCA l46wd250 | User Guide & Warranty - Page 48
dialogue (D) or situations (S), no strong language (L), and little or no violence (V). TV-Y7 (Directed to Children 7 years and older) Designed for children ages 7 fically for children, it is understood younger viewers may be part of the audience. Violence Guidelines: Will contain very little violence - RCA l46wd250 | User Guide & Warranty - Page 49
Other Information C8+ (Children 8 and Older) Programming generally considered acceptable for children 8 years and over to watch on their own. Violence Guidelines: Violence will not be portrayed as the preferred, acceptable, or only way to resolve conflict or encourage children to imitate dangerous - RCA l46wd250 | User Guide & Warranty - Page 50
required. What your warranty does not cover: • Customer instruction. (Your Owner's Manual describes how to install, adjust, and operate your television. Any additional information should be obtained from your dealer). • Installation and related adjustments. • Signal reception problems not caused by - RCA l46wd250 | User Guide & Warranty - Page 51
warranty. Costs of such service calls are the sole responsibility of the purchaser. Care and Cleaning CAUTION: Turn OFF your TV before cleaning. You can clean the TV powder. These types of cleaners will damage the TV. The TV's screen may be cleaned with a soft, lint-free cloth as well. Take - RCA l46wd250 | User Guide & Warranty - Page 52
Part instructions the user is TV technician for help. This Class B digital apparatus complies with Canadian ICES-003. Visit the RCA website at www.rca.com/television Please do not send any products to the Indianapolis address listed in this manual or on the carton. This will only add delays in service
-
 1
1 -
 2
2 -
 3
3 -
 4
4 -
 5
5 -
 6
6 -
 7
7 -
8
-
9
-
10
-
11
-
12
-
13
-
14
-
15
-
16
-
17
-
18
-
19
-
20
-
21
-
22
-
23
-
24
-
25
-
26
-
27
-
28
-
29
-
30
-
31
-
32
-
33
-
34
-
35
-
36
-
37
-
38
-
39
-
40
-
41
-
42
-
43
-
44
-
45
-
46
-
47
-
48
-
49
-
50
-
51
-
52
 |
 |

reality: reproduced.
reality: reproduced.
LCD User's Guide
Connections
............
page 7
Remote
............
page 19
Features
...............
page 27
Menus
....................
page 36
FAQs
...............
page 44
Warranty
...............
page 50