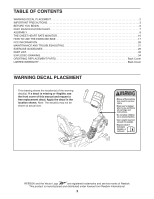
Reebok 610 Bike English Manual
Reebok 610 Bike Manual
 |
View all Reebok 610 Bike manuals
Add to My Manuals
Save this manual to your list of manuals |
Reebok 610 Bike manual content summary:
- Reebok 610 Bike | English Manual - Page 1
.com/ registration. CUSTOMER CARE For service at any time, go to www.reebokservice.com. Or call 1-877-994-4999 Mon.–-Fri. 6 a.m.–-6 p.m. MT Sat. 8 a.m.–-4 p.m. MT Please do not contact the store. CAUTION Read all precautions and instructions in this manual before using this equipment. Keep this - Reebok 610 Bike | English Manual - Page 2
EXERCISE BIKE 17 FCC INFORMATION 26 MAINTENANCE AND TROUBLESHOOTING 27 EXERCISE manual and request a free replacement decal. Apply the decal in the location shown. Note: The decal(s) may not be shown at actual size. REEBOK and the Vector Logo are registered trademarks and service marks of Reebok - Reebok 610 Bike | English Manual - Page 3
and instructions in this manual and all warnings on your exercise bike before using your exercise bike. problems. 3. Use the exercise bike only as described in this manual. 8. Keep children under age 12 and pets away from the exercise bike at all times. 9. Wear appropriate clothes while exercising - Reebok 610 Bike | English Manual - Page 4
4 - Reebok 610 Bike | English Manual - Page 5
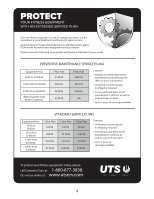
STANDARD SERVICE PLANS all 5 - Reebok 610 Bike | English Manual - Page 6
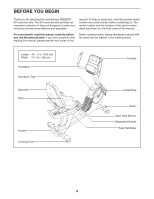
BEFORE YOU BEGIN Thank you for selecting the revolutionary REEBOK® 610 exercise bike. The 610 exercise bike provides an impressive selection of features designed to make your workouts at home more effective and enjoyable. manual. To help us assist you, note the product model number and serial - Reebok 610 Bike | English Manual - Page 7
for assembly. The number in parentheses below each drawing is the key number of the part, from the PART LIST near the end of this manual. The number following the key number is the quantity needed for assembly. Note: If a part is not in the hardware kit, check to see if - Reebok 610 Bike | English Manual - Page 8
ASSEMBLY •• To hire an authorized service technician to assemble this product, call 1-800-445-2480. offers Note: If you do not have Internet access, call CUSTOMER CARE (see the front cover of this manual) and register your product. 2. Orient the Front Stabilizer (15) so that the indi- cated hole - Reebok 610 Bike | English Manual - Page 9
3. While a second person lifts the rear of the Frame (1), attach the Rear Stabilizer (16) to the Frame 3 with two M10 x 105mm Screws (65). 16 1 65 4. Orient the Seat Frame (52) as shown. 4 Attach the Seat Frame (52) to the Seat Carriage (41) with four M8 x 16mm Screws (69). 69 52 41 9 - Reebok 610 Bike | English Manual - Page 10
5. Tip: Avoid damaging the wires inside the Seat Handlebar (11) during this step. 5 86 Attach the Seat Handlebar (11) to the Seat 11 Frame (52) with two M8 x 65mm Bolts (70) and two M8 Locknuts (86). 52 70 6. Plug the Seat Pulse Wire (10) into the receptacle in the Right Rear Shield (97). - Reebok 610 Bike | English Manual - Page 11
7. Attach the Seat (9) to the Seat Frame (52) with four M6 x 38mm Screws (25) and four 7 M6 Washers (88) (only two Screws and two 9 Washers are shown). 52 88 25 8. Attach the Backrest (8) to the Seat Frame (52) with four M6 x 38mm Screws (25) and four M6 Washers (88). 8 8 52 88 25 88 25 11 - Reebok 610 Bike | English Manual - Page 12
9. Attach the Backrest Cover (103) to the Backrest (8) with two M6 x 18mm Screws (75). 9 8 103 75 10. Orient the Upright (2) and the Top Shield (44) as shown. Slide the Top Shield upward onto the Upright. Have a second person hold the Upright (2) and the Top Shield (44) near the Frame (1) - Reebok 610 Bike | English Manual - Page 13
11. Tip: Avoid pinching the wires. Slide the Upright (2) onto the Frame (1). Attach the Upright (2) with four M10 x 16mm Screws (67) and four M10 Split Washers (100). Tip: Tighten the two Screws in the front of the Upright, and then tighten the other two Screws. Slide the Top Shield (44) downward - Reebok 610 Bike | English Manual - Page 14
13. Identify and orient the Rear Upright Cover (57) as shown. 13 Attach the Rear Upright Cover (57) to the Upright (2) with an M4 x 16mm Screw (77). 57 77 2 14. Untie and discard the wire ties on the Main Wire (43), the Frame Pulse Wire (42), and the Receiver Wire (40). While a second person - Reebok 610 Bike | English Manual - Page 15
. Plug the Power Adapter (51) into the receptacle on the frame of the exercise bike. 17 Note: To plug the Power Adapter (51) into an outlet, see ADAPTER on page 17. Strap Post 23 21 Tab 51 18. After the exercise bike is assembled, inspect it to make sure that it is assembled correctly and - Reebok 610 Bike | English Manual - Page 16
. Moisture may keep the sensor activated, shortening the life of the battery. •• Store the heart rate monitor Hand wash and air dry the chest strap. TROUBLESHOOTING If the heart rate monitor does not function normal heart rhythms. Heart rate reading problems may be caused by medical conditions - Reebok 610 Bike | English Manual - Page 17
the indicated tab and pull the strap upward. To tighten the strap, simply pull the end of the strap downward. Pedal Strap Tab If the exercise bike rocks slightly on your floor during use, turn one or both of the leveling feet under the rear stabilizer until the rocking motion is eliminated - Reebok 610 Bike | English Manual - Page 18
. Each workout automatically changes the resistance of the pedals as it guides you through an effective workout. You can also set a calories, sound system and listen to your favorite music or audio books while you exercise. To use the manual mode, see page 19. To use the sound system, see page 20 - Reebok 610 Bike | English Manual - Page 19
in miles per hour or kilometers per hour. Time—-When the manual mode is selected, this display mode will show the elapsed time. When Trail—-This tab will show a track that represents 1/4 mile (400 m). As you exercise, the flashing rectangle will show your progress. The My Trail tab will also show - Reebok 610 Bike | English Manual - Page 20
chemicals to clean the contacts. To exit the manual mode or a workout, press the Home button use the handgrip heart rate monitor, follow the instructions below. IMPORTANT: If you use both heart and then your heart 7. When you are finished exercising, the console will turn off automatically. If the - Reebok 610 Bike | English Manual - Page 21
and/or target speed may be programmed for consecutive segments. As you exercise, you will be prompted to keep your pedaling speed near the target for the current segment is too high or too low, you can manually override the setting by pressing the Resistance buttons. IMPORTANT: When the current - Reebok 610 Bike | English Manual - Page 22
to set the desired goal. 3. Begin pedaling to start the workout. As you exercise, a target speed may appear in the display to help you reach your goal depend on various factors such as your weight. In addition, if you manually change the resistance during the workout, the number of calories you burn - Reebok 610 Bike | English Manual - Page 23
the telephone number on the front cover of this manual. Note: To use an iFit module, you broadcast enabled (hidden networks are not supported). IMPORTANT: To satisfy exposure compliance requirements workouts, the voice of a personal trainer will guide you through your workout. You can select an - Reebok 610 Bike | English Manual - Page 24
you have completed. The other lines will show other competitors. The end of the matrix represents the end of the race. 9. When you are finished exercising, the console will turn off automatically. See step 7 on page 20. For more information on the iFit mode, go to www.iFit.com. 24 - Reebok 610 Bike | English Manual - Page 25
The display will show the total number of hours that the exercise bike has been used. The display will also show the total distance (in miles or when you turn on the console. Press the Enter button repeatedly to select the manual mode menu or the iFit menu as the default menu. 8 Check the - Reebok 610 Bike | English Manual - Page 26
. This equipment generates, uses, and can radiate radio frequency energy and, if not installed and used in accordance with the instructions, may cause harmful interference to radio communications. However, there is no guarantee that interference will not occur in a particular installation - Reebok 610 Bike | English Manual - Page 27
any worn parts immediately. To clean the exercise bike, use a damp cloth and a small amount of mild soap. IMPORTANT: To avoid damage to the console, keep liquids away from the console and keep the console out of direct sunlight. CONSOLE TROUBLESHOOTING If the console does not turn on, make - Reebok 610 Bike | English Manual - Page 28
adjust the drive belt, first unplug the power adapter. Then, you must remove the top shield, the right pedal, and the right shield (see the instructions below). See the drawing on page 35. Using a flat screwdriver, release the tabs at the front and along the sides of the Top Shield (44 - Reebok 610 Bike | English Manual - Page 29
heart rate as a guide to find the proper intensity level. The chart below shows recommended heart rates for fat burning and aerobic exercise. To find the flexibility of your muscles and helps to prevent post-exercise problems. EXERCISE FREQUENCY To maintain or improve your condition, complete three - Reebok 610 Bike | English Manual - Page 30
SUGGESTED STRETCHES The correct form for several basic stretches is shown at the right. Move slowly as you stretch; never bounce. 1. Toe Touch Stretch Stand with your knees bent slightly and slowly bend forward from 1 your hips. Allow your back and shoulders to relax as you reach down toward - Reebok 610 Bike | English Manual - Page 31
NOTES 31 - Reebok 610 Bike | English Manual - Page 32
PART LIST Key No. Qty. 1 1 2 1 3 2 4 1 5 1 6 1 7 1 8 1 9 1 10 1 11 1 12 1 13 1 14 1 15 1 16 1 17 2 18 1 19 2 20 1 21 1 22 1 23 1 24 1 25 8 26 1 27 1 28 1 29 1 30 2 31 1 32 1 33 2 34 1 35 1 36 1 37 1 38 1 39 1 40 1 41 - Reebok 610 Bike | English Manual - Page 33
100 4 101 2 102 1 103 1 104 1 * –- * –- M10 Split Washer M10 Locknut Backrest Cover Heart Rate Monitor/Strap Receiver Wire Assembly Tool User’'s Manual Note: Specications are subject to change without notice. For information about ordering replacement parts, see the back cover of this - Reebok 610 Bike | English Manual - Page 34
EXPLODED DRAWING A 9 8 34 11 70 77 77 102 75 10 77 86 75 70 77 10 69 88 25 88 25 88 10 25 77 77 49 69 7 56 52 88 103 25 98 99 99 4 77 97 77 57 2 100 67 77 58 77 77 49 77 67 100 100 77 20 69 Model No. RBEX06013.0 R0113A - Reebok 610 Bike | English Manual - Page 35
EXPLODED DRAWING B 64 88 63 64 88 32 96 12 63 27 92 22 50 77 24 77 26 6 41 55 89 89 55 59 91 74 77 88 64 88 96 73 18 89 35 13 47 40 104 44 51 34 46 45 77 28 33 89 39 33 95 31 3 77 17 101 15 30 77 65 17 66 3 35 Model No. RBEX06013.0 R0113A 80 93 5 80 62 93 62 60 48 - Reebok 610 Bike | English Manual - Page 36
to be free from defects in workmanship and material, under normal use and service conditions. The frame is warranted for a lifetime. Parts are warranted for product is purchased or transported outside the USA, if all instructions in this manual are not followed, if the product is abused or improperly
-
 1
1 -
 2
2 -
 3
3 -
 4
4 -
 5
5 -
 6
6 -
 7
7 -
8
-
9
-
10
-
11
-
12
-
13
-
14
-
15
-
16
-
17
-
18
-
19
-
20
-
21
-
22
-
23
-
24
-
25
-
26
-
27
-
28
-
29
-
30
-
31
-
32
-
33
-
34
-
35
-
36
 |
 |
Serial Number
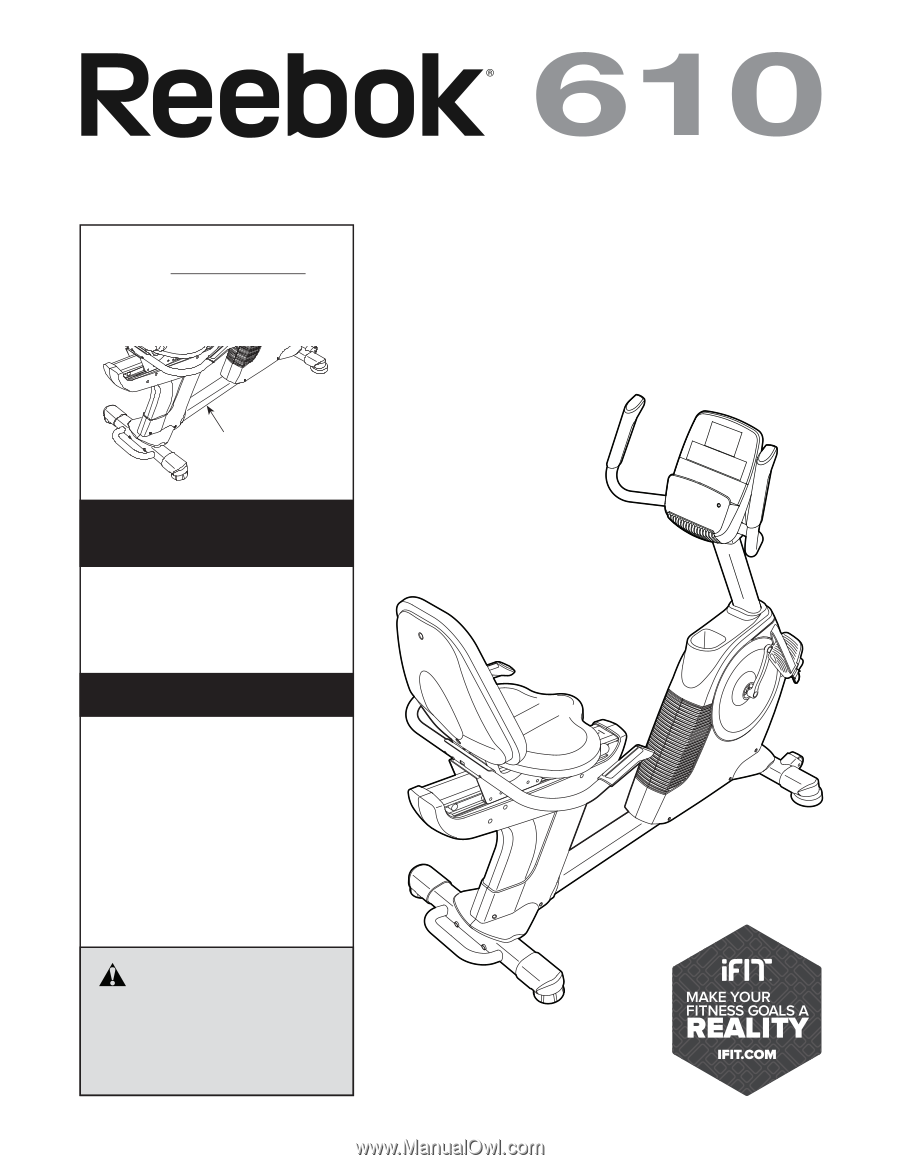
Decal
CAUTION
Read all precautions and instruc-
tions in this manual before using
this equipment. Keep this manual
for future reference.
Model No. RBEX06013.0
Serial No.
Write the serial number in the space
above for reference.
USER°S MANUAL
www.reebokfitness.com
To register your product and
activate your warranty today,
go to www.reebokservice.com/
registration.
For service at any time, go to
www.reebokservice.com.
Or call 1-877-994-4999
Mon.°Fri. 6 a.m.°6 p.m. MT
Sat. 8 a.m.°4 p.m. MT
Please do not contact the store.
ACTIVATE YOUR
WARRANTY
CUSTOMER CARE