Reebok 8400c Treadmill English Manual - Page 7
Tek Screw, without the Base Pad, first. - used
 |
View all Reebok 8400c Treadmill manuals
Add to My Manuals
Save this manual to your list of manuals |
Page 7 highlights
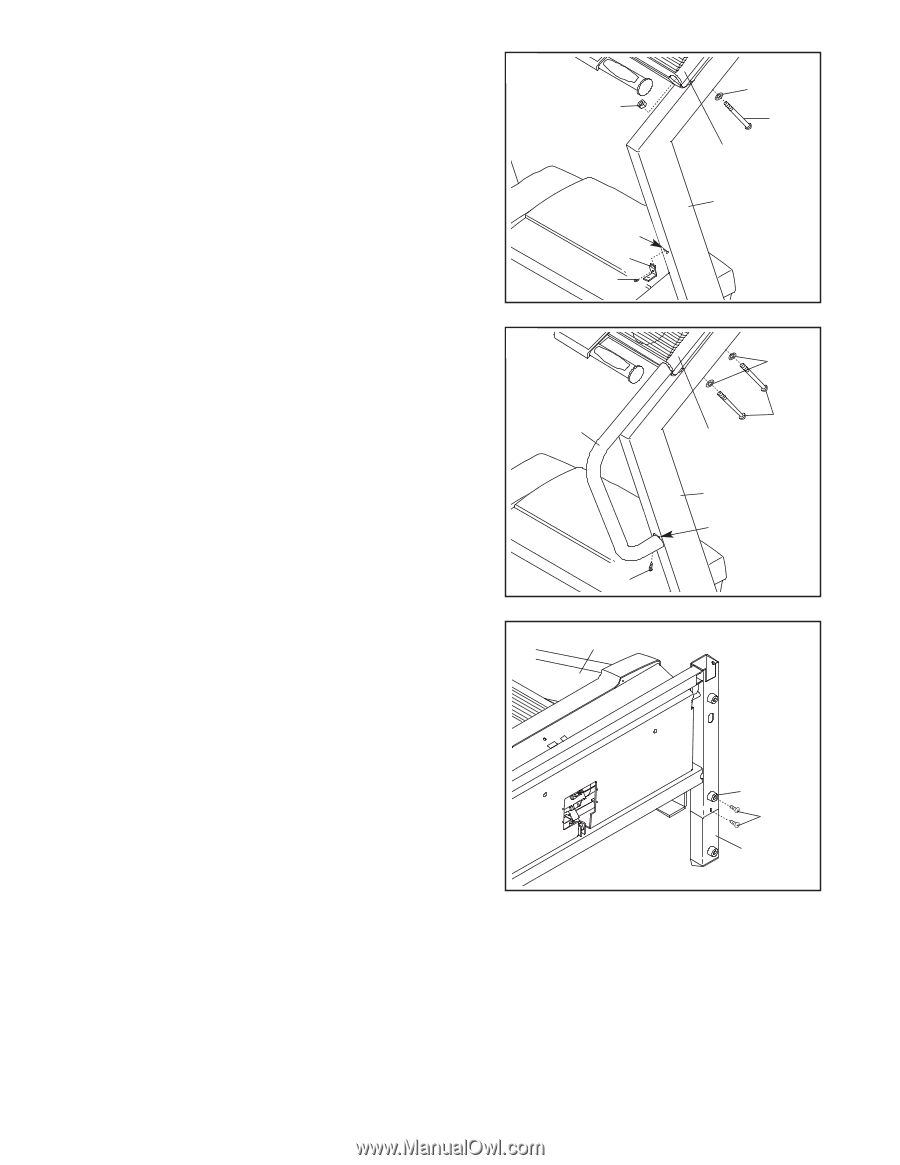
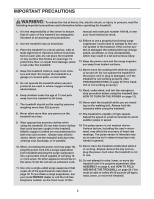
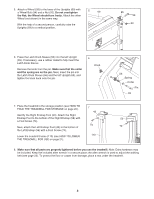
2. Insert the tab on one of the Handrail Brackets (70) into 2 the indicated slot in the right Upright (69). Attach the Handrail Bracket with a 3/4" Tek Screw (65). Attach the other Handrail Bracket (not shown) to the left Upright (not shown) the same way. While a second person holds the console assembly, remove the Console Bolts (78), the Handrail Star Washers (77), and the Nuts (A) from both Uprights (69) and the console assembly. Discard the Nuts. A Slot 70 65 77 78 Console Assembly 69 3. While a second person holds the console assembly, insert the upper end of one of the Handrails (55) into the console 3 assembly; make sure that the Handrail Bracket (70) is in- side of the lower end of the Handrail. Tighten a 1 1/4" Tek Screw (71) into the bottom of the Handrail. Repeat with the other Handrail on the left side (not shown). Next, insert two Console Bolts (78) with Handrail Star Washers (77) into the right Upright (69) and the Handrail (55). Finger tighten the Console Bolts; do not fully tighten the Console Bolts yet. Repeat with the Handrail on the left side (not shown). After all four Console Bolts have been started, tighten them. 4. With the help of a second person, carefully tip the Uprights (69) down as shown. Make sure that the 4 Extension Legs (102) remain in the Uprights. Attach each Extension Leg (102) with two 1" Tek Screws (100) and one Base Pad (99) as shown; attach the lower Tek Screw, without the Base Pad, first. Note: One replacement Base Pad may be included. Use the Base Pad to replace any Base Pad that becomes worn. 55 71 69 77 78 Console Assembly 69 70 99 100 102 7
-
 1
1 -
 2
2 -
 3
3 -
 4
4 -
 5
5 -
 6
6 -
 7
7 -
 8
8 -
 9
9 -
 10
10 -
 11
11 -
 12
12 -
13
-
14
-
15
-
16
-
17
-
18
-
19
-
20
-
21
-
22
-
23
-
24
-
25
-
26
-
27
-
28
-
29
-
30
 |
 |