Ricoh 4430L Facsimile Reference [Basic Features] - Page 39
Placing Originals - ink
 |
View all Ricoh 4430L manuals
Add to My Manuals
Save this manual to your list of manuals |
Page 39 highlights
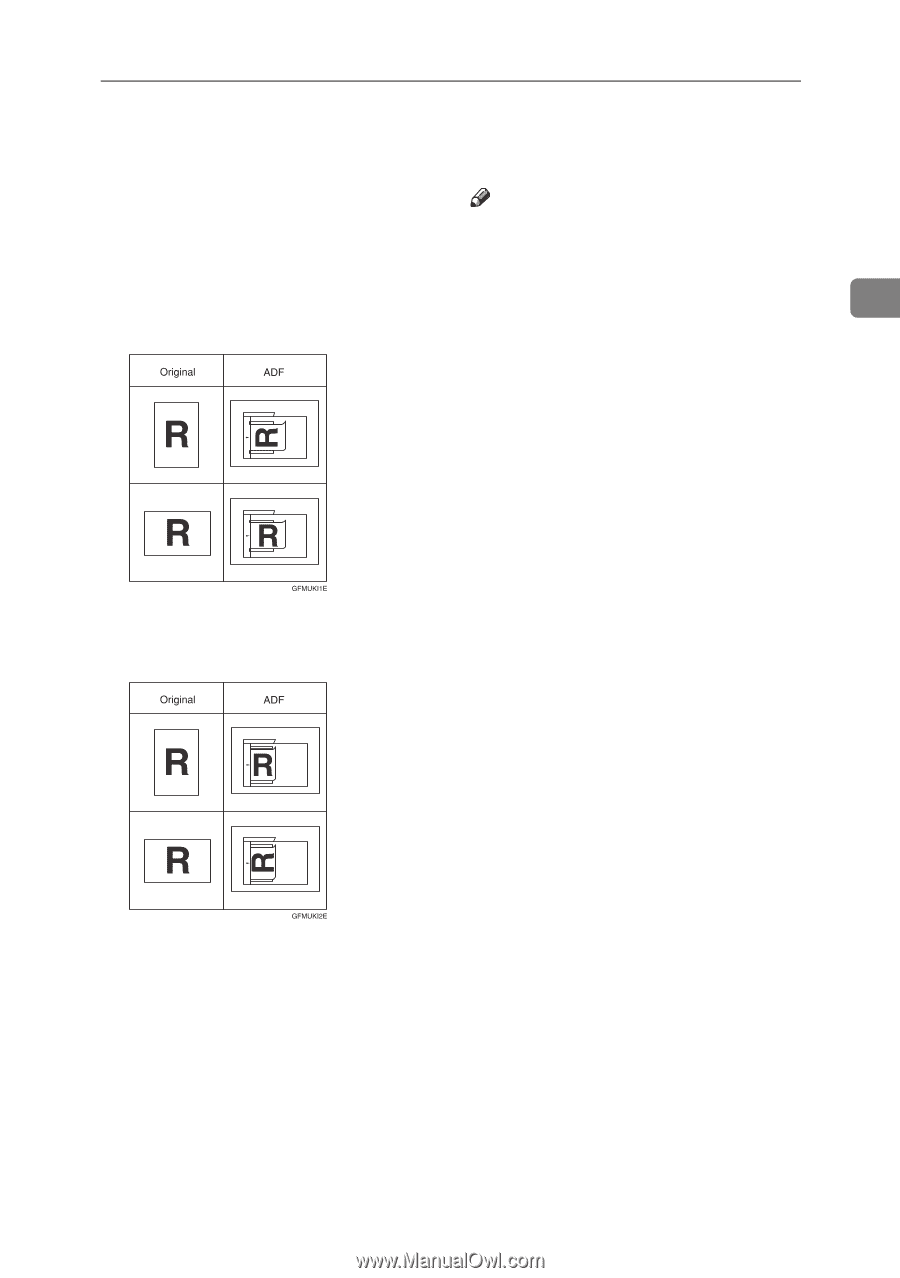
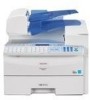
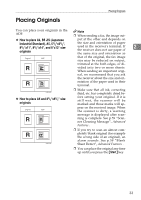
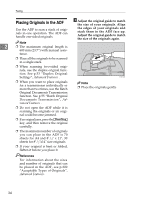
Placing Originals Placing Originals You can place your originals in the ADF. Note ❒ When sending a fax, the image out- ❖ How to place A4, B5 JIS (Japanese Industrial Standard), A5, 51/2"x81/2", 81/2"x11", 81/2"x14", and 8"x13" size originals put at the other end depends on the size and orientation of paper used in the receiver's terminal. If 2 the receiver does not use paper of the same size and orientation as that of the original, the fax image size may be reduced on output, trimmed at the both edges, or di- vided into two or more sheets. When sending an important origi- nal, we recommend that you ask the receiver about the size and ori- entation of the paper used in their terminal. ❖ How to place A5 and 81/2"x51/2" size originals ❒ Make sure that all ink, correcting fluid, etc. has completely dried before setting your original. If it is still wet, the scanner will be marked and those marks will appear on the received image. When the scanner is dirty, a warning message is displayed after scanning is complete. See p.59 "Scanner Cleaning Message", Advanced Features . ❒ If you try to scan an almost completely blank original (for example the wrong side of an original), an alarm sounds. See p.59 "Blank Sheet Detect", Advanced Features . ❒ You can place the original any time up until you press the {Start} key. 33
-
 1
1 -
2
-
3
-
4
-
5
-
6
-
7
-
8
-
9
-
10
-
11
-
12
-
13
-
14
-
15
-
16
-
17
-
18
-
19
-
20
-
21
-
22
-
23
-
24
-
25
-
26
-
27
-
28
-
29
-
30
-
31
-
32
-
33
-
 34
34 -
 35
35 -
 36
36 -
 37
37 -
 38
38 -
 39
39 -
 40
40 -
 41
41 -
 42
42 -
 43
43 -
 44
44 -
45
-
46
-
47
-
48
-
49
-
50
-
51
-
52
-
53
-
54
-
55
-
56
-
57
-
58
-
59
-
60
-
61
-
62
-
63
-
64
-
65
-
66
-
67
-
68
-
69
-
70
-
71
-
72
-
73
-
74
-
75
-
76
-
77
-
78
-
79
-
80
-
81
-
82
-
83
-
84
-
85
-
86
-
87
-
88
-
89
-
90
-
91
-
92
-
93
-
94
-
95
-
96
-
97
-
98
-
99
-
100
-
101
-
102
-
103
-
104
-
105
-
106
-
107
-
108
-
109
-
110
-
111
-
112
-
113
-
114
-
115
-
116
-
117
-
118
 |
 |