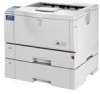
Ricoh AP610N Maintenance Manual
Ricoh AP610N - Aficio B/W Laser Printer Manual
 |
UPC - 026649023385
View all Ricoh AP610N manuals
Add to My Manuals
Save this manual to your list of manuals |
Ricoh AP610N manual content summary:
- Ricoh AP610N | Maintenance Manual - Page 1
Maintenance Guide 1 Paper and Other Media 2 Replacing Consumables and Maintenance Kit 3 Cleaning the Printer 4 Adjusting the Printer 5 Troubleshooting 6 Removing Misfed Paper 7 Appendix Read this manual carefully before you use this product and keep it handy for future reference. For safe and - Ricoh AP610N | Maintenance Manual - Page 2
Introduction This manual contains detailed instructions and notes on the operation and use of this machine. For your safety and benefit, read this manual carefully before using the machine. Keep this manual in a handy place for quick reference. - Ricoh AP610N | Maintenance Manual - Page 3
Trays 28 2. Replacing Consumables and Maintenance Kit Replacing the Toner Cartridge 29 Replacing the Maintenance Kit 32 Before Replacing...32 Replacing the Friction Pad 33 Replacing the Transfer Roller 35 Replacing the Paper Feed Rollers 37 Replacing the Fusing Unit 39 3. Cleaning the Printer - Ricoh AP610N | Maintenance Manual - Page 4
Tray" Appears 70 When "Remove Misfeed Internal Path" Appears 71 When "Remove Misfeed Paper Exit Cover" Appears 73 When "Remove Misfeed Duplex Unit" Appears 76 7. Appendix Moving and Transporting the Printer 79 Moving the Printer ...80 Consumables ...81 Toner Cartridge ...81 Maintenance Kit - Ricoh AP610N | Maintenance Manual - Page 5
• The product names of Windows® XP are as follows: Microsoft® Windows® XP Professional Microsoft® Windows® XP Home Edition • The product names of Windows ServerTM 2003 are as follows: Microsoft® Windows ServerTM 2003 Standard Edition Microsoft® Windows ServerTM 2003 Enterprise Edition Microsoft - Ricoh AP610N | Maintenance Manual - Page 6
manual. This symbol indicates a potentially hazardous situation that might result in death or serious injury when you misuse the machine without following the instructions under this symbol. Be sure to read the instructions safety. If this instruction is not followed, paper might be misfed, - Ricoh AP610N | Maintenance Manual - Page 7
Paper and Other Media Supported by This Printer This section describes the paper size, feed direction, and the maximum amount of paper that can be loaded into each paper tray in this printer. Note ❒ The following symbols and terminology are used to represent the feed direction. In this manual - Ricoh AP610N | Maintenance Manual - Page 8
Feed direction Size (mm) Bypass Tray Paper Tray (Tray1) Paper Feed Unit (Tray2/3) Envelope Feeder Unit 1 Letter (LT, 81/2 × 11) K L 51/2 × 81/2 K Executive (Exec., 71/4 × K 101/2) L Folio (81/4 × 13) K Foolscap (F4, 81/2 × 13) K F/GL (8 × 13) K Com#10 Env (41/8 × 91/2) K C5 Env - Ricoh AP610N | Maintenance Manual - Page 9
size may differ depending on the printer language you use. Set as a custom size setting using the control panel. The following sizes are supported: 1 • Bypass Tray: approximately 90 - 305 mm in width, and 148 - 432 mm in length. • Paper Feed Unit (Tray 2/3): approximately 182 - 297 mm in width - Ricoh AP610N | Maintenance Manual - Page 10
size may differ depending on the printer language you use. Set as a custom size setting using the control panel. The following sizes are supported: • Bypass Tray: approximately 3.54 - 12.01 inches in width, and 5.83 - 17.01 inches in length. • Paper Feed Unit (Tray 2/3): approximately 7.17 - 11.69 - Ricoh AP610N | Maintenance Manual - Page 11
Media Supported by This Printer ❖ Paper weight and number of sheets to be set Supported paper weight Maximum number of sheets (plain paper) Tray 1 Bypass Tray 60 - 105 g/m2 (16 - 28 lb.) 500 (80 g/m2, 20 lb.) 1 52 - 162 g/m2 (14 - 43 lb.) 100 (80 g/m2, 20 lb.) For other kind of papers, see - Ricoh AP610N | Maintenance Manual - Page 12
and Other Media Paper Recommendations 1 Loading Paper Important ❒ Do not use ink-jet printer paper because it may stick to the fusing unit and cause a paper misfeed. ❒ When printing on OHP transparencies that have a print side, load them with the print side over on the bypass tray. Not taking this - Ricoh AP610N | Maintenance Manual - Page 13
using the control panel. Printer driver setup Click [Plain] or [Plain & Recycled] in the [Type:] list. Enabled paper feeding tray Any input tray can be used. Number of sheets that can be set • Tray 1: 500 • Tray 2, Tray 3 (Paper Feed Unit Type 610): 500 • Bypass Tray: 100 Both-side printing - Ricoh AP610N | Maintenance Manual - Page 14
and then [Transparency] on the control panel. Note ❒ The paper type selected using the printer driver overrides that selected using the control panel. Printer driver setup Click [Transparency] in the [Type:] list. Enabled paper feeding tray Bypass tray Number of sheets that can Load only one OHP - Ricoh AP610N | Maintenance Manual - Page 15
been printed onto, except a preprinted letterhead Malfunctions are especially likely when using paper printed on by other than a laser printer (e.g. monochrome and color copiers, ink-jet printers, etc.) • with windows, holes, perforations, cutouts or embossing • with metal clasps, string ties or - Ricoh AP610N | Maintenance Manual - Page 16
The following shows the print area 1 for this printer. Be sure to set the print margins correctly by the application. ❖ Paper A Print Note ❒ The print area may vary de- pending on the paper size, printer language and printer driver settings. A Print area B Feed direction C Approx. 4.2 mm - Ricoh AP610N | Maintenance Manual - Page 17
out of the printer. 1 R CAUTION: • Do not pull out the paper tray forcefully. If you do, the tray might fall and cause an injury. Loading Paper in Tray 1 and the optional paper feed unit The following example explains loading procedure for the standard paper tray (Tray 1). The same procedure - Ricoh AP610N | Maintenance Manual - Page 18
❒ Do not slide the paper tray in with force. If you do, the front and side guides might move. Reference For more information about type, size and feed direction of paper that can be loaded in the tray, see p.3 "Paper and Other Media Supported by This Printer". When you change the paper size see p.14 - Ricoh AP610N | Maintenance Manual - Page 19
catches inwards to un- lock the tray. G Adjust the rear and side guides to the paper size you want to load. 1 ZKGY160E E Slide the tray until it stops. ZKGY120E Important ❒ To avoid damage, pinch the pa- per guides when moving them. H Load paper into the tray with the print side down. ZKGY170E - Ricoh AP610N | Maintenance Manual - Page 20
the front and side guides might move. J Attach the paper tray cover pro- vided when you have pulled out the tray extension. ZKGH240E Note ❒ The paper tray cover contains four mounting holes. • Use the two outer holes when attaching the paper tray cover as a cover for the standard tray. • Use the two - Ricoh AP610N | Maintenance Manual - Page 21
must configure the settings using control panel. ❒ The following is the range of paper sizes that can be loaded in each type of the paper trays: • Optional paper feed unit (Tray 2, Tray 3): 182 - 297 mm in width and 60 - 432 mm ❒ The printer cannot print from applications that do not support custom - Ricoh AP610N | Maintenance Manual - Page 22
then press the {# Enter} key. Specifying a paper type for paper tray and the optional paper feed unit 1 Custom Size: Improve printer performance by selecting the optimum paper type for Horiz. 210.0 mm the tray. You can select from the following paper types: Press the {T} or {U} key scrolls - Ricoh AP610N | Maintenance Manual - Page 23
play the target paper tray, and then press the {# Enter} key . Loading Paper in the Bypass Tray When the optional paper feed units are installed in the printer, [Tray 2] and [Tray 3] will appear de- Opening and Closing the Bypass Tray 1 pending on the number of the in- stalled units. Open the - Ricoh AP610N | Maintenance Manual - Page 24
onto the tray, so multiple sheets are not fed in together. ❒ Set the size and direction of the loaded paper on the control panel or with the printer driver. Make sure the settings do not conflict. Otherwise, the paper may jam or the print quality may be affected. A Slide the side guides outward - Ricoh AP610N | Maintenance Manual - Page 25
the size and orientation of panel and printer driver. ❒ The number of pages that can be loaded in the bypass tray differs depending on paper type. Make sure paper is not stacked above the paper guides inside the bypass tray. the paper in the bypass tray. Reference Bypass Size: *A4 (210 x 297 - Ricoh AP610N | Maintenance Manual - Page 26
size paper for the Bypass Tray C Check [Bypass Size] appears, and then press the {# Enter} key. The paper size selection menu ap- 1 Important ❒ The settings of custom sized paper that take effect are not the settings made on the control panel but the settings made in the printer driver. pears - Ricoh AP610N | Maintenance Manual - Page 27
always specify the type of paper. loaded, and then press the {# En- Duplex printing is not possible on ter} key . paper in a tray for which Thick Pa- per or Transparency has been set. Bypass Tray: ❒ The paper type selected using the Thick Paper printer driver overrides that selected using - Ricoh AP610N | Maintenance Manual - Page 28
installed. ❒ To install the envelope feeder unit, the optional paper feed unit must be installed. See "Attaching Envelope Feeder Unit Type 610", Setup Guide. Loading envelopes onto the Bypass Tray Reference With the bypass tray, you can load up to 10 envelopes at the same time. For more information - Ricoh AP610N | Maintenance Manual - Page 29
the envelope feeder unit in "Tray 2". A Slide the optional paper feed unit (Tray 2) out until it stops. Then, lift it slightly, and then slide it out. ZKGP330E Note ❒ Keep the paper tray with paper in a cool and dry place. B Prepare the envelope feeder Unit. C Pinch the side guides, and then slide - Ricoh AP610N | Maintenance Manual - Page 30
into the printer until it stops. Note ❒ Confirm that the top of the stack is not higher than the limit mark on the side guides. ❒ Confirm that the envelopes fit under the side guides. ❒ Do not push the stack of envelopes with too much force. 26 ZKGP340E Important ❒ Do not slide the paper tray in - Ricoh AP610N | Maintenance Manual - Page 31
menu appears. L Press the {U} or {T} key to dis- play the target paper tray, and then press the {# Enter} key. Reference For more information about types of envelopes you can select, see p.3 "Paper and Other Media Supported by This Printer". N Press the {# Enter} key to apply the settings. Wait for - Ricoh AP610N | Maintenance Manual - Page 32
then press the {# Enter} key. 1 When paper of the same size is load- ed in both the standard tray and the The paper tray selection menu appears. D paper feed unit (option), paper will be Press the {U} or {T} key to select fed from the standard tray when you the tray type you want to use, and - Ricoh AP610N | Maintenance Manual - Page 33
Maintenance Kit Replacing the Toner Cartridge R WARNING: • Do not incinerate spilled toner or used toner. Toner toner on your clothes or skin when removing a paper jam or replacing toner. If your skin comes into contact with toner, wash the affected area thoroughly with soap and water. • If toner - Ricoh AP610N | Maintenance Manual - Page 34
Consumables and Maintenance Kit Note ❒ When handling toner cartridges, never stand them up on either end or position them upside down. B Be sure to put the toner cartridge on a stable, flat surface. ❒ Store toner cartridges in a cool dark place. 2 ❒ Actual printable numbers vary depending - Ricoh AP610N | Maintenance Manual - Page 35
the unit horizontally while holding the cartridge with one hand as shown in the illustration. G Push down the toner cartridge to settle it in appropriate position. 2 ZKGT151E Note ❒ Be sure to remove the tape com- pletely before installing the new toner cartridge, otherwise the printer might - Ricoh AP610N | Maintenance Manual - Page 36
parts for maintaining the printer. Replace the maintenance kit if the following message appears on the display: • Transfer Roller (with gloves) See p.35 "Replacing the Transfer Roller". • Paper Feed Roller × 3 See p.37 "Replacing the Paper Feed Rollers". Replace Maintenance Kit • Fusing Unit - Ricoh AP610N | Maintenance Manual - Page 37
the Maintenance Kit Replacing the Friction Pad C Remove paper from the paper tray. Place the tray upside down Replace all friction pad of the tray. on a flat surface. There are two kinds of friction pads. One is for the paper tray (Tray 1), and the other are for the paper feed unit(s) (Tray - Ricoh AP610N | Maintenance Manual - Page 38
Replacing Consumables and Maintenance Kit E G Return the paper tray to its origi- Push the friction pad until it locks nal position, and then remove the securely. friction pad from the tray. H If your printer is equipped with Note the optional paper feed unit(s), ❒ The friction pad spring - Ricoh AP610N | Maintenance Manual - Page 39
the Maintenance Kit Replacing the Transfer Roller A Open the front cover by pushing the front cover release button. D Hold the lock levers (" " parts), and then pull them. 2 AGN020S B Pull the toner cartridge out of the printer, while lifting the front side. ZKGM200E E Hold the green parts of - Ricoh AP610N | Maintenance Manual - Page 40
Replacing Consumables and Maintenance Kit F Insert the new transfer roller on the socket with the gear of the roller positioned on the left. H Take the gloves off. I Hold the grips of the toner car- tridge, and then insert it into the printer until it stops. 2 ZKGM220E Important ❒ Do not insert - Ricoh AP610N | Maintenance Manual - Page 41
Replacing the Maintenance Kit Replacing the Paper Feed Rollers A If the optional duplex unit is in- stalled, uninstall them from the printer. B Replace all feed rollers including the Move the printer to the edge of a printer and the optional paper feed sturdy and stable table or desk. unit - Ricoh AP610N | Maintenance Manual - Page 42
Replacing Consumables and Maintenance Kit D While sliding the green lock lever to the left ( ), set the new roller ( ). Then return the green lock le- ver to its original position ( ). G Reinstall the optional duplex unit if it was removed. Reference See p.79 "Moving and Transporting the Printer" - Ricoh AP610N | Maintenance Manual - Page 43
the Maintenance Kit Replacing the Fusing Unit C Lift the lock levers of the fusing unit as shown in the illustration. R CAUTION: • The fusing unit becomes very hot. When installing the new fus- ing unit, turn off the printer and wait about an hour. After that, install the new fusing unit. Not - Ricoh AP610N | Maintenance Manual - Page 44
Consumables and Maintenance Kit F Replace the new fusing unit into the printer. I Close the rear cover. 2 AGN008S G Push the lock levers of the fusing unit down until it clicks. AGN005S J Print a configuration page to con- firm that the printer works properly. Reference For more information - Ricoh AP610N | Maintenance Manual - Page 45
Replacing the Maintenance Kit B Lift the lock levers of the fusing unit as shown in the illustration. E Replace the new fusing unit into the printer. 2 C Pull the fusing unit out. AGN006S AGN008S F Push the lock levers of the fusing unit down until it clicks. AGN007S D Pull out the pins on - Ricoh AP610N | Maintenance Manual - Page 46
Replacing Consumables and Maintenance Kit H Print a configuration page to con- firm that the printer works prop- erly. Reference For more information about printing the configuration page, 2 see "Test Printing", Setup Guide. 42 - Ricoh AP610N | Maintenance Manual - Page 47
shock, explosion or loss of sight. If the machine has laser systems, there is a risk of serious eye damage. R CAUTION: • When removing misfed paper, do not touch the fusing unit because it could be very hot. Clean the printer periodically to maintain fine printing. Dry wipe the exterior with - Ricoh AP610N | Maintenance Manual - Page 48
out of the printer. 3 ZKGY140E B Place the tray on a flat surface. When there is paper in the tray, remove paper. C Wipe the brown part of the fric- tion pad with a soft damp cloth. Then, wipe it with a dry cloth to remove the water. ZKGY150E Important ❒ Do not slide the paper tray in with force - Ricoh AP610N | Maintenance Manual - Page 49
from the one on the paper tray. Confirm the type of paper feed roller you are installing. AGN017S A For the paper tray B For the paper feed unit A Turn off the power. B Pull out the plug from the socket. Remove all the cables from the printer. C Lift the paper tray slightly, and then pull it - Ricoh AP610N | Maintenance Manual - Page 50
to the place where it was placed. Carefully slide the paper tray into the printer until it stops. 3 ZKGM120E F Wipe the rubber part of the roller with a soft damp cloth. Then, wipe it with a dry cloth to remove the water. Important ❒ Do not use chemical cleaner or organic solvent such as thinner - Ricoh AP610N | Maintenance Manual - Page 51
grips of the cartridge. R WARNING: • Be sure to turn off the power and wait for about 30 minutes before cleaning the registra- tion roller. Not waiting for the printer to cool down can result 3 in a burn. R CAUTION: • The inside of this printer be- comes very hot. Do not touch parts labelled - Ricoh AP610N | Maintenance Manual - Page 52
the left and right side indenta- tions. 3 AGN023S F Lower the toner cartridge when it touches the back. ZKGH130E Important ❒ Carefully close the front cover. If you cannot close the cover easily, pull the toner cartridge out of the printer and insert it again. After that, close the front cover - Ricoh AP610N | Maintenance Manual - Page 53
from the application or the printer driver whenever possible. A Press the {Menu} key. AGN503S The [Menu] screen appears on the display. B Press the {U} or {T} key to dis- play [Maintenance], and then press the {# Enter} key . Menu: Maintenance The maintenance menu appears. C Check [Image Density - Ricoh AP610N | Maintenance Manual - Page 54
Adjusting the Printer Adjusting Tray Registration You can adjust the registration of each tray. The vertical adjustment is used for all trays. Normally, you need not update the registration. But when the optional paper feed unit or the duplex unit is installed, updating is useful in some cases. E - Ricoh AP610N | Maintenance Manual - Page 55
the print area [Adjustment] menu. Registration: Adjustment L Print the test sheet to confirm the adjustment result. M Press the {Online} key. The initial screen appears. Adjusting Tray Registration 4 51 - Ricoh AP610N | Maintenance Manual - Page 56
Adjusting the Printer 4 52 - Ricoh AP610N | Maintenance Manual - Page 57
size in the tray, and then change the paper size setting with the control panel. Or, press {Form Feed}, and then select the tray using the control panel. Or, press {Job Reset} to cancel the print job. You can make to setting to print disregarding the error message. Close Duplex Unit Cover The - Ricoh AP610N | Maintenance Manual - Page 58
again, call your sales or service representative. Turn off the power. Replace the Hard Disk Drive and turn on the power. See "Attaching Hard Disk Drive Type 2600 ", Setup Guide. Turn off the power. Remove the Hard Disk Drive and turn on the power. The printer identified an IEEE 1394 interface - Ricoh AP610N | Maintenance Manual - Page 59
on the power. Note ❒ If you remove the memory unit, you must set up the option with the printer driver. ❒ In this case, you might not be able to print complex print jobs. There is a problem with the parallel interface. If you use the parallel I/F, replace the interface cable that caused the error - Ricoh AP610N | Maintenance Manual - Page 60
Drive Type 2600", Setup Guide. Hex Dump Mode The printer is in Hex Dump Mode. No action required. Invalid Data Power Off On The printer has received irreg- Turn the power off, and then on. If the ular data. message appears again, contact your sales or service representative. Invalid Password - Ricoh AP610N | Maintenance Manual - Page 61
standard tray, and the print job will be resumed automatically. Replace Maintenance Kit It is time to replace the maintenance kit (friction pad, paper feed roller, transfer roller and fusing Unit). Replace the new maintenance kit. See p.32 "Replacing the Maintenance Kit". Replace Toner Cartridge - Ricoh AP610N | Maintenance Manual - Page 62
off power switch and then on. If the message ap- pears again, contact your sales or service representative. The indicated paper input tray Set the indicated paper input tray coris not set correctly, or not set. rectly. #: tray number The print job is being reset. Wait for a while. The printer - Ricoh AP610N | Maintenance Manual - Page 63
action. Is paper loaded ? Load paper into the paper tray or onto the bypass tray. Can you print a configura- If you cannot print a configuration page, it probably indicates a tion page ? printer malfunction. Contact your sales or service representative. See "Test Printing", Setup Guide. Is - Ricoh AP610N | Maintenance Manual - Page 64
devices, and this printer can be blocked by obstructions. Move this printer, computers, other devices, if necessary. If printing still does not start, contact your sales or service representative. Consult with the store where the printer was purchased for information about the location of sales or - Ricoh AP610N | Maintenance Manual - Page 65
print) port connection, port 1394_00(n) *1 should be set. *1 (n) is the number of printers connected. Windows 95/98/Me A Click [Start], point to [Settings] and then click [Printers]. B Click to select the icon of the printer. Next, on the [File] menu, click [Properties]. C Click the [Details - Ricoh AP610N | Maintenance Manual - Page 66
Troubleshooting Windows XP Home Edition A Select the [Control Panel] window from [Start] on the taskbar. B Click [Printers and Other Hardware]. C Click [Printers and Faxes]. D Click to select the icon of the printer. Next, on the [File] menu, click [Properties]. E Click the [Port] tab. F Check the - Ricoh AP610N | Maintenance Manual - Page 67
cause dirt on paper surfaces, toner spillage, or printer failure. If you have accidentally shaken the toner cartridge, print some pages (about 50 pages) until the dirt disappear. The paper's reverse side is dirty. Paper loaded in the Paper Tray or Paper Feed Unit may not match the paper size dial - Ricoh AP610N | Maintenance Manual - Page 68
setting. See p.13 "Loading Paper in Tray 1 and the optional paper feed unit". When using the Bypass Tray, set the paper size using the control panel. See p.19 "Loading Paper in the Bypass Tray". When you are using a Windows operating system, the printer driver settings override those set using - Ricoh AP610N | Maintenance Manual - Page 69
"PCL Menu" with the control panel. See "Making Printer Settings Using the Control Panel", Software Guide. Confirm that the setting of orientation has been set in the application you use. Set the correct paper size and feed direction that matches tray set- tings on the RPCS printer driver. Part - Ricoh AP610N | Maintenance Manual - Page 70
Additional Troubleshooting Problems Solutions Strange noise is heard. If a supply was recently replaced or an option attached in the area the strange noise is coming from, check the supply or option is properly attached. If the strange noise persists, contact your sales or service representative - Ricoh AP610N | Maintenance Manual - Page 71
Additional Troubleshooting Problems Solutions Alert Resolving is set for sending e-mail, but no Alert-resolved e-mail is sent. If the power of the main unit is turned off after an Alert occurs, the Alert is resolved during the time the power is off: no Alert-resolved e-mail is sent. Alert - Ricoh AP610N | Maintenance Manual - Page 72
Troubleshooting 5 68 - Ricoh AP610N | Maintenance Manual - Page 73
Misfed Paper Removing Misfed Paper An error message appears if a paper misfeed occurs. The error message gives the location of the misfeed. Important ❒ Misfed paper may be covered in toner. Be careful not to get toner on your hands or clothes. ❒ Toner on prints made after removing misfed paper may - Ricoh AP610N | Maintenance Manual - Page 74
release button, and then close it to reset the mis- feed condition. 6 ZKGY280E B Carefully slide the paper tray into the printer until it stops. ZKGY300E Note ❒ You can apply this procedure for both the paper tray and the optional paper feed unit. ❒ To reset the misfeed condition, open and close - Ricoh AP610N | Maintenance Manual - Page 75
removing misfed paper may cause paper to tear and leave scraps of paper in the printer. This might cause a misfeed and damage the printer. A Open the front cover by pushing the front cover release button. C Pull out the misfed paper by holding both sides of paper. Be careful not to get toner - Ricoh AP610N | Maintenance Manual - Page 76
Removing Misfed Paper F Close the front cover by pressing the left and right side indentations. ZKGH130E Important ❒ If paper is fed from the bypass tray, be sure to remove all the paper from the bypass tray and close it before opening the front 6 cover. 72 - Ricoh AP610N | Maintenance Manual - Page 77
the new fusing unit. Not waiting for the unit to cool down can result in a burn. Removing misfed paper from the exit cover A Open the paper exit cover. Important ❒ Forcefully removing misfed paper may cause paper to tear and leave ZKGY391E scraps of paper in the printer. This might cause - Ricoh AP610N | Maintenance Manual - Page 78
E Hold the tab, and then remove the misfed paper. AGN004S B Remove the rear cover in a hori- zontal direction. 6 ZKGX220E C Lift the lock levers of the fusing unit as shown in the illustration. ZKGY410E Important ❒ Do not touch the metal part of the fusing unit. It becomes very hot. Touching it - Ricoh AP610N | Maintenance Manual - Page 79
G Push the lock levers of the fusing unit down until it clicks. When "Remove Misfeed Paper Exit Cover" Appears AGN009S H Insert the rear cover to the inside grooves on both sides of the printer in a horizontal direction. 6 I Close the rear cover. ZKGX221E AGN005S 75 - Ricoh AP610N | Maintenance Manual - Page 80
hot. C Close the rear cover of the duplex unit. Important ❒ Forcefully removing misfed paper may cause paper to tear and leave scraps of paper in the duplex unit. This might cause a misfeed and damage the printer. ZKGY330E Removing the misfed paper inside the cover D Lift the lever ( ), and - Ricoh AP610N | Maintenance Manual - Page 81
not be able to remove it by pulling the duplex unit out. In this case, pull the paper tray out, and then remove the paper. C Align the power cable with the 6 groove of the left slide of the du- plex unit, and then insert the du- plex unit into back of the printer aligning the rails inside - Ricoh AP610N | Maintenance Manual - Page 82
Removing Misfed Paper 6 78 - Ricoh AP610N | Maintenance Manual - Page 83
. Important ❒ Be sure to disconnect all cables from the printer before transporting it. ❒ The printer is a precision piece of machinery. Take care to avoid damage dur- ing shipment. ❒ If the optional paper feed unit is installed, remove it from the printer, and then move them separately. 79 - Ricoh AP610N | Maintenance Manual - Page 84
. Moving the printer facing up on down may cause the toner to scatter. ❒ If the optional paper feed unit(s) is installed, detach and move the printer separately. Never move the printer with the paper feed unit(s) attached. E If you removed options, reinstall them. See Setup Guide for installing - Ricoh AP610N | Maintenance Manual - Page 85
there is problem, contact the store where they were purchased. ❒ When you first use this printer, use the toner cartridge packaged with the printer. ❒ Numbers of pages that can be printed using the toner cartridge supplied with this printer are as follows: Name Toner Cartridge Average printable - Ricoh AP610N | Maintenance Manual - Page 86
Appendix Maintenance Kit ❖ Maintenance Kit Type 610 Name Average printable number of pages *1 Fusing Unit 90,000 pages Transfer Roller Paper Feed Roller × 3 Friction Pad × 3 90,000 pages 90,000 pages 90,000 pages *1 A4, 3% test chart Note ❒ The actual number of printable pages varies - Ricoh AP610N | Maintenance Manual - Page 87
Specifications Specifications Mainframe ❖ Configuration: Desktop ❖ Print Process: Laser beam scanning & Electrophotographic printing Dual component toner development ❖ First Print Speed: 7.5 sec or less (A4K, 81/2×11K) Note ❒ If the printer ing unit. ❖ Interface: Standard 36-pin printer cable - Ricoh AP610N | Maintenance Manual - Page 88
❖ Paper Weight: See p.3 "Paper and Other Media Supported by This Printer". ❖ Media Type: See p.9 "Types of Paper and Other Media". ❖ Power Source: 220 - 240 V, 50/60 Hz, 4.5 A or more ❖ Power Consumption: • With Options Maximum Energy Saver • Printer Only Maximum Energy Saver 920 W or less 10 - Ricoh AP610N | Maintenance Manual - Page 89
Specifications ❖ Weight: Approximately 20 kg (44.1 lb.) (toner cartridge and power cable included) ❖ Warm-up Time: Less than 19 seconds (23°C, 73F) ❖ Paper Capacity: Standard paper tray 500 sheets *1 (80 g/m2, 20 lb.) Bypass Tray *2 100 sheets *1 (80 g/m2, 20 lb.) Optional Paper Feed Unit × - Ricoh AP610N | Maintenance Manual - Page 90
Other Media Supported by This Printer". Duplex Unit AD610 ❖ Dimensions (W×D×H): 419 × 378 × 257 mm (16.5 × 14.9 × 10.2 inches) ❖ Paper Size: See p.3 "Paper and Other Media Supported by This Printer". ❖ Paper Weight: 60 - 105 g/m2 (17 - 28 lb.) ❖ Weight: 6 kg (13.2 lb.) Hard Disk Drive Type 2600 - Ricoh AP610N | Maintenance Manual - Page 91
(Synchronous Dynamic RAM) ❖ Number of Pins: 144 pins 1394 Interface Unit Type 4510 ❖ Transmission Spec.: IEEE 1394 ❖ Device number of device in a bus: Maximum 63 ❖ Allowed cable hops in a bus: Maximum 16 ❖ Power supply: Nonpower supply Cable Power repeated (IEEE 1394a-2000 compliant) Specifications - Ricoh AP610N | Maintenance Manual - Page 92
general, the transmittable dis- tance indoors is 10-100 m, depending on the environment. ❖ Transmission Mode: ad hoc mode and infrastructure mode Bluetooth Interface Unit Type C ❖ Supported Profiles: SPP (Serial Port Profile) HCRP (Hardcopy Cable Replacement Profile) BIP (Basic Imaging Profile - Ricoh AP610N | Maintenance Manual - Page 93
Remove Misfed Paper Duplex Unit, 76 Internal Path, 71 Paper Exit Cover, 73 Paper Tray, 70 Removing Misfed Paper, 69 Replacing Consumables and Maintenance Kit, 29 Replacing the Maintenance Kit, 32 Friction Pad, 33 Fusing Unit, 39 Paper Feed Roller, 37 Transfer Roller, 35 Replacing the Toner Cartridge - Ricoh AP610N | Maintenance Manual - Page 94
Specifying custom size paper Bypass Tray, 22 Optional Paper Feed Unit, 17 Specifying standard size paper Bypass Tray, 20 Optional Paper Feed Unit, 13 Tray 1, 13 Storing Paper, 8 Switching between Paper Trays, 28 T Thick Paper, 9 Toner Cartridge, 29, 81 Transfer Roller, 35, 82 Troubleshooting, 53 90 - Ricoh AP610N | Maintenance Manual - Page 95
Copyright © 2004, 2005 - Ricoh AP610N | Maintenance Manual - Page 96
: +81-3-3479-3111 Maintenance Guide Overseas Affiliates USA RICOH CORPORATION 5 Dedrick Place West Caldwell, New Jersey 07006 Phone: +1-973-882-2000 The Netherlands RICOH EUROPE B.V. Groenelaan 3, 1186 AA, Amstelveen Phone: +31-(0)20-5474111 United Kingdom RICOH UK LTD. Ricoh House, 1 Plane Tree
-
 1
1 -
 2
2 -
 3
3 -
 4
4 -
 5
5 -
 6
6 -
 7
7 -
8
-
9
-
10
-
11
-
12
-
13
-
14
-
15
-
16
-
17
-
18
-
19
-
20
-
21
-
22
-
23
-
24
-
25
-
26
-
27
-
28
-
29
-
30
-
31
-
32
-
33
-
34
-
35
-
36
-
37
-
38
-
39
-
40
-
41
-
42
-
43
-
44
-
45
-
46
-
47
-
48
-
49
-
50
-
51
-
52
-
53
-
54
-
55
-
56
-
57
-
58
-
59
-
60
-
61
-
62
-
63
-
64
-
65
-
66
-
67
-
68
-
69
-
70
-
71
-
72
-
73
-
74
-
75
-
76
-
77
-
78
-
79
-
80
-
81
-
82
-
83
-
84
-
85
-
86
-
87
-
88
-
89
-
90
-
91
-
92
-
93
-
94
-
95
-
96
 |
 |
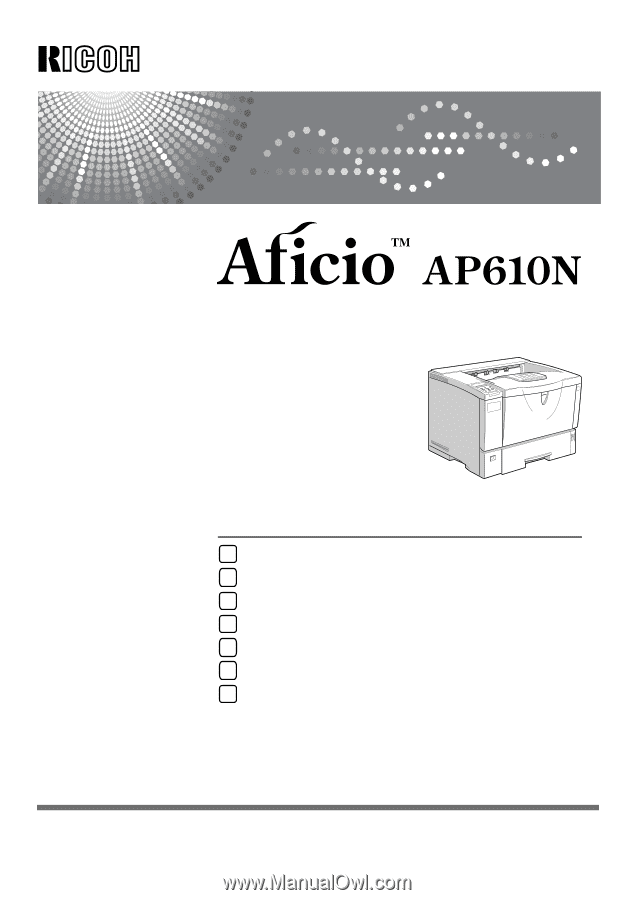
Maintenance Guide
Read this manual carefully before you use this product and keep it handy for future reference. For safe and correct use, please be sure to read
the Safety Information in the “Setup Guide” before using the machine.
Paper and Other Media
Replacing Consumables and Maintenance Kit
Cleaning the Printer
Adjusting the Printer
Troubleshooting
Removing Misfed Paper
Appendix
1
2
3
4
5
6
7