Ryobi ACRM009 Operation Manual - Page 2
Techtronic Industries Power Equipment
 |
View all Ryobi ACRM009 manuals
Add to My Manuals
Save this manual to your list of manuals |
Page 2 highlights
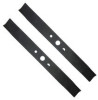
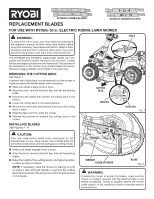
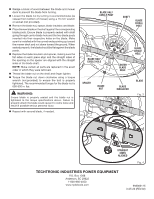
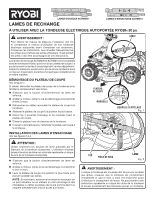
Wedge a block of wood between the blade and mower deck to prevent the blade from turning. Loosen the blade nut by turning it counterclockwise (as viewed from bottom of mower) using a 15 mm wrench or socket (not provided). Remove the blade nut, spacer, blade insulator, and blade. Place the new blade on the shaft against the corresponding blade posts. Ensure blade is properly seated with shaft going through center blade hole and the two blade posts inserted into their respective holes on the blade. Make sure it is installed with the curved ends pointing up toward the mower deck and not down toward the ground. When seated properly, the blade should be flat against the blade posts. Replace the blade insulator and spacer, making sure the flat sides on each piece align and the straight sides of the opening on the spacer are aligned with the straight sides of the blade shaft. NOTE: Make certain all parts are replaced in the exact order in which they were removed. Thread the blade nut on the shaft and finger tighten. Torque the blade nut down clockwise using a torque wrench (not provided) to ensure the bolt is properly tightened. The recommended torque for the blade nut is 600-650 in. lbs. WARNING: Ensure blade is properly seated and the blade nut is tightened to the torque specifications above. Failure to properly attach the blade could cause it to come loose and result in possible serious personal injury. Repeat with second blade, if needed. BLADE HALF CIRCLE POST SHAFT BLADE CIRCLE POST BLADE HALF CIRCLE HOLE SPACER BLADE NUT BLADE CIRCLE HOLE CENTER BLADE HOLE BLADE INSULATOR BLADE Fig. 3 STRAIGHT SIDES ALIGNED Fig. 4 TECHTRONIC INDUSTRIES POWER EQUIPMENT P.O. Box 1288 Anderson, SC 29622 1-800-860-4050 www.ryobitools.com 998000115 3-25-20 (REV:02)
-
 1
1 -
 2
2 -
 3
3 -
 4
4 -
 5
5 -
 6
6
 |
 |
