Ryobi AG700 English Manual - Page 16
Installing Sanding Disc, Warning, Sanding
 |
View all Ryobi AG700 manuals
Add to My Manuals
Save this manual to your list of manuals |
Page 16 highlights
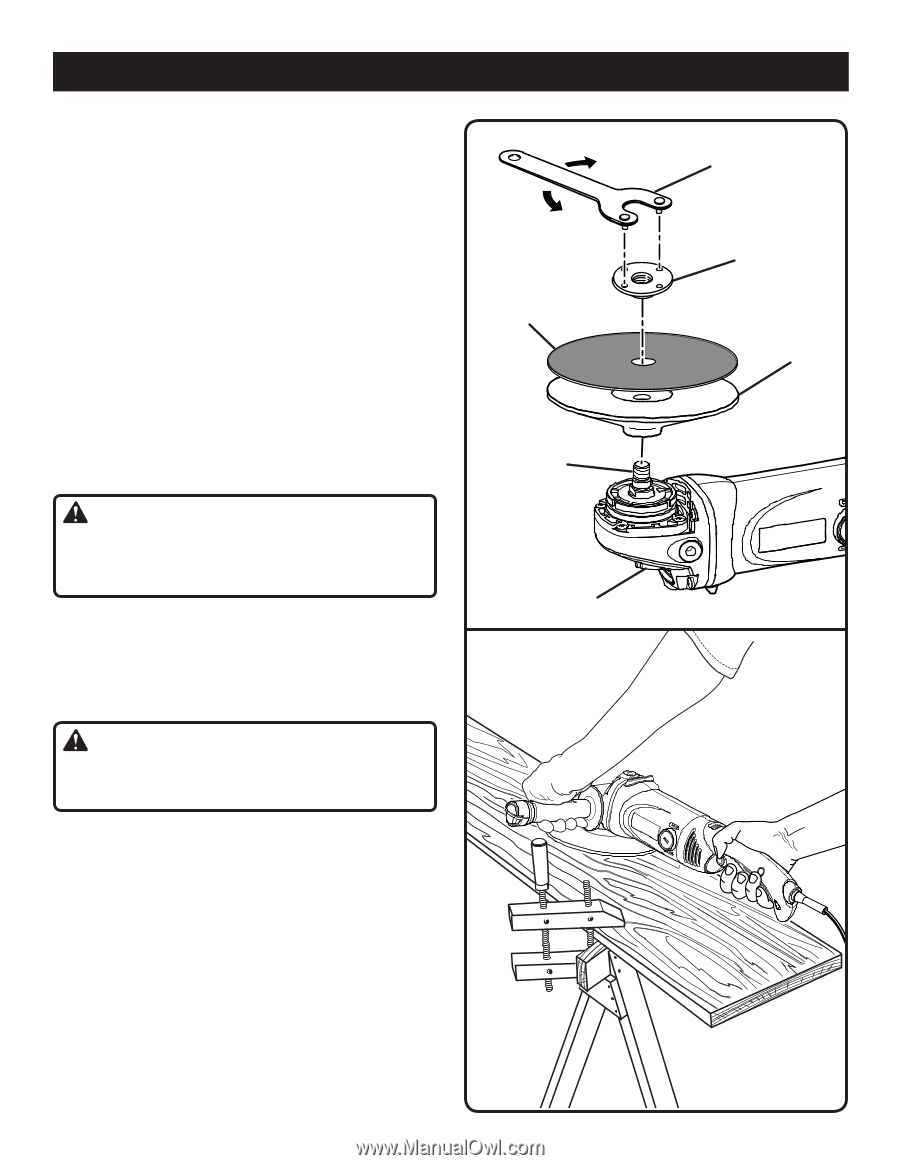
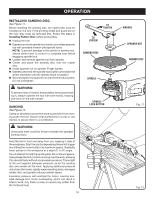
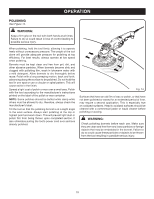
OPERATION installing sanding disc See Figure 11. Before installing the sanding disc, the rubber disc must be installed on the tool. If the grinding wheel and guard are on the tool, they must be removed first. Follow the steps in Installing Rubber Disc before proceeding. Unplug the tool. Depress and hold spindle lock button and rotate spanner nut with provided wrench until spindle locks. NOTE: To prevent damage to the spindle or spindle lock, always allow motor to come to a complete stop before engaging spindle lock. Loosen and remove spanner nut from spindle. Center and place the sanding disc over the rubber disc. Install spanner nut on spindle. Finger tighten. Depress and hold the spindle lock button and rotate the wheel clockwise until the spindle locks in position. Securely tighten the spanner nut with the wrench provided. Do not overtighten. to tighten to loosen SANDING DISc Spindle WARNING: To prevent loss of control and possible serious personal injury, always operate the tool with both hands, keeping one hand on the side handle. SANDING See Figure 12. Clamp or otherwise secure the work to prevent it from moving under the tool. Secure small workpieces in a vise or use clamps to secure them to a workbench. Spindle Lock Button WARNING: Unsecured work could be thrown towards the operator causing injury. Hold the tool in front and away from you, keeping it clear of the workpiece. Start the tool by depressing the switch trigger and letting the motor build to its maximum speed. Gradually lower sander to the workpiece at a slight (5° to 8°) angle. Do not attempt to hold the sanding disc flat on the workpiece. Always keep the tool in motion moving over the work, allowing it to operate freely without unnecessary pressure. The weight of the unit supplies adequate pressure, so let the sanding disc and sander do the work. Applying additional pressure only slows the motor, rapidly wears sanding discs, damages rubber disc, and greatly reduces sander speed. Excessive pressure will overload the motor, causing possible damage from motor overheating, which can result in inferior work. Any finish or resin on wood may soften from the frictional heat. 16 wrench spanner nut rubber disc Fig. 11 Fig. 12
-
 1
1 -
2
-
3
-
4
-
5
-
6
-
7
-
8
-
9
-
10
-
 11
11 -
 12
12 -
 13
13 -
 14
14 -
 15
15 -
 16
16 -
 17
17 -
 18
18 -
 19
19 -
 20
20 -
 21
21 -
22
 |
 |