Ryobi P310 English Manual
Ryobi P310 Manual
 |
View all Ryobi P310 manuals
Add to My Manuals
Save this manual to your list of manuals |
Ryobi P310 manual content summary:
- Ryobi P310 | English Manual - Page 1
OPERATOR'S MANUAL 18 VOLT CAULK GUN P310 BATTERIES AND CHARGERS SOLD SEPARATELY Your caulk gun has been engineered and manufactured to our high standard for dependability, ease of operation, and operator safety. When properly cared for, it will give you years of rugged, trouble-free performance. - Ryobi P310 | English Manual - Page 2
for Charger ...5 � Symbols...6-7 � Features...8-9 � Assembly ...9 � Operation...10-14 � Maintenance ...15 � Parts Ordering / Service ...16 operate. WARRANTY RYOBI® POWER TOOL - LIMITED TWO YEAR WARRANTY AND 30 DAY EXCHANGE POLICY One World Technologies, Inc., warrants its RYOBI® power tools - Ryobi P310 | English Manual - Page 3
for one type of battery may create a risk of fire when used with another battery. Use battery operated tool only with specifically designated battery pack. Use of any other batteries may create a risk of fire. Use battery only with charger listed. MODEL BATTERY PACK (P100) CHARGER (P110) P310 - Ryobi P310 | English Manual - Page 4
personnel may result in a risk of injury. When servicing a tool, use only identical replacement parts. Follow instructions in the Maintenance section of this manual. Use of unauthorized parts or failure to follow Maintenance Instructions may create a risk of shock or injury. SPECIFIC SAFETY - Ryobi P310 | English Manual - Page 5
Before using battery charger, read all instructions and cautionary markings in this manual, on battery charger, battery, and product using battery to determine if the charger is in good working order. Do not disassemble charger. Take it to an authorized serviceman when service or repair is - Ryobi P310 | English Manual - Page 6
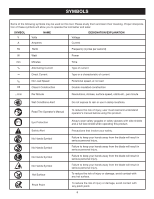
to operate the tool better and safer. SYMBOL V Volts NAME Voltage DESIGNATION/EXPLANATION A Amperes Current Hz Hertz damp locations. Read The Operator's Manual To reduce the risk of injury, user must read and understand operator's manual before using this product. Eye Protection - Ryobi P310 | English Manual - Page 7
servicing, use only identical replacement parts. WARNING: To avoid serious personal injury, do not attempt to use this product until you read thoroughly and understand completely the operator's manual. Save this operator's manual and review frequently for continuing safe operation and instructing - Ryobi P310 | English Manual - Page 8
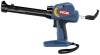
FEATURES PRODUCT SPECIFICATIONS Motor ...18 Volt DC Charger Input ...120 V, 60 Hz, AC only Charge Rate ...1 hour Capacity ...Standard 10 oz. cartridge CAULK GUN PLUNGER ROD HANDLE PLUNGER ROD SWITCH TRIGGER PUNCTURE TOOL CARRIAGE FRAME SWITCH LOCK VARIABLE SPEED SELECTOR Fig. 1 8 - Ryobi P310 | English Manual - Page 9
tool is provided for breaking the seal on a new tube of caulk. When using a partially filled caulk tube, the puncture tool can be used to remove Caulk Gun Plug-in Lanyard (not included in combo) Operator's Manual WARNING: If any parts are missing do not operate this tool until the missing parts are - Ryobi P310 | English Manual - Page 10
. DO NOT insert another battery. Return the charger and battery to your nearest service center for service or replacement. YELLOW LIGHT RED LIGHT Fig. 2 CHARGING THE BATTERY PACK Battery packs for this tool are shipped in a low charge condition to prevent possible problems. Therefore, you should - Ryobi P310 | English Manual - Page 11
pack under normal circumstances, return both the battery pack and charger to your nearest Ryobi Authorized Service Center for electrical check. Charge the battery pack only with the charger provided. Make sure the power supply is normal household voltage, 120 volts, 60 Hz, AC only. Connect the - Ryobi P310 | English Manual - Page 12
normal circumstances. Refer to "CHARGING A COOL BATTERY PACK" for normal recharging of batteries. If the charger does not charge your battery pack under normal circumstances, return both the battery pack and charger to your nearest Ryobi Authorized Service Center for electrical check. TO INSTALL - Ryobi P310 | English Manual - Page 13
seal is usually found only in cardboard caulk tubes. While holding the caulk gun steady with one hand, pull the handle of the plunger rod away from the caulk gun. Continue pulling until plunger base reaches the off, try another tube of material or take the tool to an authorized service center. 13 - Ryobi P310 | English Manual - Page 14
filling a crack, insert the spout into the crack, if possible; otherwise, run the caulk gun along the surface. Squeeze the trigger on the caulk gun, allowing the caulk to extrude from the tube tip. NOTE: If the bead of caulk is too narrow, re-cut the nozzle to provide a larger opening. However, it - Ryobi P310 | English Manual - Page 15
these circumstances may cause interior damage to the caulk gun. Only the parts shown on the parts list are intended to be repaired or replaced by the customer. All other parts should be replaced at a Ryobi Authorized Service Center. BATTERIES The battery pack for this tool is equipped with nickel - Ryobi P310 | English Manual - Page 16
OPERATOR'S MANUAL 18 VOLT CAULK GUN P310 WARNING: Some dust created by power sanding, sawing, REPAIR PARTS When ordering repair parts, always give the following information: • MODEL NUMBER • SERIAL NUMBER P310 Ryobi® is a registered trademark of Ryobi Limited used under license. ONE WORLD
-
 1
1 -
 2
2 -
 3
3 -
 4
4 -
 5
5 -
 6
6 -
 7
7 -
8
-
9
-
10
-
11
-
12
-
13
-
14
-
15
-
16
 |
 |
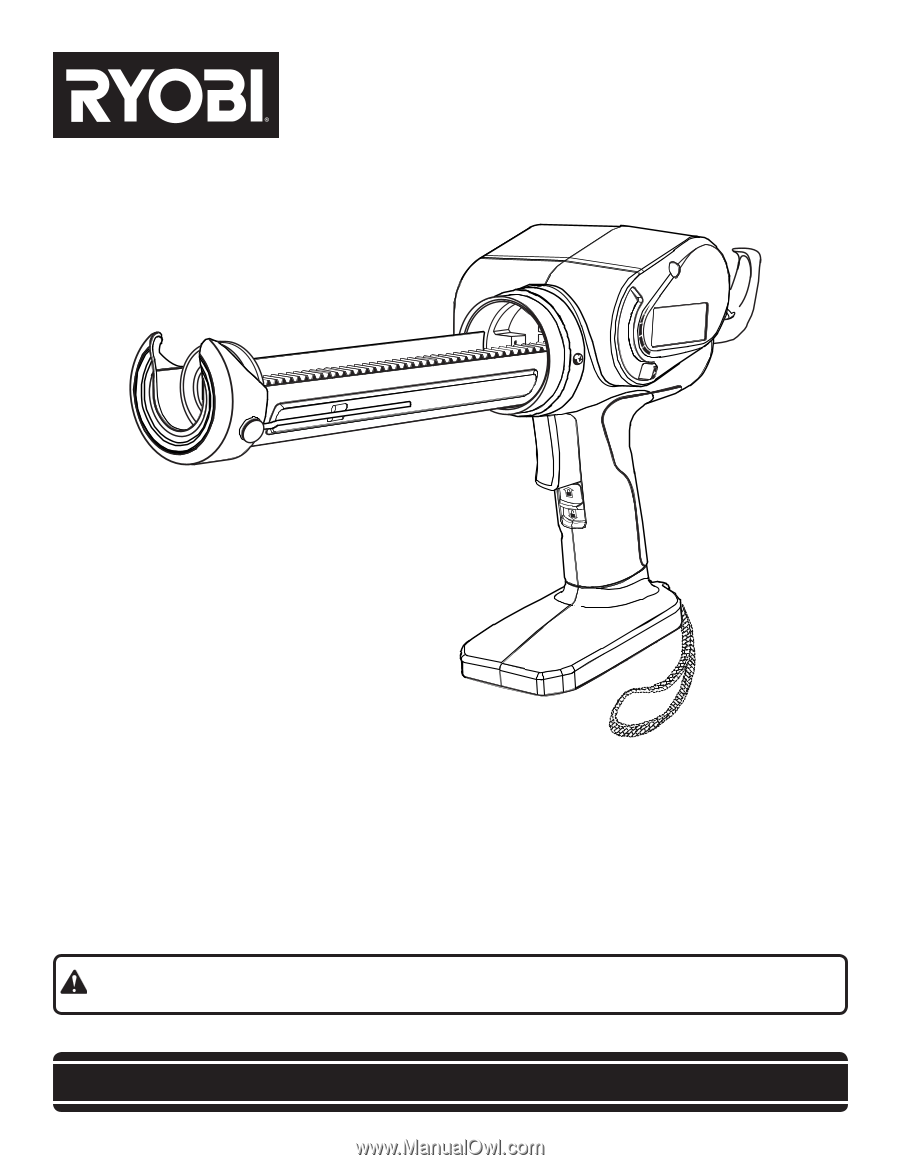
OPERATOR’S MANUAL
18 VOLT CAULK GUN
P310
SAVE THIS MANUAL FOR FUTURE REFERENCE
Your caulk gun has been engineered and manufactured to our high standard for dependability, ease of operation, and op-
erator safety. When properly cared for, it will give you years of rugged, trouble-free performance.
WARNING:
To reduce the risk of injury, the user must read and understand the operator's manual before using
this product.
Thank you for your purchase.
BATTERIES AND CHARGERS
SOLD SEPARATELY