Ryobi P310 English Manual - Page 13
Starting/stopping The Caulk Gun, Locking The Switch Trigger, Loading Caulk, Electronic Overload - caulking gun
 |
View all Ryobi P310 manuals
Add to My Manuals
Save this manual to your list of manuals |
Page 13 highlights
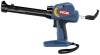
OPERATION STARTING/STOPPING THE CAULK GUN See Figure 5. Before attempting to start the caulk gun, be sure the switch lock is in the unlocked position. To turn the caulk gun ON, depress the switch trigger. � To turn the caulk gun OFF, release the switch trigger. LOCKING THE SWITCH TRIGGER See Figure 5. The switch trigger of the caulk gun can be locked off using the slide switch located below the switch trigger. To lock the switch trigger, slide the switch lock up. This will prevent the caulk gun switch trigger from being depressed. To unlock the switch trigger, slide the switch down. This will allow the caulk gun switch trigger to be depressed. TO TURN OFF TO TURN ON SWITCH TRIGGER LOCK UNLOCK LOADING CAULK See Figures 6 - 7. Lock the switch trigger by sliding the switch lock up. Using a utility knife, cut off the tip of the spout on a standard 10 oz. tube of caulk. Cut the tip at a 45˚ angle. Remove as little as possible, taking into consideration the size of the "bead" of caulk you need. Check for a second inner seal at the base of the spout. If found, insert the puncture tool inside the spout to break the seal before using. If using a partially filled tube, use the puncture tool to remove any hardened material from the tip. NOTE: An inner seal is usually found only in cardboard caulk tubes. While holding the caulk gun steady with one hand, pull the handle of the plunger rod away from the caulk gun. Continue pulling until plunger base reaches the back of the carriage frame. Load the caulk tube into the carriage frame, making sure it is well seated at both ends. SPOUT SWITCH LOCK Fig. 5 PUNCTURE TOOL SPOUT CAULK TUBE CARRIAGE FRAME Fig. 6 PLUNGER ROD HANDLE ELECTRONIC OVERLOAD PROTECTION The caulk gun is protected by an electronic overload protection feature. If too much pressure is exerted on the tube, the motor will shut down. This helps to prevent damage to the tool and the caulk tube. If the motor shuts off, make sure that: �Nozzle tip is cut �Inner seal in the caulk tube is broken �Hardened material is removed from the nozzle �Caulk tube is not damaged or frozen �Plunger rod is free of caulk/adhesive materials Release the trigger and wait for 3 to 5 seconds to allow the electronics to reset. If the motor again shuts off, move the variable speed selector to the middle position and press the 3 2 1 PLUNGER ROD Fig. 7 trigger again. If the motor continues to shut off, try another tube of material or take the tool to an authorized service center. 13
-
 1
1 -
2
-
3
-
4
-
5
-
6
-
7
-
 8
8 -
 9
9 -
 10
10 -
 11
11 -
 12
12 -
 13
13 -
 14
14 -
 15
15 -
 16
16
 |
 |
