Ryobi P321 Operation Manual
Ryobi P321 Manual
 |
View all Ryobi P321 manuals
Add to My Manuals
Save this manual to your list of manuals |
Ryobi P321 manual content summary:
- Ryobi P321 | Operation Manual - Page 1
Operation 8-10 Maintenance 10 Troubleshooting 11 Illustrations 12-13 Parts Ordering and Service Back page TABLE DES MATIÈRES Avertissements of injury, the user must read and understand the operator's manual before using this product. AVERTISSEMENT : Pour réduire les risques de - Ryobi P321 | Operation Manual - Page 2
hair can be drawn into air vents. Do not use on a ladder or unstable support. Stable footing on a solid surface enables better control of the power tool in unexpected unfamiliar with the power tool or these instructions to operate the power tool. Power tools are dangerous in the hands of - Ryobi P321 | Operation Manual - Page 3
the safety of the power tool is maintained. When servicing a power tool, use only identical replacement parts. Follow instructions in the Maintenance section of this manual. Use of unauthorized parts or failure to follow Maintenance instructions may create a risk of shock or injury. NAILER SAFETY - Ryobi P321 | Operation Manual - Page 4
safe distance from the tool while tool is in operation as accidental actuation may occur, possibly causing injury. Choice of triggering method is important. Check manual for triggering options. The brad nailer is designed for single-hand use. Do not hold the tool by the front of the magazine. Do - Ryobi P321 | Operation Manual - Page 5
Never point tool at anyone. Do not pull the trigger or depress the workpiece contact as accidental actuation may occur, possibly causing injury. SAVE THESE INSTRUCTIONS Refer to them frequently and use them to instruct others who may use this tool. If you loan someone this tool, loan them these - Ryobi P321 | Operation Manual - Page 6
. SYMBOL NAME DESIGNATION/EXPLANATION Safety Alert Indicates a potential personal injury hazard. Read Operator's Manual To reduce the risk of injury, user must read and understand operator's manual before using this product. Eye Protection Always wear eye protection with side shields marked - Ryobi P321 | Operation Manual - Page 7
GLOSSARY Activate (operating controls) To move an operating control so that it is in a position that allows the tool to be actuated or that satisifes one requirement for the tool to be actuated. Actuate (tool) To cause movement of the tool component(s) intended to drive a fastener. Actuation system - Ryobi P321 | Operation Manual - Page 8
nailer. To remove battery pack: Locate latches on battery pack and depress to release battery pack from the tool. For complete charging instructions, see the operator's manuals for your battery pack and charger. NO-MAR PAD See Figure 3, page 12. The no-mar pad attached to the nose of the - Ryobi P321 | Operation Manual - Page 9
the nailer before beginning next drive cycle. If LED worklight is flashing, install fully charged battery. If light continues to flash, see Troubleshooting section for more information. REMOVING NAILS FROM THE TOOL See Figure 11, page 13. WARNING: Remove the battery pack before removing nails - Ryobi P321 | Operation Manual - Page 10
without driving a nail, the nail channel may be dirty. See Cleaning the Nail Channel in the Maintenance section of this manual. MAINTENANCE WARNING: When servicing, use only identical replacement parts. Use of any other parts could create a hazard or cause product damage. GENERAL MAINTENANCE Avoid - Ryobi P321 | Operation Manual - Page 11
TROUBLESHOOTING PROBLEM POSSIBLE CAUSE Work-contacting element does not de- Low nails press fully - tool does repair center Clean the nail channel as described in the Maintenance section of the manual NOTE: ILLUSTRATIONS START ON PAGE 12 AFTER FRENCH AND SPANISH LANGUAGE SECTIONS. 11 - English - Ryobi P321 | Operation Manual - Page 12
les avertissements et toutes les instructions. Ne pas suivre l'ensemble des avertissements et des instructions peut entraîner une é les ouïes d'aération. Ne pas utiliser l'outil sur une échelle ou un support instable. Une bonne tenue et un bon équilibre permettent de mieux contrôler l'outil - Ryobi P321 | Operation Manual - Page 13
hors de la portée des enfants et ne laisser personne n'étant pas familiarisé avec l'outil ou ces instructions utiliser l'outil. Dans les mains de personnes n'ayant pas reçu des instructions adéquates, les outils sont dangereux. Entretenir les outils motorisés. Vérifier qu'aucune pièce mobile n'est - Ryobi P321 | Operation Manual - Page 14
RÈGLES DE SÉCURITÉ RELATIVES AUX CLOUEUSE Toujours porter une protection oculaire aven écran de L'outil ne doit être utilisé que pour les applications protection latéra certifiée conforme à la norme ANSI pour lesquelles il est conçu. Ne pas décharger des Z87.1. Les lunettes de vue ordinaires - Ryobi P321 | Operation Manual - Page 15
pas appuyer sur la gâchette ou sur le mécanisme de contact, car l'outil pourrait éjecter une agrafe, risquant blesser quelqu'un. CONSERVER CES INSTRUCTIONS Les consulter fréquemment et les utiliser pour instruire les autres utilisateurs éventuels. Si cet outil est prêté, il doit être accompagné de - Ryobi P321 | Operation Manual - Page 16
SYMBOLES Les termes de mise en garde suivants et leur signification ont pour but d'expliquer le degré de risques associé à l'utilisation de ce produit. SYMBOLE SIGNAL SIGNIFICATION DANGER : Indique une situation dangereuse qui, si elle n'est pas évitée, aura pour conséquences des blessures - Ryobi P321 | Operation Manual - Page 17
GLOSSAIRE Activer (commandes de l'outil) Mettre une commande sur une position déclenchant ou permettant de déclencher l'outil. Actionner (outil) Causer le mouvement des pièces conçues pour chasser une agrafe. Système de déclenchement Gâchette, déclencheur par contact et / ou autre commande qui, - Ryobi P321 | Operation Manual - Page 18
UTILISATION AVERTISSEMENT : Ne pas laisser la familiarité avec l'outil faire oublier la prudence. Ne pas oublier qu'une fraction de seconde d'inattention peut entraîner des blessures graves. AVERTISSEMENT : Toujours retirer la pile de l'outil au moment d'assembler des pièces, d'effectuer des ré - Ryobi P321 | Operation Manual - Page 19
UTILISATION Il est possible d'obtenir la profondeur désirée simplement en réglant la pression d'air. Si des réglages fins sont nécessaires, utiliser le réglage de profondeur d'enfoncement de l'outil. NOTE : Sous certaines conditions, il est possible que l'outil ne tire pas de clou si le cadran de - Ryobi P321 | Operation Manual - Page 20
UTILISATION le blocage de la mécanisme d'entraînement vers le bas. La mécanisme d'entraînement peut habituellement être remise en position de fonctionnement en appuyant sur l'élément de contact contre un échantillon de bois et en appuyant sur la gâchette. Si la mécanisme d'entraînement ne se réinsè - Ryobi P321 | Operation Manual - Page 21
DÉPANNAGE PROBLÈME CAUSE POSSIBLE SOLUTION La pièce de déclenchement par contact Quantité faible de clous Recharger des clous n'est pas complètement enfoncée - La pièce de déclenchement par contact Retirer la pile et déloger les débris l'outil ne fonctionne pas est bloquée L'outil - Ryobi P321 | Operation Manual - Page 22
ADVERTENCIAS DE SEGURIDAD PARA HERRAMIENTAS ELÉCTRICAS ADVERTENCIA Lea todas las advertencias de seguridad y las instrucciones. El incumplimiento de las advertencias e instrucciones puede ocasionar descarga eléctrica, fuego o lesiones graves. Guarde todas las advertencias e instrucciones para - Ryobi P321 | Operation Manual - Page 23
a una herramienta eléctrica, sólo utilice piezas de repuesto idénticas. Siga las instrucciones señaladas en la sección Mantenimiento de este manual. El empleo de piezas no autorizadas o el incumplimiento de las instrucciones de mantenimiento puede significar un riesgo de descarga eléctrica o de - Ryobi P321 | Operation Manual - Page 24
pueden transportar corriente y ocasionar así una descarga eléctrica al operador. Familiarícese con su herramienta eléctrica. Lea cuidadosamente el manual del operador. Aprenda sus usos y limitaciones, así como los posibles peligros específicos de esta herramienta eléctrica. Con el cumplimiento de - Ryobi P321 | Operation Manual - Page 25
ándose ésta ya que puede ocurrir un accionamiento accidental de la misma, y posibles lesiones. Es importante el método de disparo elegido. Estudie el manual, en el cual se describen las diferentes formas de disparar. Las herramientas están diseñadas para usarlas con una sola mano. No sujete la - Ryobi P321 | Operation Manual - Page 26
ÓN/EXPLICACIÓN Alerta de seguridad Indica un peligro posible de lesiones personales. Lea el manual del operador Para reducir el riesgo de lesiones, el usuario debe leer y comprender el manual del operador antes de usar este producto. Protección ocular Siempre póngase protección ocular - Ryobi P321 | Operation Manual - Page 27
GLOSARIO DE TÉRMINOS Activar (los controles de accionamiento) Es mover un control de accionamiento de manera que quede en una posición en la cual se accione la herramienta o cumpla con un requisito necesario para accionar la misma. Accionar (la herramienta) Es producir el movimiento de los - Ryobi P321 | Operation Manual - Page 28
de baterías y oprímalo para soltar el paquete de baterías de la herramienta. Para obtener instrucciones específicas de carga, lea el manual del operador que se incluye con el cargador y la batería. ALMOHADILLA PROTECTORA Vea la figura 3, página 12. La almohadilla protectora montada en la punta - Ryobi P321 | Operation Manual - Page 29
FUNCIONAMIENTO AJUSTE DE LA PRESIÓN DE AIRE Vea la figura 6, página 13. La cantidad presión de aire requerida depende del tamaño de los clavos y del material de la pieza de trabajo. Comience por probar la profundidad de penetración introduciendo un clavo de prueba en el mismo tipo de material de la - Ryobi P321 | Operation Manual - Page 30
un clavo, es posible que el canal de clavos esté sucio. Consulte Limpieza del canal de clavos en la sección Mantenimiento de este manual. MANTENIMIENTO ADVERTENCIA: Al dar servicio a la unidad, sólo utilice piezas de repuesto idénticas. El empleo de piezas diferentes podría causar un peligro - Ryobi P321 | Operation Manual - Page 31
mecanismo de impulsión está sucio Limpie el canal de clavos como se o realiza ciclos sin colocar un sujetador describe en la sección Mantenimiento de este manual. 11 - Español - Ryobi P321 | Operation Manual - Page 32
P321 A N Fig. 3 B M L K C D E F B A A - No-mar pad (bout de protection, almohadilla protectora) B - No-mar pad storage (rangement du coussinet de protection, lugar para guardar la almohadilla protectora) Fig. 4 J I A - Air pressure dial (cadran de pression d'air, cuadrante de presión de - Ryobi P321 | Operation Manual - Page 33
Fig. 6 Fig. 9 Fig. 11 A A B C A B A - Air pressure dial (cadran de pression d'air, cuadrante de presión de aire) B - Increase pressure (augmenter la pression, aumentar la presión) C - Decrease pressure (réduire la pression, disminuir la presión) Fig. 7 A C B B C A - Trigger (gâchette, - Ryobi P321 | Operation Manual - Page 34
NOTES / NOTAS - Ryobi P321 | Operation Manual - Page 35
NOTES / NOTAS 15 - Ryobi P321 | Operation Manual - Page 36
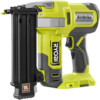
NAILER CLOUEUSE À PARQUET 18V DE CALIBRE 18 CLAVADORA DE PUNTILLAS 18V CALIBRE 18 P321 To request service, purchase replacement parts, locate an Authorized Service Center or obtain Customer or Technical Support: Visit www.ryobitools.com or call 1-800-525-2579 If any parts or accessories are damaged
-
 1
1 -
 2
2 -
 3
3 -
 4
4 -
 5
5 -
 6
6 -
 7
7 -
8
-
9
-
10
-
11
-
12
-
13
-
14
-
15
-
16
-
17
-
18
-
19
-
20
-
21
-
22
-
23
-
24
-
25
-
26
-
27
-
28
-
29
-
30
-
31
-
32
-
33
-
34
-
35
-
36
 |
 |
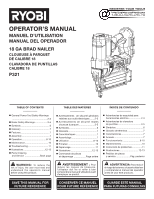
OPERATOR’S MANUAL
MANUEL D’UTILISATION
MANUAL DEL OPERADOR
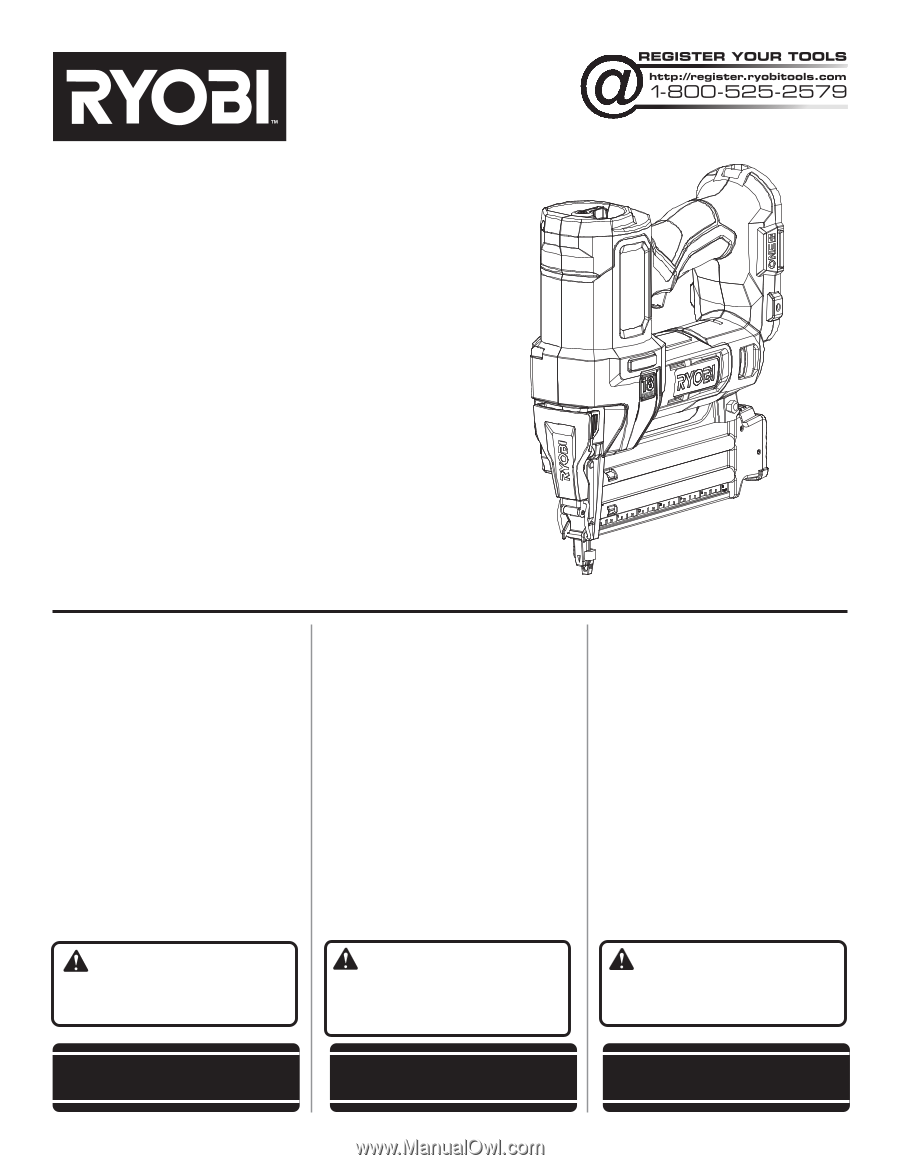
18 GA BRAD NAILER
CLOUEUSE À PARQUET
DE CALIBRE 18
CLAVADORA DE PUNTILLAS
CALIBRE 18
P321
WARNING:
To reduce the
risk of injury, the user must read and
understand the operator’s manual
before using this product.
ADVERTENCIA:
Para reducir
el riesgo de lesiones, el usuario debe leer
y comprender el manual del operador
antes de usar este producto.
AVERTISSEMENT :
Pour
réduire les risques de blessures,
l’utilisateur doit lire et veiller à bien
comprendre le manuel d’utilisation avant
d’employer ce produit.
TABLE OF CONTENTS
****************
General Power Tool Safety Warnings
........................................................
2-3
Nailer Safety Warnings
....................
3-5
Symbols
..............................................
6
Glossary
.............................................
7
Features
..............................................
7
Assembly
............................................
7
Operation
.......................................
8-10
Maintenance
.....................................
10
Troubleshooting
................................
11
Illustrations
..................................
12-13
Parts Ordering
and Service
........................
Back page
TABLE DES MATIÈRES
****************
Avertissements
de sécurité générales
relatives aux outils électriques
........
2-3
Avertissements de sécurité relatifs
cloueuse à parquet
.........................
3-5
Symboles
............................................
6
Glossaire
.............................................
7
Caractéristiques
.................................
7
Assemblage
........................................
7
Utilisation
......................................
8-10
Entretien
...........................................
10
Dépannage
.......................................
11
Illustrations
..................................
12-13
Commande de pièces
et dépannage
...................
Page arrière
ÍNDICE DE CONTENIDO
****************
Advertencias de seguridad para
herramientas eléctrica
...................
2-3
Advertencias de clavadora
de puntillas
....................................
3-5
Símbolos
............................................
6
Glosario de términos
.........................
7
Características
...................................
7
Armado
..............................................
7
Funcionamiento
...........................
8-10
Mantenimiento
.................................
10
Corrección de problemas
................
11
Illustraciones
..............................
12-13
Pedidos de piezas
y servicio
.......................
Pág. posterior
SAVE THIS MANUAL FOR
FUTURE REFERENCE
CONSERVER CE MANUEL
POUR FUTURE RÉFÉRENCE
GUARDE ESTE MANUAL
PARA FUTURAS CONSULTAS