Ryobi P421 Trilingual Manual
Ryobi P421 Manual
 |
View all Ryobi P421 manuals
Add to My Manuals
Save this manual to your list of manuals |
Ryobi P421 manual content summary:
- Ryobi P421 | Trilingual Manual - Page 1
PACKS BATTERIES AND CHARGERS SOLD SEPARATELY Your angle grinder has been engineered and manufactured to our high standard for dependability, ease of operation, and operator safety. When properly cared for, it will give you years of rugged, trouble-free performance. WARNING: To reduce the risk - Ryobi P421 | Trilingual Manual - Page 2
date of purchase, you may either request service under this warranty or you may exchange any RYOBI® power tool which does not work properly sale). We will repair any faulty workmanship, and either repair or replace any defective part, at our option. We will do so without any charge to you. We will - Ryobi P421 | Trilingual Manual - Page 3
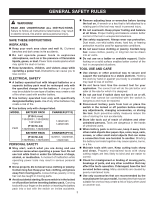
! READ AND UNDERSTAND ALL INSTRUCTIONS. Failure to follow all instructions listed below, may result in electric shock, fire and/or serious personal injury. Remove adjusting keys or wrenches before turning the tool on. A wrench or a key that is left attached to a rotating part of the tool may - Ryobi P421 | Trilingual Manual - Page 4
personnel may result in a risk of injury. When servicing a tool, use only identical replacement parts. Follow instructions in the Maintenance section of this manual. Use of unauthorized parts or failure to follow Maintenance Instructions may create a risk of shock or injury. SPECIFIC SAFETY - Ryobi P421 | Trilingual Manual - Page 5
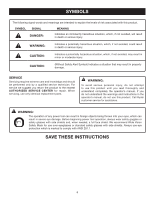
minute Wet Conditions Alert Do not expose to rain or use in damp locations. Read The Operator's Manual Eye Protection To reduce the risk of injury, user must read and understand operator's manual before using this product. Always wear safety goggles or safety glasses with side shields and, as - Ryobi P421 | Trilingual Manual - Page 6
parts. WARNING: To avoid serious personal injury, do not attempt to use this product until you read thoroughly and understand completely the operator's manual. If you do not understand the warnings and instructions in the operator's manual, do not use this product. Call Ryobi customer service - Ryobi P421 | Trilingual Manual - Page 7
FEATURES PRODUCT SPECIFICATIONS Grinding Wheel Capacity 4-1/2 in. Motor 18 Volt DC No Load Speed 6,500 r/min. (RPM) Spindle Thread 5/8 x 11 UNC SWITCH TRIGGER SPINDLE LOCK LOCK-OFF BUTTON TOOLLESS GUARD SIDE HANDLE DISC FLANGE GRINDING WHEEL CLAMP NUT ROTATING FOOT WRENCH STORAGE SLOT - Ryobi P421 | Trilingual Manual - Page 8
, please call 1-800-525-2579 for assistance. PACKING LIST Angle Grinder with Guard Clamp Nut Disc Flange Grinding Wheel Side Handle Wrench Operator's Manual WARNING: If any parts are damaged or missing do not operate this product until the parts are replaced. Failure to heed this warning could - Ryobi P421 | Trilingual Manual - Page 9
the top, left, or right side of the grinder, depending on operator preference. The handle must Ryobi One+ 18 V lithium-ion battery packs and Ryobi One+ 18 V nickel-cadmium battery packs. For complete charging instructions, refer to the Operator's Manual for the battery packs and chargers listed - Ryobi P421 | Trilingual Manual - Page 10
-off button in order to pull the switch trigger. The lock resets each time the trigger is released. SWITCH TRIGGER See Figure 4. To turn the grinder ON, depress and hold lock-off button, then depress the switch trigger. To turn it OFF, release the switch trigger. SWITCH TRIGGER BATTERY PACK LOCK - Ryobi P421 | Trilingual Manual - Page 11
is not recommended and creates a hazard, which will result in serious injury. DANGER: Never attach a type 1 straight or cut-off wheel to this angle grinder. It is only designed for grinding and sanding. Use for any other purpose is not recommended and creates a hazard, which will result in serious - Ryobi P421 | Trilingual Manual - Page 12
operator. Always place the guard in the correct location as shown. To adjust the guard: Remove battery from the grinder. Unlock the guard clasp by pulling the clasp out, away from the grinder. Rotate the guard to its correct position as shown. NOTE: Be sure the raised ridge on the guard is - Ryobi P421 | Trilingual Manual - Page 13
grinding wheel clear of the workpiece. Turn on the grinder and let the motor and grinding wheel build up to full speed. Lower the grinder gradually until the grinding wheel contacts the workpiece. Keep the grinder tilted at an angle between 5° and 15°. WARNING: To prevent loss of control - Ryobi P421 | Trilingual Manual - Page 14
parts shown on the parts list are intended to be repaired or replaced by the customer. All other parts should be replaced at an Authorized Service service from each charging will depend on the type of work you are doing. The batteries for this product have been designed to provide maximum trouble tape - Ryobi P421 | Trilingual Manual - Page 15
Unlock the guard clasp by pulling the clasp out, away from the grinder. Open clasp fully and twist guard to release it from the locking groove guard to the correct position. Refer to Positioning the Guard earlier in this manual. NOTE: Be sure the raised ridge on the guard is seated in the - Ryobi P421 | Trilingual Manual - Page 16
OPERATOR'S MANUAL 4-1/2 in., 18 VOLT ANGLE GRINDER P420 WARNING: Some dust created by power for your nearest Authorized Service Center. You can also check our web site at www.ryobitools.com for a complete list of Authorized Service Centers. • MODEL NO. AND SERIAL NO. The model number of this - Ryobi P421 | Trilingual Manual - Page 17
mm (4-1/2 po), 18 VOLT P420 COMPATIBLE AVEC TOUS LE BATTERIES ONE+ BATTERIES ET CHARGEUR VENDUS SÉPARÉMENT Cette meuleuse d'angle été conçue et fabriquée conformément à nos strictes normes de fiabilité, de simplicité d'emploi et de sécurité d'utilisation. Correctement entretenue, elle vous donnera - Ryobi P421 | Trilingual Manual - Page 18
tous les vices de matériaux et de fabrication de cet outil électrique RYOBI®, pour une période de trois ans, à compter de la date d'achat agréé le plus proche peut être obtenue en contactant un représentant du service après-vente par courrier, à l'adresse One World Technologies, Inc., P.O. Box - Ryobi P421 | Trilingual Manual - Page 19
d'aération. Ne pas utiliser l'outil sur une échelle ou un support instable. Une bonne tenue et un bon équilibre permettent de mieux contrô des personnes n'ayant pas reçu des instructions adéquates. Dans les mains de personnes n'ayant pas reçu des instructions adéquates, les outils sont dangereux. - Ryobi P421 | Trilingual Manual - Page 20
est endommagé, il doit être remplacé uniquement pas le fabricant ou par un centre de réparation agréé pour éviter tout risque. Conserver ces instructions. Les consulter fréquemment et les utiliser pour instruire les autres utilisateurs éventuels. Si cet outil est prêté, il doit être accompagné de - Ryobi P421 | Trilingual Manual - Page 21
SYMBOLES Certains des symboles ci-dessous peuvent être utilisés sur produit. Veiller à les étudier et à apprendre leur signification. Une interprétation correcte de ces symboles permettra d'utiliser produit plus efficacement et de réduire les risques. SYMBOLE NOM DÉSIGNATION / EXPLICATION V - Ryobi P421 | Trilingual Manual - Page 22
utilisation. Si tous les avertissements et toutes les consignes de sécurités et instructions du manuel d'utilisation ne sont pas bien compris, ne pas utiliser ce produit. Appeler le service après-vente Ryobi. AVERTISSEMENT : L'utilisation de tout outil motorisé peut causer la projection d'objets en - Ryobi P421 | Trilingual Manual - Page 23
CARACTÉRISTIQUES FICHE TECHNIQUE Taille de meule 115 mm (4,5 po) Moteur 18 V c.c. Vitesse à vide 6 500 r/min (RPM) Diamètre de broche 5/8 (16 mm) x 11 UNC (M14) GÂCHETTE DE COMMUTATEUR BOUTON DE VERROUILLAGE BLOCAGE DE L'AXE GARANT SANS OUTIL BRIDE CIRCULAIRE POIGNÉE LATÉRALE POIGNÉE LAT - Ryobi P421 | Trilingual Manual - Page 24
et avoir vérifié qu'il fonctionne correctement. n Si des pièces manquent ou sont endommagées, appeler le 1-800-525-2579. LISTE DE CONTRÔLE Meuleuse d'angle avec garant Écrou de serrage Bride circulaire Meule Poignée latérale Clé Manuel d'utilisation AVERTISSEMENT : Si des pièces manquent ou sont - Ryobi P421 | Trilingual Manual - Page 25
sions graves. APPLICATIONS Cet outil ne doit être utilisé que pour les applications listées ci-dessous. Meulage des métaux Ponçage du bois ou des avec les batteries 18 V au lithiumion et au nickel cadmium de Ryobi One+. Pour prendre connaissance des consignes de chargement, consulter le manuel - Ryobi P421 | Trilingual Manual - Page 26
UTILISATION INSTALLATION DU BLOC DE BATTERIES Voir la figure 3. Installer le bloc de batteries sur l'outil. S'assurer que ses deux loquets latéraux s'engagent correctement et vérifier que le bloc est solidement assujetti avant d'utiliser l'outil. RETRAIT DU BLOC DE BATTERIES Voir la figure 3. - Ryobi P421 | Trilingual Manual - Page 27
usage est déconseillé et peut créer un danger de blessures graves. DANGER: Ne jamais attacher un TYPE 1 roue droit ou de limite à ce rémouleur d'angle. Il est seulement conçu pour meuler et sanding. Utiliser pour aucun autre but n'est pas recommandé et crée un danger, qui aura pour résultat la - Ryobi P421 | Trilingual Manual - Page 28
Voir la figure 10. La base de la meule pivote à un angle maximum de 270° vers la gauche pour faciliter l'accès aux zones difficiles à atteindre. Des but ées sont prévues aux angles de 90°, 180° et 270°. UTILISATION DE LA MEULEUSE Voir la figure 11. - Ryobi P421 | Trilingual Manual - Page 29
. ATTENTION : Si la meuleuse est maintenue trop longtemps à un endroit, elle entamera et creusera la pièce. Si la meuleuse est tenue à un angle trop prononcé elle entamera également la pièce, la pression étant concentrée sur une trop petite surface. Utiliser une pression juste suffisante pour emp - Ryobi P421 | Trilingual Manual - Page 30
. Les produits chimiques peuvent endommager, affaiblir ou détruire le plastique, ce qui peut entraîner des blessures graves. Seules les pièces figurant sur la liste de contrôle sont conçues pour être réparées ou remplacées par l'utilisateur. Toutes les autres pièces doivent être remplacées dans - Ryobi P421 | Trilingual Manual - Page 31
ENTRETIEN REMPLACEMENT DU GARANT Voir la figure 12. AVERTISSEMENT : Ne pas remplacer ni desserrer la vis de le garant. Le non-respect de cet avertissement peut provoquer le détachement de le garant au cours du fonctionnement et blesser gravement l'opérateur. Après un certain temps, le garant peut - Ryobi P421 | Trilingual Manual - Page 32
MEULEUSE D'ANGLE 115 mm parations agréé le plus proche, appeler le 1-800-525-2579. Une liste complète des centres de réparation agréés est également disponible sur NUMÉRO DE MODÈLE P420 • NUMÉRO DE SÉRIE Ryobi® est une marque déposée de Ryobi Limited utilisée sous licence. 983000-984 (WW) 6-24-11 - Ryobi P421 | Trilingual Manual - Page 33
MANUAL DEL OPERADOR AMOLADORA ANGULAR 115 mm (4-1/2 pulg.), DE 18 V P420 ACEPTA TODOS LOS PAQUETES y eficiente funcionamiento. ADVERTENCIA: Para reducir el riesgo de lesiones, el usuario debe leer y comprender el manual del operador antes de usar este producto. Le agradecemos su compra. GUARDE ESTE - Ryobi P421 | Trilingual Manual - Page 34
al amparo de esta garantía o puede intercambiar cualquier herramienta eléctrica RYOBI® que no funcione correctamente debido a defectos en los materiales o en los defectos en material y en mano de obra empleados en la herramienta eléctrica RYOBI® por un período de tres años a partir de la fecha de - Ryobi P421 | Trilingual Manual - Page 35
REGLAS DE SEGURIDAD GENERALES ¡ADVERTENCIA! LEA Y COMPRENDA TODAS LAS INSTRUCCIONES. El incumplimiento de las instrucciones señaladas abajo puede causar descargas eléctricas, incendios y lesiones corporales serias. GUARDE ESTAS INSTRUCCIONES ÁREA DE TRABAJO Mantenga limpia y bien iluminada el á - Ryobi P421 | Trilingual Manual - Page 36
dar servicio a una herramienta, sólo utilice piezas de repuesto idénticas. Siga las instrucciones señaladas en la sección Mantenimiento de este manual. El empleo de piezas no autorizadas o el incumplimiento de las instrucciones de mantenimiento puede significar un riesgo de descarga eléctrica o de - Ryobi P421 | Trilingual Manual - Page 37
, carreras, velocidad superficial, órbitas, etc., por minuto Alerta de condiciones húmedas No exponga la unidad a la lluvia ni la use en lugares húmedos. Lea el manual del operador Protección ocular Alerta de seguridad Para reducir el riesgo de lesiones, el usuario debe leer y comprender el - Ryobi P421 | Trilingual Manual - Page 38
del operador. Si no comprende los avisos de advertencia y las instrucciones del manual del operador, no utilice este producto. Llame al departamento de atención al consumidor de Ryobi, y le brindaremos asistencia. ADVERTENCIA: Cualquier herramienta eléctrica en funcionamiento puede lanzar objetos - Ryobi P421 | Trilingual Manual - Page 39
CARACTERÍSTICAS ESPECIFICACIONES Capacidad de la muela abrasiva....... 115 mm (4-1/2 pulg.) Motor 18 V, c.c. Velocidad en vacío 6 500 r/min (RPM) Rosca del husillo 5/8 (16 mm) x 11 UNC (M14) GATILLO DEL INTERRUPTOR BLOQUEO DEL HUSILLO BOTÓN DEL SEGURO DE APAGADO PROTECCIÓN BRIDA CIRCULAR - Ryobi P421 | Trilingual Manual - Page 40
debe comprender la información indicada en la herramienta misma y en este manual, y se debe comprender también el trabajo que intenta realizar. Antes °, y 270°. MANGO LATERAL El mango lateral puede ser instalado en la parte superior, la izquierda o la derecha de la amoladora para estabilizarla y debe - Ryobi P421 | Trilingual Manual - Page 41
madera o de metal Este producto acepta los paquetes de baterías Ryobi One+ de iones de litio de 18 V y los paquetes de baterías Ryobi One+ de níquel-cadmio de 18 V. Para ver las instrucciones de carga completas, consulte el manual del operador de los paquetes de baterías y cargadores enumerados en - Ryobi P421 | Trilingual Manual - Page 42
FUNCIONAMIENTO INSTALACIÓN DEL PAQUETE DE PILAS Vea la figura 3. Coloque el paquete de pilas en la herramienta. Asegúrese de que los pestillos situados en ambos lados del paquete de pilas entren completamente en su lugar con un chasquido y de que el paquete quede bien asegurado en la - Ryobi P421 | Trilingual Manual - Page 43
puede producir lesiones corporales serias debido a la separación y lanzamiento de partículas flojas de la muela. No la apriete excesivamente. Para instalar con el lado plano de la tuerca hacia arriba. Acomode la parte elevada, la del diámetro pequeño de la tuerca de presión, en el orificio de - Ryobi P421 | Trilingual Manual - Page 44
ón de manera que quede al frente de la amoladora como se muestra en la figura 7. Esto puede producir lesiones serias debido a que las chispas y partículas sueltas lanzadas por la muela abrasiva saldrían dirigidas hacia el operador. Siempre coloque la protección en el lugar correcto, como se muestra - Ryobi P421 | Trilingual Manual - Page 45
para evitar el traqueteo y el rebote de la amoladora. NOTA: Una presión elevada disminuye la velocidad de la amoladora y exige más esfuerzo por parte del motor. Normalmente el peso de la herramienta por sí mismo suministra la presión adecuada para la mayoría de los trabajos de esmerilado. Aplique - Ryobi P421 | Trilingual Manual - Page 46
ías, ni de desmontar ninguno de sus componentes. Las baterías deben reciclarse o desecharse debidamente. Asimismo, nunca toque ambas terminales con objetos metálicos y partes del cuerpo, ya que puede producirse un corto circuito. Manténgase fuera del alcance de los niños. La inobservancia de estas - Ryobi P421 | Trilingual Manual - Page 47
la pestaña de la tapa del cojinete. Gire la protección a la posición correcta. Consulte el apartado Posicionamiento de la protección, previamente en este manual. NOTA: Asegúrese de que la costilla realzada de la protección quede sentada en la ranura de la tapa del cojinete. Vuelva a montar la - Ryobi P421 | Trilingual Manual - Page 48
MANUAL DEL OPERADOR como las caretas para el polvo especialmente diseñadas para filtrar partículas microscópicas. • SERVICIO Ahora que ha adquirido esta MERO DE MODELO P420 • NÚMERO DE SERIE Ryobi® es una marca comercial registrada de Ryobi Limited y es empleada mediante autorización. 983000-
-
 1
1 -
 2
2 -
 3
3 -
 4
4 -
 5
5 -
 6
6 -
 7
7 -
8
-
9
-
10
-
11
-
12
-
13
-
14
-
15
-
16
-
17
-
18
-
19
-
20
-
21
-
22
-
23
-
24
-
25
-
26
-
27
-
28
-
29
-
30
-
31
-
32
-
33
-
34
-
35
-
36
-
37
-
38
-
39
-
40
-
41
-
42
-
43
-
44
-
45
-
46
-
47
-
48
 |
 |
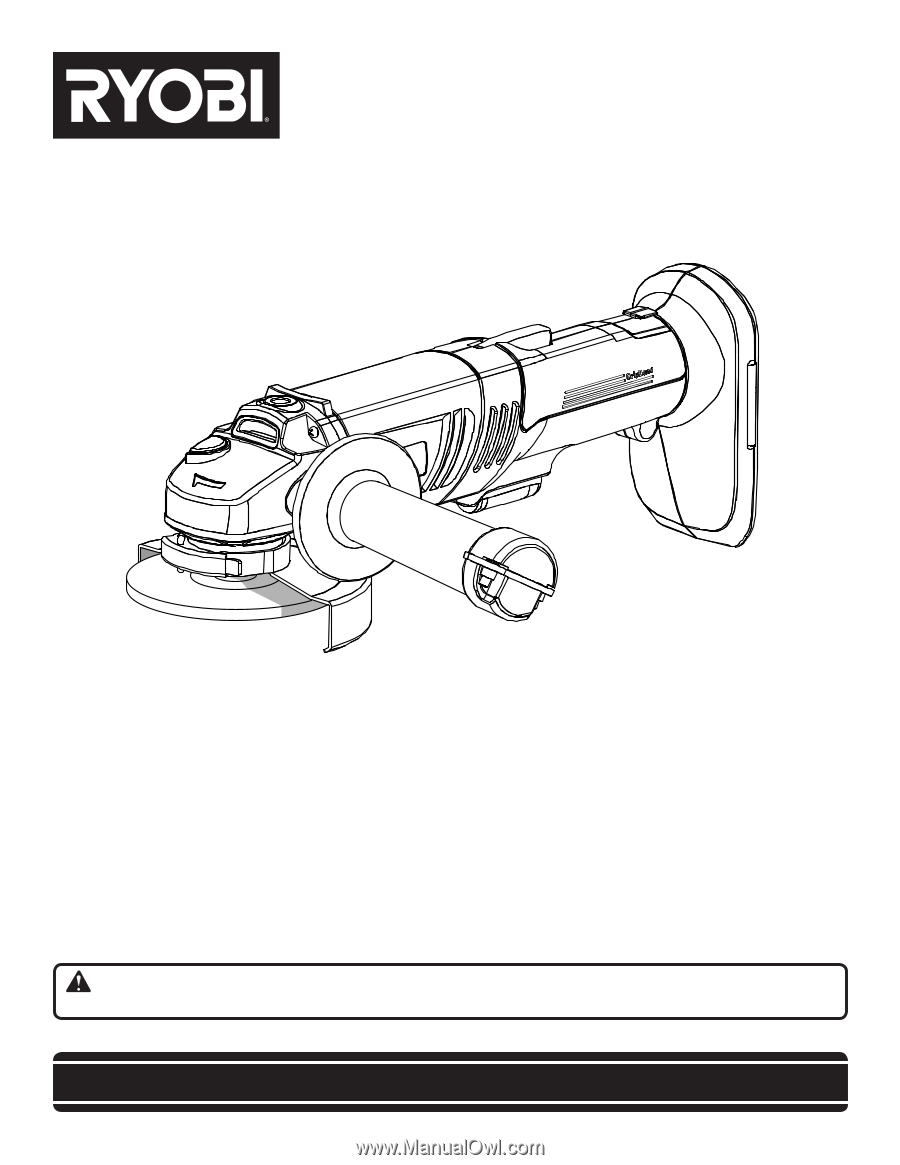
OPERATOR’S MANUAL
ANGLE GRINDER
4-1/2 in., 18 V
P420
SAVE THIS MANUAL FOR FUTURE REFERENCE
Your angle grinder has been engineered and manufactured to our high standard for dependability, ease of operation, and
operator safety. When properly cared for, it will give you years of rugged, trouble-free performance.
WARNING:
To reduce the risk of injury, the user must read and understand the operator’s manual before using
this product.
Thank you for your purchase.
ACCEPTS ALL ONE+
BATTERY PACKS
BATTERIES AND CHARGERS
SOLD SEPARATELY