Ryobi P730 English Manual - Page 14
Quick Shutoff Switch, Inflating Manually For High And Low, Pressure Applications - recall
 |
View all Ryobi P730 manuals
Add to My Manuals
Save this manual to your list of manuals |
Page 14 highlights
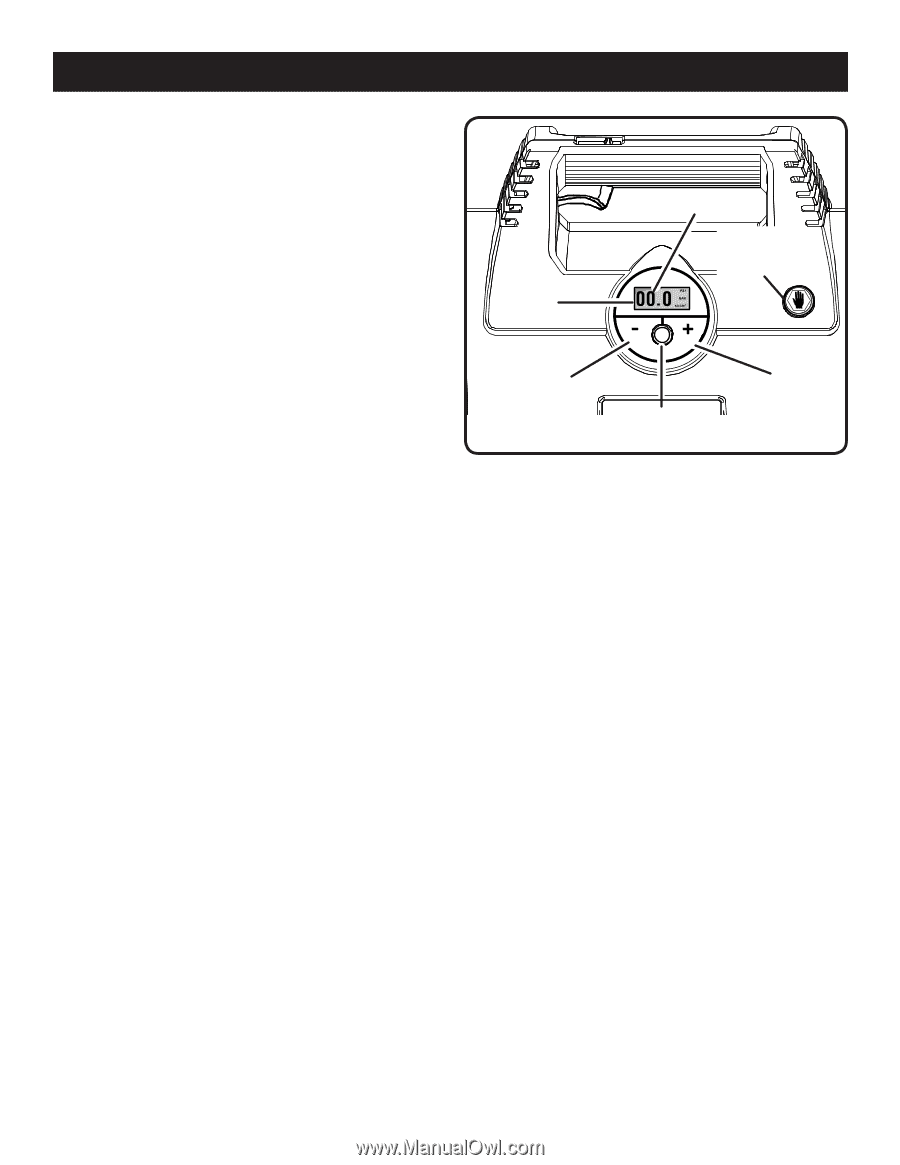
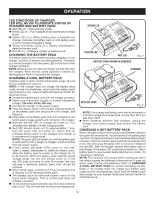
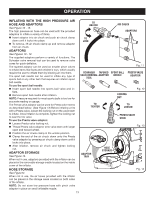
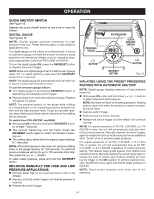
OPERATION QUICK shutoff SWITCH See Figure 15. Depress the quick shutoff switch at any time to stop the inflator. DIGITAL GAUGE See Figures 15. NOTE: Digital gauge displays pressure of high pressure hose only. Preset features apply to high pressure applications only. The digital gauge on the inflator is multifunctional. It serves as a pressure gauge, monitors the amount of pressure being applied to the item being inflated, and can change air pressure measurement units from PSI to BAR to KG/CM2. To turn the digital gauge ON, press the ON/RESET button or depress the switch trigger. NOTE: Make sure digital gauge is set at 0 before use. If gauge reads "Err" or needs resetting, press and hold ON/RESET button for 4-7 seconds. NOTE: The digital gauge will automatically shut off when not in use for 2 and a half minutes or more. To use the pressure gauge feature: Turn digital gauge on by pressing ON/RESET button or depressing and releasing switch trigger. Place air chuck over valve stem and lock in place. Readout will appear on gauge. NOTE: The pressure readout on the gauge while inflating is a measurement of the fluctuating pressure between the item and the high pressure hose. To get an accurate reading, stop inflating and follow above instructions for reading the air pressure. To switch from PSI, KG/CM2, and BAR: With gauge ON, press and hold down ON/RESET button for at least 7 seconds. The current measuring unit will flash. Press the ON/RESET button again to select the desired measuring unit. The setting takes effect after the display stops flashing. (4-7 seconds) NOTE: After preset pressure has been set, pressure setting stays in the gauge memory for 120 seconds. To recall the previous pressure setting for up to 120 seconds after inflation, press the ( + ) or ( - ) button. To reset preset pressure, press and hold the ON/RESET button. INFLATING MANUALLY FOR HIGH AND LOW PRESSURE APPLICATIONS Connect either high or low pressure hose to item to be inflated. Depress and hold switch trigger until desired pressure is reached. Release the switch trigger. PRESSURE GAUGE AIR PRESSURE QUICK SHUTOFF SWITCH (-) BUTTON on/reset button (+) BUTTON Fig. 15 INFLATING USING THE PRESET PRESSURES FEATURE WITH AUTOMATIC SHUTOFF NOTE: Digital gauge displays pressure of high pressure hose only. With gauge ON, press and hold down ( + ) or ( - ) buttons to select desired shutoff pressure. NOTE: Numbers will flash while setting pressure. Holding buttons down will make the pressure number increase/ decrease faster. Depress switch trigger. Push the lock-on button forward. Release the switch trigger and the inflator will continue running. NOTE: For preset pressures of 39 PSI, 2.68 BAR, or 2.74 KG/CM2 or less, the unit will automatically stop just short of the preset pressure. Manually depress the switch trigger again to release the lock-on button and provide an additional short "burst" of air to achieve preset pressure. For preset pressures of 40 PSI, 2.75 BAR, or 2.74 KG/ CM, or greater, the unit will automatically stop at 40 PSI, 2.75 BAR, or 2.74 KG/CM regardless of preset pressure setting. This feature helps guard against over inflation and possible bursting. Manually depress the switch trigger again to release the lock-on button and continue inflating by holding the trigger in the ON position to achieve desired pressure. Shutoff will occur again just before target pressure is reached. NOTE: Read actual pressure only when unit is not operating. 14
-
 1
1 -
2
-
3
-
4
-
5
-
6
-
7
-
8
-
 9
9 -
 10
10 -
 11
11 -
 12
12 -
 13
13 -
 14
14 -
 15
15 -
 16
16
 |
 |