Ryobi PCL1301NC Operation Manual - Page 7
Operation
 |
View all Ryobi PCL1301NC manuals
Add to My Manuals
Save this manual to your list of manuals |
Page 7 highlights
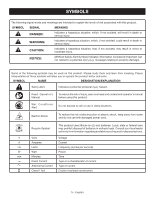
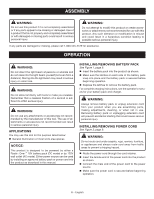
OPERATION POWER BUTTON (HIGH/LOW/OFF) See Figure 3, page 9. The work light will be in the OFF position until the power button is pressed. Connect the product to an AC or DC power supply. Press and release the button once to activate HIGH mode. Press and release the button again for LOW mode. Press and release the button a third time to turn the work light OFF. NOTE: This light is equipped with a low voltage indicator. If the light flashes 3 times while a battery pack is installed, this indicates a low charge condition. Install a charged battery pack and resume operation. WARNING: Hybrid tools are always in operating condition. Therefore, unit should always be in the OFF status, with the battery pack removed and power cord disconnected, when not in use. Do not leave light on while unattended. Failure to follow these instructions could result in serious personal injury. Using the J Hook to hang the work light: Lift the J hook from the slot. Use the J hook to hang the work light. You may use a screw to secure the work light in place. Do not overtighten. NOTE: Be careful not to hang the work light in such a way that it prevents normal work light operation or damages the cord. Using the mounting holes to hang the light: Hang work light from sturdy location using screws in mounting holes to secure in place. Do not overtighten. NOTE: Be careful not to hang the work light in such a way that it prevents normal work light operation or damages the cord. Using the cord retainer to hang the light: Hang the work light from a fence, hook the cord retainer on fence Mounting the work light to a tripod: Screw tripod into hole on the base of the light. ADJUSTABLE HEAD See Figure 4, page 9. WARNING: Keep work light away from combustible materials. If wrapped or in contact with fabrics, the work light lens can produce sufficient heat to melt some fabrics. To avoid serious personal injury, never allow the work light lens to come in contact with anything. TO HANG THE LED WORK LIGHT See Figure 4, page 9. CAUTION: Do not place hands or fingers between adjustable head and frame when positioning work light to avoid pinching your fingers or hands. The work light head can be set in a variety of positions. To switch base positions, loosen the knob. Adjust head to desired position, tighten the knob. WARNING: Only hang or mount LED work light in an area where no electrical wires, utility cables, pipes, or other obstructions are located. Contact your local utility company or a qualified electrician if you are unsure. Do not hang work light from any electrical power cord. Ensure work light is securely installed to prevent falling object hazard. Failure to follow these instructions can result in electrocution, electrical shock, or other serious personal injury. NOTE: MAINTENANCE INSTRUCTIONS BEGIN ON PAGE 8 FOLLOWING FRENCH AND SPANISH LANGUAGE SECTIONS. ILLUSTRATIONS START ON PAGE 9. 7 - English
-
 1
1 -
 2
2 -
 3
3 -
 4
4 -
 5
5 -
 6
6 -
 7
7 -
 8
8 -
 9
9 -
 10
10 -
 11
11 -
 12
12 -
13
-
14
-
15
-
16
-
17
-
18
-
19
-
20
-
21
-
22
-
23
-
24
 |
 |
