Ryobi PCL633B Operation Manual - Page 6
Operation
 |
View all Ryobi PCL633B manuals
Add to My Manuals
Save this manual to your list of manuals |
Page 6 highlights
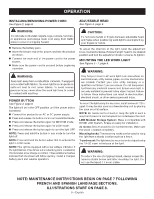
OPERATION INSTALLING/REMOVING POWER CORD See Figure 2, page 8. ADJUSTABLE HEAD See Figure 4, page 9. WARNING: Do not route cord under carpets, rugs, runners, furniture, or appliances and always route cord away from traffic areas to prevent a tripping hazard. Remove the battery pack. Insert the female end of the power cord into the product as shown. Connect the male end of the power cord to the power source. Make sure the power cord is secured before beginning operation. WARNING: Keep light away from combustible materials. If wrapped or in contact with fabrics, the work light lens can produce sufficient heat to melt some fabrics. To avoid serious personal injury, never allow the work light lens to come in contact with anything. POWER BUTTON See Figure 3, page 8. The light will be in the OFF position until the power button is pressed. Connect the product to an AC or DC power supply. Press and release the button once to activate HIGH mode. Press and release the button again for MEDIUM mode. Press and release the button again for LOW mode. Press and release the button again to turn the light OFF. NOTE: Press and hold the button in any mode to turn the light off. NOTE: Press and hold the button when OFF to activate the light in LOW mode. NOTE: This light is equipped with a low voltage indicator. If the light flashes three times while a battery pack is installed, this indicates a low charge condition. Three additional flashes indicate that shutdown will follow quickly. Install a charged battery pack and resume operation. CAUTION: Do not place hands or fingers between adjustable head and frame when positioning work light to avoid pinching your fingers or hands. To adjust the direction of the light, twist the adjustment knob counterclockwise. Rotate the light head to the desired position and turn the adjustment knob clockwise to tighten. MOUNTING THE LED WORK LIGHT See Figures 5 - 7, page 9. WARNING: Only hang or mount LED work light in an area where no electrical wires, utility cables, pipes, or other obstructions are located. Contact your local utility company or a qualified electrician if you are unsure. Do not hang work light from any electrical power cord. Ensure work light is securely installed to prevent falling object hazard. Failure to follow these instructions can result in electrocution, electrical shock, or other serious personal injury. To mount the light using the keyholes, install screws 6-1/2 in. apart. It may be also used as a freestanding unit by placing the base on a flat surface. NOTE: Be careful not to mount or hang the light in such a way that it prevents normal operation or damages the cord. LINK Modular Storage System: Base is compatible with RYOBI LINK System. Snaps on easily for installation. 2x recess: Secure wood into 2x material recess. Make sure the wood is seated completely. Mounting hooks: The mounting hooks can be used to hang the light from a sturdy location such as a fence. Tripod mount: The light may be mounted onto a tripod using the 1/4-20 insert in the base of the light. WARNING: To reduce the risk of a tipping hazard, always ensure the tripod is stable before and after mounting the light. Do not use the tripod if it is not stable. NOTE: MAINTENANCE INSTRUCTIONS BEGIN ON PAGE 7 FOLLOWING FRENCH AND SPANISH LANGUAGE SECTIONS. ILLUSTRATIONS START ON PAGE 8. 6 - English
-
 1
1 -
 2
2 -
 3
3 -
 4
4 -
 5
5 -
 6
6 -
 7
7 -
 8
8 -
 9
9 -
 10
10 -
 11
11 -
 12
12 -
13
-
14
-
15
-
16
-
17
-
18
-
19
-
20
 |
 |
