Ryobi RE180PL English Manual - Page 15
Operation - edge guide
 |
View all Ryobi RE180PL manuals
Add to My Manuals
Save this manual to your list of manuals |
Page 15 highlights
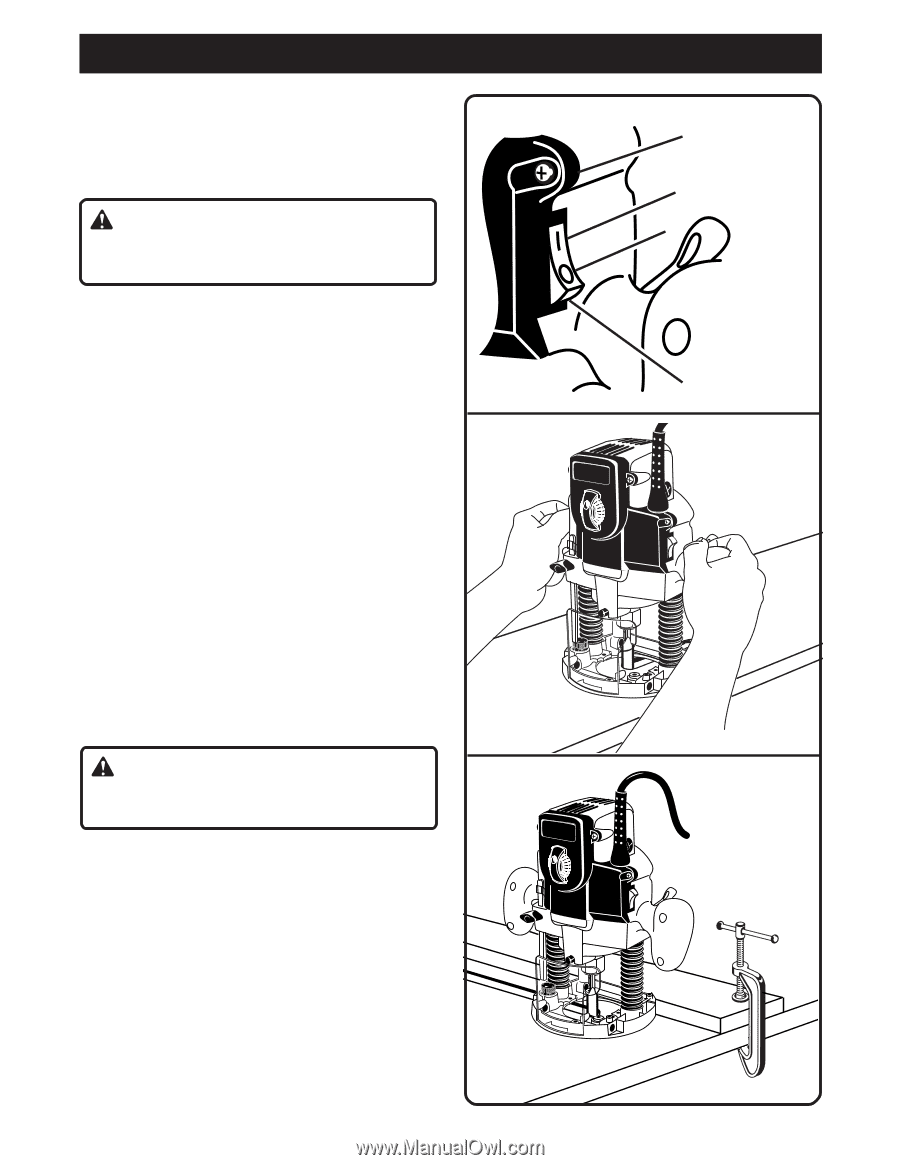
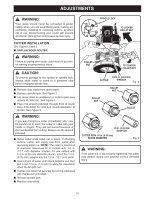
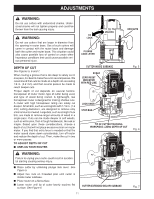
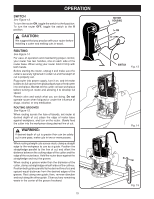
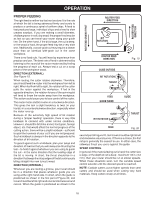
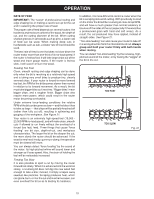
OPERATION SWITCH See Figure 13. To turn the router ON, toggle the switch to the I position. To turn the router OFF, toggle the switch to the O position. CAUTION: We suggest that you practice with your router before installing a cutter and making cuts in wood. ROUTING See Figure 14. For ease of operation and maintaining proper control, your router has two handles, one on each side of the router base. When using your router hold it firmly with both hands. Before starting the router, unplug it and make sure the cutter is securely tightened in collet nut and that depth of cut is properly set. Plug router into power supply, turn it on, and let motor build to its full speed, then gradually plunge or feed cutter into workpiece. Do not let the cutter contact workpiece before turning on router and allowing it to develop full speed. Remain alert and watch what you are doing. Do not operate router when fatigued or under the influence of drugs, alcohol, or any medication. ROUTING GROOVES See Figure 15. When routing across the face of boards, set router at desired depth of cut, place the edge of router base against workpiece, and turn on the router. Slowly feed the cutter into the workpiece along desired line of cut. WARNING: If desired depth of cut is greater than can be safely cut in one pass, make cuts in two or more passes. When routing straight cuts across stock, clamp a straight edge to the workpiece to use as a guide. Position the straightedge parallel to the line of cut and offset the distance between the cutting edge of the cutter and the edge of the router base. Hold the router base against the straightedge and rout the groove. When routing a groove wider than the diameter of the cutter, clamp a straightedge on both sides of the cutlines. Position both guides parallel to the desired line of cut and spaced equal distances from the desired edges of the groove. Rout along one guide; then, reverse direction and rout along the other guide. Clean out any remaining waste in the center of the groove freehand. 15 MOTOR HOUSING I = ON O = OFF SWITCH Fig. 13 Fig. 14 Fig. 15
-
 1
1 -
2
-
3
-
4
-
5
-
6
-
7
-
8
-
9
-
 10
10 -
 11
11 -
 12
12 -
 13
13 -
 14
14 -
 15
15 -
 16
16 -
 17
17 -
 18
18 -
 19
19 -
 20
20 -
21
-
22
-
23
-
24
 |
 |