Samsung 151N User Manual (user Manual) (English)
Samsung 151N Manual
 |
View all Samsung 151N manuals
Add to My Manuals
Save this manual to your list of manuals |
Samsung 151N manual content summary:
- Samsung 151N | User Manual (user Manual) (English) - Page 1
SyncMaster 173T/193T/170N/171N/172N/173N/ 191N/192N/193N/191T plus/153T/150N/151N/152N - Samsung 151N | User Manual (user Manual) (English) - Page 2
Main Page Safety Instructions Notational Power Installation Cleaning Other Introduction Unpacking Front Rear Setup Connecting Your Monitor Installing the Monitor Driver Automatic Manual Installing VESA compliant mounting On-Screen Display Troubleshooting Check List Q & A Self-Test Feature Check - Samsung 151N | User Manual (user Manual) (English) - Page 3
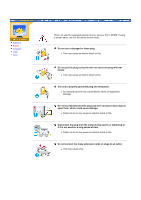
Notational Power Installation Clean Other Failure to follow directions noted by this symbol could result in bodily harm or damage to equipment. Prohibited Do not disassemble Do not touch Important to read and understand at all times Disconnect the plug from the outlet Grounding to prevent an - Samsung 151N | User Manual (user Manual) (English) - Page 4
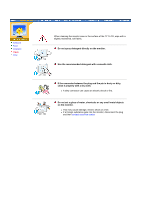
Notational Power Installation Clean Other When not used for extended periods of time, set your PC to DPMS. If using a screen saver, set it to the active screen mode. Do not use a damaged or loose plug. z This may cause an electric shock or fire. Do not pull the plug out by the wire - Samsung 151N | User Manual (user Manual) (English) - Page 5
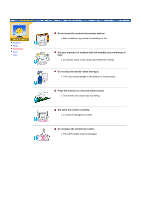
shock or fire could result inside the monitor. Do not drop the monitor when moving it. z This may cause damage to the product or human body. Place the monitor on a flat and stable surface. z The monitor can cause injury by falling. Set down the monitor carefully. z It could be damaged or broken - Samsung 151N | User Manual (user Manual) (English) - Page 6
cleaning the monitor case or the surface of the TFT-LCD, wipe with a slightly moistened, soft fabric. Do not spray detergent directly on the monitor. Use the chemicals or any small metal objects on the monitor. z This may cause damage, electric shock or a fire. z If a foreign substance gets into the - Samsung 151N | User Manual (user Manual) (English) - Page 7
Notational Power Installation Clean Other Do not remove cover(or back). No user serviceable parts inside. z This may cause an electric shock or a fire. z Refer servicing to qualified service personnel. If your monitor does not operate normally - in particular, if there are any unusual sounds or - Samsung 151N | User Manual (user Manual) (English) - Page 8
and discard vinyl bag from power adaptor before use. z Possible fire hazard. Always keep power adaptor in well-ventilated area. If you view a fixed screen for an extended period of time, residual image or blurriness may appear. z Change the mode to energy save or set a screensaver to moving picture - Samsung 151N | User Manual (user Manual) (English) - Page 9
Notational Power Installation Clean Other Do not remove cover(or back). No user serviceable parts inside. z This may cause an electric shock or a fire. z Refer servicing to qualified service personnel. If your monitor does not operate normally - in particular, if there are any unusual sounds or - Samsung 151N | User Manual (user Manual) (English) - Page 10
and discard vinyl bag from power adaptor before use. z Possible fire hazard. Always keep power adaptor in well-ventilated area. If you view a fixed screen for an extended period of time, residual image or blurriness may appear. z Change the mode to energy save or set a screensaver to moving picture - Samsung 151N | User Manual (user Manual) (English) - Page 11
SyncMaster 173T/193T/191T plus/153T Unpacking Front Rear Monitor andt Stand Power Cord Signal Cable Please make sure the following items are included with your monitor. If any items are missing, contact your dealer. DVI Cable(Option) Quick Setup Guide For Multimedia model (Option) Warranty - Samsung 151N | User Manual (user Manual) (English) - Page 12
SyncMaster 170N/171N/172N/173N/191N/192N/193N/150N/151N/152N Unpacking Front Rear Monitor and Stand Power Cord Signal Cable Please make sure the following items are included with your monitor. If any items are missing, contact your dealer. Quick Setup Guide Warranty Card (Not available in all - Samsung 151N | User Manual (user Manual) (English) - Page 13
is pressed to change the input mode, a message appears in the center of the screen displaying the current mode -- analog or digital input signal.) Note:If you select the Digital mode, you must connect your monitor to the graphic card with a digital port using the DVI cable. 3. MagicBright button - Samsung 151N | User Manual (user Manual) (English) - Page 14
SyncMaster 170N/171N/172N/173N/191N/192N/193N/150N/151N/152N Unpacking Front Rear 1. Auto button once as the monitor saves your adjustments. Note: See PowerSaver described in the manual for further information regarding power saving functions. For energy conservation, turn your monitor OFF when - Samsung 151N | User Manual (user Manual) (English) - Page 15
SyncMaster 173T/193T/191T plus/153T Unpacking Front Rear (The configuration at the back of the monitor may vary from product to product.) 1. Power port Connect the power cord for your monitor to the power port on the back of the monitor. 2. AudioPower - Out (Option) 3. DVI port Connect the DVI - Samsung 151N | User Manual (user Manual) (English) - Page 16
SyncMaster 170N/171N/172N/173N/191N/192N/193N/150N/151N/152N Unpacking Front Rear (The configuration at the back of the monitor may vary from product to product.) 1. Power port 2. AudioPower - Out (Option) 3. Signal port 4. Pin a. Power on/off Switch Connect the DC Adapter for your monitor to the - Samsung 151N | User Manual (user Manual) (English) - Page 17
. 4. In the case of an old model Macintosh, you need to connect the monitor using a special Mac adaptor. 5. Turn on your computer and monitor. If your monitor displays an image, installation is complete. You may get a blank screen depending on the type of video card you are using, if you connect - Samsung 151N | User Manual (user Manual) (English) - Page 18
-For Multimedia model (Option) 1. Connect the power cord of the multimedia stand to the multimedia stand power port on the back of the monitor. 2. Connect a sound cable from the input source (sound card,computer,CD-ROM drive). 3. To listen in privacy,connect headphones here. Multimedia Speaker Stand - Samsung 151N | User Manual (user Manual) (English) - Page 19
SyncMaster 170N/171N/172N/173N/191N/192N/193N/150N/151N/152N Connecting Your Monitor Installing the Monitor Driver Installing VESA compliant mounting Setup-General 1. Connect the power cord for your monitor to the power port on the back of the monitor. Plug the power cord for the monitor into a - Samsung 151N | User Manual (user Manual) (English) - Page 20
Multimedia Speaker Stand 1. Speaker Power Cord 2. On/Off Volume 3. Bass Control 4. Treble Control 5. Stereo Input Jack 6. Headphone Jack - Samsung 151N | User Manual (user Manual) (English) - Page 21
the driver program file at the Internet web site shown here. z Internet web site : http://www.samsung-monitor.com/ (Worldwide) http://www.samsungusa.com/monitor/ (USA) http://www.sec.co.kr/monitor/ (Korea) http://www.samsungmonitor.com.cn/ (China) Windows ME 1. Insert CD into the CD-ROM drive - Samsung 151N | User Manual (user Manual) (English) - Page 22
click the "Continue Anyway" button. Then click "OK" button. This monitor driver is under certifying MS logo,and this installation don't damage your system.The certified driver will be posted on Samsung Monitor Homepage http://www.samsung-monitor.com/. 6. Monitor driver installation is completed. - Samsung 151N | User Manual (user Manual) (English) - Page 23
driver program file at the Internet web site shown here. z Internet web site : http://www.samsung-monitor.com/ (Worldwide) http://www.samsungusa.com/monitor/ (USA) http://www.sec.co.kr/monitor/ (Korea) http://www.samsungmonitor.com.cn/ (China) Microsoft® Windows® XP Operating System 1. Insert CD - Samsung 151N | User Manual (user Manual) (English) - Page 24
. 6. Select "Don't search ,I will.." then click "Next" and then click "Have disk". 7. Click the "Browse" button then choose A:(D:\Driver) and choose your monitor model in the model list and click the "Next" button. 8. If you can see following "Message" window, then click the "Continue Anyway" button - Samsung 151N | User Manual (user Manual) (English) - Page 25
installation don't damage your system.The certified driver will be posted on Samsung Monitor Homepage http://www.samsung-monitor.com/. 9. Click the "Close" button then click "OK" button continually. 10. Monitor driver installation is completed. Microsoft® Windows® 2000 Operating System When you can - Samsung 151N | User Manual (user Manual) (English) - Page 26
and "OK" button until you close the Display Properties dialogue box. (You can get some other screen for warning message or others, then click the appreciate option for your monitor.) Microsoft® Windows® NT Operating System 1. Click Start, Settings, Control Panel, and then double-click Display icon - Samsung 151N | User Manual (user Manual) (English) - Page 27
face-down on a flat surface with a cushion beneath it to protect the screen. 3. Remove the two screws and then remove the Stand from the LCD monitor. Attaching a base NOTE: This monitor accepts a 100mm x 100mm VESA-compliant mounting interface pad. 1. Rear cover mounting pad 2. Mounting interface - Samsung 151N | User Manual (user Manual) (English) - Page 28
SyncMaster 173T/193T/191T plus/153T - Samsung 151N | User Manual (user Manual) (English) - Page 29
SyncMaster 170N/171N/172N/173N/ 191N/192N/193N/150N/151N/152N - Samsung 151N | User Manual (user Manual) (English) - Page 30
Menu Contrast Menu How to adjust Brightness - Adjust Brightness. 1. Push the Menu button. 2. Push the Menu button to open the Brightness adjustment screen. 3. Use the [ + ] button to increase the brightness or [ - ] button to decrease the brightness. Direct Access Feature : When OSD is not on the - Samsung 151N | User Manual (user Manual) (English) - Page 31
then use Fine again. 1. Push the Menu button. 2. Push the [ - ] button or [ + ] button until the Image Lock screen is displayed. 3. Push the Menu button twice to open the Fine adjustment screen. 4. Use the [ - ] button or [ + ] button to remove any noise. How to adjust Image Lock [Coarse] - Image - Samsung 151N | User Manual (user Manual) (English) - Page 32
H-Position Menu V-Position Menu How to adjust H-Position - Follow these instructions to change the horizontal position of the monitor's entire display. 1. Push the Menu button. 2. Push the [ - ] button or [ + ] button until the H-Position screen is displayed. 3. Push the Menu button to open the H- - Samsung 151N | User Manual (user Manual) (English) - Page 33
is displayed. 3. Push the Menu button twice to open the Geometry Reset adjustment screen. 4. Push the [ + ] button to select Yes. If you don't want to reset the monitor, use the [ - ] button to select No. How to adjust Reset [Color Reset] - Color parameters are replaced with the factory default - Samsung 151N | User Manual (user Manual) (English) - Page 34
R,G,B color control. 1. Push the Menu button. 2. Push the [ - ] button or [ + ] button until the Color Control screen is displayed. 3. Push the Menu button to open the Color Control adjustment screen. Use the [-] or [+] button to select R(ed) G(reen_ or B(lue) and push the Menu button 4. Press the - Samsung 151N | User Manual (user Manual) (English) - Page 35
the background of the OSD. 1. Push the Menu button. 2. Push the [ - ] button or [ + ] button until the Halftone screen is displayed. 3. Push the Menu button to open the Halftone selection screen. 4. Use the [ - ] button or [ + ] button to select On or Off. How to adjust Language - Follow these steps - Samsung 151N | User Manual (user Manual) (English) - Page 36
Menu Position(V-Position) - You can change the vertical position where the OSD menu appears on your monitor. 1. Push the Menu button. 2. Push the [ - ] button or [ + ] button until the Menu Position screen is displayed. 3. Push the Menu button again and then press the [ - ] or [ + ] button until the - Samsung 151N | User Manual (user Manual) (English) - Page 37
value. How to adjust Display Mode - You can see the frequency, the polarity of the operational signals and the resolution level. Note : These screens do not allow any changes to the settings, they are for information only. 1. Push the Menu button. 2. Push the [ - ] button or [ + ] button until - Samsung 151N | User Manual (user Manual) (English) - Page 38
Auto Adjustment Menu How to adjust Auto Adjustment - Auto adjustment allows the monitor to self-adjust to the incoming video signal. The values of fine, coarse and position are adjusted automatically. 1. Push the Auto button. Note : To make - Samsung 151N | User Manual (user Manual) (English) - Page 39
Magic Bright Menu How to adjust Magic Bright 1. Push the MagicBright button. Text: Normal Brightness For documentations or works involving heavy text. Internet: Medium Brightness For working with mixture of contents such as text and graphics. Entertain: High Brightness For watching motion pictures - Samsung 151N | User Manual (user Manual) (English) - Page 40
SyncMaster 173T/193T/191T plus/153T Check List Q & A Self-Test Feature Check Before calling for service, check the information in this section to see if you can remedy any problems supported" on the screen? Note: If the initial screen (the login screen) does not appear, contact a service center - Samsung 151N | User Manual (user Manual) (English) - Page 41
you installed the monitor driver? Install the monitor driver according to the Driver Installation Instructions. See the video card manual to see Install the monitor driver according to if the Plug & Play (VESA DDC) the Driver Installation Instructions. function can be supported. For Multimedia - Samsung 151N | User Manual (user Manual) (English) - Page 42
the PC, check if the installed the adapter (video) driver and the monitor driver. 4. Check if the scanning ratio of the video screen is set at 75Hz. (Do not exceed 60Hz when using the maximum resolution.) 5. If you have problems in installing the adapter (video) driver, boot the computer in Safe - Samsung 151N | User Manual (user Manual) (English) - Page 43
(the login screen) does not appear, contact a service center or your dealer. Can you see "Video mode not supported" on the screen? You can see this message when the signal from the video card exceeds the maximum resolution and frequency that the monitor can properly handle. Adjust the maximum - Samsung 151N | User Manual (user Manual) (English) - Page 44
the video card manual to see if the Plug & Play (VESA DDC) function can be supported. Install the monitor driver according to the Driver Installation Instructions. Install the monitor driver according to the Driver Installation Instructions. Check the following items if there is trouble with the - Samsung 151N | User Manual (user Manual) (English) - Page 45
video card support can vary, depending on the version of the driver used. (Refer to the computer or the video card manual for details.) or the screen saver. (Refer to Windows/Computer Manual). How can I clean the outer case/LCD Panel? Disconnect the power cord and then clean the monitor with a - Samsung 151N | User Manual (user Manual) (English) - Page 46
Failure of any of the boxes to appear indicates a problem with your monitor. This box also appears during normal operation if the video cable message appears on the screen or the screen goes blank although the power indicator LED is still on. The message may indicate that the monitor is out of scan - Samsung 151N | User Manual (user Manual) (English) - Page 47
first check the source of the problem, and then contact a service center or your dealer. z Judging the monitor's working condition If there is no image on the screen or an "Video mode not supported" message comes up, disconnect the cable from the computer while the monitor is still powered on. { If - Samsung 151N | User Manual (user Manual) (English) - Page 48
Preset Timing Modes General Model Name SyncMaster 173T LCD Panel Size 17.0 inch diagonal monitor can be installed on any Plug & Play compatible system. Interaction of the monitor and computer systems will provide the best operating conditions and monitor settings. In most cases, monitor - Samsung 151N | User Manual (user Manual) (English) - Page 49
of black pixels could be seen. This is not from bad quality and you can use it without uneasiness. z For example, the no. of TFT LCD pixels that is contained in this product are 3,932,160. Multimedia Speaker Stand Dimension (Length x Height x Depth) / Monitor Body Weight / Carton - Samsung 151N | User Manual (user Manual) (English) - Page 50
Modes General Model Name SyncMaster 193T/191T plus LCD Panel Size 19.0 inch diagonal Display monitor can be installed on any Plug & Play compatible system. Interaction of the monitor and computer systems will provide the best operating conditions and monitor settings. In most cases, monitor - Samsung 151N | User Manual (user Manual) (English) - Page 51
of black pixels could be seen. This is not from bad quality and you can use it without uneasiness. z For example, the no. of TFT LCD pixels that is contained in this product are 3,932,160. Multimedia Speaker Stand Dimension (Length x Height x Depth) / Monitor Body Weight / Carton - Samsung 151N | User Manual (user Manual) (English) - Page 52
Timing Modes General Model Name SyncMaster 170N/171N/172N/173N LCD Panel Size 17.0 inch diagonal monitor can be installed on any Plug & Play compatible system. Interaction of the monitor and computer systems will provide the best operating conditions and monitor settings. In most cases, monitor - Samsung 151N | User Manual (user Manual) (English) - Page 53
of black pixels could be seen. This is not from bad quality and you can use it without uneasiness. ! For example, the no. of TFT LCD pixels that is contained in this product are 3,932,160. Multimedia Speaker Stand Dimension (Length x Height x Depth) / Monitor Body Weight / Carton - Samsung 151N | User Manual (user Manual) (English) - Page 54
Modes General Model Name SyncMaster 191N/192N/193N LCD Panel Size 19.0 inch diagonal Display monitor can be installed on any Plug & Play compatible system. Interaction of the monitor and computer systems will provide the best operating conditions and monitor settings. In most cases, monitor - Samsung 151N | User Manual (user Manual) (English) - Page 55
of black pixels could be seen. This is not from bad quality and you can use it without uneasiness. ! For example, the no. of TFT LCD pixels that is contained in this product are 3,932,160. Multimedia Speaker Stand Dimension (Length x Height x Depth) / Monitor Body Weight / Carton - Samsung 151N | User Manual (user Manual) (English) - Page 56
General PowerSaver Preset Timing Modes General Model Name SyncMaster 153T LCD Panel Size 15.0 inch diagonal Display area 304.1 (H) x 228 ~ 45°C) Humidity: 5% ~ 95%, non-condensing Plug and Play Capability This monitor can be installed on any Plug & Play compatible system. Interaction of the - Samsung 151N | User Manual (user Manual) (English) - Page 57
of black pixels could be seen. This is not from bad quality and you can use it without uneasiness. z For example, the no. of TFT LCD pixels that is contained in this product are 2,359,296. Multimedia Speaker Stand Dimension (Length x Height x Depth) / Monitor Body Weight / Carton - Samsung 151N | User Manual (user Manual) (English) - Page 58
English > Main > Specification > General General Model Name SyncMaster 150N/151N/152N LCD Panel Size 15.0 inch diagonal Display area 304.1 (H) and Play Capability This monitor can be installed on any Plug & Play compatible system. Interaction of the monitor and computer systems will provide - Samsung 151N | User Manual (user Manual) (English) - Page 59
of black pixels could be seen. This is not from bad quality and you can use it without uneasiness. z For example, the no. of TFT LCD pixels that is contained in this product are 2,359,296. Multimedia Speaker Stand Dimension (Length x Height x Depth) / Monitor Body Weight / Carton - Samsung 151N | User Manual (user Manual) (English) - Page 60
Less than 1W SyncMaster 191N/192N/193N State Normal Operation Power Indicator Power Consumption Green Less than 45W Power saving mode EPA/ENERGY 2000 Green, Blinking Less than 2W Power off (120Vac) (Power button) Black Less than 1W This monitor is EPA ENERGY STAR® compliant and ENERGY2000 - Samsung 151N | User Manual (user Manual) (English) - Page 61
Green, Blinking (Power button) Black Power Consumption Less than 30W Less than 2W Less than 1W This monitor is EPA ENERGY STAR® compliant and ENERGY2000 compliant when used with a computer equipped with VESA DPMS functionality. As an ENERGY STAR® Partner, SAMSUNG - Samsung 151N | User Manual (user Manual) (English) - Page 62
SyncMaster 173T/193T/170N/171N/172N/173N/191N/192N/193N/191T plus General PowerSaver Preset Timing Modes If the signal transferred from the computer is the same as the following Preset Timing Modes, the screen will be adjusted automatically. However, if the signal differs, the screen may go blank - Samsung 151N | User Manual (user Manual) (English) - Page 63
SyncMaster 153T/150N/151N/152N English > Main > Specification > Preset Timing Modes General PowerSaver Preset Timing Modes If the signal transferred from the computer is the same as the following Preset Timing Modes, the screen to the video card manual and adjust the screen as follows. Table 1. - Samsung 151N | User Manual (user Manual) (English) - Page 64
For Better Display Authority U.S.A. : Samsung Computer Products Customer Service 400 Valley Road, Suite 201, Mt. Arlington, NJ 07856 Tel. : (973)601-6000, 1-800-SAMSUNG (1-800-726-7864) Fax. : (973)601-6001 http://www.samsungusa.com/monitor BRAZIL : Samsung Eletronica da Amazonia Ltda. R. Prof - Samsung 151N | User Manual (user Manual) (English) - Page 65
8001-1800 Samsung support Finland: 0800-118001 Tel +46 8 590 966 00 Fax +46 8 590 966 50 http://www.samsung.se/ HUNGARY : Samsung Electronics Magyar Rt. 1039, Budapest, Lehel u. 15-17. Tel: 36 1 453 1100 Fax: 36 1 453 1101 http://www.samsung.hu/ FRANCE : SAMSUNG ELECTRONICS FRANCE Service Paris Nord - Samsung 151N | User Manual (user Manual) (English) - Page 66
800 220 120 http://www.samsung.pt/ NETHERLANDS/BELGIUM/LUXEMBOURG : Samsung Electronics Benelux B. V. Fleminglaan 12 2289 CP Rijiswijk, NEDERLANDS Service and informatielijn ; Belgium :0800-95214, http://www.samsung.be/ Netherlands : 0800-2295214, http://www.samsung.nl/ CHILE : SONDA S.A. Teatinos - Samsung 151N | User Manual (user Manual) (English) - Page 67
Service Terms Regulatory Natural Color For Better Display Authority Dot Pitch The image on a monitor is composed of red, , this is regarded as 60 Hz. In this case, flickering of the screen can be detected. To avoid this problem, there is a Flicker-free Mode using a vertical frequency over 70 Hz - Samsung 151N | User Manual (user Manual) (English) - Page 68
CO., LTD America QA Lab of Samsung 3351 Michelson Drive, Suite #290, Irvine, CA92612 USA Tel) 949-975-7310 Fax) 949-922-8301 Warning User must use shielded signal interface cables to maintain FCC compliance for the product. Provided with this monitor is a detachable power supply cord with - Samsung 151N | User Manual (user Manual) (English) - Page 69
quipements produisant des interférences au Canada. MPR II Compliance This monitor complies with SWEDAC(MPR II) recommendations for reduced electric and interference. Install and use the equipment according to the instruction manual. TCO'95-Ecological requirements for personal computers (TCO'95 - Samsung 151N | User Manual (user Manual) (English) - Page 70
the adaptation of goods and services to the environment.The main problem as far as monitors and other electronic equipment are concerned chlorine and bromine. Lead Lead can be found in picture tubes, display screens, solders and capacitors. Lead damages the nervous system and in higher doses, - Samsung 151N | User Manual (user Manual) (English) - Page 71
computers? In many countries, environmental labelling has become an established method for encouraging the adaptation of goods and services to the environment. The main problem, as far as computers and other electronics equipment are concerned, is that environmentally harmful substances are used - Samsung 151N | User Manual (user Manual) (English) - Page 72
requirement states that batteries, the colour-generating layers of display screens and the electrical or electronics components must not contain any cadmium the time being, permitted in the back light system of flat panel monitors as today there is no commercially available alternative. TCO aims on - Samsung 151N | User Manual (user Manual) (English) - Page 73
user and to reduce sight and strain problems. Important parameters are luminance, contrast, installed and used in accordance with the instructions, may cause harmful interference to other devices (s) are connected. z Consult the manufacturer or field service technician for help. Video In / RS 232 / - Samsung 151N | User Manual (user Manual) (English) - Page 74
Service Terms Regulatory Natural Color For Better Display Authority Natural Color Software Program One of the recent problems in using a on the initial screen to install the Natural Color software. To install the program manually, insert the CD included with the Samsung monitor into the CD- - Samsung 151N | User Manual (user Manual) (English) - Page 75
to be bright sometimes or some of black pixels could be seen. This is not from bad quality and you can use it without uneasiness. { For example, the number of TFT LCD pixels that is contained in this product are 3,932,160. 3. When you clean the monitor and the panel outside, please apply - Samsung 151N | User Manual (user Manual) (English) - Page 76
Service Terms Regulatory Natural Color For Better Display Authority Information in this document is subject to change without notice. © 2003 Samsung Electronics Co., Ltd. All rights reserved. Reproduction in any manner whatsoever without the written permission of Samsung Electronics Co., Ltd. is
-
 1
1 -
 2
2 -
 3
3 -
 4
4 -
 5
5 -
 6
6 -
 7
7 -
8
-
9
-
10
-
11
-
12
-
13
-
14
-
15
-
16
-
17
-
18
-
19
-
20
-
21
-
22
-
23
-
24
-
25
-
26
-
27
-
28
-
29
-
30
-
31
-
32
-
33
-
34
-
35
-
36
-
37
-
38
-
39
-
40
-
41
-
42
-
43
-
44
-
45
-
46
-
47
-
48
-
49
-
50
-
51
-
52
-
53
-
54
-
55
-
56
-
57
-
58
-
59
-
60
-
61
-
62
-
63
-
64
-
65
-
66
-
67
-
68
-
69
-
70
-
71
-
72
-
73
-
74
-
75
-
76
 |
 |
191N/192N/193N/191T plus/153T/150N/151N/152N
SyncMaster 173T/193T/170N/171N/172N/173N/