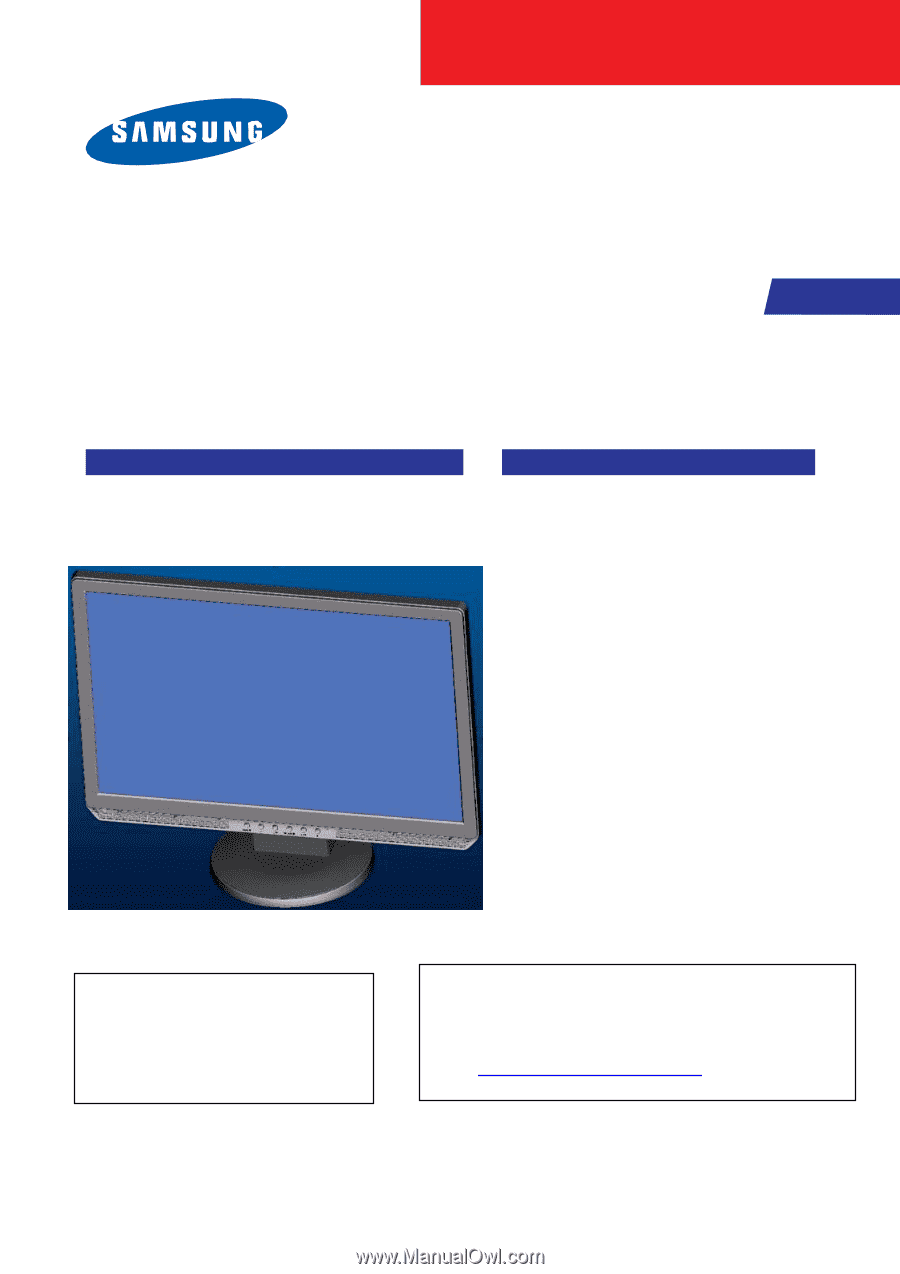
Samsung 2220WM Service Manual
Samsung 2220WM - SyncMaster - 22" LCD Monitor Manual
 |
UPC - 729507801940
View all Samsung 2220WM manuals
Add to My Manuals
Save this manual to your list of manuals |
Samsung 2220WM manual content summary:
- Samsung 2220WM | Service Manual - Page 1
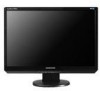
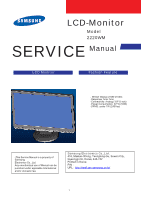
LCD-Monitor Model 2220WM SERVICE Manual LCD Monitor Fashion Feature - WXGA Display (1680 x1050) -Response Time: 5ms -Connectivity: Analog (15P D-sub) -Power Consumption: 22''W (52W) -DPMS: under 1W (240Vac) -This Service Manual is a property of Samsung Electronics Co., Ltd. Any unauthorized use - Samsung 2220WM | Service Manual - Page 2
Code ...15 4. Troubleshooting ...16 4-1 Common Acknowledge ...16 4-2 No Picture (VGA Mode) ... 17 4-3 No Picture (DVI Mode) ... 18 4-4 No Power ... 19 5. Exploded View and Parts List ...20 5-1 Exploded View ...20 5-2 Parts List ...22 6. Block Diagram ...24 6-1 Power Tree ...24 6-2 Main - Samsung 2220WM | Service Manual - Page 3
Monitor Assembly ... 34 9-5 Attaching a Base ... 35 10. Disassembly and Reassembly ...36 10-1 Disassembly ...36 10-2 Assembly Block ...39 11. PCB Diagram ...40 11-1 Mian Board...40 12-2 Power Board...41 12. Circuit Descriptions ...42 12-1 Overall Block Structture ...42 12-2 IP Board Part - Samsung 2220WM | Service Manual - Page 4
Disconnect the AC power and DC power jack before servicing. 1-1-2 Servicing the LCD Monitor 1. When servicing the LCD Monitor, Disconnect the AC line cord from the AC outlet. 2. It is essential that service technicians have an accurate voltage meter available at all times. Check the calibration of - Samsung 2220WM | Service Manual - Page 5
sure that the area around the serviced part has not been damaged. 4. Check the insulation between the blades of the AC plug and accessible conductive parts (examples: metal panels, input terminals and earphone jacks). 5. Insulation Checking Procedure: Disconnect the power cord from the AC source - Samsung 2220WM | Service Manual - Page 6
exposed to moisture. Otherwise, it may cause a fire or electric shock. 5. Make sure to turn the power off and unplug the power cord from the outlet before repositioning the product. Also check the antenna cable or the external connectors if they are fully unplugged. Damage to the cord may cause fire - Samsung 2220WM | Service Manual - Page 7
light system 4 CCFL (top & bottom edge side) Actual Resolution display WSXGA+(1680x1050) Pixel pitch 0.282(H) x 0.282(V) Display area 473.76 ( H ) x 296.1 ( V ) , 22 & DVI-D Power management Compatible with Energy Star Plug & Play University AC supply OSD language VESA DDC 2B power 100V - - Samsung 2220WM | Service Manual - Page 8
Adjustments This section of the service manual explains how to use the DDC Manager JIG. This function is needed for AD board change and program memory (U105) change. 3-1 Required Equipment The following equipment is necessary for adjusting the monitor and enter the data. PC Parallel Cable Figure 1. 8 - Samsung 2220WM | Service Manual - Page 9
15h Max Horizontal Image Size 16h Max Vertical Image Size 17h Display Gamma 18h Power Management and Supported Feature(s) 19~22h Chroma Info 23h Established Timing I Description SAM 031F 0 1 2007 1 3 Analog Signal Level 0.700, 0.000 (0.700Vp-p) No Blank -to-black Setup Separate Syncs - Samsung 2220WM | Service Manual - Page 10
36,00,DA,28,11,00,00,1C 5A~6Bh Detailed Timing / Descriptor Block 2 Monitor Name: SyncMaster 00,00,00,FC,00,53,79,6E,63, 4D,61,73,74,65,72,0A, ,00,0A,20,20, 20,20, 20,20, 6C~7Dh Detailed Timing / Descriptor Block 4 Monitor Serial Number: H1AK500000 00,00,00,ff,00,48,31,41,4B,3 5,30,30,30,30, - Samsung 2220WM | Service Manual - Page 11
II Description SAM 0320 0 1 2007 1 3 Analog Signal Level 0.700, 0.000 (0.700Vp-p) No Blank -to-black Setup Separate Syncs. Supported Composite Sync. Supported No Sync. on Green Supported No Serration Required 47 30 2.2 No Standby No Suspend Active Off/Very Low Power RGB Color Display No sRGB Color - Samsung 2220WM | Service Manual - Page 12
36,00,DA,28,11,00,00,1C 5A~6Bh Detailed Timing / Descriptor Block 2 Monitor Name: SyncMaster 00,00,00,FC,00,53,79,6E,63, 4D,61,73,74,65,72,0A, ,00,0A,20,20, 20,20, 20,20, 6C~7Dh Detailed Timing / Descriptor Block 4 Monitor Serial Number: H1AK500000 00,00,00,ff,00,48,31,41,4B,3 5,30,30,30,30, - Samsung 2220WM | Service Manual - Page 13
3-5 How to execute DDC 1. Install Analog DVI EDID Tool Program 2. Click the Analog DVI EDID Tool icon. 3. Then Select the model which you want to write EDID. 4. Select VGA EDID or DVI EDID: Click `Setting' --`Config File' to enable the `Setting' Window Then choose a port for EDID writing or read - Samsung 2220WM | Service Manual - Page 14
5. Write EDID: Select "File"- "Auto Write" to enable EDID Writing. It will auto write when you enter a S/N which i Successful EDID written when it shows'PASS' Logo 14 - Samsung 2220WM | Service Manual - Page 15
3-6 How to execute MCU Code 1. Set the options. -. Manufacture : MSTAR -. Device Type : TSUM16_ROM128K_ext_flash -. Communication Port : DSUB15 (Analog) -. External Memory: PM25LV010E 5. If Program and Verify is OK, turn off the hard power and than turn on again. 15 - Samsung 2220WM | Service Manual - Page 16
stand the problem happen in the digital circuit part. If you check the H/V position, please use the crosshatch pattern. This LCM support more than 30 timing modes, if the input timing mode is out of specification, the picture may appears abnormally. If brightness uneven, repairs Inverter circuit - Samsung 2220WM | Service Manual - Page 17
4-2 No Picture (VGA Mode) 17 - Samsung 2220WM | Service Manual - Page 18
4-3 No Picture (DVI Mode) 18 - Samsung 2220WM | Service Manual - Page 19
4-4 No Power 19 - Samsung 2220WM | Service Manual - Page 20
5. Exploded View & Part List 5-1. LS22WJWKBJUXAA Exploded View 5. Exploded View & Part List 7140300119 M0561 M0215 7911513005 7911514006 M0562 M0564 M0563 7140500110 5-1 - Samsung 2220WM | Service Manual - Page 21
5. Exploded View & Part List 5-1-1. LS22WJWKBJUXAA Parts List Location No. Code No. Description & Specification Q'ty SA/SNA Remark 7911514006 BN81-01275A A/S-PCBA P/I;791151400610R,-,-,-,-,-,- 1 S.A M0215 BN07-00427A LCD-PANEL;M220Z1-L03 1 S.A M0561 BN81-01095A A/S-PCBA,KEYPAD BOARD - Samsung 2220WM | Service Manual - Page 22
5-2. LS22WJWKBJUXAA Parts List 5. Exploded View & Part List Level Location No. Code No. LS22WJWKBJUXAA Description & Specification BRIGHTNESS 300CD/M2 CONTRAST RATIO 1000: Q'ty SA/SNA Remark 0.1 M0215 BN07-00427A LCD-PANEL;M220Z1-L03 1 S.A 0.1 M0560 BN81-00549A A/S-PWR CORD;BLK 6FT - Samsung 2220WM | Service Manual - Page 23
Power Tree 6-2 Main Board Part TSUM16AWK-LF-1 (PC)ANALOG R G B HSYNC Display Response LVDS P Processing Time Panel A Single Interface Engine Enhancement Interface N Engine SDRAM E L OSD Clock MCU Generator Function Key 3.3V Regulator 1.8V Regulator 14.318MH z 1MB Flash - Samsung 2220WM | Service Manual - Page 24
6-3 IP Board Part (power Part) 6-4 IP Board Part (Inverter Part) 25 - Samsung 2220WM | Service Manual - Page 25
7 Wiring Diagram 26 - Samsung 2220WM | Service Manual - Page 26
8 Schematic Diagram 8- 1 DC-DC 8- 2 Input 27 - Samsung 2220WM | Service Manual - Page 27
8- 3 TSUMU58WHJ 8- 4 Power 28 - Samsung 2220WM | Service Manual - Page 28
8- 5 Inverter 8- 6 Keypad 29 - Samsung 2220WM | Service Manual - Page 29
8- 7 Audio 8- 8 Ear Phone 30 - Samsung 2220WM | Service Manual - Page 30
9 Operating Instructions and Installation 9-1 Front 1. Menu button Opens the OSD menu. auto adjustment. 6. Power button / Power indicator Use this button for turn the monitor on and off. /This light glows green during nomal operation, and blinks green once as the monitor saves your adjustments.. - Samsung 2220WM | Service Manual - Page 31
power cord for your monitor to the power port on the back of the monitor. 2. D-sub 15-pin port Connect the signal cable to the 15-pin, D-sub connector on the back of your monitor. 3. Audio port Connect the audio cord for your monitor to the audio port on the back of the monitor 4. Kensington Lock - Samsung 2220WM | Service Manual - Page 32
9-3 Connecting the Monitor 33 - Samsung 2220WM | Service Manual - Page 33
9-4 Monitor Assembly 34 - Samsung 2220WM | Service Manual - Page 34
B. Mounting Interface Pad 1. Turn off your monitor and unplug its power cord. 2. Lay the LCD monitor face-down on a flat surface with a cushion beneath it to protect the screen. 3. Remove four screws and then remove the stand from the LCD monitor. 4. Align the mounting interface Pad with the holes - Samsung 2220WM | Service Manual - Page 35
10-1 Disassembly Block LE 2294 LCD Monitor ASSY BASE*1 BASE*1 RUBBER FOOT*4 SCREW,MINUS,M4*8,Zn* 1 STAND_BACK*1 HINGE *1 SCREW M4*10 *3 STAND_FRONT*1 SCREW M4*10, *3 ASSY STAND*1 BACK COVER*1 BKT-VESA *4 SHIELDING*1 TAPE,ACE,(PC=10x4 LCP 22 MT220WW01-V0G1 (INNOLUX)& LCP 22 N220Z1-L01 - Samsung 2220WM | Service Manual - Page 36
1.unscrew the manual scerw and remove the base 2.unscrew the stand screws and remove the stand 3.Lift the back cover and use jig remove the lamp shielding 4.Disconnect lamp wire and earphone wire 37 - Samsung 2220WM | Service Manual - Page 37
5.Tear the adhesive tape and disconnect keypad wire 6.Disconnect the speaker and LVDS wire 7.Remove chassis assembly and lift up the panel 38 - Samsung 2220WM | Service Manual - Page 38
-V0G1 (INNOLUX)& LCP 22 N220Z1-L01(A)(CMO)& LCP 22 MT220WW01-V2G1 (INNOLUX) ASSY PANEL*1 ASSY CHASSIS SHIELDING*1 TAPE,ACE,(PC=10x45mm) *1 BEZEL&PANEL&A SSY CHASSIS CHASSIS *1 MYLAR TRANSPARENT*2 MYLAR BLACK*2 Power Board *1 SCREW M3*6, *4 SCREW M4*6, *1 PCBA I/F BOARD *1 CABLE 30 PIN FFC SCEW - Samsung 2220WM | Service Manual - Page 39
11 PCB Diagram 11-1 Main Board 11-1-1 Main Board Top Layer 11-1-2 Main Board Bottom Layer 40 - Samsung 2220WM | Service Manual - Page 40
11-2 Power Board 11-2-1 Power Board TOP Layer 11-2-2 Power Board BOTTOM Layer 41 - Samsung 2220WM | Service Manual - Page 41
consumption of less than 0.8W of. 1.2 The Scaler consumes power up to 37mA 1.3 The power to the panel is switched off 2. When the AD board is operating normally: 2.1 The maximum power consumption of the panel lamps is described below (It may vary depending on the panel manufacturer) INL: 4*(7.0mA - Samsung 2220WM | Service Manual - Page 42
receives 5V and outputs a lower voltage in DPMS mode and supplies the whole 5V for the panel operating board in normal conditions. In that case, the switching of Power MosFET is controlled by Micom. 4. Scaler: Receives the analog R,G,B signals and convert them to proper reso- lutions using up- or - Samsung 2220WM | Service Manual - Page 43
-2 IP Board Part(Power) Schematic Diagrams Power Switching Mode Power Supply 1.1 AC Current Input Circuit P801 is a connector for connecting AC Power. F801 is -up, the MOSFET Q804 is initially off, and the Vcc pin capacitor is charged. When the Vcc pin voltage reaches approximately 10V, the control - Samsung 2220WM | Service Manual - Page 44
R508 connected at CT pin of IC501. C515 connect the TIMER pin of IC501, the capacitor to set striking time and shunt down delay time. DRV!, DRV2 output for power MOSFET U501, U502. 2. OZ9938 provides two drive signals for U501, U502, and they work in push pull topology driving, two transformers are - Samsung 2220WM | Service Manual - Page 45
Converter) This is a circuit that converts from analog signal to digital signals. -PLL(Phase Locked Loop) During progressing ADC, Device makes clock synchronizing HSYNC with Video clock -Inverter Device that supplies Power to LCD panel lamp. This device generates about 1,500~2,000V. AC Adapter - Samsung 2220WM | Service Manual - Page 46
called Vertical Frequency or Refresh Rate. Unit: Hz Example: If the same light repeats itself 60 times per second, this is regarded as 60 Hz. - monitor to exchange information automatically. This monitor follows the international standard VESA DDC for the Plug & Play function. -Resolution The - Samsung 2220WM | Service Manual - Page 47
VGA Sync Type 15-Pin D-Sub Signal Cable Connector Pin No. Separate Sync-on-green 1 Red Red 2 Green Green + H/V Sync 3 Blue Blue 4 NC NC 5 DDC Return(GND) DDC Return(GND) 6 GND-R GND-R 7 GND-G GND-G 8 GND-B GND-B 9 NC NC 10 Cable Detect Cable Detect 11 NC NC 12 Bi - Samsung 2220WM | Service Manual - Page 48
service manual describes the timing that the computer industry recognizes as standard for computer- generated video signals. Through D-SUB connectors, this unit can support 001 27.000 - - 864 720 60 64 625 576 39 5 31.250 50.000 36.000 + + 1,024 800 128 72 625 600 22 2 35.156 56.25 40.000 + - Samsung 2220WM | Service Manual - Page 49
50
-
 1
1 -
 2
2 -
 3
3 -
 4
4 -
 5
5 -
 6
6 -
 7
7 -
8
-
9
-
10
-
11
-
12
-
13
-
14
-
15
-
16
-
17
-
18
-
19
-
20
-
21
-
22
-
23
-
24
-
25
-
26
-
27
-
28
-
29
-
30
-
31
-
32
-
33
-
34
-
35
-
36
-
37
-
38
-
39
-
40
-
41
-
42
-
43
-
44
-
45
-
46
-
47
-
48
-
49
 |
 |
1
LCD-Monitor
Model
2220WM
SERVICE
Manual
LCD Monitor
Fashion Feature
-This Service Manual is a property of
Samsung
Electronics Co., Ltd.
Any unauthorized use of Manual can be
punished under applicable International
and/or domestic law
- WXGA Display (1680 x1050)
-Response Time: 5ms
-Connectivity: Analog (15P D-sub)
-Power Consumption: 22’’W (52W)
-DPMS: under 1W (240Vac)
Samsung Electronics Co.,Ltd.
416, Maetan-3Dong, Yeongtong-Gu, Suwon City,
Gyeonggi-Do, Korea, 443-742
Printed in Korea
P/N :
URL :