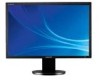
Samsung 305T Service Manual - Page 27
Operating Instructions and Installation - resolution
 |
UPC - 729507700151
View all Samsung 305T manuals
Add to My Manuals
Save this manual to your list of manuals |
Page 27 highlights
10 Operating Instructions and Installation 10 Operating Instructions and Installation 10-1 Product Features 0o(Standard) Swivle Tilt - Improved Response Time by Adopting RTA : 6 ms (Based on "Gray to Gray") - High contrast ratio & high aperture structure - High speed response - WQXGA (2560 x 1600 pixels) resolution - S-PVA (Super Patterned Vertical Alignment) mode - Direct BLU Structure (Cold Cathod Fluorescent Tube) - Sync & DE(Data Enable) mode - Dual Link TMDS serial interface (4pixel/clock) - RoHS compliance - Pb-free compliance - VESA Mount 200 x 100 mm, 100 x 100 mm 10-2 Component & Function 1. Brightness button Push the button to adjust brightness. ¡ã : The screen is getting bright. ¡å : The screen is getting dark. 2. Power button / Power indicator Turns the monitor on/off. / This light glows blue during normal operation, and blinks blue once as the monitor saves your adjustments. 10-1
-
 1
1 -
2
-
3
-
4
-
5
-
6
-
7
-
8
-
9
-
10
-
11
-
12
-
13
-
14
-
15
-
16
-
17
-
18
-
19
-
20
-
21
-
 22
22 -
 23
23 -
 24
24 -
 25
25 -
 26
26 -
 27
27 -
 28
28 -
 29
29 -
 30
30 -
 31
31 -
 32
32 -
33
-
34
-
35
-
36
-
37
-
38
-
39
-
40
-
41
-
42
-
43
-
44
-
45
-
46
-
47
-
48
-
49
-
50
-
51
-
52
-
53
-
54
-
55
-
56
-
57
-
58
-
59
-
60
-
61
-
62
-
63
-
64
-
65
-
66
 |
 |
