Samsung 5065W User Manual (user Manual) (ver.1.0) (English)
Samsung 5065W - HLM - 50" Rear Projection TV Manual
 |
View all Samsung 5065W manuals
Add to My Manuals
Save this manual to your list of manuals |
Samsung 5065W manual content summary:
- Samsung 5065W | User Manual (user Manual) (ver.1.0) (English) - Page 1
DLPTV INSTRUCTION MANUAL HLM4365W/HLM5065W/HLM437W/HLM507W/HLM617W - Samsung 5065W | User Manual (user Manual) (ver.1.0) (English) - Page 2
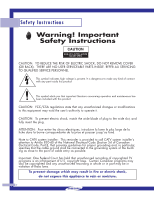
Instructions CAUTION RISK OF ELECTRIC SHOCK DO NOT OPEN CAUTION: TO REDUCE THE RISK OF ELECTRIC SHOCK, DO NOT REMOVE COVER (OR BACK). THERE ARE NO USER SERVICEABLE PARTS INSIDE. REFER ALL SERVICING TO QUALIFIED SERVICE held that unauthorized recording of copyrighted TV programs is an infringement of - Samsung 5065W | User Manual (user Manual) (ver.1.0) (English) - Page 3
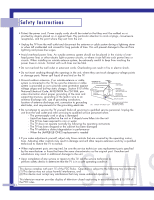
sure that there is adequate ventilation and that you've followed the manufacturer's instructions for mounting. • Operate your TV only from the type of power source indicated on the marking label. If you are not sure of the type of power supplied to your home, consult your appliance dealer or local - Samsung 5065W | User Manual (user Manual) (ver.1.0) (English) - Page 4
to qualified service personnel when: - The power-supply cord or plug is damaged - Liquid has been spilled on the unit or if objects have fallen into the unit - The TV has been exposed to rain or water - The TV does not operate normally by following the operating instructions - The TV has been - Samsung 5065W | User Manual (user Manual) (ver.1.0) (English) - Page 5
. You may find the booklet called How to Identify and Resolve Radio/TV Interference Problems helpful. This SAMSUNG ELECTRONICS CO., LTD America QA Lab of Samsung 85 West Tasman Drive San Jose, CA 95134 USA Tel) 408-544-5124 Fax) 408-544-5191 Provided with this monitor is a detachable power supply - Samsung 5065W | User Manual (user Manual) (ver.1.0) (English) - Page 6
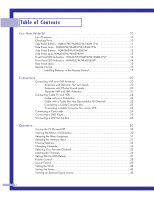
Table of Contents Your New Wide TV 10 List of Features ...10 Checking Parts...10 Side Panel Buttons : HLM437W/HLM507W/HLM617W 11 Side Panel Jacks : HLM437W/HLM507W/HLM617W 11 Side Panel Buttons : HLM4365W/HLM5065W 12 Side Panel Jacks HLM4365W/HLM5065W 12 Front Panel LED Indicators : HLM437W/ - Samsung 5065W | User Manual (user Manual) (ver.1.0) (English) - Page 7
78 How to Set up Your TV as a PC display 79 Picture Quality Adjustment 80 Changing the Position of the Image (Moving left, right, up and down 81 Changing the Screen Size (PC mode 82 Appendix...86 Troubleshooting 86 Care and Maintenance 87 Using Your TV in Another Country 87 Specifications - Samsung 5065W | User Manual (user Manual) (ver.1.0) (English) - Page 8
SAMSUNG - Samsung 5065W | User Manual (user Manual) (ver.1.0) (English) - Page 9
Your New Wide TV - Samsung 5065W | User Manual (user Manual) (ver.1.0) (English) - Page 10
timer to turn the TV on and off at any time you choose • Adjustable picture and Parts Once you have unpacked your TV, check to make sure that you have all the parts shown here. If any piece is missing or broken, call your dealer. HLM437W HLM507W HLM617W Television HLM4365W HLM5065W This Manual - Samsung 5065W | User Manual (user Manual) (ver.1.0) (English) - Page 11
to see the on-screen menu. ˇ ▼ CHANNEL ▲ Press to change channels and move between items on the on-screen menu. ¨ VOLUME +, - Press to lower or raise the volume and to select items when using the on-screen menu. ˆ POWER Press to turn the TV on and off. Side Panel Jacks : HLM437W/HLM507W/HLM617W Use - Samsung 5065W | User Manual (user Manual) (ver.1.0) (English) - Page 12
-screen menu. ˇ ▼ CHANNEL ▲ Press to change channels and move between items on the on-screen menu. ¨ VOLUME +, - Press to lower or raise the volume and to select items when using the on-screen menu. ˆ POWER Press to turn the TV on and off. Side Panel Jacks HLM4365W/HLM5065W Use the side panel jacks - Samsung 5065W | User Manual (user Manual) (ver.1.0) (English) - Page 13
will automatically be turned on in about 25 seconds. A cooling fan inside the set is not operating normally. Lamp cover on rear of the set is not properly shut. Check if the ventilation hole on the rear of the set is blocked, because if the inner temperature is too high, the power will shut off - Samsung 5065W | User Manual (user Manual) (ver.1.0) (English) - Page 14
will automatically be turned on in about 25 seconds. A cooling fan inside the set is not operating normally. Lamp cover on rear of the set is not properly shut. Check if the ventilation hole on the rear of the set is blocked, because if the inner temperature is too high, the power will shut off - Samsung 5065W | User Manual (user Manual) (ver.1.0) (English) - Page 15
panel of your TV. For more AUDIO INPUT jacks(VCR1, VCR2) Connect video/audio signals from external sources, such as a VCR or DVD players. ¨ VIDEO/AUDIO MONITOR OUTPUT jacks Sends a video signal from the TV supported. ∏ PC AUDIO INPUT jacks Connect these to the audio-output jacks on your PC. " DVI - Samsung 5065W | User Manual (user Manual) (ver.1.0) (English) - Page 16
Press to change the screen size. 8. Surround Press to hear the Dolby surround effect. 9. MTS(Multichannel Television Stereo) Press to choose stereo, mono or Separate Audio Program (SAP broadcast). 10. Mode Selects a target device to be controlled by the Samsung remote control (i.e., TV, VCR, Cable - Samsung 5065W | User Manual (user Manual) (ver.1.0) (English) - Page 17
the remote, the batteries may need to be replaced. Make sure you replace both batteries and do not mix old and new batteries in the remote control. If you won't be using the remote control for a long time, remove the batteries and store them in a cool dry place. 1 Slide the back cover all - Samsung 5065W | User Manual (user Manual) (ver.1.0) (English) - Page 18
SAMSUNG - Samsung 5065W | User Manual (user Manual) (ver.1.0) (English) - Page 19
Connections - Samsung 5065W | User Manual (user Manual) (ver.1.0) (English) - Page 20
have a cable system, you will need to connect an antenna to your TV. Antennas with 300-ohm Flat Twin Leads If your antenna looks like this screws. 2 Plug the adapter into the ANT-A terminal on the back panel of the TV. Antennas with 75-ohm Round Leads If your antenna looks like this: 1 Plug the - Samsung 5065W | User Manual (user Manual) (ver.1.0) (English) - Page 21
Separate VHF and UHF Antennas If you have two separate antennas for your TV (one VHF and one UHF), you must combine the two antenna signals before connecting them to the TV. This requires a combiner attachment, which you can buy at an electronics store. 1 Connect both antenna leads to the combiner. - Samsung 5065W | User Manual (user Manual) (ver.1.0) (English) - Page 22
do not need to use a cable box: 1 Plug the incoming cable into the ANT-A antenna terminal on the back of the TV. Cable with a Cable Box that Descrambles All Channels 1 Find the cable that is connected to the ANTENNA OUT terminal on your cable box. This terminal might be labeled "ANT OUT - Samsung 5065W | User Manual (user Manual) (ver.1.0) (English) - Page 23
then use the converter box to change channels. You will need two coaxial cables. Note: When you use a converter box with your TV, there may be features that box. If you have a mono VCR, connect L/Mono to VCR Audio OUT using only one audio cable. If you have a S-VHS VCR, use the S-video connections - Samsung 5065W | User Manual (user Manual) (ver.1.0) (English) - Page 24
cables. (The audio cables are usually included with the camcorder.) 3 Connect a video cable between the VIDEO OUTPUT jack on the camcorder and the VIDEO terminal on the side of the TV. (A video cable is usually included with the camcorder.) To watch a tape, follow your camera's instructions and the - Samsung 5065W | User Manual (user Manual) (ver.1.0) (English) - Page 25
the DVD player. Note: For an explanation of Component video, see your DVD player's owner's manual. Connecting to audio and video jacks 1 Connect a set of audio cables between the AUDIO IN jacks on the TV and the AUDIO OUT jacks on the DVD player. 2 Connect video cables between the VIDEO OUT jack on - Samsung 5065W | User Manual (user Manual) (ver.1.0) (English) - Page 26
, see your Set Top Box owner's manual. Connecting to DVI (Digital Visual Interface) 1 Connect a set of audio cables between the PC AUDIO IN jacks on the TV and the AUDIO OUT jacks on the Set Top Box. 2 Connect video cables between the DVI IN jack on the TV and the DVI OUT jack on the Set Top Box - Samsung 5065W | User Manual (user Manual) (ver.1.0) (English) - Page 27
PC IN jack on the TV and the R.G.B OUT jack on the Set Top Box. TV Rear Panel Component1 Component1/2 (480i/480p) (480p/720p/10801i) PC AUDIO Y ANT-A Pb ANT A-OUT MONITOR OUT Pr VIDEO 2 L L ANT-B S-VIDEO 1 S-VIDEO 2 VIDEO 1 R R V L R DVI PC RS-232C DVI DTV Set Top Box 27 - Samsung 5065W | User Manual (user Manual) (ver.1.0) (English) - Page 28
SAMSUNG - Samsung 5065W | User Manual (user Manual) (ver.1.0) (English) - Page 29
Operation - Samsung 5065W | User Manual (user Manual) (ver.1.0) (English) - Page 30
Operation Turning the TV On and Off Press the Power button on the remote control or on the side panel to turn your TV on and off. Viewing the Menus and Displays The on-screen menu system allows you to control the settings of your TV. Access the on-screen menu system by pressing the Menu button - Samsung 5065W | User Manual (user Manual) (ver.1.0) (English) - Page 31
Selecting the Menu Language Choose a language for the on-screen menus: English, Spanish or French. 1 Press the Menu button. Move the joystick down to select SETUP, then press the joystick to enter. 2 Move the joystick down to select "Language." 3 Move the joystick right or left to select the - Samsung 5065W | User Manual (user Manual) (ver.1.0) (English) - Page 32
CH buttons to scan through the available channels. Selecting the Broadcast Source Before memorizing available channels, you must select what broadcast source your TV is connected to, either an antenna or a cable system. 1 Press the Menu button. Move the joystick down to select SETUP, then press the - Samsung 5065W | User Manual (user Manual) (ver.1.0) (English) - Page 33
Channel Memory." Move Select Menu 2 Press the joystick to enter. The TV will begin memorizing all of the available stations. Press the VOL+ button at Add/Erase button on the remote control. The channel will be added to the TV's memory and the word "Channel added" will appear in the corner of the - Samsung 5065W | User Manual (user Manual) (ver.1.0) (English) - Page 34
button first. Example: For channel 122, press "+100," then "2," then "2." Using the Previous Channel Press the Pre-ch button on the remote control. The TV changes to the last channel you were watching. Scanning channels You can automatically scan all of the channels in memory at the touch of just - Samsung 5065W | User Manual (user Manual) (ver.1.0) (English) - Page 35
and CATV). Then, when you press the Fav.CH button on the remote control, the TV displays only the favorite channels you previously stored, allowing you to quickly and easily find frequently watched channels. To Store Your Favorite Channels: 1 Press the Menu button. Move the joystick down to select - Samsung 5065W | User Manual (user Manual) (ver.1.0) (English) - Page 36
Operation Labeling the Channels Use this feature to assign an easy-to-remember label to any channel (i.e., "CBS", "ESPN", "PBS2", CNN1", etc.) A label consists of four fields, where each field is a letter, a number, or a blank. When the DISPLAY button is pressed, the channel label will appear next - Samsung 5065W | User Manual (user Manual) (ver.1.0) (English) - Page 37
Setting The On/Off Melody You can hear clear melody sound when the TV is powered On or Off. 1 Press the Menu button. Move the joystick down to select SETUP, then press the joystick to enter. 2 Move the joystick down to - Samsung 5065W | User Manual (user Manual) (ver.1.0) (English) - Page 38
Using the remote, you can change the contrast, brightness, tint, color, and sharpness settings of the TV. Customizing the Picture 1 Press the Menu button. Press the joystick to enter. 2 Move the joystick down to select Adjust, then press the joystick to enter. You will see - Samsung 5065W | User Manual (user Manual) (ver.1.0) (English) - Page 39
1 Press the P.Mode button on the remote control to change the picture settings. 2 Press P.Mode repeatedly to select the "Dynamic", "Standard", "Movie" or "Custom" picture setting. Guide to Automatic Picture Settings • Choose Standard to set the TV to operate at top performance according to your - Samsung 5065W | User Manual (user Manual) (ver.1.0) (English) - Page 40
Operation Sound Control You can control and customize the sound levels and settings of the TV with the remote control. Using the on-screen menus, you can change the TV's bass, treble, and balance settings. Adjusting the Volume Press VOL + to raise the volume or VOL - to lower the volume. Using the - Samsung 5065W | User Manual (user Manual) (ver.1.0) (English) - Page 41
3 Move the joystick up or down to select the item you want to change. 4 Move the joystick right or left to raise or lower the value of the item, using the onscreen gauge as your guide. You can continue to make adjustments, or press the Menu button to exit. Using Automatic(Standard) Sound - Samsung 5065W | User Manual (user Manual) (ver.1.0) (English) - Page 42
this clock also allows you to use it to automatically turn the TV on or off. 1 Press the Menu button. Move hour. Move the joystick up or down to select the correct hour. 4 Move the joystick right to select the minute. Move the joystick up or down to select the correct minute. When selecting the hours - Samsung 5065W | User Manual (user Manual) (ver.1.0) (English) - Page 43
enter. 3 Move the joystick down to select the "On Time". Move the joystick right to select the hour, then Move the joystick up or down to adjust the hour for the TV to turn on. When selecting the hours, be sure to select the proper time of day (am or pm). 4 Move the joystick right - Samsung 5065W | User Manual (user Manual) (ver.1.0) (English) - Page 44
"Off Time". Set the "Off Time" just as you set the "On Time". 8 If you want to set the volume level or channel when the TV turns on, move the joystick down to select "On Timer Vol." or "On Timer CH". Move the joystick right to set the volume level or to - Samsung 5065W | User Manual (user Manual) (ver.1.0) (English) - Page 45
can choose between the following sets of jacks: Video 1, Video 2, S-video 1, S-video 2, Component 1, Component 2, Component 3, DVI or PC on the TV's rear panel, and Video 3 or S-Video 3 on the TV's side panel. Remote Control VCR/DVD Buttons Flip the cover of the remote control up to access buttons - Samsung 5065W | User Manual (user Manual) (ver.1.0) (English) - Page 46
SAMSUNG - Samsung 5065W | User Manual (user Manual) (ver.1.0) (English) - Page 47
Special Features - Samsung 5065W | User Manual (user Manual) (ver.1.0) (English) - Page 48
can operate in four different modes: TV, VCR, Cable, or DVD. Pressing manual for your brand of VCR. Make sure you enter three digits of the code, even if the first digit is a "0". (If more than one code is listed, try the first one.) 5 Press the Power button on the remote control. Your VCR should turn - Samsung 5065W | User Manual (user Manual) (ver.1.0) (English) - Page 49
47 of this manual for your brand of cable box. Make sure you enter three digits of the code, even if the first digit is a "0." If there is more than one code listed, try the first one. 5 Press the Power button on the remote control. Your cable box should turn on if your - Samsung 5065W | User Manual (user Manual) (ver.1.0) (English) - Page 50
page 47 of this manual for your brand of DVD. Make sure you enter three digits of the code, even if the first digit is a "0." If there is more than one code listed, try the first one. 5 Press the Power button on the remote control. Your DVD should turn on if your remote - Samsung 5065W | User Manual (user Manual) (ver.1.0) (English) - Page 51
Remote Control Codes VCR Codes Cable Box Codes DVD Codes 51 - Samsung 5065W | User Manual (user Manual) (ver.1.0) (English) - Page 52
Features Fine Tuning Channels Fine tuning lets you manually adjust the TV's tuner if you have difficulty tuning in a joystick right or left to adjust the fine tuning. To store the fine tuning setting in the TV's memory, move the joystick up. (A heart icon will appear.) To reset the fine tuning - Samsung 5065W | User Manual (user Manual) (ver.1.0) (English) - Page 53
joystick to enter. 2 Move the joystick down to select Color Tone, then move the joystick right repeatedly to select " Automatically senses and processes film signals from all sources and adjusts the picture for optimum quality. Off: Switches off the Film mode. 1 Press supported in 480i only. 53 - Samsung 5065W | User Manual (user Manual) (ver.1.0) (English) - Page 54
the Blue Screen Mode If no signal is being received or the signal is very weak, a blue screen automatically replaces the noisy picture background. If you wish to continue viewing the poor picture, you must set the "Blue screen" mode to "Off". 1 Press the Menu button on the remote control. Move the - Samsung 5065W | User Manual (user Manual) (ver.1.0) (English) - Page 55
. The screen displays in this order: Wide, Panorama, Zoom1, Zoom2, Normal. The name of the screen mode will be displayed at the bottom of the TV screen. Wide Sets the picture to 16:9 wide mode. Wide Panorama Use this mode for the wide aspect ratio of a panoramic - Samsung 5065W | User Manual (user Manual) (ver.1.0) (English) - Page 56
(4:3) screen size in the Component Mode. • Screen size can't be changed in the DVI and PC (1080i) mode. • You can select Wide(TV), Wide(PC) screen size in the DVI and PC (720p) Mode. • You can select Wide(TV), Wide(PC), Normal(4:3) screen size in the DVI and PC (480p) Mode. • If you set PIP ON - Samsung 5065W | User Manual (user Manual) (ver.1.0) (English) - Page 57
you can listen to stereo, mono, or a Separate Audio Program. (SAP audio is usually a foreign-language translation. Sometimes SAP has to select "Mono", "SAP" or"Stereo". 4 Press the Menu button to exit. Guide to MTS Settings • Choose Stereo for channels that are broadcasting in stereo. • Choose Mono - Samsung 5065W | User Manual (user Manual) (ver.1.0) (English) - Page 58
Special Features Dolby Virtual This feature allows the TV's L/R speakers to provide a home Theater-like Dolby effect. The center and surround sounds are mixed into the L/R speakers. 1 Press the Menu button. Move the joystick - Samsung 5065W | User Manual (user Manual) (ver.1.0) (English) - Page 59
BBE BBE is a built-in effect that adds clarity, punch and dynamics to the sound. 1 Press the Menu button. Move the joystick down to select SOUND, then press the joystick to enter. 2 Move the joystick down to select BBE. 3 Move the joystick to the right or left to select "On"or "Off". 4 Press the - Samsung 5065W | User Manual (user Manual) (ver.1.0) (English) - Page 60
Features Auto Volume Each broadcasting station has its own signal conditions, and it is inconvenient to adjust the volume every time the channel is changed. "Auto volume" automatically adjusts the volume of the desired channel by lowering the sound output when the modulation signal is high or by - Samsung 5065W | User Manual (user Manual) (ver.1.0) (English) - Page 61
right or left to turn closed captioning on/off. you change channels. (These do not indicate the TV is picture. In text mode, information unrelated to the program, such as news or weather, is displayed. Text often covers a large portion of the screen. 4 If you wish, use the joystick button to change - Samsung 5065W | User Manual (user Manual) (ver.1.0) (English) - Page 62
TV is the Picture-in-Picture (PIP) feature. The advanced PIP system allows you to watch two different pictures at once, even if you don't have a VCR connected to your TV NOTES • Picture-in-Picture doesn't function when the V-chip is active. • If you turn the TV off while watching and turn it on - Samsung 5065W | User Manual (user Manual) (ver.1.0) (English) - Page 63
TV's input jacks. For more information about external signals, see "Viewing an External Signal Source" (See page 41). If you select "TV." the PIP image is the same as the main image. 4 Press Menu to exit. NOTE • The PIP subscreen doesn't support ANT-B, Component1, Component2, Component3, PC, and DVI - Samsung 5065W | User Manual (user Manual) (ver.1.0) (English) - Page 64
source is TV during PIP ON, you can select the broadcasting source of PIP picture separately from the main picture. (If the main picture is ANT-B CATV". 3 If an antenna is connected, the setting is "AIR." If a Cable TV system is providing the signal, move the joystick to the left or right until the - Samsung 5065W | User Manual (user Manual) (ver.1.0) (English) - Page 65
channel in the PIP image will appear in the main image, and vice versa. 4 Press Menu to exit. NOTE • When ANT-B, Component mode, PC, or DVI is selected, the PIP Swap function doesn't work. 65 - Samsung 5065W | User Manual (user Manual) (ver.1.0) (English) - Page 66
Special Features Changing the Size of the PIP image 1 Press the Menu button. Move the joystick down to select PIP, then press the to the right or left to select "Large", "Double1", "Double2" or "Small". Note: Double function doesn't operate In the Component, PC, DVI mode. 4 Press Menu to exit. 66 - Samsung 5065W | User Manual (user Manual) (ver.1.0) (English) - Page 67
Changing the Picture-in-Picture Channel After you set the PIP signal source (antenna or cable), it is easy to change channels. 1 Press the joystick down to select "Channel". 3 Move the joystick to the right or left to change the channel of the PIP image. 4 Press Menu to exit. NOTE • The PIP channels - Samsung 5065W | User Manual (user Manual) (ver.1.0) (English) - Page 68
select "Sound Select". 3 Move the joystick to the right or left to switch Main or Sub audio source. Main is for the main TV picture audio, and Sub is for the PIP picture audio. 4 Press Menu to exit. Changing the Location of the PIP image Press the Locate button repeatedly to move the PIP image from - Samsung 5065W | User Manual (user Manual) (ver.1.0) (English) - Page 69
or changed. Note: The V-chip doesn't function when the Picture-in-Picture TV set is "0-0-0-0." 3 After entering a valid PIN number, the "V-chip" screen will appear. Move the joystick down to select "Change PIN", then press the joystick to enter. The Change POWER OFF → Mute → 8 → 2 → 4 → POWER ON. 69 - Samsung 5065W | User Manual (user Manual) (ver.1.0) (English) - Page 70
up a personal identification number (PIN), and enable the V-Chip. (See previous section.) Parental restrictions can be set up using either of two methods: The TV guidelines or the MPAA rating. 1 Press the Menu button. Move the joystick down to select SETUP, then press the joystick to enter. Move the - Samsung 5065W | User Manual (user Manual) (ver.1.0) (English) - Page 71
category. Move the joystick to the right. To select a different TV-Rating, move the joystick down or up and then repeat the process. Note 1: TV-Y7, TV-PG, TV-14 and TV-MA have additional options. See the next step to change any of the following sub-ratings: FV:Fantasy violence, D:Dialog, L:Language - Samsung 5065W | User Manual (user Manual) (ver.1.0) (English) - Page 72
change the sub-rating. Note: The V-chip will automatically block certain categories that are "More restrictive". For example, if you block "L" sub-rating in TV-PG, then the "L" sub-ratings in TV-14 and TV , X The MPAA rating system uses the Motion Picture Association of America (MPAA) system, and its - Samsung 5065W | User Manual (user Manual) (ver.1.0) (English) - Page 73
: "Excessive rating." To resume normal viewing, tune to a different channel using the number buttons. Under certain conditions (depending on the rating of the local TV programs) the V-Chip might lock out all the channels. In this case, use the V-Chip button for an "emergency escape": Press the Menu - Samsung 5065W | User Manual (user Manual) (ver.1.0) (English) - Page 74
SAMSUNG - Samsung 5065W | User Manual (user Manual) (ver.1.0) (English) - Page 75
PC Display - Samsung 5065W | User Manual (user Manual) (ver.1.0) (English) - Page 76
PC Display Using Your TV as a Computer (PC) Display How to connect Your PC to the TV Note: This figure shows the Standard Connector-jack panel. The actual configuration on your TV may be different, depending on the model. 15Pin(D-Sub) Cable Audio Cable 76 - Samsung 5065W | User Manual (user Manual) (ver.1.0) (English) - Page 77
apply in almost all cases. (If not, contact your computer manufacturer or Samsung Dealer.) First, click on "Settings" on the Windows start menu. dialog-box. The two key variables that apply to the TV-PC interface are "resolution" and "colors." The correct settings for these two variables are: * - Samsung 5065W | User Manual (user Manual) (ver.1.0) (English) - Page 78
different, depending on the manufacturer (and depending on your particular version of Windows). Check your PC instruction book for information about connecting your PC to a TV display-monitor. • Same modes as PC are supported for the signal input to the DVI jack. Only a separate sync signal is - Samsung 5065W | User Manual (user Manual) (ver.1.0) (English) - Page 79
self-adjust to the incoming video signal. The values of fine, coarse and position are adjusted automatically. 1 Press TV/VIDEO on the remote control. Move the joystick up or down to select PC, then press the joystick to enter. 2 Press the Menu button. Move - Samsung 5065W | User Manual (user Manual) (ver.1.0) (English) - Page 80
the frequency adjustments to the utmost and fine tune again. After the noise has been reduced, re-adjust the picture so that it is aligned on the center of screen. Frequency Adjustment 1 Press TV/VIDEO on the remote control. Move the joystick up or down to select PC, then press the joystick - Samsung 5065W | User Manual (user Manual) (ver.1.0) (English) - Page 81
Changing the Position of the Image (Moving left, right, up and down) After connecting the TV to your PC, adjust the position of screen if it is not well-aligned. 1 Press TV input to DVI, you can't adjust the quality and position of picture. To Initialize the Screen Position and Picture Quality - Samsung 5065W | User Manual (user Manual) (ver.1.0) (English) - Page 82
the TV screen regardless of the aspect ratio of the input source. Wide (PC) Scales the picture to 92% of the screen regardless of the aspect ratio of the input source. Expand Scales the picture to the aspect ratio of the input source. Normal Displays the picture as it is without changing the aspect - Samsung 5065W | User Manual (user Manual) (ver.1.0) (English) - Page 83
Aspect Supported settings Source (PC/DVI) 1920 x 1080i 1280 x 720 1024 x 768 720 x 483 (480p) Others Aspect Wide(TV) Wide(TV) ➝ Wide(PC) Wide(TV) ➝ Wide(PC) ➝ Expand Wide(TV) ➝ Wide(PC) ➝ Normal Wide(TV) ➝ Wide(PC) ➝ Expand ➝ Normal NOTES • In VGA (640x480) and SVGA (800x600) modes, the Wide(TV), - Samsung 5065W | User Manual (user Manual) (ver.1.0) (English) - Page 84
SAMSUNG - Samsung 5065W | User Manual (user Manual) (ver.1.0) (English) - Page 85
Appendix - Samsung 5065W | User Manual (user Manual) (ver.1.0) (English) - Page 86
Appendix Troubleshooting Before you call a service technician, please scan this list of problems and possible solutions. It may save you time and money. Problem Possible Solution Poor picture quality. Poor sound quality or no sound. No picture or sound. No color or wrong colors. Picture rolls - Samsung 5065W | User Manual (user Manual) (ver.1.0) (English) - Page 87
DLP Projection TV projects the image onto a large screen by applying an optical system. If you place the TV set face down, it might cause a problem because TV channel frequencies. Specifications Model Voltage Frequency of Operation Power Consumption Dimension (W x D x H) Weight HLM4365W HLM5065W - Samsung 5065W | User Manual (user Manual) (ver.1.0) (English) - Page 88
DLPTV Samsung Electronics of America, Inc. Service Division 400 Valley Road, Suite 201 Mt. Arlington, N.J. 07660 TEL: 1-800-SAMSUNG (1-800-726-7864) www.samsungusa.com BP68-00030A-00(ENG)
-
 1
1 -
 2
2 -
 3
3 -
 4
4 -
 5
5 -
 6
6 -
 7
7 -
8
-
9
-
10
-
11
-
12
-
13
-
14
-
15
-
16
-
17
-
18
-
19
-
20
-
21
-
22
-
23
-
24
-
25
-
26
-
27
-
28
-
29
-
30
-
31
-
32
-
33
-
34
-
35
-
36
-
37
-
38
-
39
-
40
-
41
-
42
-
43
-
44
-
45
-
46
-
47
-
48
-
49
-
50
-
51
-
52
-
53
-
54
-
55
-
56
-
57
-
58
-
59
-
60
-
61
-
62
-
63
-
64
-
65
-
66
-
67
-
68
-
69
-
70
-
71
-
72
-
73
-
74
-
75
-
76
-
77
-
78
-
79
-
80
-
81
-
82
-
83
-
84
-
85
-
86
-
87
-
88
 |
 |

INSTRUCTION MANUAL
HLM4365W/HLM5065W/HLM437W/HLM507W/HLM617W
DLPTV