Samsung 920NW User Guide
Samsung 920NW - SyncMaster - 19" LCD Monitor Manual
 |
UPC - 729507800905
View all Samsung 920NW manuals
Add to My Manuals
Save this manual to your list of manuals |
Samsung 920NW manual content summary:
- Samsung 920NW | User Guide - Page 1
Install driver SyncMaster 920NW - Samsung 920NW | User Guide - Page 2
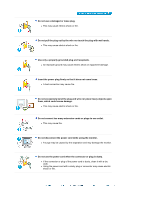
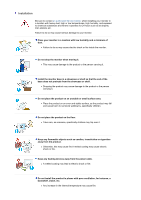
not disassemble Do not touch Important to read and understand at all times Disconnect the plug from the outlet Ground to prevent an electric shock Power When not used for an extended period of time, set your computer to DPMS. If using a screen saver, set it to active screen mode. - Samsung 920NW | User Guide - Page 3
shock or equipment damage. Insert the power plug firmly so that it does not come loose. z A bad connection may cause one outlet. z This may cause fire. Do not disconnect the power cord while using the monitor. z A surge may be caused by the separation and may damage the monitor. Do not use the power - Samsung 920NW | User Guide - Page 4
Be sure to contact an authorized Service Center, when installing your monitor in a location with heavy dust, high or low temperatures, high humidity, and exposed to chemical substances and where it operates for 24 hours such as - Samsung 920NW | User Guide - Page 5
in the owner's manual. When installing the product, make sure to keep it away from the wall (more than 10 cm/4 inches) for ventilation purposes if children play with it. Clean When cleaning the monitor case or the surface of the TFT-LCD screen, wipe with a slightly moistened, soft fabric. Do - Samsung 920NW | User Guide - Page 6
interior over an extended period of time may cause a malfunction or fire. Others Do not remove the cover (or back). z This may cause electric shock or fire. z Refer to a qualified servicing company. If your monitor does not operate normally - in particular, if there is any unusual sound or smell - Samsung 920NW | User Guide - Page 7
monitor is dropped or the casing is damaged, turn the monitor off and unplug the power cord. Then contact the Service Center . z The monitor may electric shock or fire due to damage to the cable. Do not cover the vents on the monitor cabinet. z Bad ventilation may cause a breakdown or fire. Do not - Samsung 920NW | User Guide - Page 8
may cause undesirable picture quality. 19 inch Wide (48 cm) - 1440 X 900 Viewing the monitor continuously at a too close angle may result in damage to your eyesight. To ease eye strain, take at least a five-minute break after every hour of using the monitor. Do not install the product on an unstable - Samsung 920NW | User Guide - Page 9
of about 45 ~ 50 cm between your eyes and the monitor screen. Look at the screen from slightly above it, and have the monitor directly in front of you. z Tilt the monitor upwards by 10 ~20 degrees. Adjust the monitor height so that the top of the monitor is slightly below eye level. z Adjust the - Samsung 920NW | User Guide - Page 10
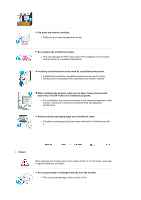
Please make sure the following items are included with your monitor. If any items are missing, contact your dealer. Contact a local dealer to buy optional items. Unpacking Without stand Monitor With stand Monitor & Simple Stand Manual Bottom - Samsung 920NW | User Guide - Page 11
Guide, Monitor Driver D-sub Cable Power Cord Front MENU button [ ] MagicBright™ [] Opens the OSD menu. Also use to exit the OSD menu or return to the previous menu value. You can easily select one of four settings by simply pressing MagicBright™ control button. 1) Custom Although the values are - Samsung 920NW | User Guide - Page 12
on the screen, push the button to adjust brightness. Adjust buttons [ ] Adjust items in the menu. Enter button [ ] Activates a highlighted menu item. AUTO button [ AUTO ] Power button [ ]/ Power indicator Use this button for auto adjustment. Use this button for turning the monitor on and off - Samsung 920NW | User Guide - Page 13
cable to the 15-pin, D-sub port on the back of your monitor. [ RGB IN ] 2-2. Connected to a Macintosh. Connect the monitor to the Macintosh computer using the D-sub connection cable. Turn on your computer and monitor. If your monitor displays an image, installation is completed. Using the Stand - Samsung 920NW | User Guide - Page 14
) 1. Turn off your monitor and unplug its power cord. 2. Lay the LCD monitor face-down on a flat surface with a cushion beneath it to protect the screen. 3. Remove screws and then remove the stand from the LCD monitor. 4. Align the mounting interface pad with the holes in the rear cover mounting - Samsung 920NW | User Guide - Page 15
installation is completed. Installing the Monitor Driver (Manual) Windows Vista | Windows XP | Windows 2000 | Windows ME | Windows NT | Linux When prompted by the operating system for the monitor driver, insert the CD-ROM included with this monitor. Driver installation is slightly different from one - Samsung 920NW | User Guide - Page 16
Prepare a blank disk and download the driver program file at the Internet web site shown below. z Internet web site : http://www.samsung.com/ (Worldwide) http://www.samsung.com/monitor (U.S.A) http://www.sec.co.kr/monitor (Korea) http://www.samsungmonitor.com.cn/ (China) Microsoft® Windows Vista™ - Samsung 920NW | User Guide - Page 17
is under certifying MS logo, and this installation doesn't damage your system. The certified driver will be posted on Samsung Monitor homepage http://www.samsung.com/ 6. Click "Update Driver..." in the "Driver" tab. 7. Check the "Browse my computer for driver software" checkbox and click "Let me - Samsung 920NW | User Guide - Page 18
Close"→ "Close" → "OK" → "OK" on the following screens displayed in sequence. Microsoft® Windows® XP Operating System 1. Insert CD into the CD-ROM driver. 2. Click "Start" -> "Control Panel" then click the "Appearance and Themes" Icon. 3. Click "Display" icon and choose the "Settings" tab then click - Samsung 920NW | User Guide - Page 19
the "Properties" button on the "Monitor" tab and select "Driver" tab. 5. Click "Update Driver.." and select "Install from a list or.." then click "Next" button. 6. Select "Don't search ,I will.." then click "Next" and then click "Have disk". 7. Click the "Browse" button then choose A:(D:\Driver) and - Samsung 920NW | User Guide - Page 20
doesn't damage your system.The certified driver will be posted on Samsung Monitor homepage. http://www.samsung.com/ 9. Click the "Close" button then click "OK" button continually. 10. Monitor driver installation is completed. Microsoft® Windows® 2000 Operating System When you can see "Digital - Samsung 920NW | User Guide - Page 21
location of the driver". 7. Choose "Display a list of all the driver in a specific location.." then click "Next" button. 8. Click the "Have Disk" button 9. Specify A:\(D:\driver) then click "OK" button. 10. Select "Show all devices" and choose the monitor that corresponds to the one you connected to - Samsung 920NW | User Guide - Page 22
1. [ ]Use this button to open the on-screen menu and exit from the menu screen or close screen adjustment menu. 2. [ ]These buttons allow you to adjust items in the menu. 3. [ ]Press this button to activate a highlighted menu item. 4. [AUTO]Press to self-adjust to the incoming PC signal. The values - Samsung 920NW | User Guide - Page 23
Menu AUTO Description When the 'AUTO' button is pressed, the Auto Adjustment screen appears as shown in the animated screen on the center. Auto adjustment allows the monitor to self-adjust to the incoming video signal. The values of fine, coarse and position are adjusted automatically. (Available - Samsung 920NW | User Guide - Page 24
of settings or prevent others from adjusting the current settings. Lock : Hold down the menu button for more than five seconds to activate the OSD adjustment lock function. Unlock : Hold down the menu button for more than five seconds to deactivate the OSD adjustment lock function. Though the OSD - Samsung 920NW | User Guide - Page 25
MagicBright™ Menu Description Then push the MagicBright button again to circle through available MagicBright™ preconfigured modes. - Four different modes(Custom/Text/Internet/Entertain) Brightness Menu Brightness Description When OSD is not on the screen, push the button to adjust brightness. - Samsung 920NW | User Guide - Page 26
Reset Gamma Sharpness V-Position H-Position V-Position Transparency Display Time Picture Menu Brightness Contrast Description You can use the on-screen menus to change the brightness according to personal preference. Direct Access Feature : When OSD is not on the screen, push the [ ] button - Samsung 920NW | User Guide - Page 27
color can be changed and one of four modes can be selected - Cool, Normal, Warm and Custom. Cool - Makes whites bluish. Normal - Keeps whites white. Warm - Makes whites reddish. Custom - Select this mode when you want to adjust the image according to your preferences. [MENU MENU] Adjusts individual - Samsung 920NW | User Guide - Page 28
] Removes noise such as horizontal stripes. If the noise persists even after fine tuning, repeat it after adjusting the frequency (clock speed). (Available in analog mode only) [MENU MENU] Changes the clearance of image. [MENU MENU] Changes the horizontal position of the monitor's entire display - Samsung 920NW | User Guide - Page 29
horizontal position where the OSD menu appears on your monitor. [MENU MENU] You can change the vertical position where the OSD menu appears on your monitor. [MENU MENU] Change the transparency of the background of the OSD. [MENU MENU] The menu will be automatically turned off if no adjustments - Samsung 920NW | User Guide - Page 30
Menu Image Reset Color Reset Description Image parameters are replaced with the factory default values. [MENU MENU] Color parameters are replaced with the factory default values. [MENU MENU] Play/Stop Information - Samsung 920NW | User Guide - Page 31
Menu Information Description Shows a video source, display mode on the OSD screen. [MENU → , → MENU] - Samsung 920NW | User Guide - Page 32
section to see if you can remedy any problems yourself. If you do need assistance, please call the phone number on the Information section or contact your dealer. Symptom No images on the screen. I cannot turn on the monitor. Check List Solutions Is the power cord connected properly? Check the - Samsung 920NW | User Guide - Page 33
Driver Installation Instructions. See the video card manual to see if Install the monitor driver according the Plug & Play (VESA DDC) to the Driver Installation Instructions. function can be supported. Check the following items if there is trouble with the monitor. 1. Check if the power cord - Samsung 920NW | User Guide - Page 34
of the driver used. (Refer to the computer or the video card manual for details.) How can I adjust the resolution? Windows ME/XP/2000 : Set the resolution at the Control Panel→Display→Settings. * Contact the video card manufacturer for details. How can I set the Power Saving Windows ME/XP/2000 - Samsung 920NW | User Guide - Page 35
the computer. Therefore, if there is trouble with the computer or the video card, this can cause the monitor to become blank, have poor coloring, noise, Video mode not supported, etc. In this case, first check the source of the problem, and then contact the Service Center or your dealer. z Judging - Samsung 920NW | User Guide - Page 36
Model Name SyncMaster 920NW LCD Panel Size 19 " Wide Diagonal (48 cm) Display area 410.4 mm(H) x 256.5 mm(V) Pixel Pitch 0.285 mm (H) x 0.285 mm (V) Synchronization Horizontal 30 ~ 81 kHz Vertical 56 ~ 75 Hz Display Color 16.19M(6bit with FRC) Resolution Optimum resolution 1440 - Samsung 920NW | User Guide - Page 37
utility installed on your computer to set up this feature. State Power Indicator Power Consumption Normal Operation Green Less than 36 W Power saving mode Green, Blinking Less than 1 W (Off- mode) Power off (Power button OFF) EPA/ENERGY 2000 Off Less than 1 W (120 Vac / 220 Vac) This monitor is - Samsung 920NW | User Guide - Page 38
screen may go blank while the power LED is on. Refer to the video card manual and adjust the screen as follows. Table 1. Preset Timing Modes Display Horizontal Frequency The time to scan one line connecting the right edge to the left edge of the screen horizontally is called Horizontal Cycle and - Samsung 920NW | User Guide - Page 39
COSTA RICA ECUADOR EL SALVADOR GUATEMALA JAMAICA PANAMA PUERTO RICO REP. DOMINICA TRINIDAD & TOBAGO VENEZUELA Latin America 0800-333-3733 4004-0000 800-726-7864 (SAMSUNG) 01-8000112112 0-800-507-7267 1-800-10-7267 800-6225 1-800-299-0013 1-800-234-7267 800-7267 1-800-682-3180 1-800-751-2676 1-800 - Samsung 920NW | User Guide - Page 40
19 70 030-6227 515 3260 SAMSUNG(7267864) (€ 0,15/min) 01805 - 121213 (€ 0,14/Min) 06-80-SAMSUNG (7267864) 800 SAMSUNG samsung.ee http://www.samsung.com/lv http://www.samsung.lt http://www.samsung.kz http://www.samsung.ru http://www.samsung.com/ur http://www.samsung.uz AUSTRALIA CHINA HONG KONG INDIA - Samsung 920NW | User Guide - Page 41
international standard VESA DDC for the Plug & Play function. Resolution The number of horizontal and vertical dots used to compose the screen image is called 'resolution'. This number shows the accuracy of the display. High resolution is good for performing multiple tasks as more image information - Samsung 920NW | User Guide - Page 42
black pixels could be seen. This is not from bad quality and you can use it without uneasiness. { For example, the number of TFT LCD sub pixels that is contained in this product are 3,888,000. 3. When you clean the monitor display screen that is appeared as window termination button SAMSUNG - Samsung 920NW | User Guide - Page 43
416, Mae tan-3dong, Yeongtong - gu, Suwon City, Gyeonggi-do Korea - Samsung 920NW | User Guide - Page 44
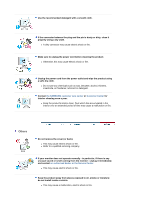
hours in use - Turn the power off for 2 hours after 12 hours in use z Use a Screen saver if possible - Screen saver in one color or a moving image is recommended. z Set the Monitor to power off with the PC Display Properties Power Scheme. Suggestions for specific applications Ex) Airports, Transit - Samsung 920NW | User Guide - Page 45
Ex) The best way to protect your monitor from Image retention is to set your PC or System to operate a Screen Saver program when you are not using it. Image retention may not occur when a LCD panel is operated under normal conditions. Normal conditions are defined as continuously changing video - Samsung 920NW | User Guide - Page 46
Correct Disposal of This Product (Waste Electrical & Electronic Equipment) - Europe only (Applicable in the European Union and other European countries with separate collection systems) This marking shown on the product or its literature, indicates that it should not be disposed with other household
-
 1
1 -
 2
2 -
 3
3 -
 4
4 -
 5
5 -
 6
6 -
 7
7 -
8
-
9
-
10
-
11
-
12
-
13
-
14
-
15
-
16
-
17
-
18
-
19
-
20
-
21
-
22
-
23
-
24
-
25
-
26
-
27
-
28
-
29
-
30
-
31
-
32
-
33
-
34
-
35
-
36
-
37
-
38
-
39
-
40
-
41
-
42
-
43
-
44
-
45
-
46
 |
 |

Install driver
SyncMaster
920NW