Samsung 932BW Quick Guide (easy Manual) (ver.1.0) (English)
Samsung 932BW - SyncMaster - 19" LCD Monitor Manual
 |
View all Samsung 932BW manuals
Add to My Manuals
Save this manual to your list of manuals |
Samsung 932BW manual content summary:
- Samsung 932BW | Quick Guide (easy Manual) (ver.1.0) (English) - Page 1
SyncMaster 932BW - Samsung 932BW | Quick Guide (easy Manual) (ver.1.0) (English) - Page 2
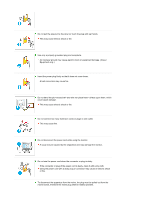
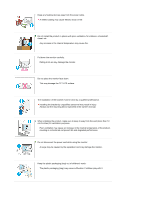
. Prohibited Do not disassemble Do not touch Important to read and understand at all times Disconnect the plug from the outlet Ground to prevent an electric shock Power When not used for extended period of time, set your computer to DPMS. If using a screen saver, set it to active screen mode. The - Samsung 932BW | Quick Guide (easy Manual) (ver.1.0) (English) - Page 3
. A surge may be caused by the separation and may damage the monitor. Do not use the power cord when the connector or plug is dusty. If the connector or plug of the power cord is dusty, clean it with a dry cloth. Using the power cord with a dusty plug or connector may cause an electric shock or fire - Samsung 932BW | Quick Guide (easy Manual) (ver.1.0) (English) - Page 4
fire. Installation Be sure to contact an authorized Service Center, when installing your monitor in a location with heavy dust, high or surface, as the product may fall and cause harm to someone walking by, specifically children. TO PREVENT THE SPREAD OF FIRE, KEEP CANDLES OR OTHER OPEN FLAMES - Samsung 932BW | Quick Guide (easy Manual) (ver.1.0) (English) - Page 5
Do not place the monitor face down. This may damage the TFT-LCD surface. The installation of the bracket must be done by a qualified professional. Installing the bracket by unqualified personnel may result in injury. Always use the mounting device specified in the owner's manual. When installing the - Samsung 932BW | Quick Guide (easy Manual) (ver.1.0) (English) - Page 6
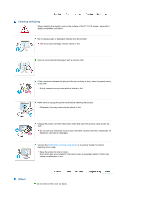
Cleaning and Using When cleaning the monitor case or the surface of the TFT-LCD screen, wipe with a slightly moistened, soft fabric. Do not spray water or detergent directly onto the monitor. This may cause damage, electric shock or fire. Use the recommended detergent with a smooth cloth. If the - Samsung 932BW | Quick Guide (easy Manual) (ver.1.0) (English) - Page 7
water or outdoors where it could be exposed to snow or rain. If the monitor is dropped or the casing is damaged, turn the monitor off and unplug the power cord. Then contact the Service Center. The monitor may malfunction, causing electric shock or fire. Disconnect the plug from the outlet during - Samsung 932BW | Quick Guide (easy Manual) (ver.1.0) (English) - Page 8
the Service Center. When viewing a fixed screen for an extended period of time, residual image or blurriness may appear. Change the mode to energy saving mode or set a screensaver to a changing picture when away from the monitor for an extended period of time. Adjust the resolution and frequency - Samsung 932BW | Quick Guide (easy Manual) (ver.1.0) (English) - Page 9
fire. When moving the monitor, turn off and unplug the power cord. Make sure that all monitor screen. Look at the screen from slightly above it, and have the monitor directly in front of you. z Tilt the monitor upwards by 10 ~20 degrees. Adjust the monitor height so that the top of the monitor - Samsung 932BW | Quick Guide (easy Manual) (ver.1.0) (English) - Page 10
Correct Disposal of This Product (Waste Electrical & Electronic Equipment) - Europe only (Applicable in the European Union and other European countries with separate collection systems) This marking shown on the product or its literature, indicates that it should not be disposed with other household - Samsung 932BW | Quick Guide (easy Manual) (ver.1.0) (English) - Page 11
for 2 hours after 12 hours in use z Use a Screen saver if possible - Screen saver in one color or a moving image is recommended. z Set the Monitor to power off with the PC Display Properties Power Scheme. Suggestions for specific applications Ex) Airports, Transit Stations, Stock Markets, Banks, and - Samsung 932BW | Quick Guide (easy Manual) (ver.1.0) (English) - Page 12
Ex) The best way to protect your monitor from Image retention is to set your PC or System to operate a Screen Saver program when you are not using it. Image retention may not occur when a LCD panel is operated under normal conditions. Normal conditions are defined as continuously changing video - Samsung 932BW | Quick Guide (easy Manual) (ver.1.0) (English) - Page 13
Model Features RTA Monitor RTA (Response Time Accelerator) A function that accelerates the response speed of the . Package Contents Please make sure the following items are included with your monitor. If any items are missing, contact your dealer. Contact a local dealer to buy optional items. - Samsung 932BW | Quick Guide (easy Manual) (ver.1.0) (English) - Page 14
Cable Quick Setup Guide Warranty Card (Not available in all locations) User's Guide, Monitor Driver, Natural Color software, MagicTune™ software Others Power Cord D-sub Cable Cleaning Cloth Will be applied to black and high gloss models only. Sold separately DVI Cable Your Monitor Front - Samsung 932BW | Quick Guide (easy Manual) (ver.1.0) (English) - Page 15
its own pre-configured brightness value. You can easily select one of seven settings by simply pressing MagicBright™ control button. 1) Custom Although the values are Click here to see an animation clip When OSD is not on the screen, push the button to adjust brightness. >> Click here to see an animation - Samsung 932BW | Quick Guide (easy Manual) (ver.1.0) (English) - Page 16
for long periods. Rear The configuration at the back of the monitor may vary from product to product. POWER port DVI IN port RGB IN port Kensington Lock Connect the power cord for your monitor to the power port on the back of the monitor. Connect the DVI Cable to the DVI IN port on the - Samsung 932BW | Quick Guide (easy Manual) (ver.1.0) (English) - Page 17
Model Connecting Cables Connect the power cord for your monitor to the power port on the back of the monitor. Plug the power cord for the monitor into a nearby outlet. Use appropriate connection for your computer. Using the D-sub (Analog) connector on the video card. - Connect the signal cable to - Samsung 932BW | Quick Guide (easy Manual) (ver.1.0) (English) - Page 18
You can tilt the monitor upwards at an angle of 0° to18°. - Samsung 932BW | Quick Guide (easy Manual) (ver.1.0) (English) - Page 19
web site :http://www.samsung.com/ (Worldwide) http://www.samsung.com/monitor (U.S.A) http://www.sec.co.kr/monitor (Korea) http://www.samsungmonitor.com.cn/ (China) Installing the Monitor Driver (Automatic) Insert the CD into the CD-ROM drive. Click "Windows". Choose your monitor model in the model - Samsung 932BW | Quick Guide (easy Manual) (ver.1.0) (English) - Page 20
your system. The certified driver will be posted on Samsung Monitor homepage http://www.samsung.com/ Monitor driver installation is completed. Installing the Monitor Driver (Manual) Windows Vista | Windows XP | Windows 2000 | Windows ME | Windows NT | Linux Microsoft® Windows Vista™ Operating System - Samsung 932BW | Quick Guide (easy Manual) (ver.1.0) (English) - Page 21
MS logo, and this installation doesn't damage your system. The certified driver will be posted on Samsung Monitor homepage http://www.samsung.com/ Click "Update Driver..." in the "Driver" tab. Check the "Browse my computer for driver software" checkbox and click "Let me pick from a list of device - Samsung 932BW | Quick Guide (easy Manual) (ver.1.0) (English) - Page 22
"→ "Close" → "OK" → "OK" on the following screens displayed in sequence. Microsoft® Windows® XP Operating System Insert the CD into the CD-ROM drive. Click "Start" → "Control Panel" then click the "Appearance and Themes" icon. Click "Display" icon and choose the "Settings" tab then click "Advanced." - Samsung 932BW | Quick Guide (easy Manual) (ver.1.0) (English) - Page 23
on the "Monitor" tab and select "Driver" tab. Click "Update Driver." and select "Install from a list or." then click the "Next" button. Select "Don't search ,I will." then click "Next" and then click "Have disk". Click the "Browse" button then choose A:(D:\Driver) and choose your monitor model in - Samsung 932BW | Quick Guide (easy Manual) (ver.1.0) (English) - Page 24
this installation doesn't damage your system. The certified driver will be posted on Samsung Monitor homepage http://www.samsung.com/ Click the "Close" button then click the "OK" button continually. Monitor driver installation is completed. Microsoft® Windows® 2000 Operating System When you can see - Samsung 932BW | Quick Guide (easy Manual) (ver.1.0) (English) - Page 25
"Display" icon. Select the "Settings" tab and click the "Advanced Properties" button. Select the "Monitor" tab. Click the "Change" button in the "Monitor Type" area. Choose "Specify the location of the driver." Choose "Display a list of all the driver in a specific location." then click the "Next - Samsung 932BW | Quick Guide (easy Manual) (ver.1.0) (English) - Page 26
the CD included with the Samsung monitor into the CD-ROM Drive. The initial Natural Color screen will appear. Click on Natural Color in the startup window to install the Natural Color software. To install the program manually, insert the CD included with the Samsung monitor into the CD-ROM Drive - Samsung 932BW | Quick Guide (easy Manual) (ver.1.0) (English) - Page 27
not appear depending on specification of computer system or monitor. If that happens, press F5 Key. Installation Problems (MagicTune™) The Windows™ XP, go to [Control Panel] in the [Start] menu. 2. Click the "Add or Remove Programs" icon in Control Panel. 3. In the "Add or Remove Programs" screen, - Samsung 932BW | Quick Guide (easy Manual) (ver.1.0) (English) - Page 28
allow you to adjust items in the menu. Press this button to activate a highlighted menu item. When the 'AUTO' button is pressed, the Auto Adjustment screen appears as shown in the animated screen on the center. Direct Functions AUTO - Samsung 932BW | Quick Guide (easy Manual) (ver.1.0) (English) - Page 29
pressed, the Auto Adjustment screen appears as shown in the animated screen on the center. Auto adjustment allows the monitor to self-adjust to the accuracy. If you change resolution in the control panel, auto function will be executed automatically. OSD Locked & Unlock In case of pushing AUTO button - Samsung 932BW | Quick Guide (easy Manual) (ver.1.0) (English) - Page 30
In case of pushing MENU button after locking OSD Menu OSD Locked & Unlock Description This is the function that locks the OSD in order to keep the current states of settings or prevent others from adjusting the current settings. Locked : Hold down the menu button for more than five seconds to - Samsung 932BW | Quick Guide (easy Manual) (ver.1.0) (English) - Page 31
available preconfigured modes. - Seven different modes: Custom, Text, Internet, Game, Sport, Movie and Dynamic Contrast. Brightness Menu Brightness Description When OSD is not on the screen, push the button to adjust brightness. - Samsung 932BW | Quick Guide (easy Manual) (ver.1.0) (English) - Page 32
SOURCE Menu SOURCE Description Selects the Video signal while the OSD is off. (Analog/Digital) OSD Function Picture Brightness Color MagicColor Image Coarse OSD Language Setup Auto Source Information Contrast Color Tone Fine H-Position Image Reset Color Control Sharpness V-Position - Samsung 932BW | Quick Guide (easy Manual) (ver.1.0) (English) - Page 33
menus to change the brightness according to personal preference. MENU MENU You can use the on-screen menus to change the contrast according to personal preference. ( Not available in MagicColor mode of Full and Intelligent. ) Play/Stop MENU MENU Color : Not available - Samsung 932BW | Quick Guide (easy Manual) (ver.1.0) (English) - Page 34
a new technology that Samsung has exclusively developed to improve digital image and to display natural color more clearly without disturbing image quality. MagicColor Off Returns to the original mode. Demo The screen before applying MagicColor appears on the right and the screen after applying - Samsung 932BW | Quick Guide (easy Manual) (ver.1.0) (English) - Page 35
in MagicColor mode of Full and Intelligent. ) MENU MENU Changes the horizontal position of the monitor's entire display. (Available in analog mode only) MENU MENU Changes the vertical position of the monitor's entire display. (Available in analog mode only) MENU MENU Menu Description You can - Samsung 932BW | Quick Guide (easy Manual) (ver.1.0) (English) - Page 36
the vertical position where the OSD menu appears on your monitor. MENU MENU Change the transparency of the background of the OSD. MENU MENU The menu will be automatically turned off if no adjustments are made for a certain time period. You can set the amount of time the menu will wait before - Samsung 932BW | Quick Guide (easy Manual) (ver.1.0) (English) - Page 37
function so that the panel operates at its original response speed. MENU MENU Information Menu Information Description Shows a video source, display mode on the OSD screen. MENU → , - Samsung 932BW | Quick Guide (easy Manual) (ver.1.0) (English) - Page 38
any problems yourself. If you do need assistance, please call the phone number on the Information section or contact your dealer. Symptom No images on the screen. I cannot turn on the monitor. Check List Solutions Is the power cord connected properly? Check the power cord connection and supply - Samsung 932BW | Quick Guide (easy Manual) (ver.1.0) (English) - Page 39
→ Settings. Windows ME/2000 : Set the resolution in the Control Panel → Display → Settings. Set the video card by referring to the video card manual. There is a message that Have you installed the monitor driver? Install the monitor driver according to the Driver Installation Instructions. - Samsung 932BW | Quick Guide (easy Manual) (ver.1.0) (English) - Page 40
The frequency can be changed by reconfiguring the video card. Note that video card support can vary, depending on the version of the driver used. (Refer to the computer or the video card manual for details.) Windows XP : Set the resolution in the Control Panel → Appearance and Themes → Display - Samsung 932BW | Quick Guide (easy Manual) (ver.1.0) (English) - Page 41
in the BIOS-SETUP of the computer. Windows ME/2000 : Set the resolution in the Control Panel → Display → Screen Saver. Set the function in the BIOS-SETUP of the computer. Refer to the Windows / Computer Manual Disconnect the power cord and then clean the monitor with a soft cloth, using either - Samsung 932BW | Quick Guide (easy Manual) (ver.1.0) (English) - Page 42
poor coloring, become noisy, and video mode not supported, etc. In this case, first check the source of the problem, and then contact the Service Center or your dealer. Judging the monitor's working condition If there is no image on the screen or a "Not Optimum Mode", "Recommended Mode 1440 x 900 - Samsung 932BW | Quick Guide (easy Manual) (ver.1.0) (English) - Page 43
Specifications General Model Name SyncMaster 932BW LCD Panel Size Display area Pixel Pitch 19 " Wide Diagonal (48 cm) 408.24 mm (H) x 255.15 mm (V) 0.2835 mm (H) x 0.2835 mm (V) Synchronization Horizontal Vertical 30 ~ 81 kHz 56 ~ 75 Hz Display Color 8 bit color (16,2 M) Resolution - Samsung 932BW | Quick Guide (easy Manual) (ver.1.0) (English) - Page 44
software utility installed on your computer to set up this feature. State Power Indicator Power Consumption Normal Operation Blue Less than 42 W Power saving mode Blue, Blinking Less than 1 W Power off EPA/ENERGY 2000 Off Less than 1 W This monitor is EPA ENERGY STAR® compliant and ENERGY2000 - Samsung 932BW | Quick Guide (easy Manual) (ver.1.0) (English) - Page 45
computer is the same as the following Preset Timing Modes, the screen will be adjusted automatically. However, if the signal differs, the screen may go blank while the power LED is on. Refer to the video card manual and adjust the screen as follows. Display Mode MAC, 640 x 480 MAC, 832 x 624 MAC - Samsung 932BW | Quick Guide (easy Manual) (ver.1.0) (English) - Page 46
repetition is called the Vertical Frequency or Refresh Rate. Unit : Hz - Samsung 932BW | Quick Guide (easy Manual) (ver.1.0) (English) - Page 47
5303 http://www.samsung.com http://www.samsung.com/ca http://www.samsung.com/mx http://www.samsung.com/ar http://www.samsung.com/br http://www.samsung.com/cl http://www.samsung.com.co http://www.samsung.com/latin http://www.samsung.com/latin http://www.samsung.com/latin http://www.samsung.com/latin - Samsung 932BW | Quick Guide (easy Manual) (ver.1.0) (English) - Page 48
ESTONIA LATVIA LITHUANIA KAZAKHSTAN RUSSIA UKRAINE UZBEKISTAN Asia Pacific AUSTRALIA CHINA HONG KONG 70 70 19 70 030-6227 515 3260 SAMSUNG(7267864) (€ 0,15/min) 01805 - 121213 (€ 0,14/Min) 06-80-SAMSUNG (7267864) 800 SAMSUNG (7267864) 0032 (0)2 201 24 18 0900 20 200 88 (€ 0,10/Min) 815-56 480 0 801 - Samsung 932BW | Quick Guide (easy Manual) (ver.1.0) (English) - Page 49
://www.samsung.com/za http://www.samsung.com/mea Terms Dot Pitch The image on a monitor is composed of red, green and blue dots. The closer the dots, the higher the resolution. The distance between two dots of the same color is called the 'Dot Pitch'. Unit : mm Vertical Frequency The screen must - Samsung 932BW | Quick Guide (easy Manual) (ver.1.0) (English) - Page 50
quality of picture. You can have an uneven quality of picture in the screen if the best quality of picture is not provided in TFT-LCD. Resolution : 1440 x 900 Vertical frequency (refresh rate) : 60 Hz TFT LCD panel manufactured by using advanced semiconductor technology with precision of 1ppm (one
-
 1
1 -
 2
2 -
 3
3 -
 4
4 -
 5
5 -
 6
6 -
 7
7 -
8
-
9
-
10
-
11
-
12
-
13
-
14
-
15
-
16
-
17
-
18
-
19
-
20
-
21
-
22
-
23
-
24
-
25
-
26
-
27
-
28
-
29
-
30
-
31
-
32
-
33
-
34
-
35
-
36
-
37
-
38
-
39
-
40
-
41
-
42
-
43
-
44
-
45
-
46
-
47
-
48
-
49
-
50
 |
 |
SyncMaster 932BW