Samsung CLP 300 Service Manual - Page 56
Disassembly Procedure, 5.4.1 Cover Unit
 |
UPC - 635753721041
View all Samsung CLP 300 manuals
Add to My Manuals
Save this manual to your list of manuals |
Page 56 highlights
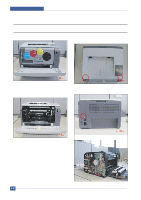
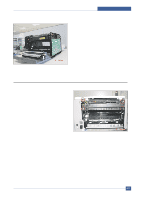
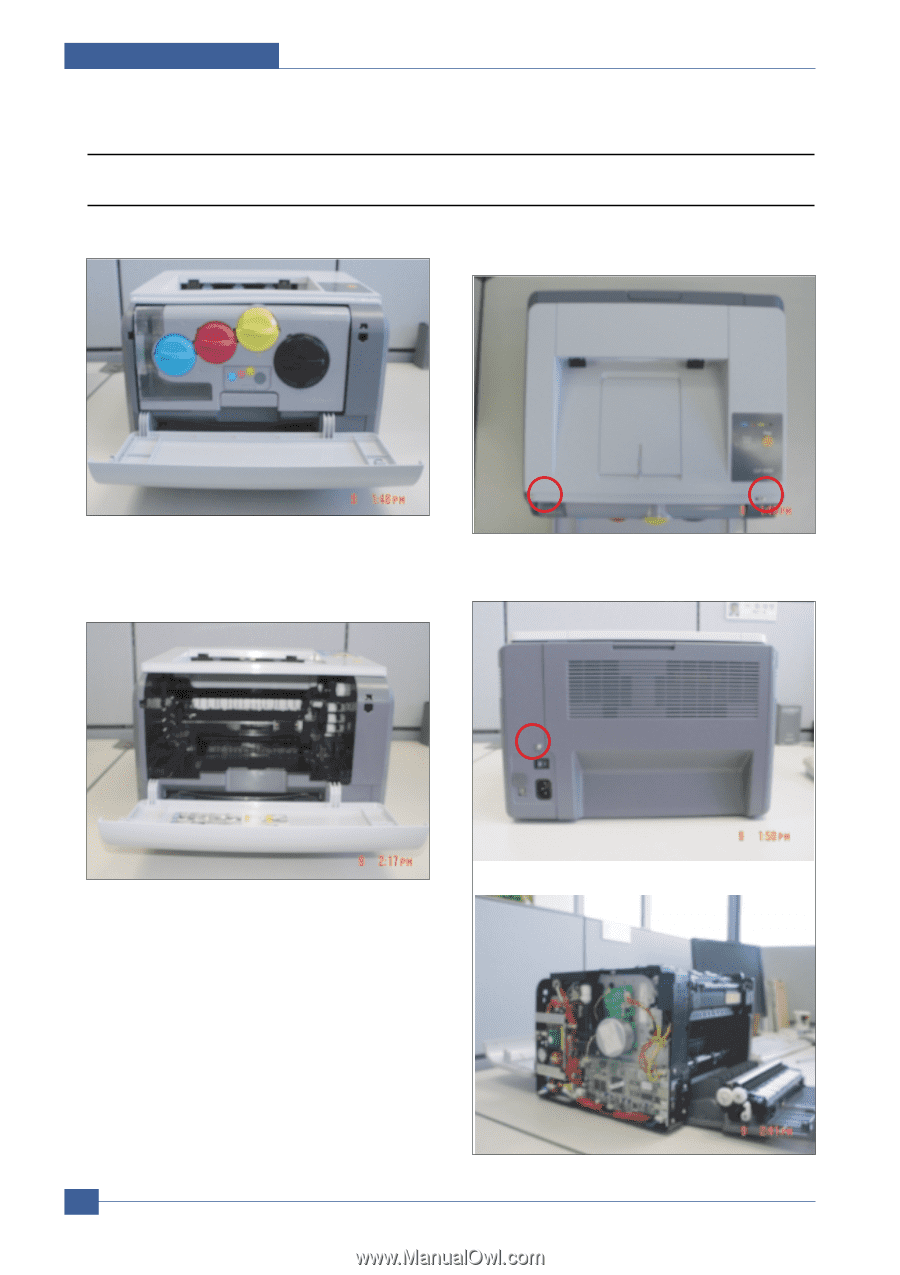
Disassembly and Reassembly 5.4 Disassembly Procedure 5.4.1 Cover Unit 1. Open a Front-Cover and Remove the Imagine Unit. 3. Unscrew 2 screws on the Top Cover and then remove the Top Cover. 2. Remove the ITB Unit 1) Pull out the unit toward out side of printer slightly. 2) Lift up the unit gently. 3) Pull out the unit gently. 4. Unscrew 1 screw on the Right Cover and then remove the Right Cover after open the Rear Cover. 5-10 Service Manual Samsung Electronics
-
 1
1 -
2
-
3
-
4
-
5
-
6
-
7
-
8
-
9
-
10
-
11
-
12
-
13
-
14
-
15
-
16
-
17
-
18
-
19
-
20
-
21
-
22
-
23
-
24
-
25
-
26
-
27
-
28
-
29
-
30
-
31
-
32
-
33
-
34
-
35
-
36
-
37
-
38
-
39
-
40
-
41
-
42
-
43
-
44
-
45
-
46
-
47
-
48
-
49
-
50
-
 51
51 -
 52
52 -
 53
53 -
 54
54 -
 55
55 -
 56
56 -
 57
57 -
 58
58 -
 59
59 -
 60
60 -
 61
61 -
62
-
63
-
64
-
65
-
66
-
67
-
68
-
69
-
70
-
71
-
72
-
73
-
74
-
75
-
76
-
77
-
78
-
79
-
80
-
81
-
82
-
83
-
84
-
85
-
86
-
87
-
88
-
89
-
90
-
91
-
92
-
93
-
94
-
95
-
96
-
97
-
98
-
99
-
100
-
101
-
102
-
103
-
104
-
105
-
106
-
107
-
108
-
109
-
110
-
111
-
112
-
113
-
114
-
115
-
116
-
117
-
118
-
119
-
120
-
121
-
122
-
123
-
124
-
125
-
126
-
127
-
128
-
129
-
130
-
131
-
132
-
133
-
134
-
135
-
136
-
137
-
138
-
139
-
140
-
141
-
142
-
143
-
144
-
145
-
146
-
147
-
148
-
149
-
150
-
151
-
152
-
153
-
154
-
155
-
156
-
157
-
158
-
159
 |
 |
Samsung Electronics
Service Manual
Disassembly and Reassembly
5-10
1. Open a Front-Cover and Remove the Imagine Unit.
2. Remove the ITB Unit
1) Pull out the unit toward out side of printer slightly.
2) Lift up the unit gently.
3) Pull out the unit gently.
3. Unscrew 2 screws on the Top Cover and then remove
the Top Cover.
4. Unscrew 1 screw on the Right Cover and then
remove the Right Cover after open the Rear Cover.
5.4 Disassembly Procedure
5.4.1 Cover Unit